1. Introduction
Thank you for choosing the CHKOSDA Digital Wall Clock. This oversized LED clock is designed for clear visibility and versatile functionality, making it ideal for various indoor settings. Please read this manual carefully to ensure proper setup and operation of your new clock.

Image: The CHKOSDA Digital Wall Clock with its large, red LED display.
Video: An overview of the Large Digital Wall Clock, showcasing its size and display.
2. Product Features
- Large Display: 5.9-inch tall red numbers on a 27-inch wide LED screen for excellent readability from a distance.
- Multi-functional: Displays time, date, and temperature. Features up to 16 alarms, a countdown timer (up to 999 days), and a stopwatch.
- Brightness Control: Equipped with an automatic dimmer that adjusts brightness based on ambient light, and 8 levels of manual brightness adjustment via remote control.
- Durable Construction: Display board cover made of acrylic and shell from high-strength ABS material.
- Power Source: Powered by a 10-foot power cord for flexible installation. A CR2032 coin cell battery (not included) can be installed to maintain time accuracy during power disconnection, but it does not power the clock.
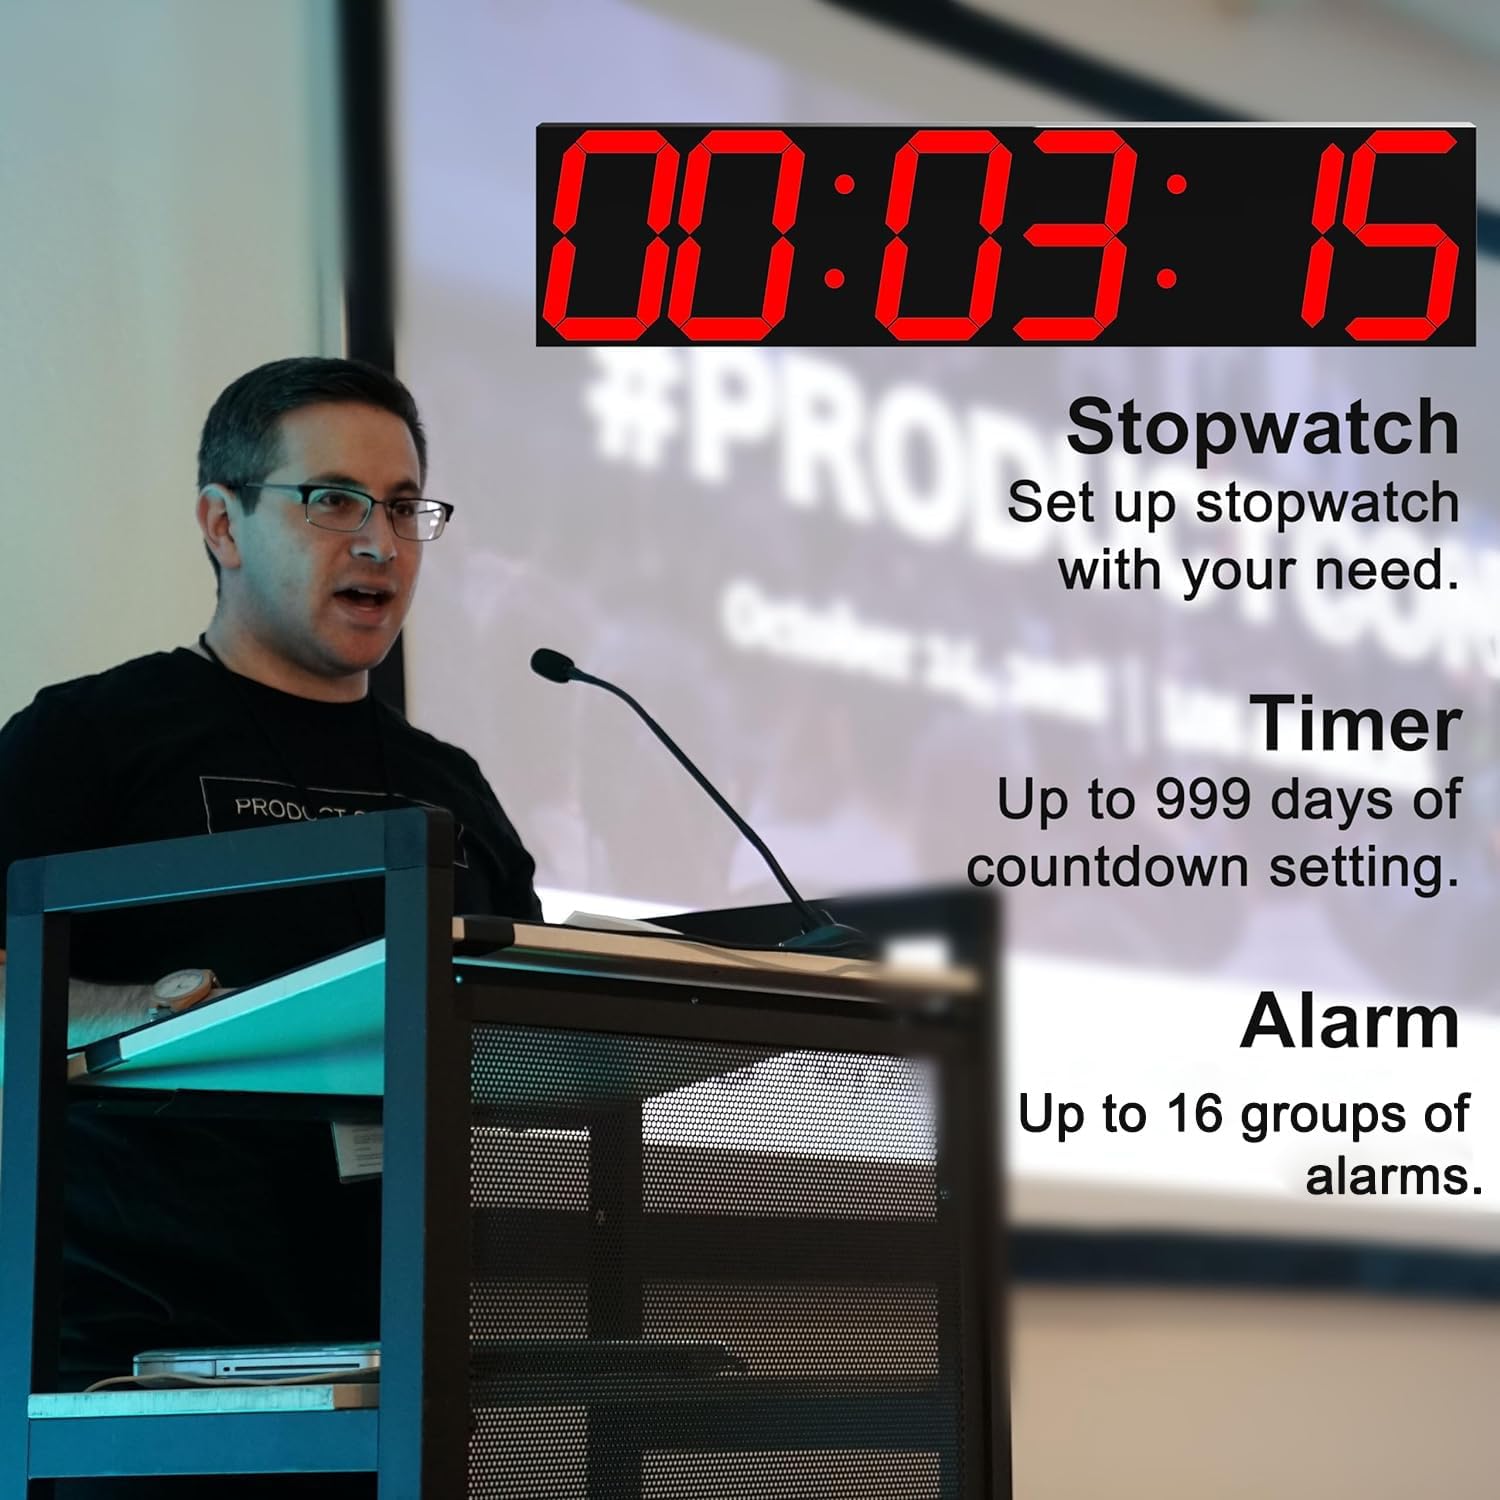
Image: Illustration of the clock's stopwatch, timer, and alarm capabilities.

Image: The clock's auto-dimming feature and manual brightness control via remote.
3. Components and Overview
Your CHKOSDA Digital Wall Clock package includes the main clock unit, a remote control, a USB power cord, and a power adapter. Familiarize yourself with the clock's physical features and connections.

Image: Detailed view of the clock's dimensions, keyhole for mounting, USB power input, and the CR2032 button cell battery compartment (battery not included).
The clock is powered via a USB cable and power adapter. A CR2032 button cell battery (not included) can be inserted into the battery compartment to retain time settings in case of power loss. Note that this battery does not power the clock's display.
4. Installation
The CHKOSDA Digital Wall Clock is designed for wall mounting. Identify a suitable location with access to a power outlet.
- Choose Location: Select a clear wall space where the clock will be easily visible and within reach of the 10-foot power cord.
- Mounting: Use the keyhole slot on the back of the clock to securely mount it to the wall using appropriate hardware (e.g., screws, wall anchors, not included). Ensure the clock is level before finalizing the installation.
- Connect Power: Plug the USB power cord into the clock and then into the provided power adapter. Plug the adapter into a standard electrical outlet. The clock display will illuminate.
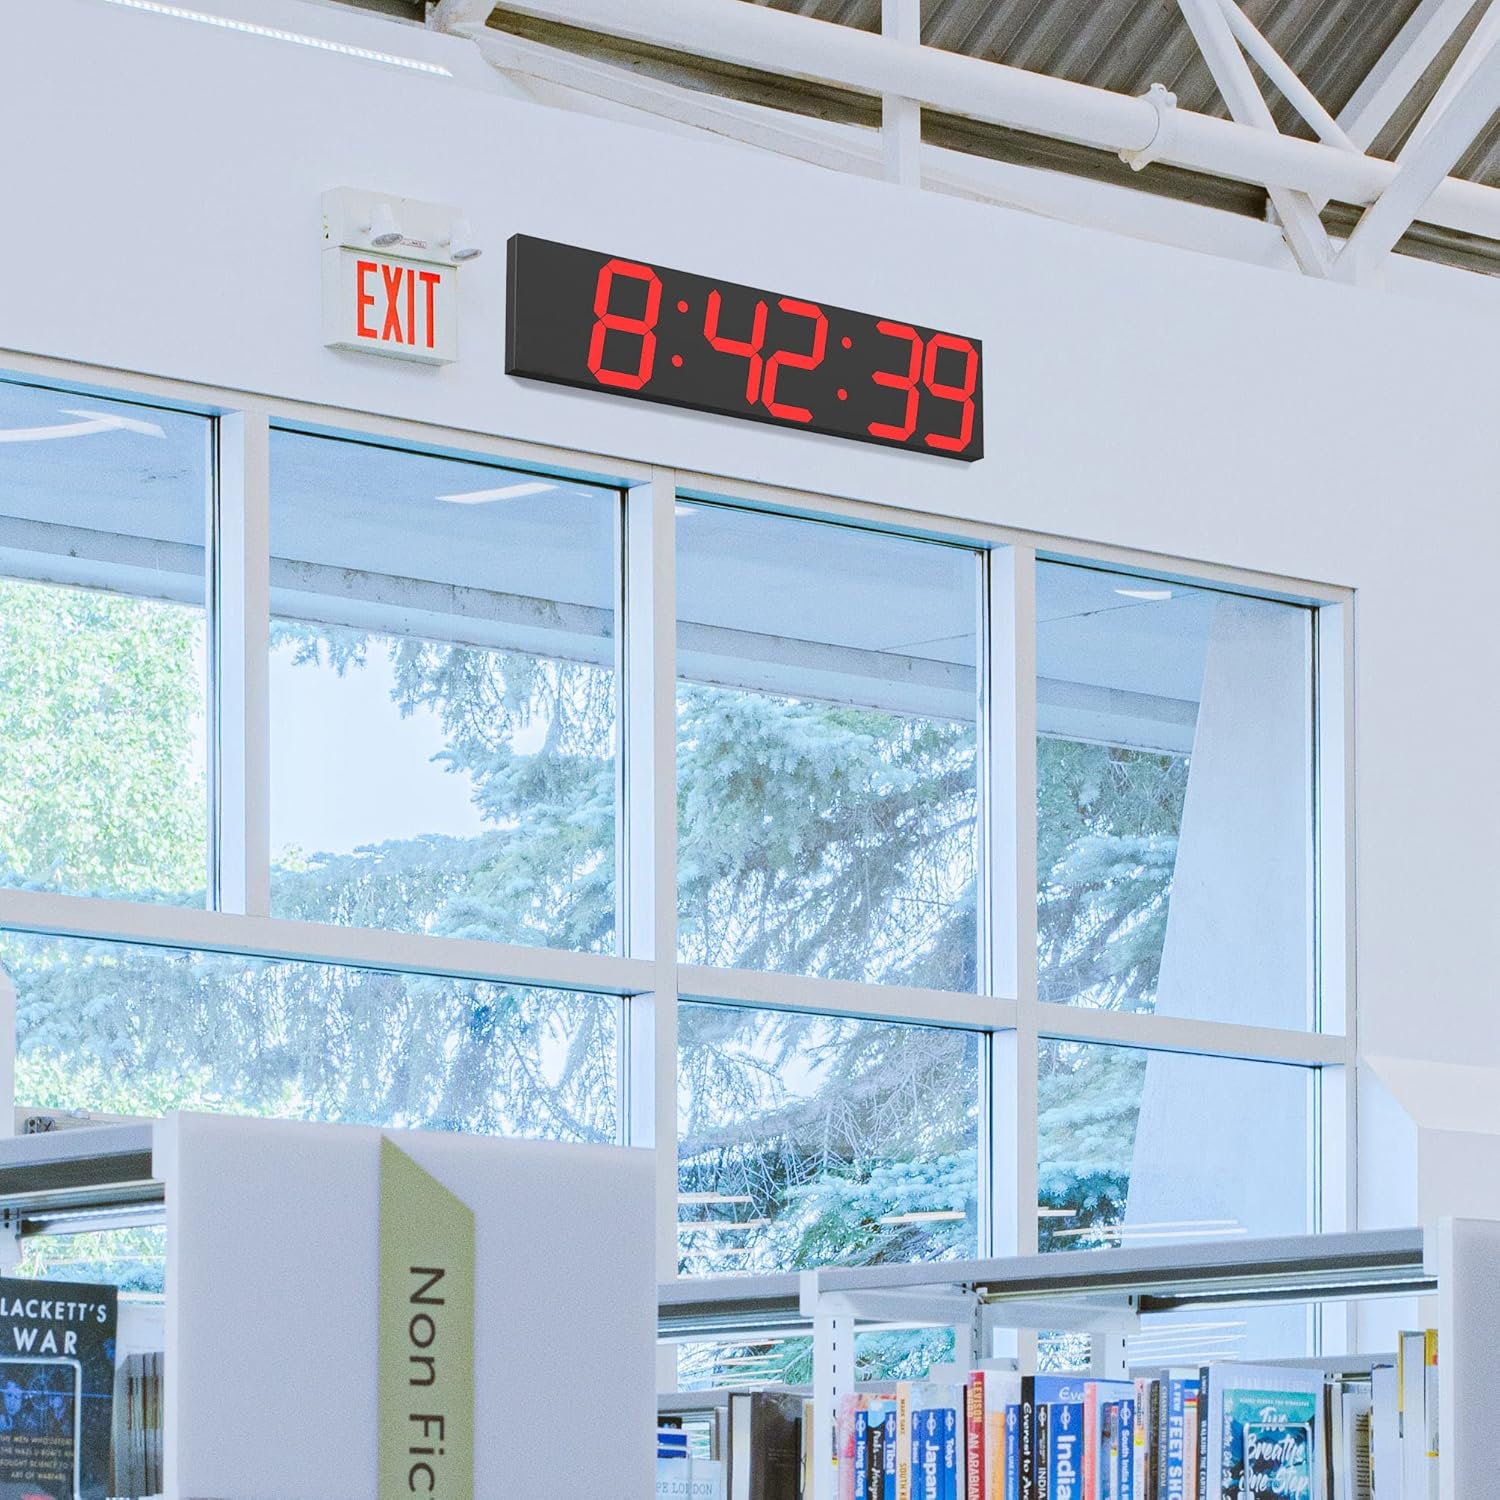
Image: The digital wall clock installed in a spacious indoor environment.
5. Operating Instructions
All functions of the CHKOSDA Digital Wall Clock are controlled via the included remote control.
5.1 Setting Time
To set the current time:
- Press the "T SET" button on the remote control. The hour digits will begin to flash.
- Use the number buttons (0-9) or the "UP" and "DOWN" buttons to adjust the hour.
- Press "MODE" to switch to setting minutes. The minute digits will flash.
- Use the number buttons (0-9) or the "UP" and "DOWN" buttons to adjust the minutes.
- Press "MODE" to switch to setting seconds. The second digits will flash.
- Use the number buttons (0-9) or the "UP" and "DOWN" buttons to adjust the seconds.
- Press "RET" to exit time setting mode and save changes.
5.2 Setting 12/24 Hour Mode
To switch between 12-hour and 24-hour display formats:
- Press the "0 (12/24)" button on the remote control.
- The clock will beep once for 12-hour mode or twice for 24-hour mode to confirm the change.
5.3 Setting Countdown Timer
The clock supports countdowns up to 999 days. To set a countdown:
- Press "CD SET" twice on the remote control to enter countdown setting mode. The display will show "00:00:00".
- Press "MODE" to cycle through setting days, hours, minutes, and seconds.
- Use the number buttons (0-9) or the "UP" and "DOWN" buttons to set the desired value for each unit (days, hours, minutes, seconds).
- After setting the time, press "MODE" again to set the reminder seconds before the countdown ends (default is 5 seconds). Use "UP" or "DOWN" to adjust.
- Press the Play/Pause (►►) button to start the countdown.
- Press "RET" to exit countdown mode and return to time display.
Video: Detailed instructions on how to set the countdown function on the CHKOSDA Large Digital Wall Clock.
5.4 Brightness Adjustment
The clock features both automatic and manual brightness control:
- Automatic Dimmer: The clock automatically adjusts its brightness based on the ambient light in the room.
- Manual Adjustment: Press the "DIM" button on the remote control to switch between manual brightness adjustment mode and auto-dimming mode. In manual mode, use the "UP" and "DOWN" buttons to select from 8 levels of brightness.
6. Maintenance
To ensure the longevity and optimal performance of your CHKOSDA Digital Wall Clock, follow these simple maintenance guidelines:
- Cleaning: Gently wipe the display and casing with a soft, dry cloth. Avoid using abrasive cleaners or solvents, as they may damage the surface.
- Placement: Do not expose the clock to direct sunlight for extended periods or to extreme temperatures, as this may affect the display's lifespan.
- Power: Ensure the power cord is not kinked or placed under heavy objects. Disconnect power during electrical storms or if the clock will be unused for a long time.
7. Troubleshooting
If you encounter any issues with your clock, please refer to the following common problems and solutions:
| Problem | Possible Cause | Solution |
|---|---|---|
| Clock does not turn on. | No power supply or loose connection. | Check if the power adapter is securely plugged into the wall outlet and the USB cable is firmly connected to the clock. Ensure the outlet is functional. |
| Remote control is not working. | Remote battery is dead or line of sight is blocked. | Replace the remote control battery (CR2025, not included). Ensure there are no obstructions between the remote and the clock's sensor. |
| Time is inaccurate after power loss. | CR2032 coin cell battery is not installed or is dead. | Install a new CR2032 coin cell battery in the compartment. This battery helps retain time settings during power outages. |
| Display is too dim or too bright. | Brightness setting needs adjustment. | Press the "DIM" button on the remote to toggle between auto-dimming and manual brightness modes. In manual mode, use "UP" and "DOWN" to adjust. |
If the problem persists after attempting these solutions, please contact CHKOSDA customer support for further assistance.
8. Specifications
| Feature | Detail |
|---|---|
| Brand | CHKOSDA |
| Model Number | CH3389-R |
| Color | Red |
| Display Type | Digital |
| Product Dimensions | 27.55"W x 6.49"H |
| Item Weight | 4.2 Pounds |
| Power Source | Corded Electric |
| Material | Acrylic and ABS Plastic |
| Mounting Type | Wall Mount |
| Special Features | Large Display, Timer, Adjustable Brightness, Auto Dimmable |
| Batteries Required | 1 CR2032 (for memory backup, not included) |
| UPC | 743815841290 |
9. Warranty and Support
For warranty information and customer support, please refer to the documentation included with your product or visit the official CHKOSDA website. A digital version of the user manual is also available for download at https://manuals.plus/m/b5c016445d57cc6c76aca74a6e7137b9d717c2512f471177807dc02f0df4525f.
Additionally, protection plans are available for purchase to extend coverage for your device:
- 2-Year Protection Plan
- 3-Year Protection Plan
- Complete Protect (monthly plan)
Details on these plans can be found where you purchased the product.


