
1. Introduction
This manual provides essential instructions for the safe and effective use, setup, operation, and maintenance of your Kwadron Equaliser™ Drop Pen Tattoo Machine. Please read this manual thoroughly before operating the device to ensure proper function and longevity.
2. Product Overview
The Kwadron Equaliser™ Drop Pen is a compact, ergonomic, and powerful tattoo machine designed for professional use. Its balanced design aims to reduce hand fatigue during extended tattooing sessions.

Image 1: Front view of the Kwadron Equaliser™ Drop Pen Tattoo Machine, showcasing its sleek black anodized aluminum body.
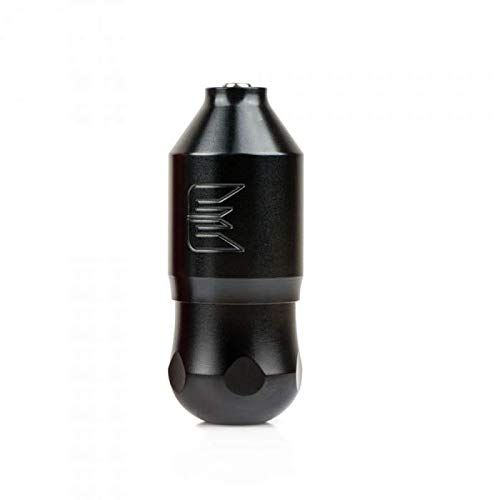
Image 2: Side view of the Kwadron Equaliser™ Drop Pen Tattoo Machine, highlighting its compact form factor.

Image 3: The Kwadron Equaliser™ Drop Pen Tattoo Machine shown alongside its packaging, illustrating the product presentation.
3. Specifications
| Feature | Detail |
|---|---|
| Model Name | Equaliser™ Drop Pen |
| Color | Black |
| Body Material | High-quality anodized aluminum |
| Weight | 180g |
| Machine Length | 3.5 inches (~9cm) |
| Machine Diameter | 1.38 inches (~35mm) |
| Number of Pieces | 1 |
| UPC | 644287911088 |
| ASIN | B08SL1WWCK |
4. Setup
- Unboxing: Carefully remove the tattoo machine and all accessories from its packaging. Inspect for any visible damage.
- Power Supply Connection: Connect the machine to a compatible tattoo power supply using the appropriate cable (typically RCA or DC, depending on the machine's connector type). Ensure the power supply is turned off before connecting.
- Needle Cartridge Insertion: Twist the grip counter-clockwise to loosen it slightly. Insert a sterile, compatible needle cartridge into the machine's front opening. Twist the grip clockwise to secure the cartridge firmly in place. Ensure the needle is properly seated and aligned.
- Grip Adjustment: Adjust the grip by twisting it to control the needle depth. Test the depth on a practice surface before actual use.
5. Operating
- Power On: Turn on your tattoo power supply.
- Voltage Adjustment: Start with a low voltage setting on your power supply and gradually increase it to your desired operating voltage. Refer to your needle cartridge manufacturer's recommendations for optimal voltage ranges.
- Safety Precautions: Always use sterile needle cartridges and follow all local health and safety regulations for tattooing. Wear appropriate personal protective equipment (PPE).
- During Operation: Maintain a steady hand and consistent pressure. Monitor the machine's performance and temperature. If the machine becomes excessively hot, discontinue use and allow it to cool.
- Power Off: After use, turn off the power supply before disconnecting the machine.
6. Maintenance
- Cleaning: After each use, disconnect the machine from the power supply. Remove and safely dispose of the needle cartridge. Wipe down the exterior of the machine with a suitable disinfectant solution. Do not immerse the machine in liquid.
- Lubrication: Periodically apply a small amount of machine oil (specifically designed for tattoo machines) to moving parts as recommended by the manufacturer. Avoid over-lubrication.
- Storage: Store the machine in a clean, dry, and safe place when not in use, away from direct sunlight and extreme temperatures.
- Inspection: Regularly inspect the machine for any signs of wear, damage, or loose components. Address any issues promptly.
7. Troubleshooting
- Machine Not Turning On:
- Check power supply connection and ensure it is turned on.
- Verify that the power cable is securely connected to both the machine and the power supply.
- Test with a different power supply or cable if available.
- Inconsistent Needle Movement:
- Ensure the needle cartridge is correctly seated and locked into the machine.
- Check for any debris or dried ink obstructing the needle bar.
- Verify the voltage setting on your power supply.
- Excessive Vibration or Noise:
- Ensure all parts of the machine are securely tightened.
- Check for any loose components or internal damage.
- Apply lubrication if necessary, following maintenance guidelines.
If you encounter issues not covered here or require further assistance, please contact the manufacturer or your supplier.
8. Official Product Videos
No official product videos from the seller were available in the provided data for embedding in this manual.
9. Warranty and Support
For specific warranty information, terms, and conditions, please refer to the documentation provided with your purchase or contact the retailer or manufacturer directly. Keep your proof of purchase for warranty claims.
For technical support or service inquiries, please reach out to Kwadron customer service or the authorized distributor from whom you purchased the machine.