1. Introduction
Thank you for choosing the Ryobi R18IW3-0 Impact Wrench Kit. This powerful 18V ONE+ tool is designed for heavy-duty applications, offering exceptional torque and versatility. This manual provides essential information for the safe and effective use, maintenance, and troubleshooting of your impact wrench.
Key Features:
- Powerful 300 ft./lbs. (400Nm) of torque.
- Up to 3,200 impacts per minute (IPM).
- 3-speed selector switch for versatile applications.
- Integrated tri-beam LED lights for improved visibility.
- Compatible with Ryobi 18V ONE+ battery system.
Included Components:
- 1 x P261 3-Speed 1/2 in. Impact Wrench
- 1 x P197 4.0 Ah Lithium-Ion High Capacity Battery
- 1 x P118B 18V Lithium-Ion Charger
- Operator's Manual (this document)

Figure 1: Ryobi R18IW3-0 Impact Wrench Kit, including the wrench, 4.0 Ah battery, and charger.
2. Safety Information
Always read and understand all safety warnings, instructions, illustrations, and specifications provided with this power tool. Failure to follow all instructions listed below may result in electric shock, fire, and/or serious injury.
General Power Tool Safety Warnings:
- Work Area Safety: Keep work area clean and well lit. Cluttered or dark areas invite accidents. Do not operate power tools in explosive atmospheres, such as in the presence of flammable liquids, gases, or dust.
- Electrical Safety: Power tool plugs must match the outlet. Never modify the plug in any way. Do not expose power tools to rain or wet conditions.
- Personal Safety: Stay alert, watch what you are doing, and use common sense when operating a power tool. Always wear eye protection and hearing protection.
- Tool Use and Care: Do not force the power tool. Use the correct power tool for your application. Disconnect the battery pack from the power tool before making any adjustments, changing accessories, or storing power tools.
- Battery Tool Use and Care: Recharge only with the charger specified by the manufacturer. Use power tools only with specifically designated battery packs.
WARNING: This product can expose you to chemicals including lead, which is known to the State of California to cause cancer and birth defects or other reproductive harm. For more information go to www.P65Warnings.ca.gov.
3. Setup
Before first use, ensure the battery is fully charged and properly installed.
3.1 Charging the Battery
The kit includes a P197 4.0 Ah Lithium-Ion High Capacity Battery and a P118B 18V Lithium-Ion Charger. The battery features a built-in 4-bar illuminated charge indicator to warn of diminishing charge.
- Connect the P118B charger to a standard electrical outlet.
- Slide the P197 battery pack onto the charger until it clicks into place.
- Allow the battery to charge until the indicator lights show a full charge. Refer to the charger's specific instructions for charging times and indicator meanings.
- Once charged, remove the battery from the charger.
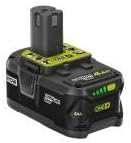
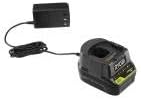
Figure 2: The 4.0 Ah Lithium-Ion Battery and 18V Lithium-Ion Charger included in the kit.
3.2 Installing the Battery and Socket
- Align the charged battery pack with the base of the impact wrench and slide it in until it locks securely.
- Select the appropriate 1/2-inch drive socket for your application.
- Push the socket firmly onto the square drive anvil of the impact wrench until it snaps into place.
4. Operating Instructions
The Ryobi R18IW3-0 Impact Wrench is designed for tightening or loosening various nuts and bolts with high efficiency.
4.1 Powering On and Off
To operate the tool, simply depress the trigger switch. The tri-beam LED lights will illuminate when the trigger is pressed, providing visibility to your work area. Release the trigger to turn off the tool.
4.2 Speed Selection
This impact wrench features a 3-speed selector switch, allowing you to adjust the speed and torque output for different tasks. The no-load speed ranges from 0-2,900 RPM. Choose a lower speed for delicate tasks or starting fasteners, and a higher speed for maximum torque applications.
4.3 Applying Torque
The impact mechanism produces 300 ft./lbs. of torque and up to 3,200 impacts per minute (IPM). Apply the socket to the fastener, ensure a secure fit, and depress the trigger. The tool will apply rotational force and impacts to loosen or tighten the fastener.

Figure 3: The Ryobi Impact Wrench in use for automotive applications, demonstrating its capability for removing lug nuts.
Note: Official product videos from the seller are not available for embedding at this time. Please refer to the text instructions and diagrams for operational guidance.
5. Maintenance
Regular maintenance ensures the longevity and optimal performance of your Ryobi Impact Wrench.
- Cleaning: Keep the tool's air vents clear and free of debris. Use a clean, dry cloth to wipe down the tool. Do not use harsh chemicals or abrasive cleaners.
- Battery Care: Store batteries in a cool, dry place away from direct sunlight and extreme temperatures. Do not store batteries in a discharged state for extended periods. The built-in 4-bar illuminated charge indicator helps monitor battery status.
- Inspection: Periodically inspect the tool for any signs of damage, loose screws, or worn parts. If any issues are found, discontinue use and contact a qualified service technician.
6. Troubleshooting
If you encounter issues with your Ryobi Impact Wrench, consider the following common troubleshooting steps:
- Tool not starting: Ensure the battery is fully charged and properly inserted into the tool. Check for any obstructions in the trigger mechanism.
- Loss of power/torque: The battery may be low on charge. Recharge the battery. Ensure the correct speed setting is selected for the task.
- Excessive vibration or noise: Discontinue use immediately. Check for loose components or damage to the tool or socket.
- Socket not attaching securely: Ensure the socket is the correct 1/2-inch drive size and is pushed firmly onto the anvil.
For persistent issues, contact Ryobi customer support or an authorized service center.
7. Specifications
| Specification | Value |
|---|---|
| Brand | RYOBI |
| Model Number (Wrench) | P261K |
| Part Number (Kit) | R18IW3-140 |
| Power Source | Battery Powered |
| Voltage | 18 Volts |
| Amperage | 4 Amps |
| Battery Capacity | 4 Amp Hours (P197 Battery) |
| Maximum Rotational Speed | 2,900 RPM (No Load) |
| Number of Speeds | 3 |
| Maximum Torque | 300 Foot Pounds (400 Nm) |
| Impacts Per Minute (IPM) | Up to 3,200 |
| Drill Type | Impact Driver |
| Material | Metal, Plastic |
| Item Weight | 6.59 pounds |
| Product Dimensions | 7.75 x 8 x 7.75 inches |
| UPC | 033287192427 |
8. Warranty & Support
For detailed warranty information, please refer to the warranty card included with your product or visit the official Ryobi website. Warranty terms may vary based on region and point of purchase.
It is recommended to purchase Ryobi products from authorized dealers to ensure warranty eligibility.
Protection Plans:
- 3-Year Protection Plan
- 4-Year Protection Plan
- Complete Protect (monthly plan covering eligible purchases)
For technical support, service, or to find an authorized service center, please contact Ryobi customer service through their official channels.