1. Introduction
Thank you for choosing the Hama 186369 Weather Forecast Center. This device provides comprehensive weather data, including satellite-based forecasts, indoor and outdoor temperature/humidity, and more. This manual will guide you through the setup, operation, and maintenance of your weather station to ensure optimal performance.
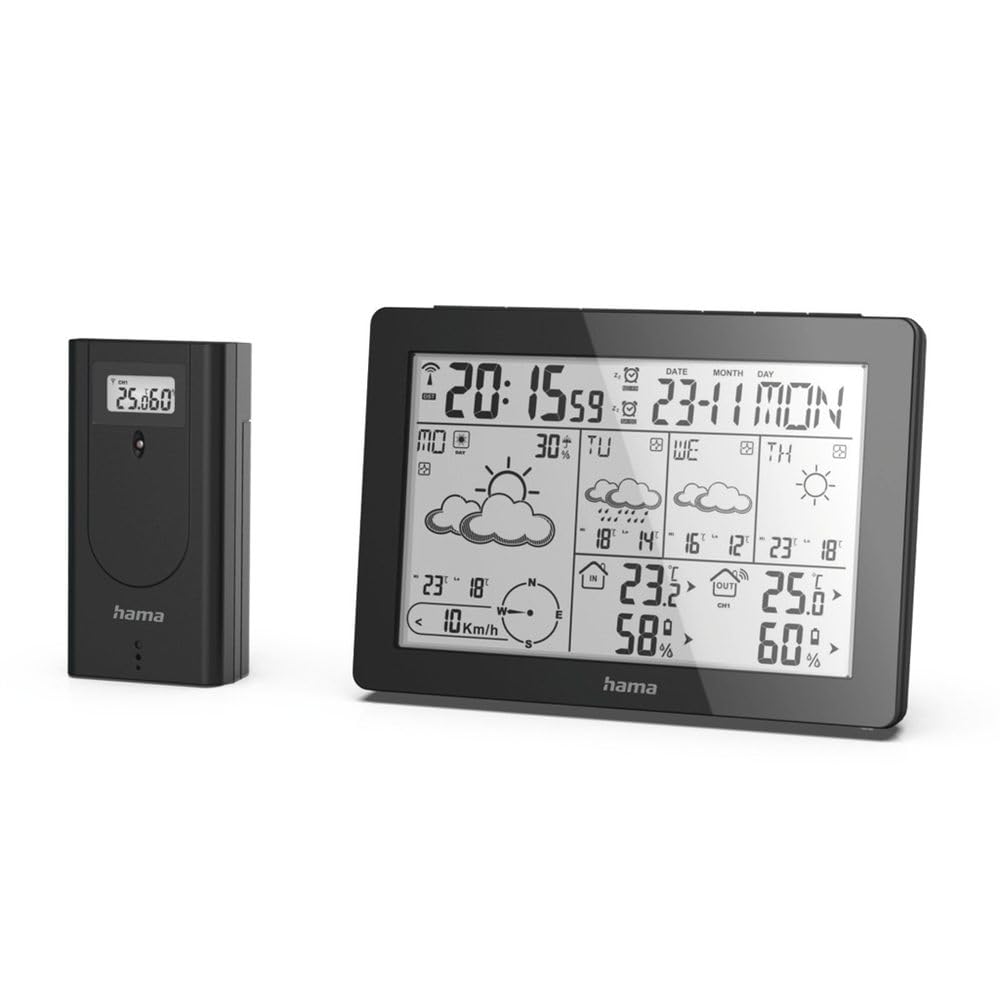
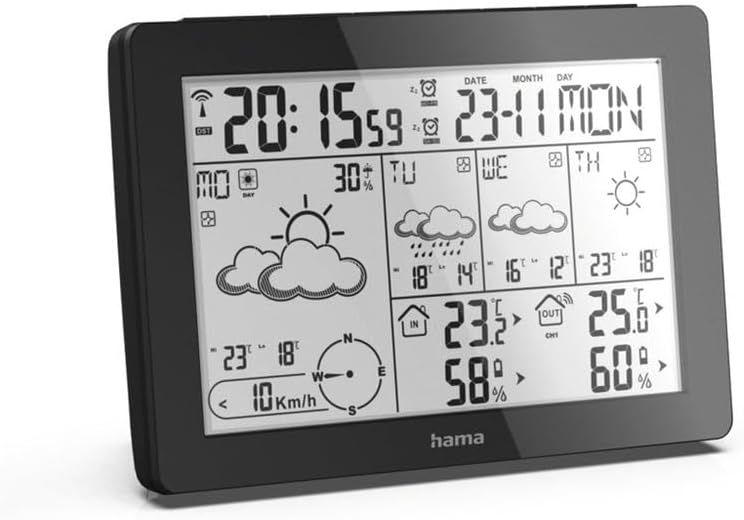
The Hama 186369 Weather Forecast Center main unit, showcasing its digital display with various weather parameters.
2. Package Contents
Please check that all items listed below are present and in good condition:
- Hama 186369 Weather Forecast Center (Base Station)
- Wireless Outdoor Sensor
- 4 x AA Batteries (for both units)
- This Instruction Manual

The complete set, including the base station and the wireless outdoor sensor.
3. Safety Instructions
- Do not open the device. Improper repair can lead to considerable hazards for the user.
- Do not expose the product to direct sunlight, extreme temperatures, or high humidity.
- Keep this product, as all electrical products, out of the reach of children.
- Protect the product from dirt, moisture, and overheating.
- Only use the product for its intended purpose.
- Do not use the product in areas where electronic products are not permitted.
- When inserting batteries, note the correct polarity (+ and - markings) and insert the batteries accordingly. Otherwise, the batteries could leak or explode.
- Replace all batteries of a set at the same time. Do not mix old and new batteries or batteries of different types.
4. Setup
4.1 Inserting Batteries
The Hama 186369 Weather Forecast Center and its outdoor sensor require AA batteries for operation.
- Open the battery compartment cover on the back of both the base station and the outdoor sensor.
- Insert the AA batteries, ensuring correct polarity (+ and -). The base station requires 2x AA batteries, and the outdoor sensor requires 2x AA batteries.
- Close the battery compartment covers securely.
Inserting batteries into the base station. Ensure correct polarity.

The wireless outdoor sensor, which also requires batteries.
4.2 Initial Operation and Signal Reception
After inserting the batteries, the base station will automatically search for the DCF-77 signal and connect to the outdoor sensor.
- Place the base station and the outdoor sensor close to each other during initial setup.
- The DCF-77 radio signal for time and date synchronization will be automatically received. This process may take several minutes.
- The outdoor sensor will transmit temperature and humidity data to the base station. Ensure they are within range (up to 30 meters in open areas).

Overview of the weather station's features and components, including the outdoor sensor and base station display.
5. Operating the Weather Forecast Center
5.1 Display Overview
The main display shows various information at a glance:
- Time and Date: Synchronized via DCF-77 signal.
- Indoor Temperature and Humidity: Measured by the base station.
- Outdoor Temperature and Humidity: Received from the wireless outdoor sensor.
- Weather Forecast: Satellite-based 4-day forecast for 60 regions/30 regions in Europe, updated daily.
- Rain Probability: Indication of precipitation likelihood.
- Wind Speed and Direction: Displayed graphically.
- Frost Alarm: Activates when temperatures drop to a critical level.
5.2 Button Functions
The buttons on the top of the base station allow you to adjust settings and view different information.

Top view of the base station showing the control buttons.
- MODE: Switches between display modes (e.g., time, alarm setting).
- CHANNEL: Selects different outdoor sensor channels if multiple sensors are used.
- DAY/NIGHT/SNOOZE+LIGHT: Activates backlight, snooze function for alarm, or switches between day/night display.
- TEST: Initiates a test of the sensor connection.
- UP / DOWN: Adjusts values during settings or navigates through forecast data.
5.3 Setting Time and Date (Manual Adjustment)
While the time and date are usually set automatically via the DCF-77 signal, you can manually adjust them if needed.
- Press and hold the MODE button until the time display starts flashing.
- Use the UP and DOWN buttons to adjust the hour, then press MODE to confirm and move to minutes.
- Repeat for minutes, year, month, and day.
- Press MODE again to exit the setting mode.
5.4 Alarm Function
The weather station includes an alarm function.
- Press the MODE button repeatedly until the alarm time is displayed.
- Press and hold MODE to enter alarm setting mode.
- Use UP and DOWN to set the desired alarm time.
- Press MODE to confirm each setting.
- To activate/deactivate the alarm, press the UP button when the alarm time is displayed. An alarm icon will appear/disappear.
6. Maintenance
6.1 Cleaning
- Only clean this product with a slightly damp, lint-free cloth and do not use aggressive cleaning agents.
- Ensure that no water gets into the device.
6.2 Battery Replacement
When the battery indicator appears on the display, replace all batteries in the respective unit (base station or outdoor sensor).
- Follow the steps in section 4.1 "Inserting Batteries".
- Dispose of used batteries according to local regulations.
7. Troubleshooting
| Problem | Possible Cause | Solution |
|---|---|---|
| No display / Weak display | Batteries are empty or incorrectly inserted. | Replace batteries, ensuring correct polarity. |
| No outdoor temperature/humidity reading | Outdoor sensor not connected or out of range. |
|
| Incorrect time/date | DCF-77 signal not received or interference. |
|
| Inaccurate weather forecast | Incorrect region setting or temporary signal issue. |
|
8. Specifications
| Feature | Detail |
|---|---|
| Model Number | 186369 |
| Dimensions (Base Station) | 3 x 15.3 x 10.5 cm |
| Weight | 510 g |
| Material | Acrylic |
| Power Source | Battery-powered (4 AA batteries required, included) |
| Connectivity | Wireless (for outdoor sensor) |
| Special Features | Alarm, Wireless Outdoor Sensor, Frost Alarm, DCF-77 Radio Clock |
| Weather Forecast | Satellite-based 4-day forecast for 60 regions/30 regions in Europe, daily updated data for 611 locations. |
| Recommended Use | Temperature measurement, hobby, private, business. |
9. Warranty and Support
Hama GmbH & Co KG assumes no liability and provides no warranty for damage resulting from improper installation/mounting, improper use of the product, or from failure to observe the operating instructions and/or safety notes.
For technical support or warranty claims, please contact your retailer or visit the official Hama website for further assistance.

Hama: Experience and competence since 1923.