1. Introduction
Thank you for choosing the ProTuning TREVLIG 59 cm Induction Hob. This manual provides essential information for the safe and efficient use of your new appliance. Please read these instructions carefully before installation and use, and keep them for future reference.
2. Safety Information
Important Safety Instructions:
- Read all instructions before using the appliance.
- This appliance is intended for household use only.
- Do not touch hot surfaces. Use handles or knobs.
- Ensure proper ventilation around the appliance.
- Keep children away from the appliance during operation.
- Unplug the appliance from the outlet when not in use and before cleaning.
- Do not operate any appliance with a damaged cord or plug, or after the appliance malfunctions or has been damaged in any manner.
- Only use induction-compatible cookware.
- Do not place metallic objects such as knives, forks, spoons, and lids on the hob surface as they can get hot.
3. Product Overview
The ProTuning TREVLIG 59 cm Induction Hob features a sleek design and efficient cooking zones. It is designed for easy integration into your kitchen countertop.
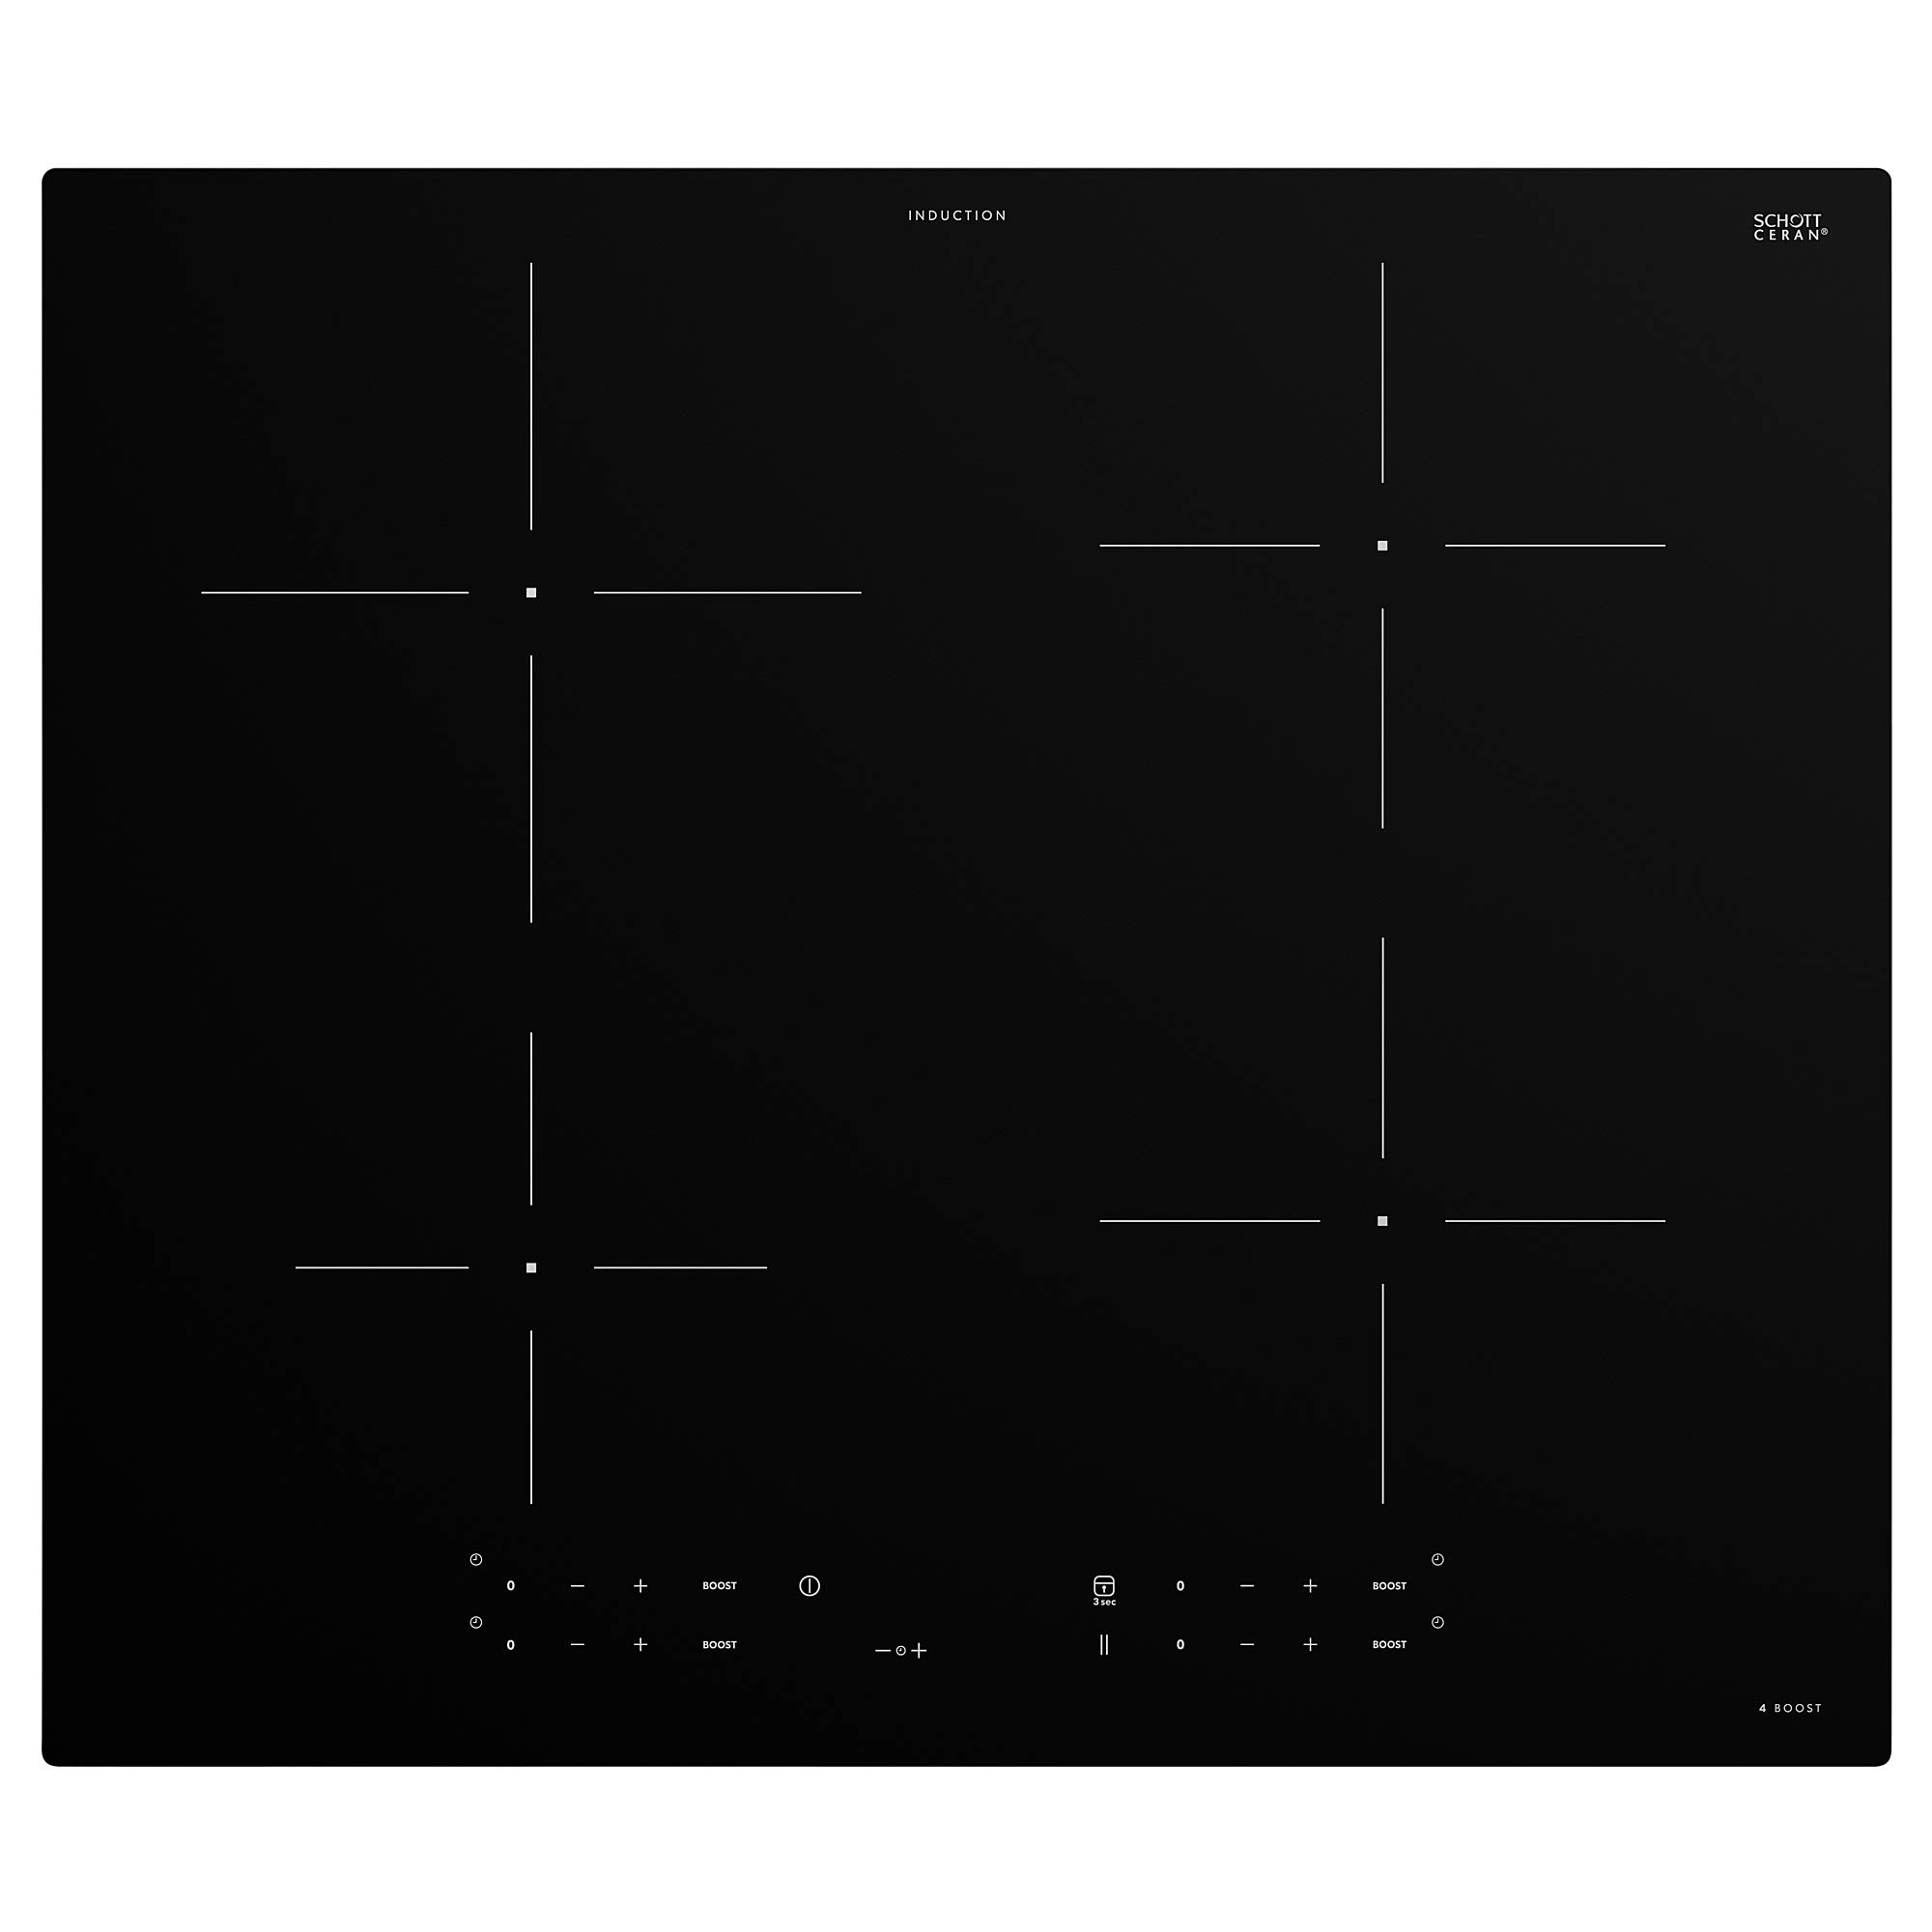
Figure 3.1: The ProTuning TREVLIG 59 cm Induction Hob in a kitchen setting, showcasing its design and integration.
Key Features:
- Four induction cooking zones.
- Touch controls for precise temperature adjustment.
- Integrated safety features.
- Easy-to-clean glass surface.
4. Installation
Installation should be performed by a qualified technician. Ensure all local regulations and standards are met.
4.1 Dimensions and Cutout
The hob requires a specific cutout in your countertop. Refer to the diagram below for precise measurements.

Figure 4.1: Installation dimensions. The hob measures 59 cm (width) x 51 cm (depth) x 5.4 cm (height). The required cutout dimensions are 56 cm (width) x 49 cm (depth). A minimum clearance of 10 cm from the rear wall and 2.8 cm from adjacent cabinets is required.
Product Dimensions:
- Width: 59.0 cm
- Depth: 51.0 cm
- Height: 5.4 cm
- Weight: 10.00 kg
- Cable Length: 150.0 cm
Cutout Dimensions:
- Cutout Width: 56.0 cm
- Cutout Depth: 49.0 cm
4.2 Electrical Connection
Connect the appliance to a suitable power supply according to local electrical codes. The cable length is 150 cm. Ensure the power supply is adequate for the hob's requirements.
5. Operating Instructions
5.1 Turning On/Off
Press the power button on the control panel to turn the hob on or off.
5.2 Selecting a Cooking Zone and Power Level
Place an induction-compatible pan on the desired cooking zone. Select the zone using the touch controls and adjust the power level from 1 to 9. The hob features four cooking zones with varying diameters:
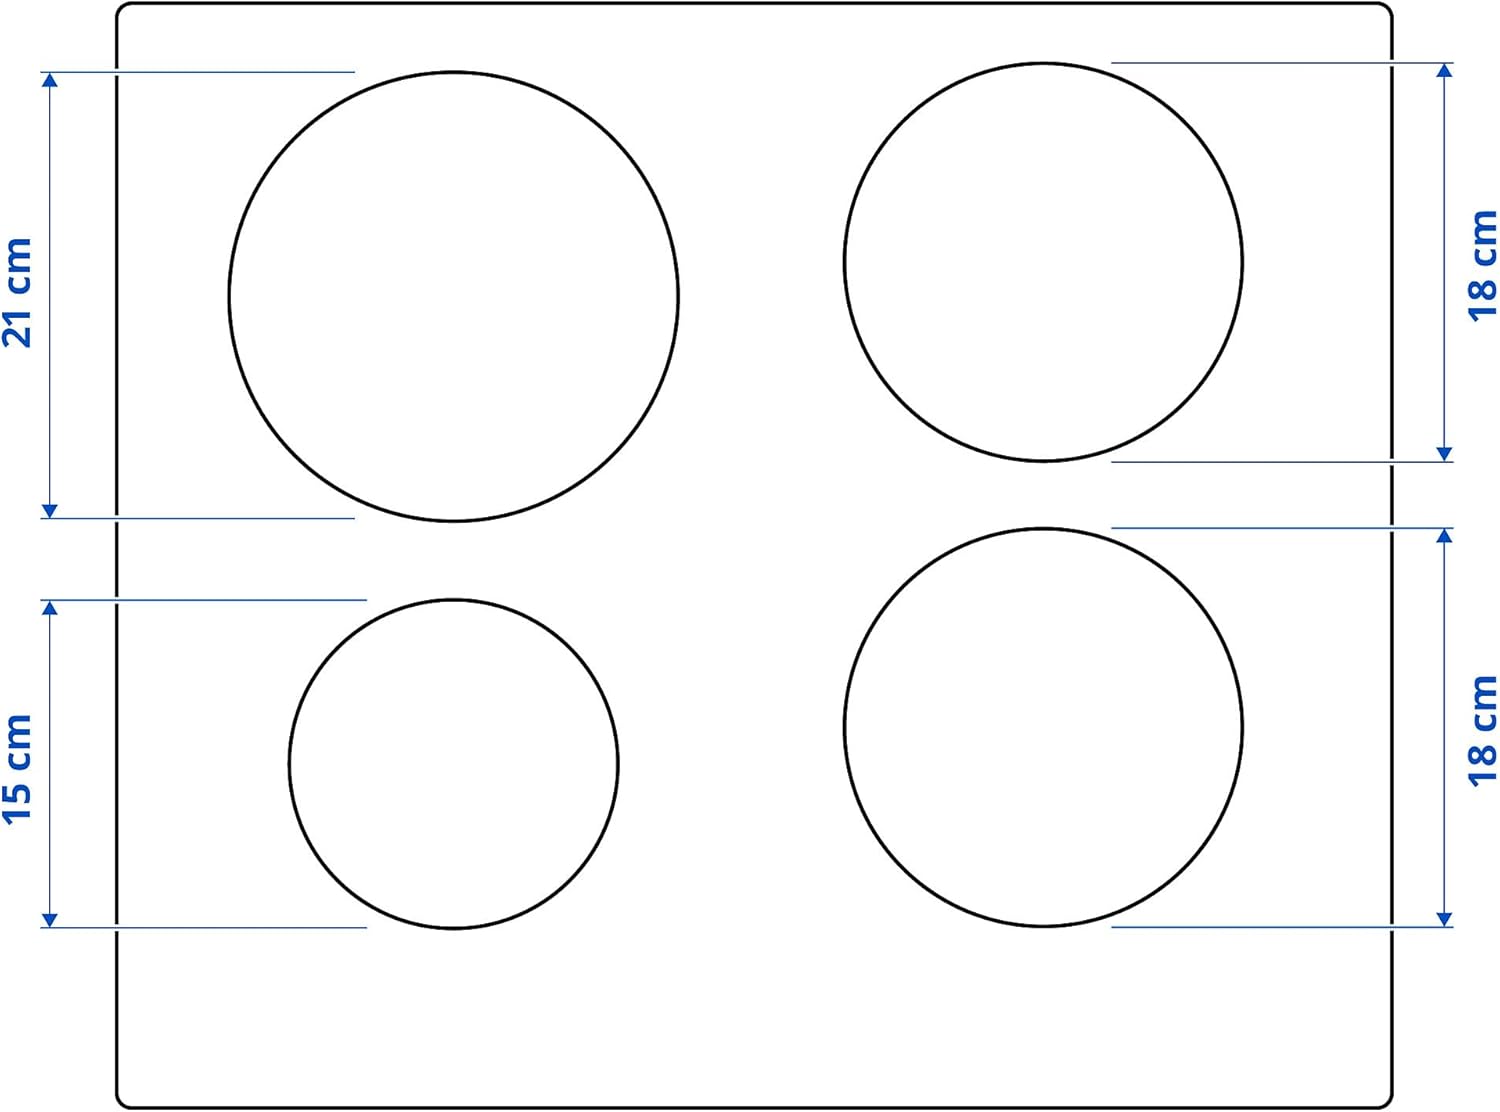
Figure 5.1: Cooking zone layout. Two zones have a diameter of 21 cm, and two zones have a diameter of 18 cm. There is also a smaller zone of 15 cm.
- Two zones: approximately 21 cm diameter
- Two zones: approximately 18 cm diameter
- One zone: approximately 15 cm diameter

Figure 5.2: The induction hob in operation, boiling broccoli in a pot, demonstrating the digital display and controls.

Figure 5.3: A closer view of the induction hob with a pot boiling, highlighting the power level '05' displayed on the control panel.

Figure 5.4: A wider shot of the induction hob with a pot boiling on one of the zones, integrated into a kitchen countertop.
5.3 Using the Boost Function
Some zones may feature a 'Boost' function for rapid heating. Activate it by pressing the designated boost button on the control panel.
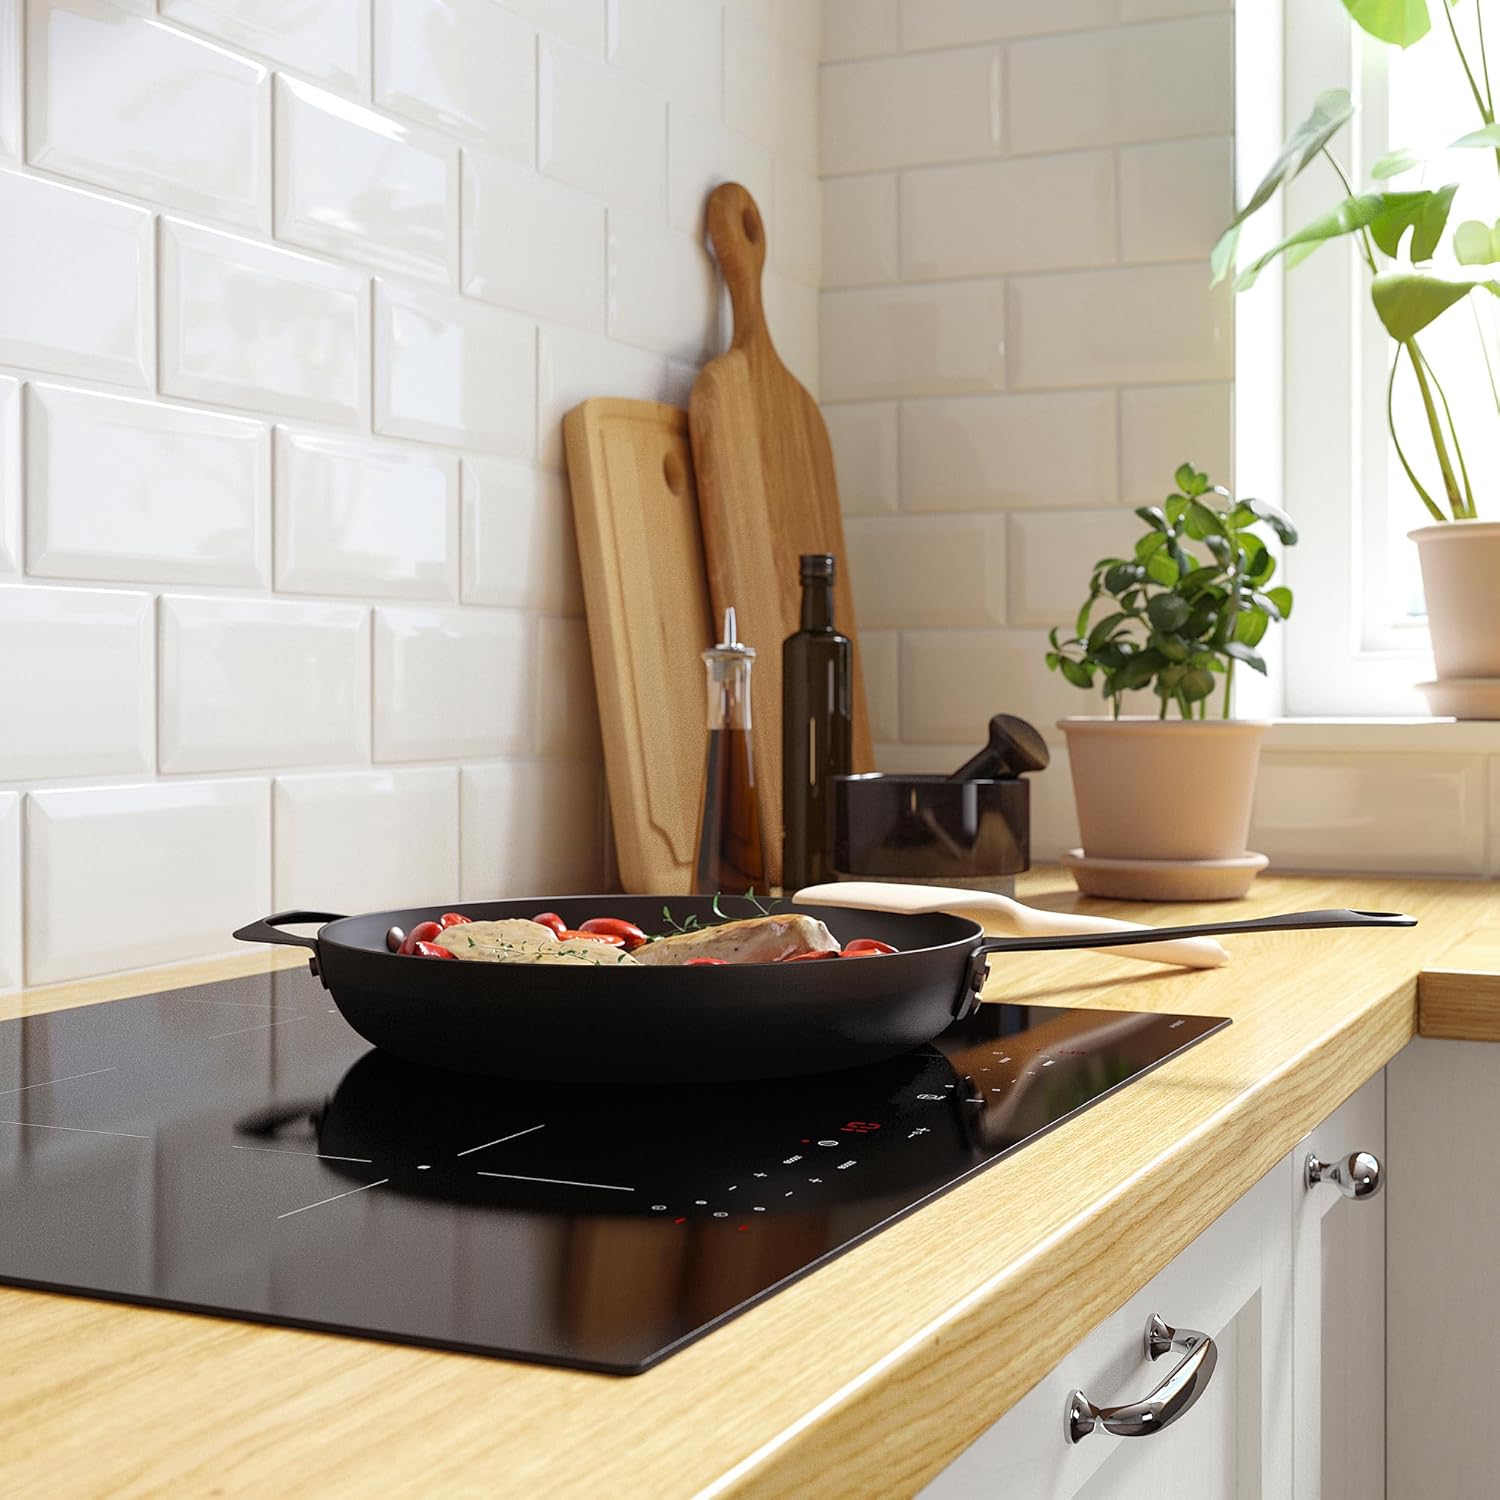
Figure 5.5: The induction hob in use with a frying pan, demonstrating an active cooking zone and the touch controls.
6. Care and Maintenance
6.1 Cleaning the Hob
Allow the hob to cool completely before cleaning. Use a soft cloth and a mild detergent. For stubborn stains, use a ceramic hob cleaner. Avoid abrasive cleaners or scouring pads.
6.2 General Care
- Do not drop heavy objects on the glass surface.
- Avoid dragging cookware across the surface to prevent scratches.
- Wipe up spills immediately to prevent them from baking onto the surface.
7. Troubleshooting
If you encounter issues with your induction hob, refer to the following common problems and solutions:
| Problem | Possible Cause | Solution |
|---|---|---|
| Hob does not turn on | No power supply; control panel locked. | Check power connection; unlock control panel (refer to operating instructions). |
| Cooking zone not heating | Cookware not induction-compatible; pan too small or not centered. | Use induction-compatible cookware; ensure pan covers the zone adequately. |
| Error code displayed | Specific malfunction. | Refer to the full service manual or contact customer support with the error code. |
8. Specifications
| Feature | Detail |
|---|---|
| Brand | ProTuning |
| Model | TREVLIG 59 cm Induction Hob |
| Manufacturer Part Number | IK.504.678.35 |
| ASIN | B08SC4TM8F |
| Width | 59.0 cm |
| Depth | 51.0 cm |
| Height | 5.4 cm |
| Weight | 10.00 kg |
| Cable Length | 150.0 cm |
| Cutout Width | 56.0 cm |
| Cutout Depth | 49.0 cm |
9. Warranty and Support
The product comes with a 5-year warranty. Please refer to the separate warranty brochure for full terms and conditions. For technical support, service, or warranty claims, please contact ProTuning customer service.
For customers ordering from countries outside the EU, please note that you may be subject to duties and taxes. Please check with your local postal or tax office for import regulations.