1. Overview
The Audiobank AP15 is a 1/2 DIN car audio digital bass processor designed to enhance and restore low-frequency information in your car audio system. It accurately recreates and injects missing bass notes, providing efficient bass equalization and maximum control for your subwoofer. This unit is engineered to deliver improved bass performance and sound quality.
2. Key Features
- Digital Bass Maximizer and Restoration Processor
- Accurately recreates and injects low-frequency information into the signal path
- Efficient bass equalization circuit for maximum bass control
- Includes a dash-mount remote control for convenient bass level adjustment
- Integrated subsonic filter
- Lighted bass restoration display
- Frequency response: 10-10000Hz output
- Input noise rejection: 60dB
3. Product Components

Figure 1: Audiobank AP15 Digital Bass Processor with included remote bass knob.
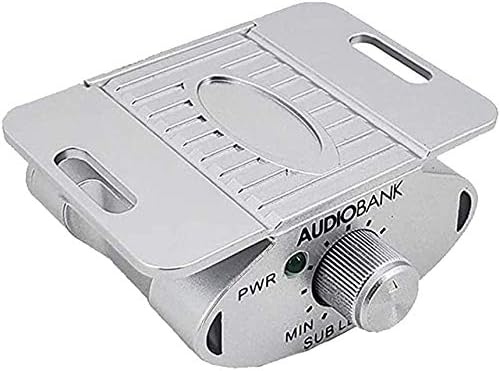
Figure 2: Dash-mount remote control for bass level adjustment.
The package includes the AB-AP15 Bass Processor, a dash-mount Bass Knob, and a user manual.
4. Setup and Installation
Proper installation is crucial for optimal performance. It is recommended that installation be performed by a qualified car audio technician.
4.1 Wiring Connections
Refer to the diagram below for typical wiring connections. Ensure all connections are secure and properly insulated.

Figure 3: Rear panel connections of the Audiobank AP15.
- Power Connection: Connect the +12V terminal to a constant +12V power source from your vehicle's battery. Connect the GND terminal to a solid chassis ground point.
- Remote Turn-On: Connect the REM terminal to the remote turn-on output of your head unit or amplifier. This will turn the AP15 on and off with your audio system.
- Audio Input: Connect the balanced input (L/R) from your head unit's RCA outputs or a line output converter (if using speaker-level inputs) to the AP15's input terminals.
- Audio Output: Connect the output (L/R) from the AP15 to the RCA inputs of your amplifier(s).
- Dash Remote: Connect the included dash-mount bass knob to the "DASH REM" port on the AP15 using the provided cable.
4.2 Mounting
The Audiobank AP15 is a 1/2 DIN unit, designed for flexible mounting. Choose a location that is dry, well-ventilated, and away from direct heat or moisture. Secure the unit using appropriate screws and mounting hardware.
5. Operating Instructions
The AP15 features several controls to fine-tune your bass experience.

Figure 4: Top panel controls of the Audiobank AP15.
- WIDE Control: This knob adjusts the width of the bass restoration effect. Turning it clockwise increases the range of frequencies affected by the bass restoration.
- SWEEP Control: This knob allows you to select the center frequency for the bass restoration. Adjust it to target the specific low frequencies you wish to enhance.
- Bass Control Knob (Dash Remote): Use the remote knob to conveniently adjust the overall bass level from your driving position.
- Subsonic Filter Switch: The AP15 includes a subsonic filter to protect your subwoofers from damaging ultra-low frequencies. Select the desired cutoff frequency (35Hz, 50Hz, or 80Hz) using the switch.
- Power LED: Indicates when the unit is powered on.
- Bass Restoration Display: The lighted display provides a visual indication of the bass restoration activity.
Start with the WIDE and SWEEP controls at their minimum settings and gradually increase them while listening to your audio to find the optimal bass enhancement for your system and preferences. Use the dash remote for real-time adjustments.
6. Maintenance
- Keep the unit clean and free from dust. Use a soft, dry cloth for cleaning.
- Avoid exposing the unit to extreme temperatures, moisture, or direct sunlight.
- Ensure all connections remain secure. Periodically check wiring for any signs of wear or damage.
- Do not attempt to open the unit or perform repairs yourself, as this will void the warranty.
7. Troubleshooting
| Problem | Possible Cause | Solution |
|---|---|---|
| No power/Unit does not turn on |
|
|
| No bass output |
|
|
| Distorted bass |
|
|
| Engine noise/Whining sound |
|
|
8. Specifications
| Feature | Detail |
|---|---|
| Maximum Input Level | 15V RMS |
| Maximum Output Level | 13.5V Peak |
| Frequency Response | 10-100,000 Hz |
| T.H.D Rating | 0.003% |
| Signal-to-Noise Ratio | 130 dB |
| Balanced Input Noise Rejection | >60 dB |
| Input Impedance | 10,000 ohms |
| Output Impedance | 150 ohms |
| Power Draw | 150 mA |
| Recommended Fuse Rating | 1 Amp |
| Dimensions | 6-1/2"D x 9"W x 2-3/4"H |
| Item Weight | 1.8 pounds |
| Material | Plastic |
9. Warranty and Support
For warranty information and technical support, please refer to the documentation included with your purchase or contact Audiobank customer service. Keep your proof of purchase for any warranty claims.
For further assistance, visit the Audiobank brand store on Amazon.