1. Introduction
Thank you for choosing the ONE Light 10105TR/W Trimless GU10 50W Recessed Spotlight. This manual provides essential information for the safe installation, operation, and maintenance of your new lighting fixture. Please read these instructions carefully before installation and retain them for future reference. This product complies with EN60598-1 and other specific standards.
2. Safety Instructions
- Always disconnect the power supply at the main circuit breaker before installation, maintenance, or bulb replacement.
- Installation should be performed by a qualified electrician in accordance with all local electrical codes and regulations.
- This product is designed for indoor use only. Do not install in wet or damp locations.
- Ensure the ceiling material can support the weight of the fixture.
- Do not exceed the maximum wattage of 50W for the GU10 bulb.
- Avoid touching the bulb directly with bare hands, as oils can reduce bulb life.
- Keep flammable materials away from the light fixture.
3. Package Contents
Verify that all components are present before beginning installation:
- 1x Recessed Spotlight Housing (White Aluminum)
- Mounting Hardware
- Electrical Cord
- Adhesive Pad
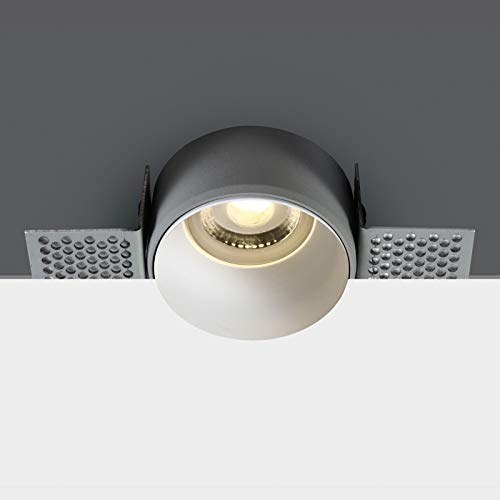
Image 1: Components of the ONE Light Trimless Recessed Spotlight, showing the mounting bracket and the light housing.
4. Setup and Installation
This trimless recessed spotlight requires careful installation to achieve a seamless finish. Professional installation is recommended.
4.1 Dimensions and Preparation
Before cutting, ensure the chosen location avoids joists, pipes, or electrical wires. Refer to the dimensional diagram for precise cutout requirements.

Image 2: Dimensional diagram of the ONE Light Trimless Recessed Spotlight, indicating a 60mm diameter and 40mm height.
4.2 Installation Steps
- Turn off Power: Ensure the main power supply to the installation area is switched off at the circuit breaker.
- Prepare Ceiling Opening: Using the provided dimensions (60mm diameter), cut a precise hole in the ceiling. For trimless installation, additional plastering work around the fixture may be required after mounting the housing.
- Wire Connections: Connect the electrical cord from the spotlight housing to your main electrical wiring. Ensure all connections are secure and insulated according to local electrical codes.
- Mount Housing: Insert the spotlight housing into the ceiling opening. Use the provided mounting hardware to secure the housing firmly in place. For a trimless finish, the housing should be flush with the ceiling surface, ready for plastering.
- Install GU10 Bulb: Once the housing is securely installed and any finishing work is complete, insert a GU10 bulb (max 50W) into the lamp holder. Twist to lock it in place.
- Final Assembly: Insert the inner light component into the outer housing.
- Restore Power: Once installation is complete and all connections are secure, restore power at the circuit breaker.
5. Operating Instructions
The ONE Light 10105TR/W spotlight operates via a standard wall switch connected to its electrical circuit. This fixture is not dimmable.
5.1 Bulb Replacement
To replace the GU10 bulb:
- Turn off Power: Always disconnect power at the circuit breaker before replacing the bulb.
- Allow to Cool: Let the old bulb cool down completely before touching it.
- Remove Bulb: Gently push the bulb upwards and twist it counter-clockwise to release it from the GU10 base.
- Insert New Bulb: Align the pins of the new GU10 bulb with the slots in the lamp holder. Push upwards and twist clockwise to secure it. Ensure the new bulb is a GU10 type and does not exceed 50W.
- Restore Power: Restore power at the circuit breaker.
6. Maintenance
The ONE Light 10105TR/W spotlight requires minimal maintenance.
- Cleaning: Ensure the power is off and the fixture is cool. Wipe the exterior with a soft, dry cloth. Do not use abrasive cleaners or solvents, as they may damage the finish.
- No User-Serviceable Parts: Other than bulb replacement, there are no user-serviceable parts inside the fixture. Do not attempt to disassemble the unit.
7. Troubleshooting
If you encounter issues with your spotlight, refer to the following common problems and solutions:
- Light Does Not Turn On:
- Check if the power supply to the fixture is on at the circuit breaker and wall switch.
- Ensure the GU10 bulb is correctly installed and not faulty. Try replacing it with a known working bulb.
- Verify electrical connections are secure (consult a qualified electrician if unsure).
- Light Flickers:
- Ensure the GU10 bulb is fully seated and twisted into the base.
- The bulb may be faulty or nearing the end of its life. Replace the bulb.
- Check for loose wiring connections (consult a qualified electrician).
8. Specifications
| Feature | Specification |
|---|---|
| Brand | ONE Light |
| Model Number | 10105TR/W (Internal: 178a2842-1e75-4e3c-87ee-d3a8b094c1aa) |
| Material | Aluminum |
| Color | White |
| Dimensions (Height) | 40 mm |
| Bulb Base | GU10 |
| Max Wattage | 50 Watts |
| Voltage | 120 Volts |
| Light Source | Replaceable Lamp (Halogen/LED compatible) |
| Dimmable | No |
| Installation Type | Recessed / Flush Mount |
| Usage Environment | Indoor Only |
| Energy Efficiency | Compatible with bulbs A++ to E |
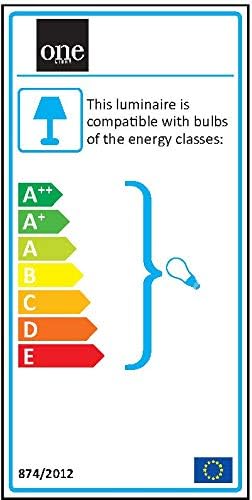
Image 3: EU Energy Label for the luminaire, indicating compatibility with bulbs of various energy classes from A++ to E.
9. Warranty and Support
This product is covered by a standard manufacturer's warranty. For specific warranty terms and conditions, please refer to the documentation provided at the point of purchase or contact your retailer. For technical support or inquiries, please reach out to your seller or the ONE Light customer service department.


