1. Product Overview
The XUSHIDZ Q18 Dual Lens Dash Cam is designed to record your driving journey with both front and rear cameras, providing comprehensive coverage. It features Full HD 1080P resolution, a 3.0-inch LCD screen, loop recording, G-sensor, WDR technology, night vision, and motion detection capabilities.
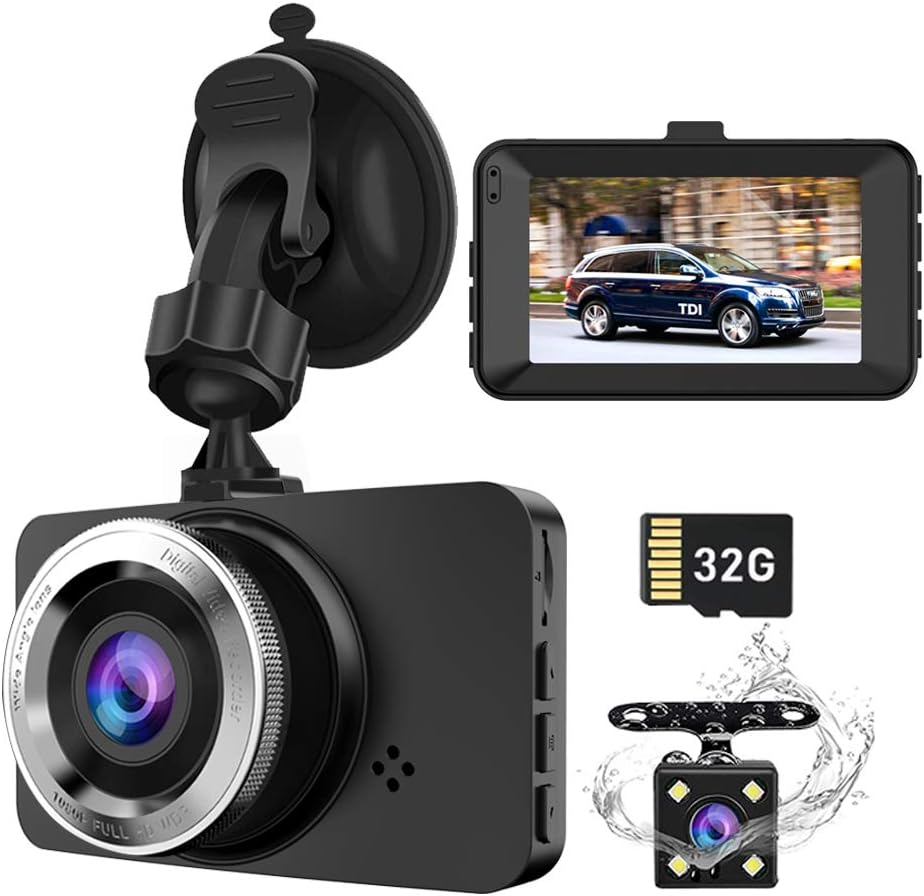
Image 1.1: Overview of the XUSHIDZ Q18 Dash Cam components, including the main front camera unit, a separate rear camera, and a 32GB SD card.
Key Features:
- Full HD 1080P Resolution: Captures clear video at 30 frames per second.
- Dual Lens Recording: Simultaneous recording from front (170°) and rear (130°) cameras.
- 3.0" LCD Screen: For real-time viewing and playback.
- Loop Recording: Automatically overwrites oldest files when the memory card is full.
- G-Sensor: Detects sudden impacts and locks footage to prevent overwriting.
- WDR & Night Vision: Enhances video clarity in various lighting conditions, including low light.
- Motion Detection: Records automatically when motion is detected near the vehicle.
- Parking Monitor: Provides protection for your vehicle when parked.

Image 1.2: Visual representation of the dash cam's primary functions and specifications.
2. Package Contents
Please check the package contents upon unboxing to ensure all items are present and undamaged.

Image 2.1: Contents of the XUSHIDZ Q18 Dash Cam retail package, including the main unit, rear camera, suction mount, car charger, 32GB Micro SD card, and instruction manual.
- XUSHIDZ Q18 Dash Cam (Front Unit)
- Rear Camera
- Suction Cup Mount
- Car Charger (USB Cable)
- 32GB Micro SD Card (pre-installed)
- Instruction Manual
3. Product Components and Controls
Familiarize yourself with the dash cam's various ports, buttons, and indicators.
Image 3.1: Front, top, bottom, and side views of the dash cam with labeled components.
Front Camera Unit:
- Power ON/OFF Button: Press and hold to power on/off. Short press to turn screen on/off during recording.
- File Locking Button: Locks the current recording file.
- Mode Button: Switches between video recording, photo mode, and playback mode.
- OK Key: Confirms selections in menus, starts/stops recording.
- Up/Down Buttons: Navigate menu options, zoom in/out in playback.
- Menu Button: Accesses settings menu.
- HDMI Port: For connecting to an external display.
- USB Port: For power supply and data transfer.
- TF Card Port: Slot for the Micro SD card.
- Reset Button: Resets the device (use a thin pin).
- Microphone: Records audio.
4. Setup and Installation
4.1 Micro SD Card Installation
- Ensure the dash cam is powered off.
- Insert the provided 32GB Micro SD card into the TF card slot until it clicks into place.
- Important: Format the SD card regularly (at least once a month) within the dash cam's settings to ensure optimal performance and prevent recording errors.
4.2 Front Camera Installation
- Clean the windshield area where you intend to mount the dash cam.
- Attach the suction cup mount to the windshield, ideally near the rearview mirror, ensuring it does not obstruct your view.
- Secure the dash cam to the suction cup mount.
- Adjust the lens angle to capture the road ahead clearly.
- Route the power cable neatly along the windshield edge, down the A-pillar, and to the car's cigarette lighter socket.

Image 4.1: Recommended installation path for the dash cam cables.
4.3 Rear Camera Installation
The rear camera is waterproof and can be installed either inside the rear window or externally above the license plate.
- Choose a suitable location for the rear camera, ensuring a clear view of the rear.
- Securely mount the rear camera using the provided adhesive or screws.
- Route the rear camera cable from the rear of the vehicle to the front dash cam unit. This typically involves tucking the cable along the headliner and side panels.
- Connect the rear camera cable to the dedicated port on the main dash cam unit.
- Optional: The red cable included with the rear camera is for connecting to your vehicle's reverse light power source. This enables the dash cam to display a reversing image on the screen when the vehicle is in reverse gear. Connect this red wire to the positive wire of your reverse light.

Image 4.2: Front and rear camera wide-angle coverage.

Image 4.3: Dash cam mounted in a vehicle, showing its display and feature icons.
5. Operating Instructions
5.1 Powering On/Off
- Automatic Power: The dash cam will automatically power on and begin recording when connected to the car's power supply and the engine starts. It will power off automatically when the engine is turned off.
- Manual Power: Press and hold the Power ON/OFF button for a few seconds to manually turn the device on or off.
5.2 Recording Modes
The dash cam supports three main modes: Video Recording, Photo Mode, and Playback Mode. Press the Mode button to switch between these modes.
Video Recording Mode:
- Upon powering on, the dash cam automatically enters video recording mode. A red dot icon will flash on the screen, indicating recording is in progress.
- Press the OK button to manually start or stop recording.
- During recording, other buttons are locked. Press the OK button first to unlock and access menu or mode functions.
Photo Mode:
- In Photo Mode, press the OK button to take a still picture.
Playback Mode:
- In Playback Mode, use the Up/Down buttons to navigate through recorded videos or photos.
- Press the OK button to play a selected video or view a photo.
5.3 Menu Settings
Press the Menu button to access the settings menu. Use the Up/Down buttons to navigate and the OK button to confirm selections.
- Loop Recording: Set video clip duration (1, 3, or 5 minutes). When the SD card is full, the oldest unprotected files will be overwritten.
- G-Sensor Sensitivity: Adjust sensitivity for impact detection. When an impact is detected, the current video file is locked and protected from overwriting.
- WDR (Wide Dynamic Range): Improves video quality in high-contrast lighting conditions.
- Motion Detection: When enabled, the camera will start recording if motion is detected in front of the lens while the vehicle is stationary. Recommendation: Turn off motion detection when driving to avoid continuous recording of unnecessary events.
- Parking Monitor: Provides 24-hour protection. If an external force is detected while parked, the dash cam will record approximately 1 minute of video. Note: For continuous 24-hour parking monitoring, a hardwire kit (not included) is required to provide constant power.
- Screen Saver: Set the screen to turn off automatically after 3, 5, or 10 minutes, or disable it. Recording continues even when the screen is off.
- Date/Time: Set the correct date and time.
- Format SD Card: Erases all data on the SD card. Perform this regularly.
Image 5.1: Explanation of the loop recording function.

Image 5.2: Demonstration of Superior Night Vision and WDR technology.
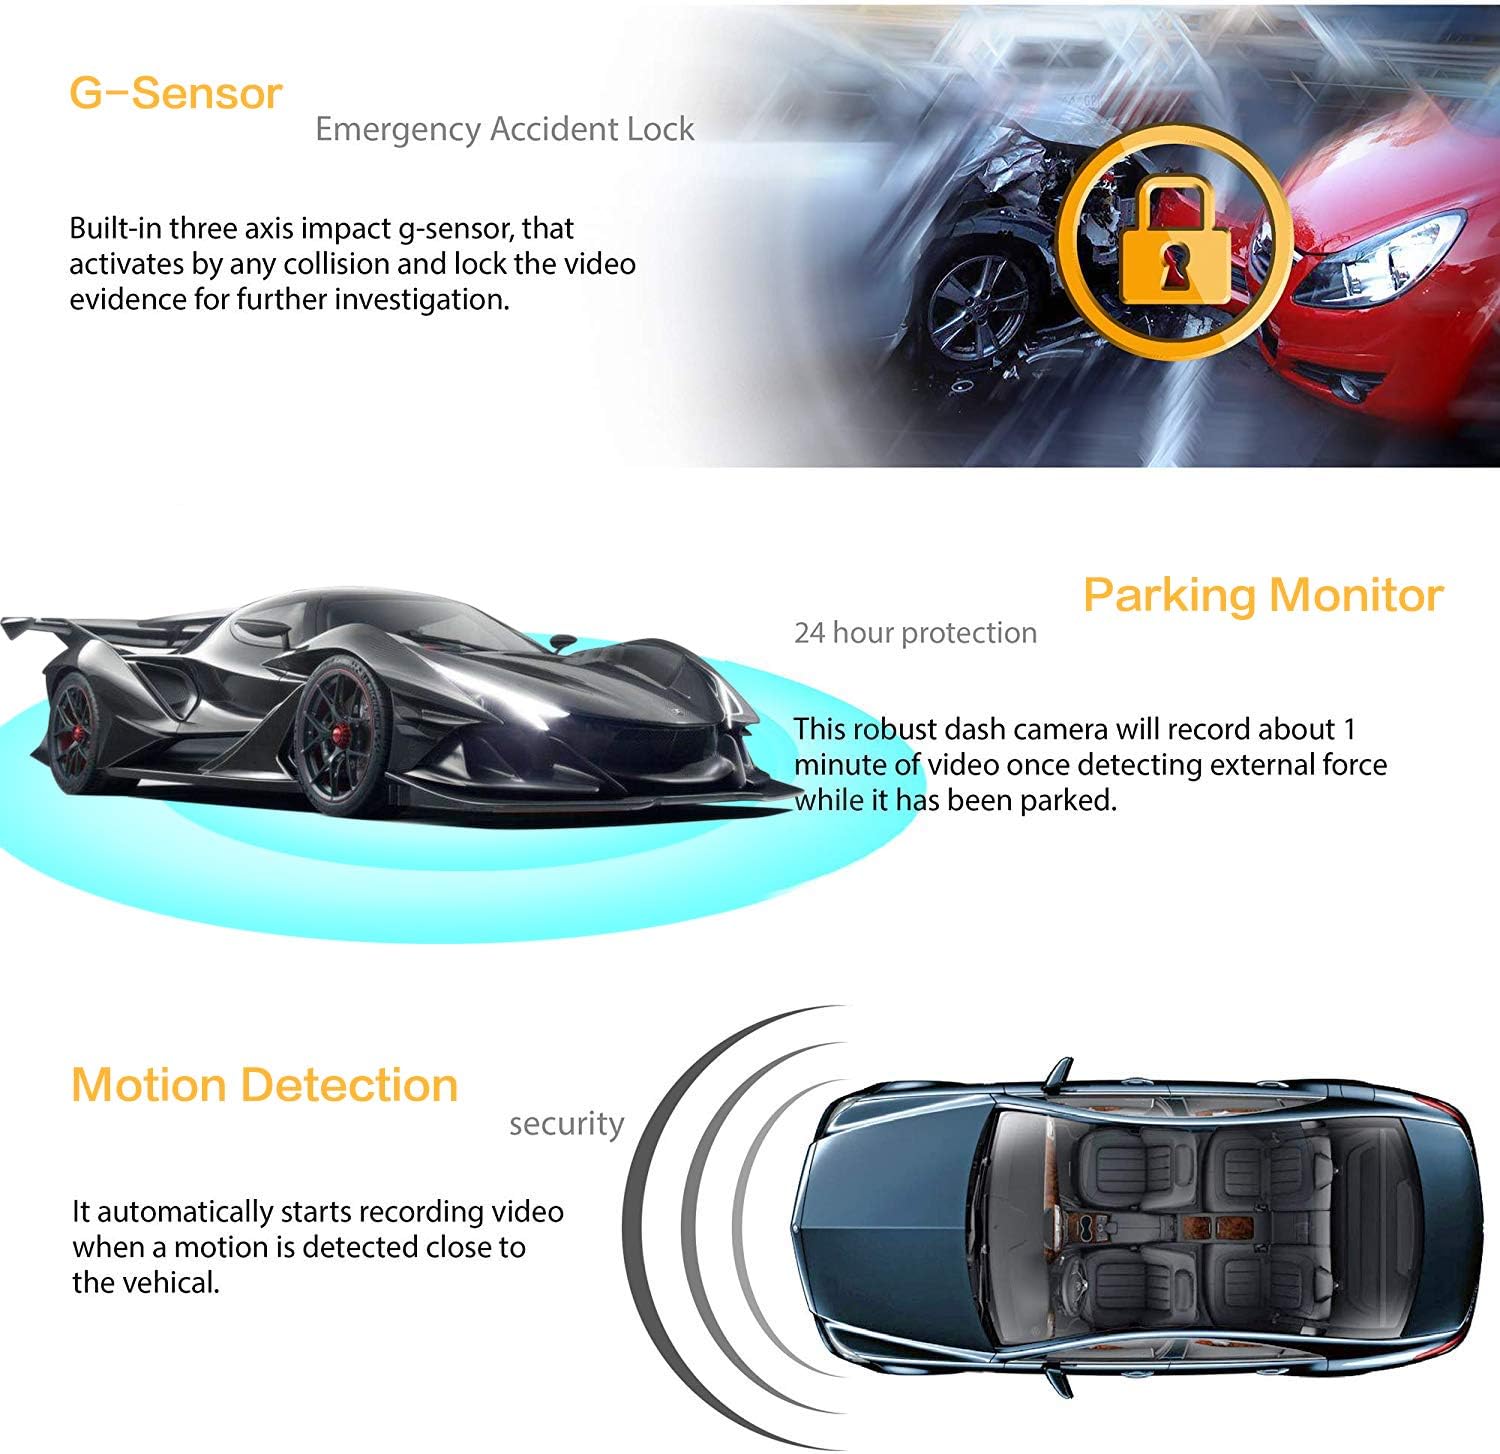
Image 5.3: Explanation of G-Sensor, Parking Monitor, and Motion Detection features.
6. Maintenance
- SD Card Formatting: To maintain optimal recording performance and prevent data corruption, format the Micro SD card within the dash cam's settings at least once a month.
- Cleaning: Use a soft, dry cloth to clean the camera lenses and screen. Avoid using abrasive cleaners or solvents.
- Temperature: Avoid exposing the dash cam to extreme temperatures for extended periods.
7. Troubleshooting
| Problem | Possible Cause / Solution |
|---|---|
| Dash cam does not power on. |
|
| Dash cam freezes or stops recording. |
|
| Video quality is poor or blurry. |
|
| Buttons are unresponsive during recording. |
|
| Parking Monitor not working for 24 hours. |
|
8. Specifications
| Feature | Detail |
|---|---|
| Model | Q18 |
| Screen Size | 3.0 Inches LCD |
| Front Lens Angle | 170° Wide Angle |
| Rear Lens Angle | 130° Wide Angle |
| Lens Aperture | F2.0 |
| Video Resolution | 1080FHD (1920x1080) / 720P (1280x720) |
| External Power Supply | DC 12V~24V |
| Operating Temperature | -15°C ~ 60°C |
| Loop Recording Options | 1 minute / 3 minutes / 5 minutes / Off |
| Memory Card Support | Up to 32GB Micro SD (Class 10 recommended) |
| Special Features | G-Sensor, Night Vision, Parking Monitor, WDR, Motion Detection |
| Battery Type | Lithium Ion (small internal battery for emergency shutdown) |
| Connectivity | USB |
| Product Dimensions | 8 x 6 x 5 cm |
| Item Weight | 100 g (0.1 Kilograms) |
9. Warranty and Support
For warranty information or technical support, please refer to the contact details provided with your purchase or visit the official XUSHIDZ website. Keep your purchase receipt as proof of purchase.