1. Introduction
This manual provides detailed instructions for the proper setup, operation, and maintenance of your HAKRDRDO T3 Teleprompter. Please read this guide thoroughly before using the device to ensure optimal performance and longevity.
2. Safety Information
- Handle the teleprompter with care, especially the reflective glass, to prevent damage.
- Ensure all components are securely fastened before use to prevent equipment from falling.
- Keep the device away from water and extreme temperatures.
- Do not attempt to disassemble or modify the teleprompter, as this may void the warranty and cause damage.
3. Package Contents
Verify that all items listed below are included in your package:
- Teleprompter Unit (x1)
- Remote Control (x1)
- Mobile Phone Clip (x1)
- Adapter Rings (49-77mm for camera recording)
- Phone Barn Doors (for phone recording)
- Storage Bag (x1)

Image: Packing list showing all included components.
4. Setup Instructions
4.1. Camera Installation
- Install the holder onto the teleprompter unit.
- Remove the original filter ring from your camera lens.
- Attach the appropriate camera adapter ring (49-77mm) to your camera lens.
- Mount the teleprompter onto the camera lens via the adapter ring.

Image: Step-by-step guide for camera installation.
4.2. Mobile Phone Installation (for recording)
- Install the holder onto the teleprompter unit.
- Insert the original ring into the teleprompter's camera opening.
- Attach the phone barn doors to the teleprompter.
- Install the mobile phone clip onto the teleprompter.
- Place your phone securely into the mobile phone clip.

Image: Step-by-step guide for mobile phone installation for recording.
4.3. Device Compatibility (for display)
The teleprompter supports various devices for displaying your script:
- Smartphones: Place your smartphone in the designated tray for script display.
- Tablets: The teleprompter is compatible with tablets up to 12 inches. Insert the tablet into the tray on the opposite side of the holder for larger devices.

Image: Illustration of phone and tablet PC insertion for script display.
5. Operating Instructions
5.1. Teleprompter Application
To use the teleprompter, you will need a compatible teleprompter application on your smartphone or tablet. This app will mirror and scroll your script.
- Download a suitable teleprompter application from the Google Play Store (for Android) or the Apple App Store (for iOS).
- Ensure the app supports mirroring text horizontally so it appears correctly when reflected by the teleprompter glass.
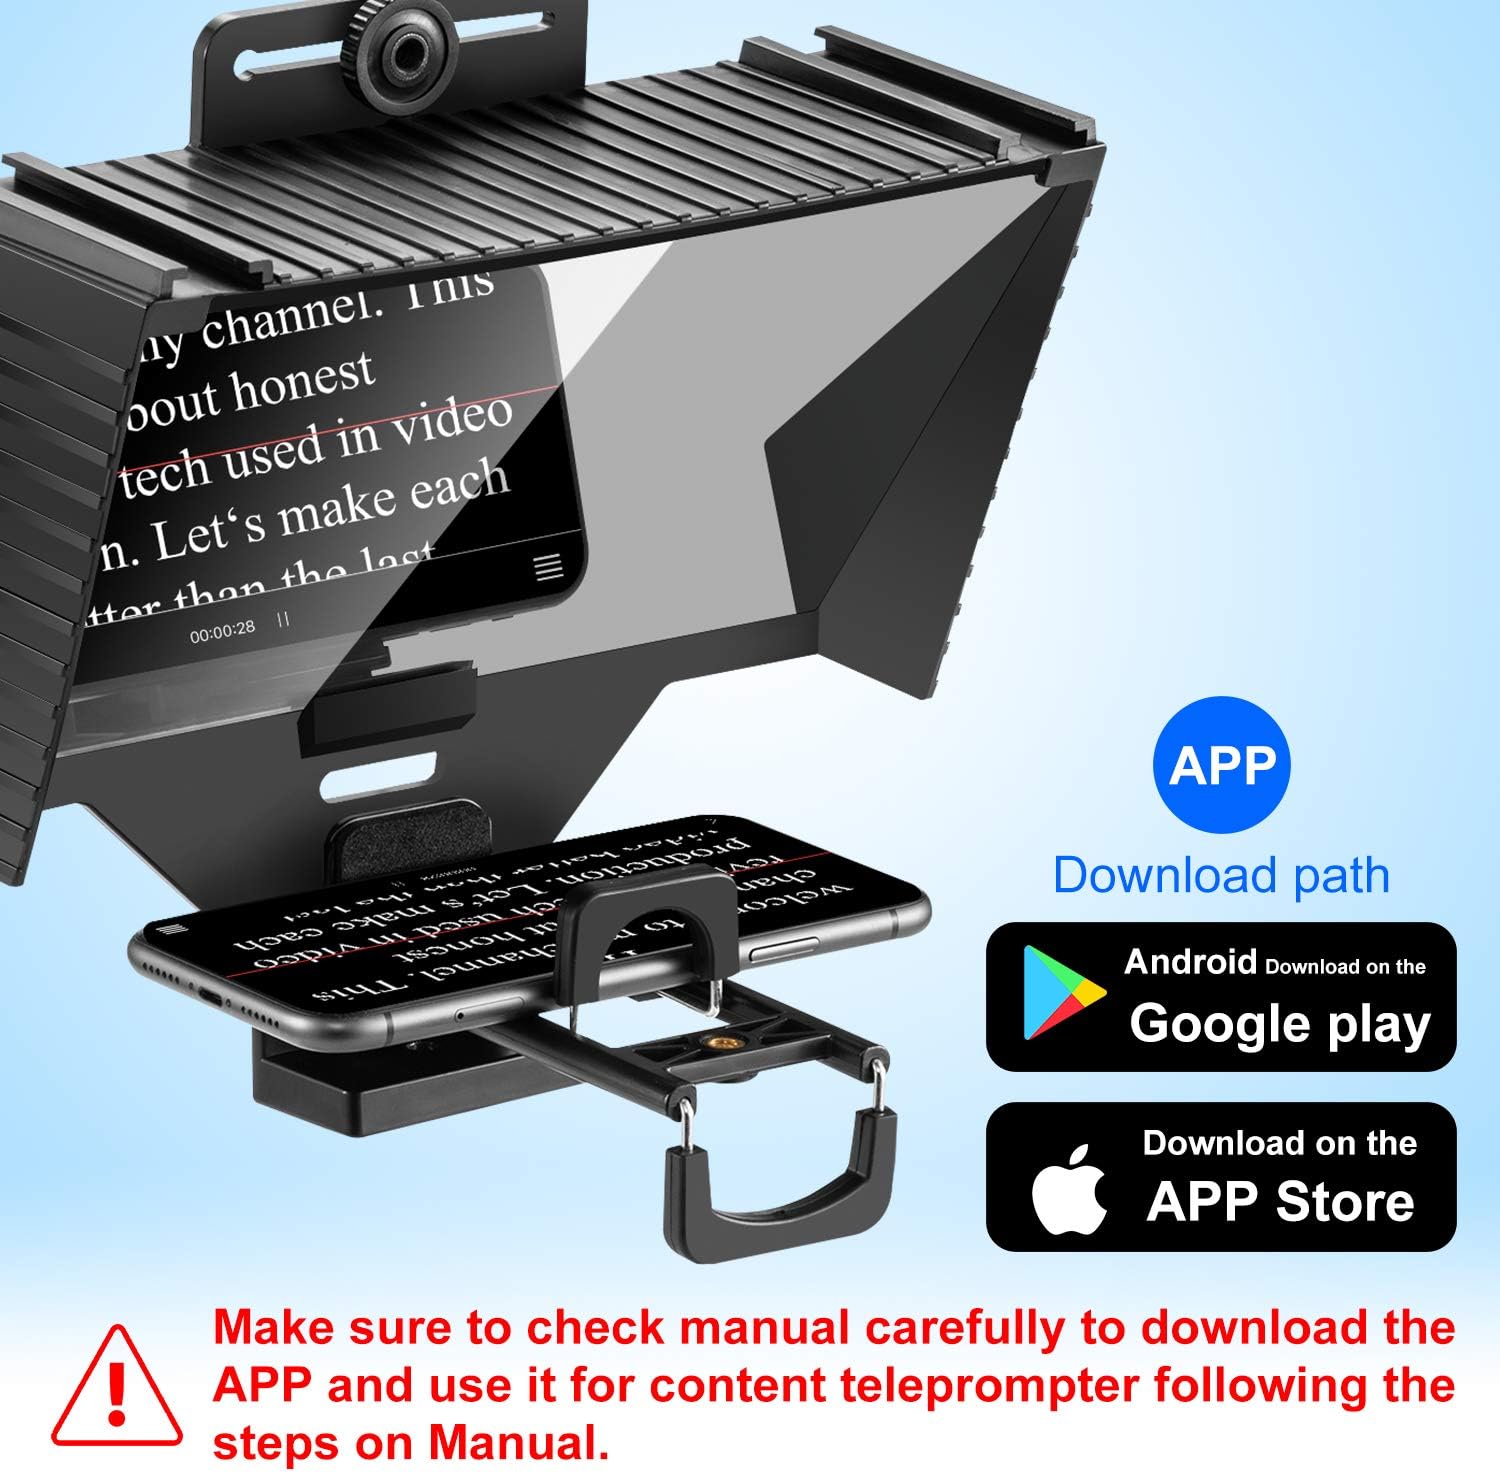
Image: Teleprompter in use with app download paths.
5.2. Remote Control Functions
The included Bluetooth remote control allows for convenient operation of your teleprompter application.
- Power ON/OFF: Use the dedicated button to turn the remote on or off.
- Pause/Play: Control the scrolling of your script.
- Forward/Backward: Navigate through your script or adjust scrolling speed.
- KEY/GAME: This button may have additional functions depending on the teleprompter application used.

Image: Bluetooth remote control and its functions.
6. Maintenance
- Cleaning: Use a soft, lint-free cloth to clean the teleprompter glass. For stubborn smudges, a small amount of lens cleaning solution can be applied to the cloth (not directly to the glass).
- Storage: When not in use, store the teleprompter in the provided storage bag to protect it from dust and scratches.
- Handling: Avoid dropping or subjecting the teleprompter to strong impacts.
7. Troubleshooting
- Text not clear/blurry: Ensure the display device (phone/tablet) is positioned correctly and securely in the tray. Check for smudges on the teleprompter glass and clean if necessary.
- Text appears backward: Activate the mirroring function within your teleprompter application.
- Remote control not working: Ensure the remote is powered on and properly paired via Bluetooth to your display device. Check battery levels.
- Teleprompter not attaching to camera: Verify that you are using the correct size adapter ring for your camera lens.
8. Specifications
| Feature | Specification |
|---|---|
| Model Number | T3 |
| Item Weight | 2.2 pounds (approximately 1 kg) |
| Package Dimensions | 10.67 x 10.59 x 6.93 inches |
| Display Device Compatibility | Smartphones, Tablets up to 12 inches |
| Camera Lens Compatibility | Lenses with 49-77mm filter threads (via adapter rings) |
9. Expandability
The HAKRDRDO T3 Teleprompter features a standard 1/4-inch screw mount, allowing for versatile attachment to various photography and videography accessories.
- Tripods: Easily mount the teleprompter onto a table tripod, lamp bracket, or floor tripod for stable recording.
- Accessories: The 1/4-inch screw can also be used to attach additional accessories such as external lights or microphones (not included).
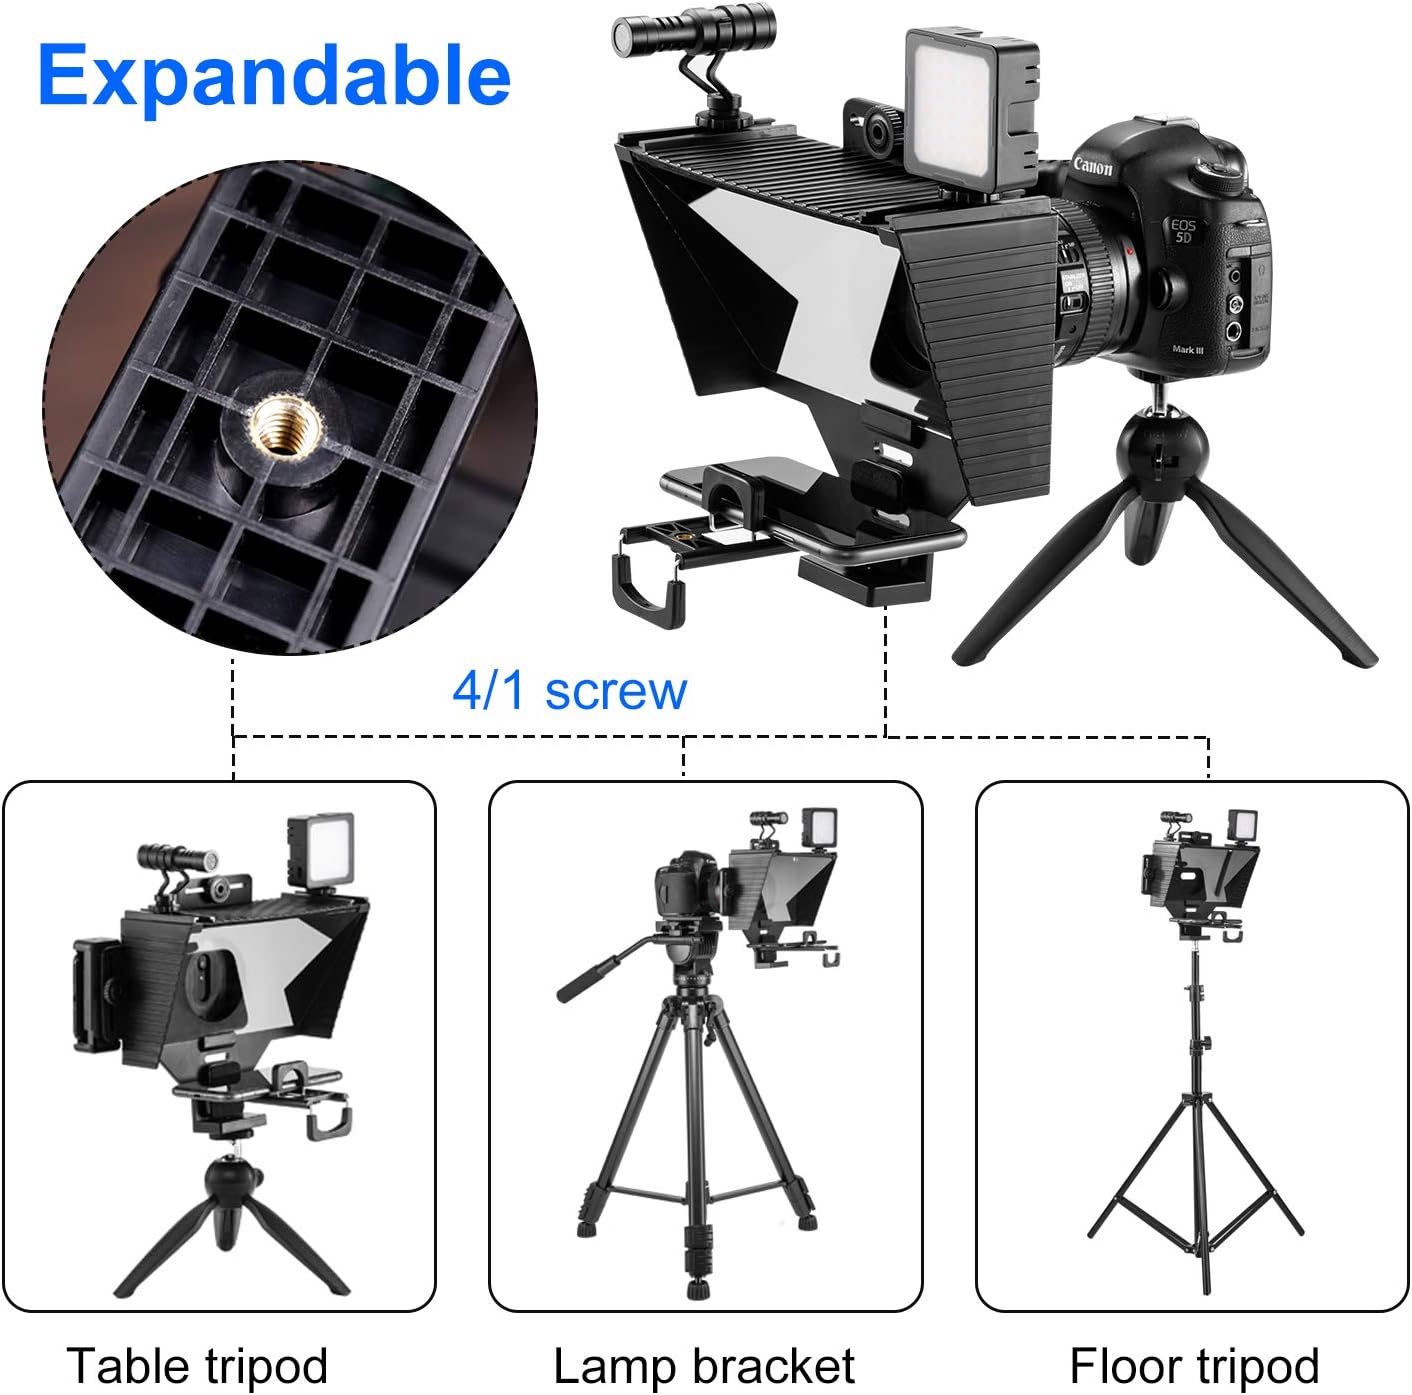
Image: Expandable features with 1/4 inch screw mount.
10. Warranty and Support
For warranty information or technical support, please refer to the contact details provided with your purchase or visit the official HAKRDRDO website. Keep your proof of purchase for warranty claims.