Introduction
The MICROWARE 7" LCD Digital Microscope is a versatile tool designed for detailed observation and analysis. Featuring up to 1200X magnification, a 12MP camera, and a 7-inch 1080P HD display, it is suitable for various applications including circuit board inspection, coin examination, jewelry appraisal, and educational purposes. This manual provides essential information for setting up, operating, and maintaining your digital microscope.
Package Contents
Carefully unpack the box and ensure all the following items are present:
- 7" LCD Digital Microscope Unit
- Adjustable Metal Stand
- Wired Remote Control
- USB Cable
- 32GB TF Memory Card
- Auxiliary LED Lights (2 units)
- User Manual
- Software CD (for PC connection)
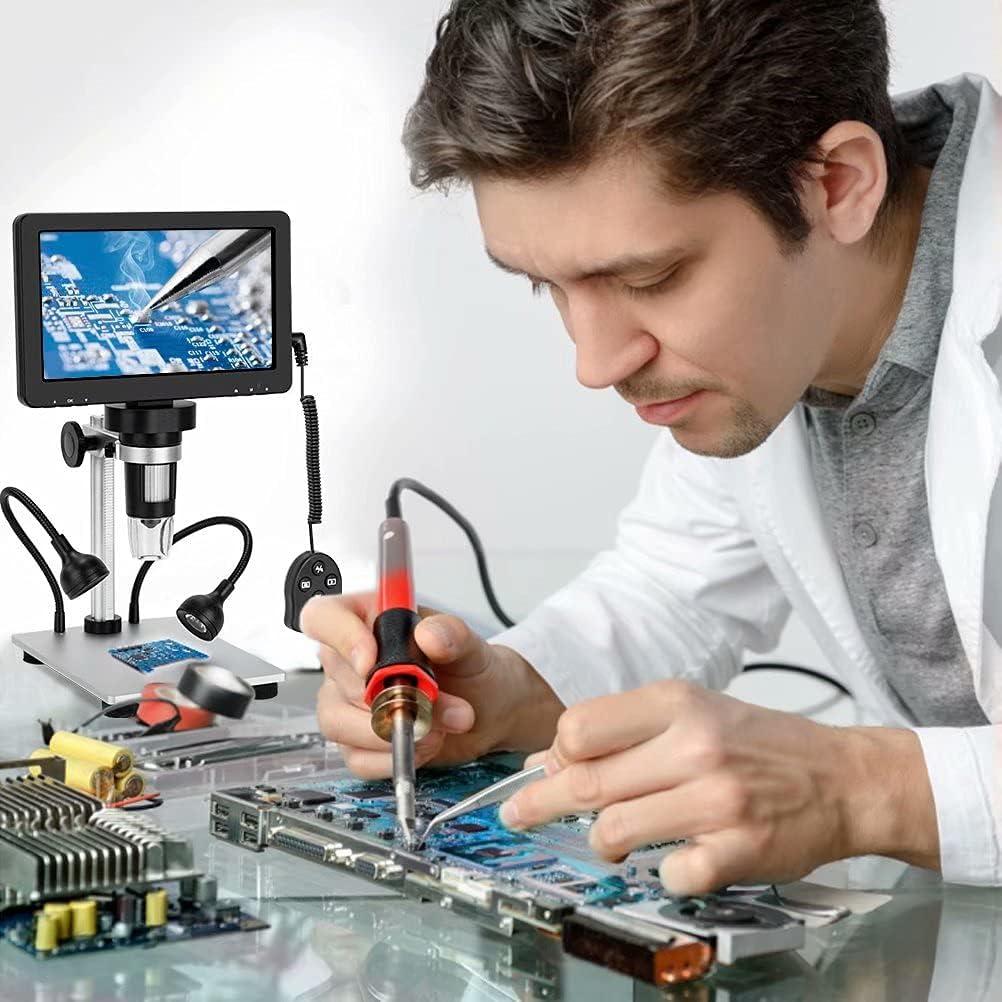
Image: Overview of the microscope components.
Setup
- Assemble the Stand: Insert the vertical bracket into the base plate. Tighten the bracket securely, then adjust the black knob to fix its position.
- Attach the Microscope Unit: Carefully place the 7" LCD digital microscope unit onto the top of the stand's bracket. Secure it by tightening the screws.
- Connect Auxiliary Lights: Plug the two auxiliary LED lights into their designated ports on the base. Position them to provide optimal illumination for your specimens.
- Insert TF Card: Locate the TF card slot on the microscope unit and insert the provided 32GB TF card. This is necessary for saving photos and videos.
- Power Connection: Connect the microscope to a power source using the provided USB cable.
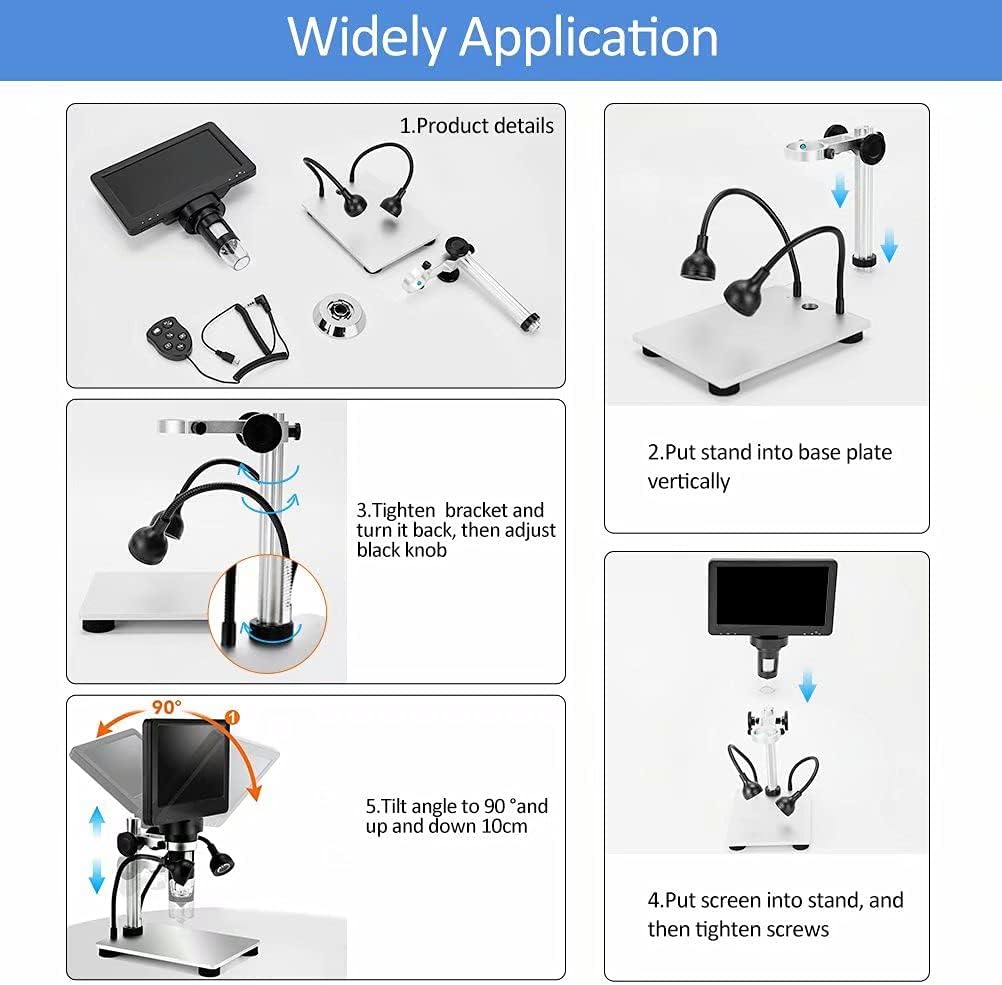
Image: Visual guide for assembling the microscope.
Operating Instructions
1. Power On/Off
Press and hold the power button on the microscope unit to turn it on or off. The screen will display the live view from the camera.
2. Magnification and Focusing
Place your specimen on the base plate directly under the microscope lens. Adjust the object's distance from the lens (optimal range is 2cm-10cm). Rotate the focusing wheel on the microscope barrel slowly until the image on the 7-inch LCD screen becomes clear. The microscope offers up to 1200X magnification.
Video: Demonstration of adjusting focus and magnification on the digital microscope.
Video: Quick demonstration of the microscope's capabilities.
3. Adjusting LED Lights
The microscope is equipped with 8 adjustable LED lights around the lens and 2 additional auxiliary lights. Use the adjustable fill light wheel and controls on the wired remote to optimize brightness and illumination for your specimen, especially in darker environments.
4. Photo and Video Capture
Use the wired remote control to capture 12MP photos or 1080FHD videos of your observations. The captured media will be stored on the inserted 32GB TF card.
5. PC Connection (Windows/Mac Compatible)
To view images and videos on a larger screen, connect the microscope to your PC using the USB cable. The device supports Windows and Mac OSx10.5 or higher. Install the provided software from the CD for full camera and video functions on your computer.

Image: Connecting the microscope to a PC for viewing and recording.
Maintenance
- Cleaning: Use a soft, dry cloth to clean the microscope body and screen. For the lens, use a specialized lens cleaning cloth and solution. Avoid abrasive cleaners.
- Storage: Store the microscope in a cool, dry place away from direct sunlight and extreme temperatures. Keep it covered to prevent dust accumulation.
- Battery Care: If the microscope has a built-in battery, ensure it is charged regularly to maintain battery health. Avoid fully discharging the battery for extended periods.
Troubleshooting
- No Power: Ensure the USB cable is securely connected to both the microscope and a power source. Check if the power adapter is functioning correctly.
- Blurry Image: Adjust the focusing wheel slowly. Ensure the specimen is within the optimal working distance (2cm-10cm) from the lens. Clean the lens if necessary.
- No Image on PC: Verify the USB connection. Ensure the correct software/drivers are installed on your PC. Check your computer's display settings.
- Cannot Save Photos/Videos: Confirm that the TF card is correctly inserted and has sufficient free space. Check the card's write protection switch.
- Lights Not Working: Check the connections of the auxiliary LED lights. Adjust the brightness control.
Specifications
| Brand | MICROWARE |
| Model Number | 7inchlcdmicroscopewith2light |
| Magnification Maximum | 1200 x |
| Camera Resolution | 12MP |
| Video Resolution | 1080FHD |
| Display Size | 7 inches |
| Light Source Type | LED (10 adjustable lights) |
| Material | Metal |
| Color | Black |
| Item Weight | 1.11 Kilograms |
| Power Source | Battery Powered |
| Compatible Devices | Personal Computer (Windows/Mac) |
Warranty and Support
For warranty information, technical support, or service inquiries, please refer to the contact details provided with your purchase documentation or visit the official MICROWARE website. Keep your proof of purchase for warranty claims.