1. Introduction
Thank you for choosing the HYCENCY Programmable Wireless Plug-in Thermostat Outlet. This device is designed to provide precise temperature control for your heating or cooling appliances, enhancing comfort and energy efficiency. Please read this manual thoroughly before operation to ensure proper use and to maximize the product's lifespan.
2. Safety Information
Always adhere to the following safety precautions to prevent injury or damage to the device:
- Do not exceed the maximum load capacity of 15A (1800W at 120V).
- Ensure the plug is fully inserted into a grounded outlet.
- Do not immerse the device in water or expose it to excessive moisture.
- Do not disassemble or attempt to repair the device. Contact qualified personnel for service.
- Keep out of reach of children.
- Unplug the device from the power outlet before cleaning.
- Use only as intended for heating and cooling appliances.
3. Product Overview
The HYCENCY Wireless Thermostat system consists of two main components: the Receiver Outlet and the Remote Control Thermostat.

Figure 3.1: Wireless Thermostat Outlet and Remote Control
This image displays the two main components of the HYCENCY wireless thermostat system: the white plug-in receiver outlet on the left and the white remote control thermostat with a green LCD screen on the right. The remote shows current and target temperatures.
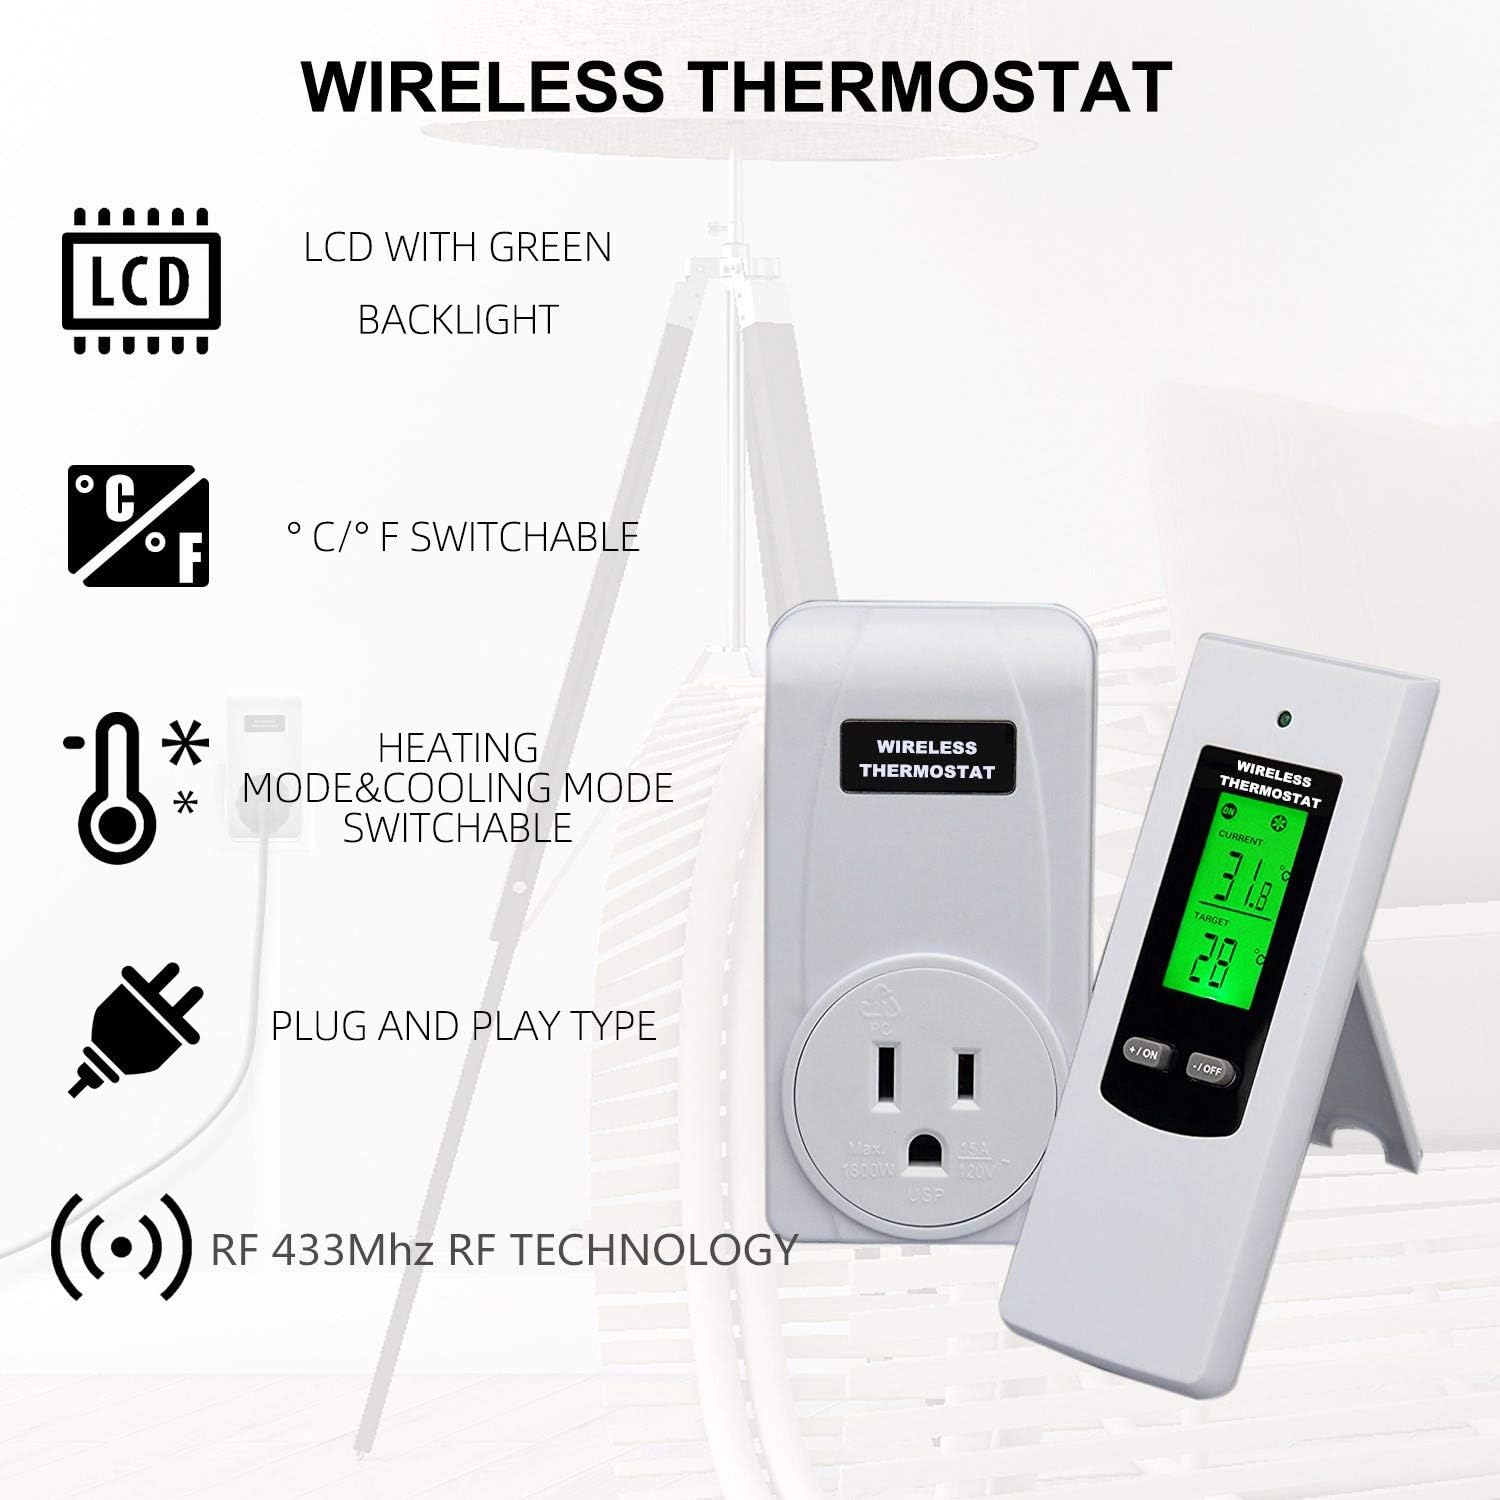
Figure 3.2: Key Features
This image highlights the key features of the wireless thermostat, including an LCD with green backlight, Celsius/Fahrenheit switchable modes, heating and cooling mode switchable, plug-and-play design, and RF 433Mhz RF technology.
3.1 Components
- Receiver Outlet: Plugs into a standard wall outlet and controls the power to your appliance.
- Remote Control Thermostat: Displays current temperature, allows setting of target temperature, and controls the receiver outlet wirelessly. Features a backlit LCD screen.
- Temperature Sensor: Built into the remote control for accurate ambient temperature detection.
3.2 Product Dimensions

Figure 3.3: Product Dimensions
This image provides the dimensions for both the receiver outlet and the remote control. The receiver outlet measures approximately 98mm (3.9in) in height and 55mm (2.2in) in width. The remote control measures approximately 122mm (4.8in) in height and 42mm (1.7in) in width.
4. Setup
4.1 Initial Pairing (Automatic Code-Learning)
The thermostat plug features automatic code-learning technology, simplifying the setup process.
- Insert the batteries into the remote control thermostat.
- Plug the Receiver Outlet into a standard 120V wall outlet.
- Plug your heating or cooling appliance into the Receiver Outlet.
- The remote control and receiver outlet should automatically pair. If not, refer to the troubleshooting section for manual pairing instructions.

Figure 4.1: Plug and Play Setup
This image illustrates the simple plug-and-play setup: plug the appliance into the thermostat outlet, and then plug the thermostat outlet into the wall. No complex wiring is required.
4.2 Remote Control Placement
The remote control can be used handheld, placed on a desk using its support frame, or mounted on a wall using its magnetic base or screw hook.

Figure 4.2: Remote Control Placement
This image shows the back of the remote control, highlighting the support frame for desk placement and the screw hook for wall mounting, offering versatile placement options.
5. Operating Instructions
5.1 Powering On/Off
Use the remote control to power devices on/off effortlessly.
5.2 Setting Temperature
The remote control displays the current ambient temperature and allows you to set a target temperature. Once the preset target temperature is reached, the system intelligently pauses heating/cooling cycles to maintain consistent comfort.
5.3 Switching Between Heating and Cooling Modes
The thermostat supports both heating and cooling modes, making it versatile for various appliances.

Figure 5.1: Heating and Cooling Mode
This diagram illustrates how the wireless thermostat operates in both cooling and heating modes, showing the remote control at the center with temperature gauges indicating cooling (blue) and heating (red) cycles.

Figure 5.2: Mode Switching
This image visually represents the switchable cooling and heating modes, with the remote control displaying different target temperatures for each mode, surrounded by blue flames for cooling and red flames for heating.
5.4 Switching Temperature Units (°C/°F)
The unit flexibility allows you to switch between Celsius and Fahrenheit with ease.

Figure 5.3: Temperature Unit Switch
This image shows the remote control with arrows indicating the ability to switch between Fahrenheit (°F) and Celsius (°C) temperature units on the display.
5.5 Multi-Channel Control
One remote control can be used to control multiple receiver outlets, allowing for centralized temperature management in different areas.

Figure 5.4: Multi-Channel Control
This diagram illustrates a house floor plan with multiple thermostat outlets placed in different rooms, all controlled by a single remote control, demonstrating the multi-channel capability.
6. Maintenance
- Cleaning: Unplug the receiver outlet from the wall before cleaning. Wipe both the receiver and remote with a soft, dry cloth. Do not use abrasive cleaners or solvents.
- Battery Replacement: The remote control will display a low battery warning (icon flashes at <2.7V) when batteries need replacement. Replace with new batteries of the specified type.
- Storage: If storing the device for an extended period, remove the batteries from the remote control. Store in a cool, dry place.
7. Troubleshooting
| Problem | Possible Cause | Solution |
|---|---|---|
| Device not turning on/off | No power to receiver outlet; Remote batteries low/dead; Remote not paired; Appliance not powered on. | Check wall outlet power; Replace remote batteries; Re-pair remote and receiver (see manual for specific steps if automatic pairing fails); Ensure appliance is switched on. |
| Inaccurate temperature reading | Sensor obstructed or in direct sunlight/draft; Remote too far from receiver. | Relocate remote to an area with stable ambient temperature; Ensure remote is within effective range of receiver. |
| Low battery warning on remote | Batteries are low. | Replace batteries immediately. |
| No display on remote | Batteries are dead or incorrectly inserted. | Check battery orientation or replace batteries. |
| Protection Alarms triggered | Sensor malfunction, extreme temperatures, or circuit overloads. | Check for obstructions or extreme environmental conditions. If persistent, contact support. Ensure appliance load does not exceed 1800W. |
8. Specifications
| Feature | Detail |
|---|---|
| Model Number | OPS100N+OTS100N |
| Voltage | 120 Volts |
| Maximum Load | 15A / 1800W |
| Connectivity Technology | RF 433Mhz |
| Temperature Control Type | Programmable |
| Display Type | LCD with Green Backlight |
| Temperature Units | Celsius (°C) / Fahrenheit (°F) Switchable |
| Power Source (Remote) | Battery Powered |
| Material | Metal, ABS (V0-grade flame-retardant PC material) |
| Product Dimensions | 5 x 4 x 2 inches (overall package dimensions) |
| Item Weight | 6.08 ounces |
9. Warranty and Support
For warranty information or technical support, please contact HYCENCY customer service. Refer to the product packaging or the official HYCENCY website for contact details.
Manufacturer: HYCENCY