1. Important Safety Information
Please read and understand all safety warnings and instructions before operating the Kärcher K 2 Power Control Home Pressure Washer. Failure to follow these instructions may result in electric shock, fire, and/or serious injury.
- Eye Protection: Always wear appropriate eye protection (safety glasses or goggles) when operating the pressure washer.
- Electrical Safety: Ensure the power cord and plug are in good condition. Do not operate the unit with a damaged cord or plug. Connect to a properly grounded outlet.
- Water Connection: Only connect the pressure washer to a potable water supply. Do not use with contaminated water.
- Keep Clear: Keep children, pets, and bystanders away from the operating area. The high-pressure spray can cause serious injury.
- Stable Surface: Operate the pressure washer on a stable, level surface to prevent tipping.
- Nozzle Direction: Never direct the spray at people, animals, electrical devices, or the unit itself.
- Chemical Use: Use only Kärcher approved detergents. Follow detergent instructions carefully.
- Unplug When Not In Use: Always unplug the unit from the power source and disconnect the water supply when not in use or before performing any maintenance.
2. Setup and Assembly
Follow these steps to prepare your Kärcher K 2 Power Control Home Pressure Washer for use.
2.1 Unpacking and Component Check
Carefully remove all components from the packaging. Ensure all parts listed in your product manual are present. The Home Kit includes a T 1 surface cleaner and patio and decking detergent.
2.2 Connecting the High-Pressure Hose and Gun
Connect the high-pressure hose to the pressure washer unit and then to the high-pressure gun. Ensure connections are secure to prevent leaks.

Image: Securely connect the high-pressure hose to the spray gun for operation.
2.3 Connecting the Water Supply
Attach a standard garden hose to the water inlet on the pressure washer. Ensure the water filter is clean and properly installed. Turn on the water supply fully before starting the unit.

Image: Attach your garden hose to the water inlet on the pressure washer. Ensure a tight seal.
2.4 Power Connection
Plug the power cable into a suitable grounded electrical outlet. The unit is designed for corded electric operation.
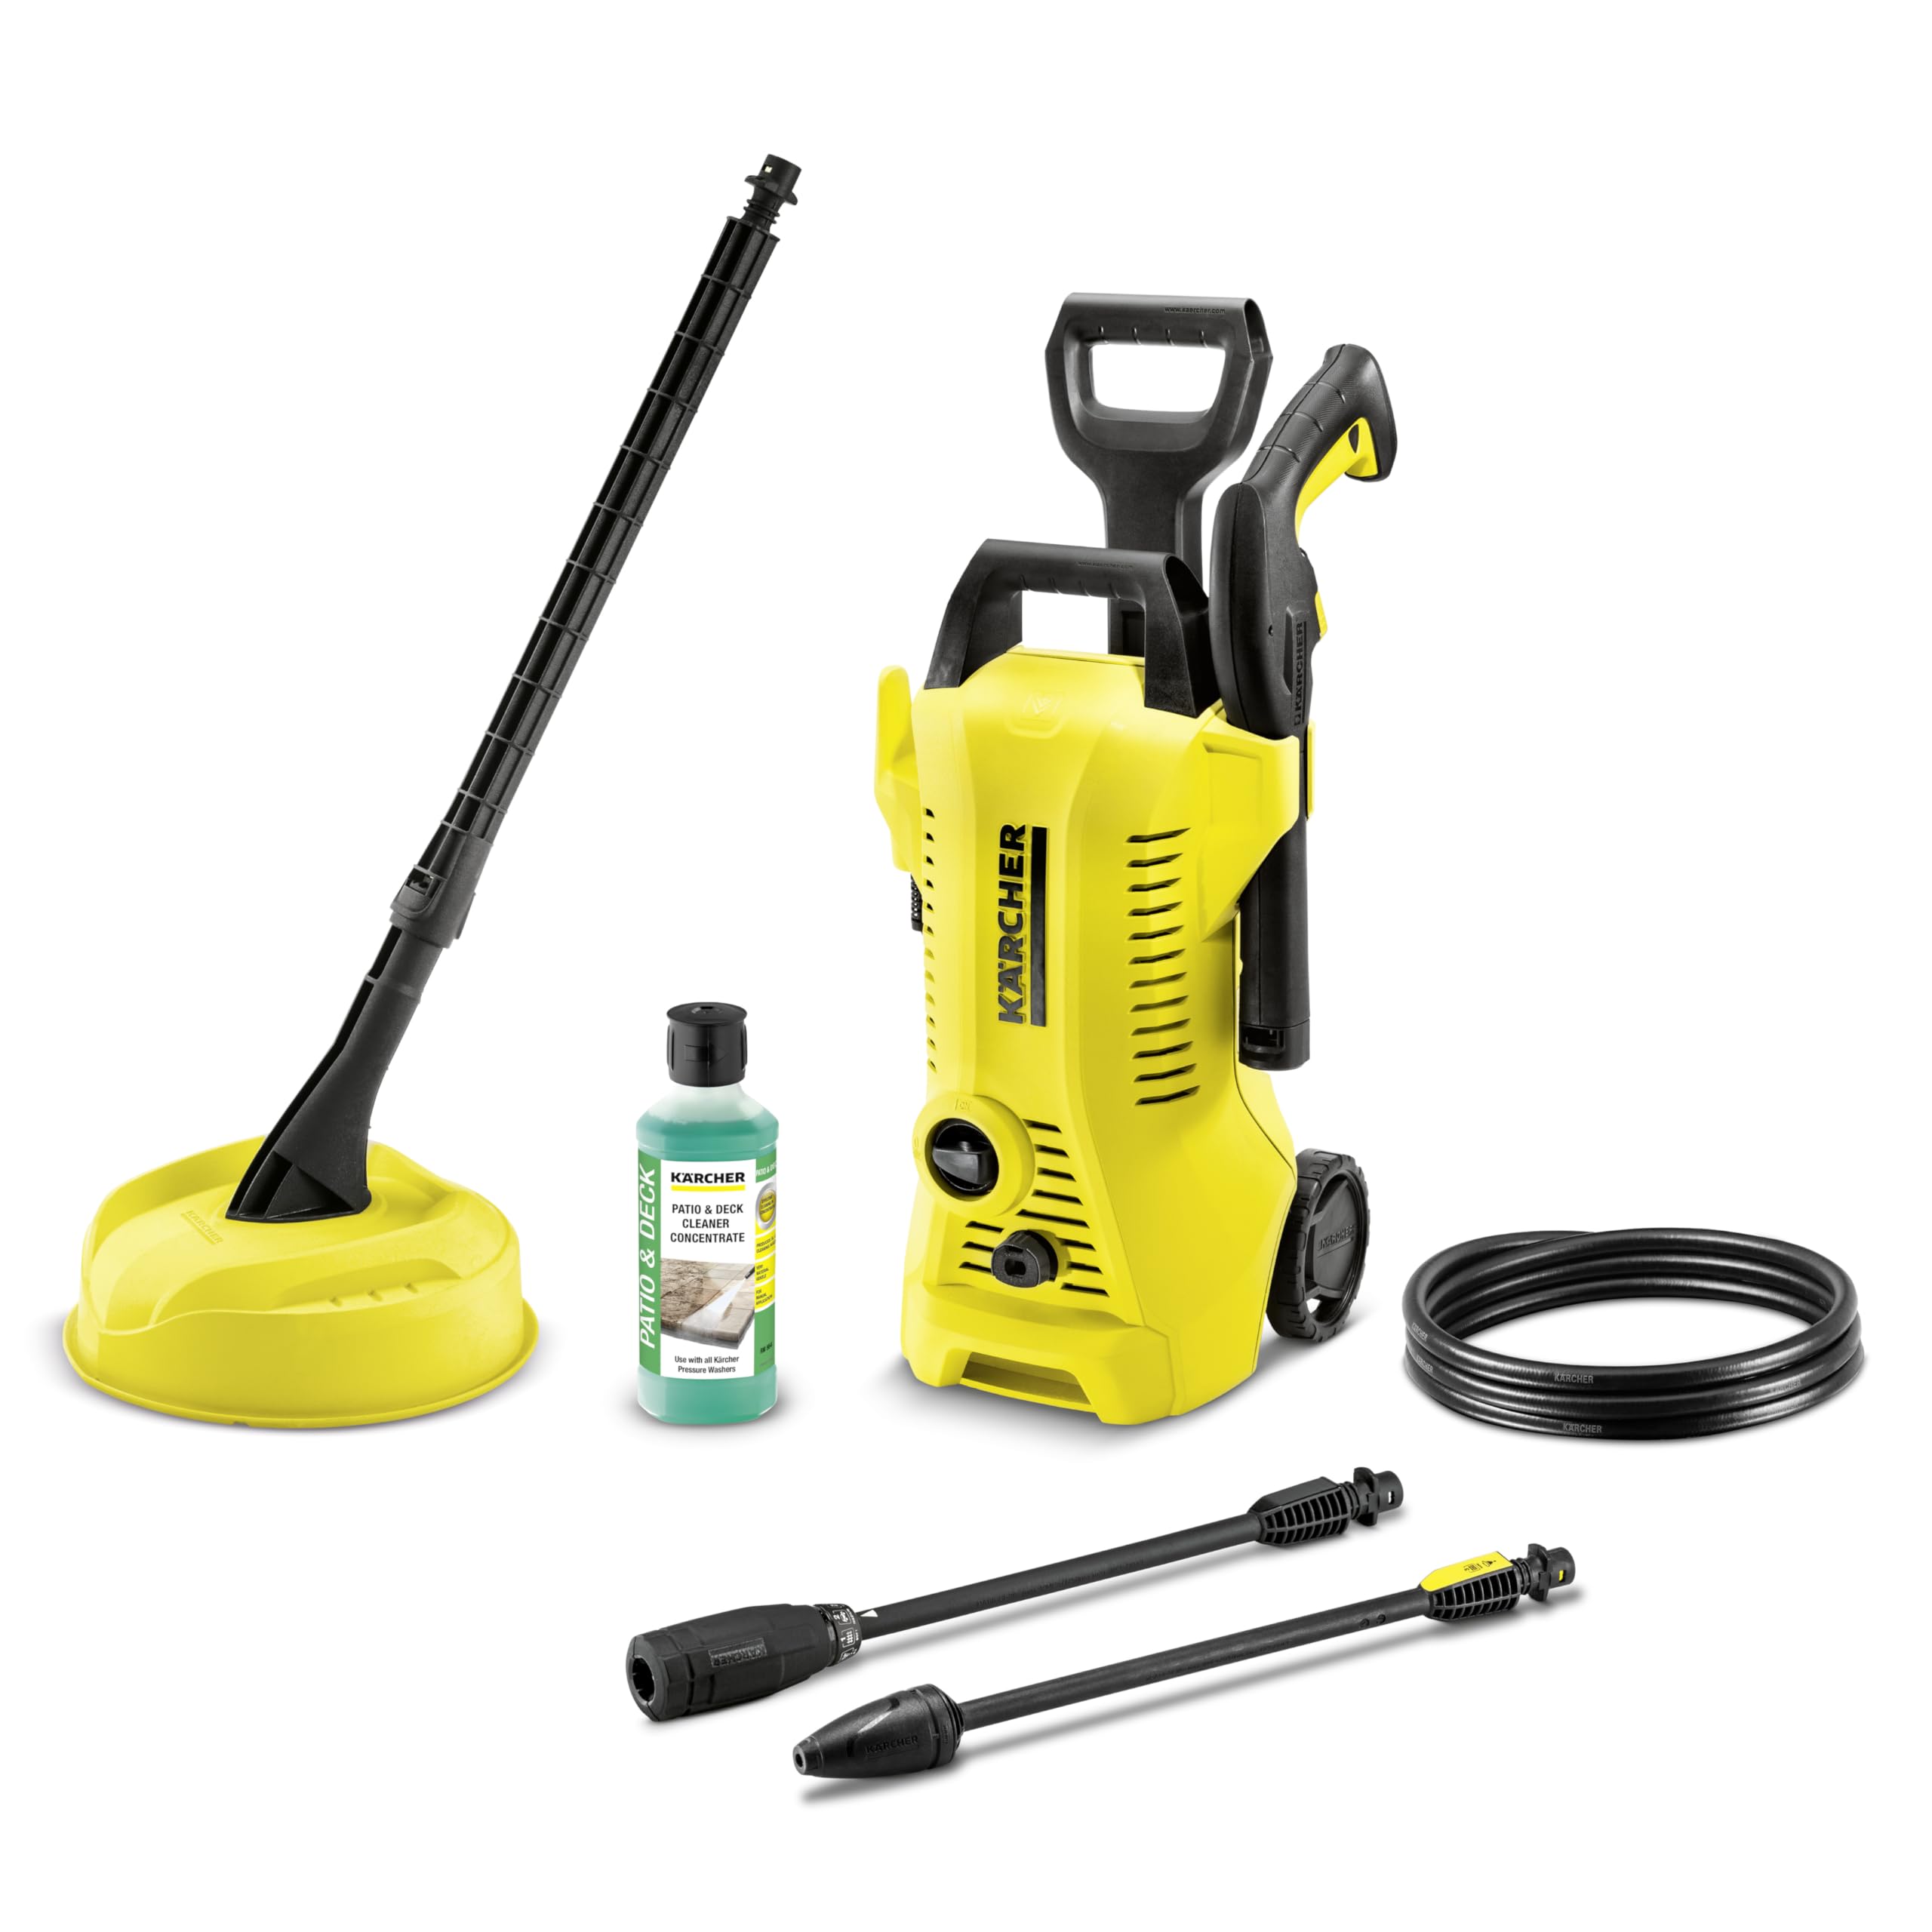
Image: The main power switch, typically located on the front or side of the unit, controls the pressure washer's power.
3. Operating Instructions
Learn how to effectively use your pressure washer for various cleaning tasks.
3.1 Starting the Unit
- Ensure the water supply is fully open.
- Turn the main power switch on.
- Squeeze the trigger on the high-pressure gun to release any trapped air and allow water to flow steadily.
3.2 Using Lances and Nozzles
The K 2 Power Control Home comes with a Vario Power lance and a Rotabuse (dirt blaster) for different cleaning needs.
- Vario Power Lance: This lance allows you to adjust the pressure by twisting the nozzle. Use lower pressure for delicate surfaces and higher pressure for tougher dirt.
- Rotabuse (Dirt Blaster): This rotating jet nozzle provides maximum cleaning power for stubborn dirt and heavily soiled surfaces like patios and driveways.

Image: The Vario Power lance offers adjustable pressure settings with a simple twist.

Image: The Rotabuse is ideal for removing stubborn dirt from hard surfaces.
3.3 Applying Detergent
The unit features a built-in suction hose for detergent application. Insert the suction hose into a bottle of Kärcher detergent. Switch to detergent mode on your Vario Power lance (if applicable) or use the dedicated detergent nozzle.
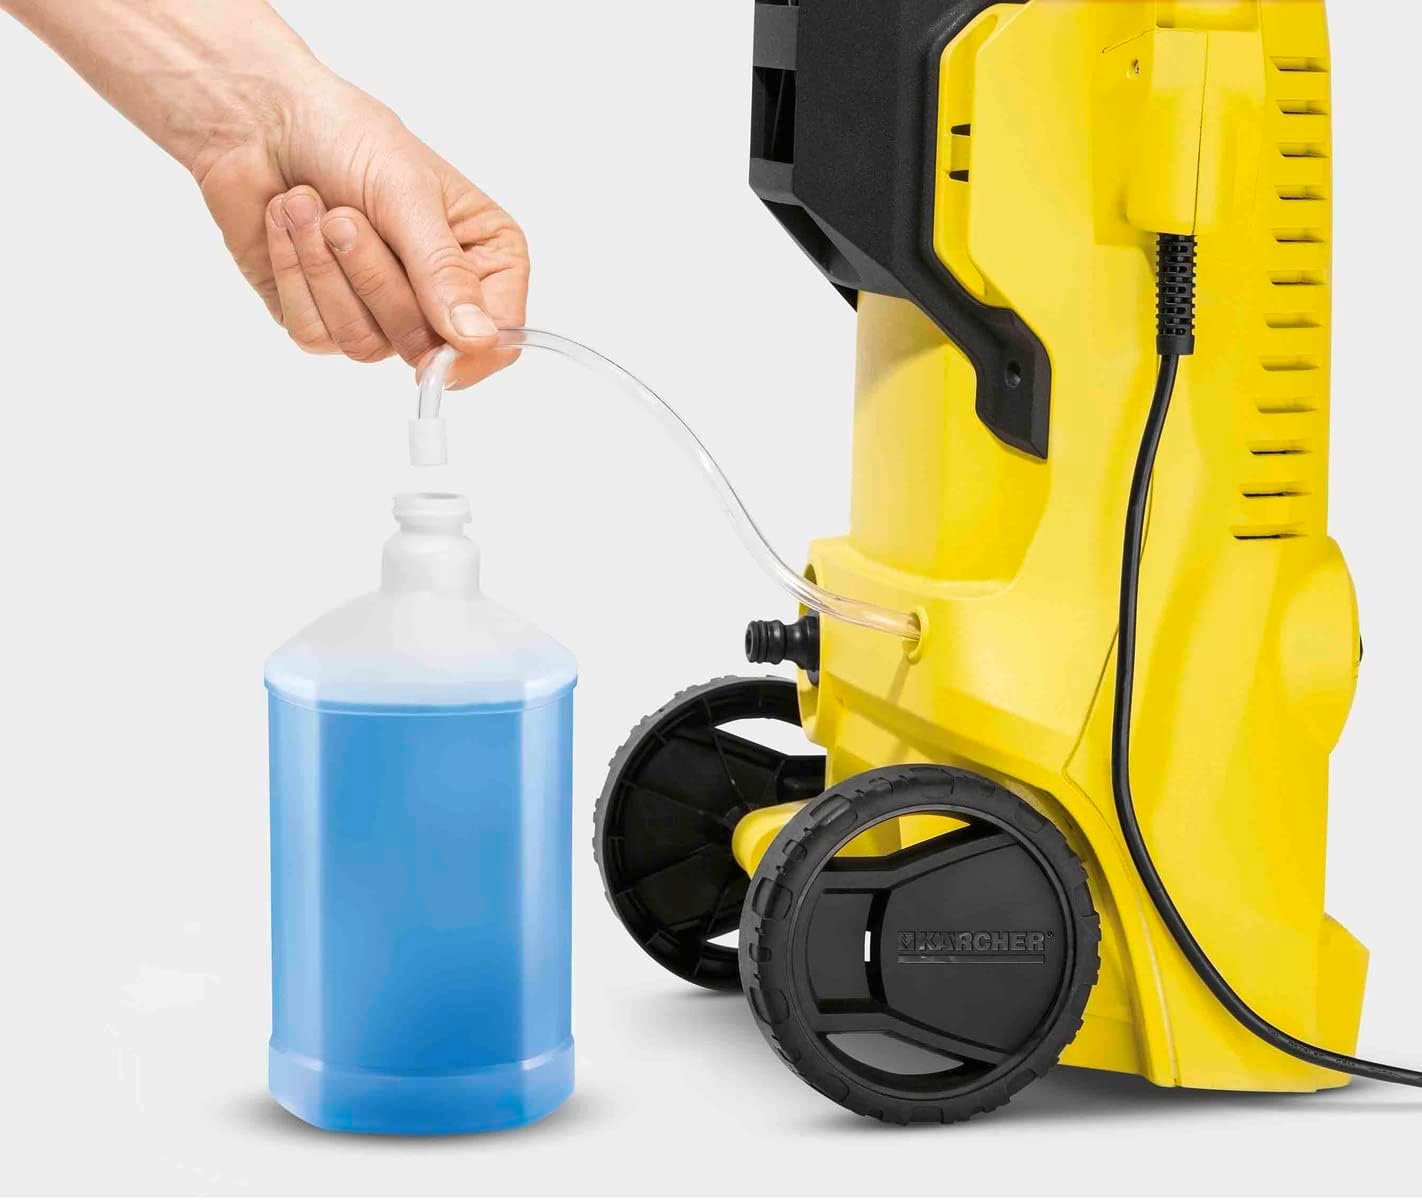
Image: Detergent can be applied directly through the integrated suction hose.
3.4 General Cleaning Tips
For optimal cleaning results and to protect surfaces, always start with a low-pressure setting and increase as needed. Maintain a suitable distance from the surface being cleaned. For specific cleaning tasks and accessory recommendations, consult the Kärcher Home & Garden app.

Image: The pressure washer is effective for cleaning various outdoor surfaces like wooden decks.
4. Maintenance and Storage
Proper maintenance and storage will extend the life of your pressure washer.
4.1 After Each Use
- Turn off the pressure washer and disconnect the power supply.
- Turn off the water supply and squeeze the trigger on the gun to release any remaining pressure.
- Disconnect the garden hose and high-pressure hose.
- Clean the water filter regularly to prevent blockages.
4.2 Storage
Store the pressure washer and its accessories in a frost-free location. The unit features integrated storage for accessories, the high-pressure hose, and the power cable. The telescopic handle can be retracted for compact storage.

Image: The rear of the unit provides convenient storage for the high-pressure hose and other accessories.

Image: The unit is designed with wheels for easy transport and a retractable handle for compact storage.
5. Troubleshooting
If you encounter issues with your pressure washer, refer to the following common problems and solutions.
- Unit Not Starting: Check power connection, ensure the main switch is ON, and verify the water supply is connected and turned on.
- No Pressure or Low Pressure: Ensure the water supply is fully open and the garden hose is not kinked. Check the water filter for blockages. Ensure all hose connections are tight.
- Water Leaks: Check all connections for tightness. Replace any worn O-rings or seals.
- Motor Runs Continuously: This may indicate a leak in the system. Check all connections and hoses for damage.
If the problem persists after attempting these solutions, please contact Kärcher customer support.
6. Specifications
| Feature | Specification |
|---|---|
| Brand | Karcher |
| Model Number | 1.673-603.0 |
| Power Source | Corded Electric |
| Maximum Pressure | 110 bar |
| Maximum Flow Rate | 360 Liters Per Hour |
| Surface Area Performance | 20 m²/h |
| Item Weight | 6.13 Kilograms |
| Hose Length | 5 Meters |
| Product Dimensions (L x W x H) | 19.41" x 11.54" x 11.89" |
| Color | Yellow/Black |
| Certifications | CE, GS |
| Included Components | Pressure washer, 5m spray gun & high pressure hose, Vario Power lance, Rotabuse, Home Kit (T 1 surface cleaner, 500ml patio detergent) |
7. Warranty and Support
7.1 Warranty Information
Kärcher provides a commitment to quality, including 5 years of EU spare part availability for this model. For specific warranty terms and conditions, please refer to the warranty card included with your product or visit the official Kärcher website.
7.2 Customer Support
For technical assistance, spare parts, or service inquiries, please contact Kärcher customer support. You can find contact information on the Kärcher website or in your product documentation.