1. Introduction and Overview
The Walfront BSC6048 Solar Controller is a multifunctional device designed to manage power flow from solar panels to various battery types. It supports 12V, 24V, 36V, and 48V battery systems, automatically identifying the voltage. This controller is suitable for sealed valve-regulated lead-acid, gel, liquid lead-acid, lithium iron, and ternary lithium batteries, with customizable parameters for other battery types. Its compact design ensures ease of use and storage.

Figure 1.1: Front view of the Walfront BSC6048 Solar Controller, showing the LCD display and USB ports.
2. Key Features
- Versatile Battery Compatibility: Supports sealed valve-regulated lead-acid, gel, liquid lead-acid, lithium iron, and ternary lithium batteries.
- Customizable Parameters: Allows for parameter customization to charge other battery types not listed by default.
- Universal Voltage Adaptability: Automatically adapts to 12V, 24V, 36V, and 48V battery systems without manual adjustment.
- Intelligent Identification: Features intelligent recognition for truly automated control.
- Compact and Portable: Small size for easy carrying and storage, ensuring good performance in various applications.

Figure 2.1: The Walfront BSC6048 Solar Controller depicted in various usage environments, including residential solar setups and portable applications.
3. Specifications
| Parameter | Value |
|---|---|
| Item Type | Solar Controller |
| Material | Engineering Plastic |
| Rated Current | 60A |
| Rated Working Voltage | 12V/24V/36V/48V (Auto-sensing) |
| Solar Panel Input Voltage | ≤100V |
| Static Loss | ≤20mA |
| Loop Pressure Drop | ≤0.3V |
| USB Output | 5V/2A x 2 |
| Working Temperature | -20°C to +55°C |
| Protection Level | IP30 |
| Relative Humidity | ≤95% (non-condensing) |
| Terminal Size | 4AWG/25mm² |
| Item Weight | 1.83 pounds (828 grams) |
| Display Type | LCD or LED |
4. Package Contents
Upon opening the package, please verify that all items are present and in good condition:
- 1 x Walfront BSC6048 Solar Controller
- 1 x User Manual (This document)
5. Setup and Installation
Proper installation is crucial for the safe and efficient operation of your solar controller. Please follow these steps carefully:
- Preparation: Ensure all components (solar panels, battery bank, load, and appropriate wiring) are available and in good condition. Disconnect any power sources before beginning installation.
- Mounting: Mount the solar controller in a cool, dry, and well-ventilated area, away from direct sunlight and flammable materials. Ensure there is sufficient space around the controller for heat dissipation. The controller features mounting brackets for secure installation.
- Battery Connection: Connect the battery to the controller's battery terminals first. Ensure correct polarity (+ to + and - to -). The controller will automatically detect the battery voltage (12V/24V/36V/48V).
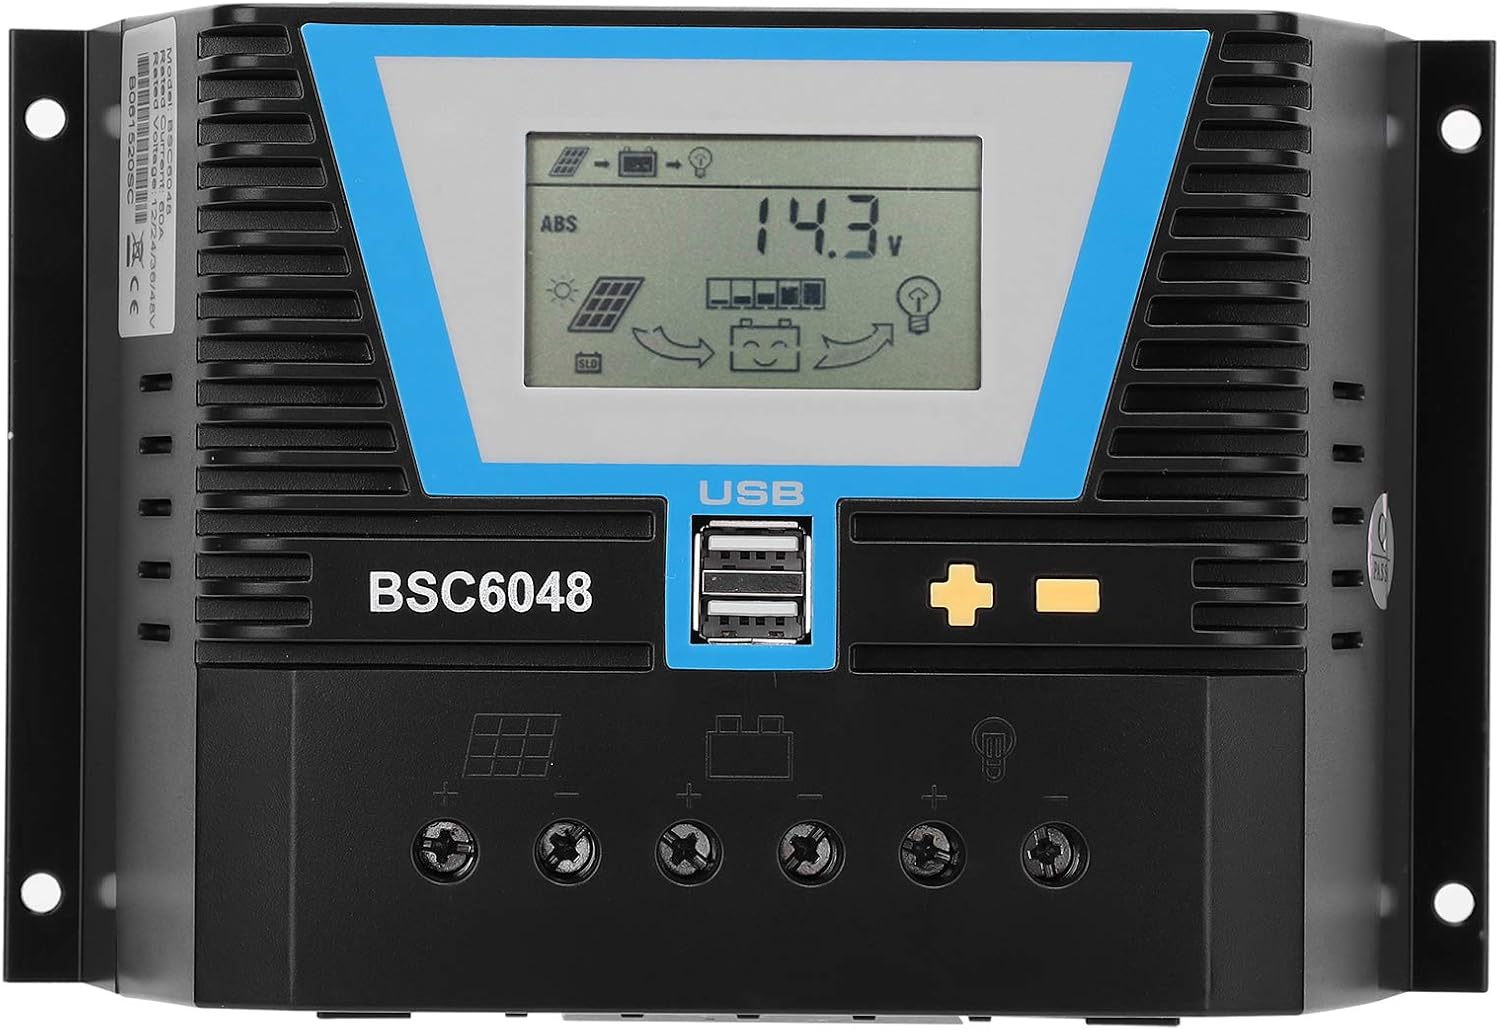
Figure 5.1: Rear view of the controller highlighting the terminal connections for solar panels, battery, and load.
- Solar Panel Connection: Connect the solar panels to the controller's solar panel terminals. Again, observe correct polarity. Ensure the solar panel input voltage does not exceed 100V.
- Load Connection: Connect your DC loads (e.g., lights, fans) to the controller's load terminals. Pay attention to polarity. The controller can manage the load output based on battery status.
- Verification: Double-check all connections for tightness and correct polarity. Once verified, the controller's display should illuminate, indicating proper operation.
Important Safety Note: Always connect the battery to the controller BEFORE connecting the solar panels. Disconnect solar panels BEFORE disconnecting the battery. Failure to follow this order may damage the controller.
6. Operating Instructions
The BSC6048 controller features an intuitive LCD display and control buttons for monitoring and adjusting settings.

Figure 6.1: Detailed view of the controller's LCD display and control buttons.
6.1. Display Information
The LCD display provides real-time information about your solar system, including:
- Battery voltage and charge status
- Solar panel charging current
- Load discharge current
- System status indicators (charging, discharging, errors)
6.2. Button Functions
The controller typically has three buttons:
- Menu/Set Button: Used to enter the settings menu and confirm selections.
- Up Button: Used to navigate through menu options or increase values.
- Down Button: Used to navigate through menu options or decrease values.
Refer to the on-screen prompts and the detailed user manual (if provided separately) for specific navigation and parameter adjustment procedures. The controller's intelligent identification function means basic operation is largely automatic.
6.3. USB Charging Ports
The controller is equipped with two 5V/2A USB output ports, allowing you to charge compatible electronic devices directly from the controller.
7. Maintenance
Regular maintenance ensures the longevity and optimal performance of your solar controller.
- Cleanliness: Keep the controller clean and free from dust and debris. Use a dry, soft cloth for cleaning. Do not use liquid cleaners.
- Connections: Periodically check all wiring connections to ensure they are secure and free from corrosion. Loose connections can lead to power loss or overheating.
- Ventilation: Ensure the ventilation fins are not obstructed to allow for proper heat dissipation.
- Environmental Conditions: Verify that the operating environment remains within the specified temperature and humidity ranges.
8. Troubleshooting
This section addresses common issues you might encounter with your solar controller.
| Problem | Possible Cause | Solution |
|---|---|---|
| Controller display is off. | No power from battery or incorrect battery connection. | Check battery connections and ensure battery has sufficient charge. Reconnect battery first, then solar panels. |
| Battery not charging. | Solar panels not connected, insufficient sunlight, or incorrect panel polarity. | Verify solar panel connections and polarity. Ensure panels are receiving adequate sunlight. Check solar panel input voltage. |
| Load not working. | Load disconnected, incorrect polarity, or battery voltage too low. | Check load connections and polarity. Ensure battery has sufficient charge. Some controllers automatically disconnect load when battery is low. |
| Controller overheating. | Poor ventilation or excessive load/current. | Ensure controller is in a well-ventilated area. Check if the total current draw exceeds the controller's rated capacity (60A). |
If the problem persists after attempting these solutions, please contact Walfront customer support for further assistance.
9. Warranty and Support
Specific warranty details for the Walfront BSC6048 Solar Controller are typically provided with your purchase documentation or can be found on the official Walfront website. Please retain your proof of purchase for warranty claims.
For technical support, troubleshooting assistance beyond this manual, or warranty inquiries, please contact Walfront customer service through their official channels. You can often find contact information on the product packaging, the Walfront brand store on Amazon, or their official website.
Visit the Walfront Store: Walfront Amazon Store


