1. Introduction
This manual provides comprehensive instructions for the installation, operation, and maintenance of your Aigo Warrior AK700 Max 700W Power Supply. Designed for high-performance desktop computers, this power supply unit (PSU) delivers stable and efficient power to your system components. Please read this manual thoroughly before installation and use to ensure proper functionality and safety.
2. Safety Information
Always observe the following safety precautions to prevent injury or damage to the product and other components:
- Ensure the power supply is disconnected from the main power outlet before installation or handling.
- Do not open the power supply casing. High voltages are present inside, even when disconnected, and can cause electric shock.
- Install the power supply in a well-ventilated area to prevent overheating.
- Use only the cables provided with the power supply.
- Avoid exposing the unit to moisture or extreme temperatures.
- This product is designed for indoor use only.
3. Package Contents
Verify that all items are present in your package:
- Aigo Warrior AK700 Max 700W Power Supply Unit
- AC Power Cord
- Modular Cables (if applicable, otherwise fixed cables)
- Mounting Screws
- User Manual (this document)
4. Product Overview
The Aigo Warrior AK700 Max is a 700-watt power supply designed to meet the demands of modern gaming and high-performance computing systems. It features an energy-efficient design with a silent 12cm hydraulic bearing fan for optimal cooling and quiet operation. The unit incorporates a built-in Power Factor Correction (PFC) and a dual magnetic ring magnetic amplifier circuit, along with high-frequency low-resistance filter capacitors, to ensure a pure and stable current output. Multiple protection circuits are integrated to safeguard against overvoltage, overcurrent, overload, undervoltage, and short circuits.
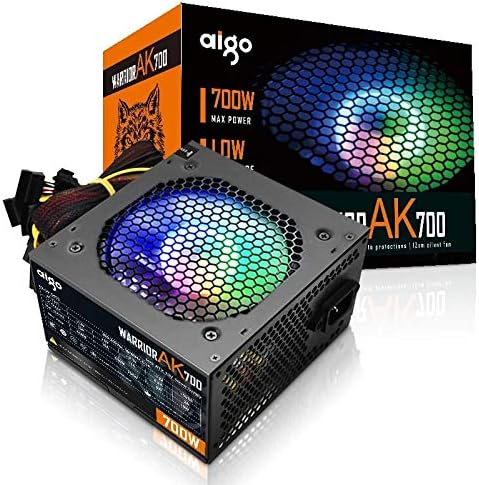
Figure 4.1: The Aigo Warrior AK700 Max 700W Power Supply, showcasing its RGB fan and retail packaging.
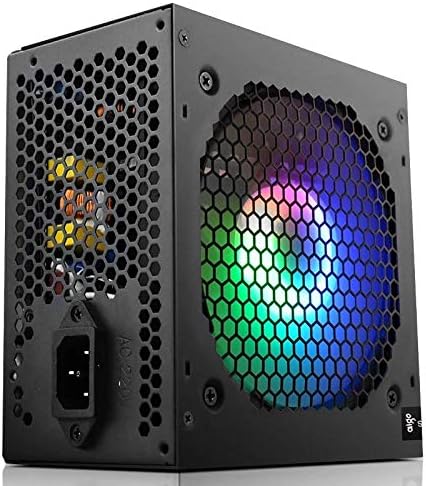
Figure 4.2: Side view of the power supply, highlighting the 12cm RGB cooling fan and honeycomb grille.

Figure 4.3: Rear view of the power supply, illustrating the exhaust grille and AC power input socket.
5. Setup and Installation
Follow these steps to properly install the Aigo Warrior AK700 Max power supply into your computer system:
- Preparation: Ensure your computer is completely powered off and unplugged from the wall outlet. Open your computer case.
- Remove Old PSU (if applicable): Disconnect all cables from your old power supply and remove its mounting screws. Carefully slide it out of the case.
- Install New PSU: Gently slide the Aigo Warrior AK700 Max into the power supply bay of your computer case. Ensure the fan is oriented correctly for optimal airflow (usually facing down or up, depending on your case design).
- Secure PSU: Align the screw holes on the power supply with those on your case. Secure the power supply using the provided mounting screws.
- Connect Cables:
- 24-pin ATX Motherboard Connector: Connect the main 24-pin cable to your motherboard.
- CPU Power Connector (4+4 pin or 8-pin EPS): Connect the CPU power cable to the appropriate socket on your motherboard.
- PCIe Power Connectors (6+2 pin): Connect these to your graphics card(s) if required.
- SATA Power Connectors: Connect to your storage drives (HDDs, SSDs) and optical drives.
- Peripheral (Molex) Connectors: Connect to other peripherals as needed.
- Cable Management: Route cables neatly to improve airflow and aesthetics within your case.
- Close Case: Once all connections are made and verified, close your computer case.
- Connect AC Power: Plug the AC power cord into the power supply and then into a wall outlet.
6. Operating Instructions
After successful installation, follow these steps to operate your computer system with the Aigo Warrior AK700 Max power supply:
- Power On: Ensure the power switch on the back of the PSU is in the 'ON' (I) position. Press the power button on your computer case.
- System Boot: Your computer should now power on and begin its boot sequence. The RGB fan on the power supply will illuminate.
- Power Off: To turn off your computer, use the operating system's shutdown function. For a complete power cycle, switch the PSU to the 'OFF' (O) position after shutting down the computer.
The intelligent temperature control design automatically adjusts the fan speed to maintain optimal cooling and extend the lifespan of the unit, ensuring quiet operation under various loads.
7. Maintenance
Proper maintenance ensures the longevity and optimal performance of your power supply:
- Dust Cleaning: Periodically clean dust from the power supply's fan and vents using compressed air. Ensure the computer is powered off and unplugged before cleaning.
- Airflow: Ensure that the power supply's intake and exhaust vents are not obstructed by cables or other components within the computer case.
- Environmental Conditions: Operate the power supply in a clean, dry environment with adequate ventilation.
- Do Not Disassemble: Never attempt to open the power supply unit. There are no user-serviceable parts inside, and doing so will void your warranty and poses a risk of electric shock.
8. Troubleshooting
If you encounter issues with your Aigo Warrior AK700 Max power supply, refer to the following common problems and solutions:
| Problem | Possible Cause | Solution |
|---|---|---|
| Computer does not power on. |
|
|
| System powers on but shuts down immediately. |
|
|
| Fan is not spinning or is excessively loud. |
|
|
If the problem persists after attempting these solutions, please contact Aigo customer support for further assistance.
9. Specifications
Detailed technical specifications for the Aigo Warrior AK700 Max 700W Power Supply:

Figure 9.1: The specifications label found on the Aigo Warrior AK700 Max Power Supply.
| Feature | Detail |
|---|---|
| Model | AK700 Max |
| Wattage | 700 Watts |
| Form Factor | ATX, ATX12V |
| Input Voltage | 220V (Minimum 220V, Maximum 220V) |
| Cooling Method | Air Cooling |
| Fan Size | 120 Millimeters (Hydraulic Bearing) |
| Compatible Devices | Personal Computer |
| Connector Type | SATA, PCIe (6+2 pin), ATX 24-pin, EPS 4+4 pin |
| Protection Features | Overvoltage, Overcurrent, Overload, Undervoltage, Short Circuit, Light Protection |
| Item Weight | 1.9 Kilograms |
| Package Dimensions | 5 x 5 x 5 cm (approximate) |
10. Warranty and Support
For warranty information and technical support, please refer to the official Aigo website or contact your local retailer. Keep your proof of purchase for warranty claims.
Aigo Official Website: www.aigocorp.com (Note: This is a placeholder URL as no official website was provided in the product data. Please refer to actual product documentation for correct contact information.)


