
1. Introduction
This manual provides detailed instructions for installing the OFFTEK 8GB DDR4-19200 (PC4-2400) RAM memory module into your HP-Compaq Pavilion All-in-One 24-xa0903np desktop computer. Upgrading your system's RAM can enhance overall performance, improve multitasking capabilities, and reduce application loading times.
2. Safety Information
Before proceeding with the installation, please observe the following safety precautions:
- Always disconnect the computer from the power outlet before opening the case.
- Discharge any static electricity from your body by touching a grounded metal object (e.g., the unpainted metal chassis of your computer) before handling components. An anti-static wrist strap is recommended.
- Handle the memory module by its edges to avoid touching the gold connectors or the chips.
- Work in a clean, well-lit area.
3. Package Contents
Verify that your package contains the following item:
- 1 x OFFTEK 8GB DDR4-19200 (PC4-2400) SODIMM Memory Module
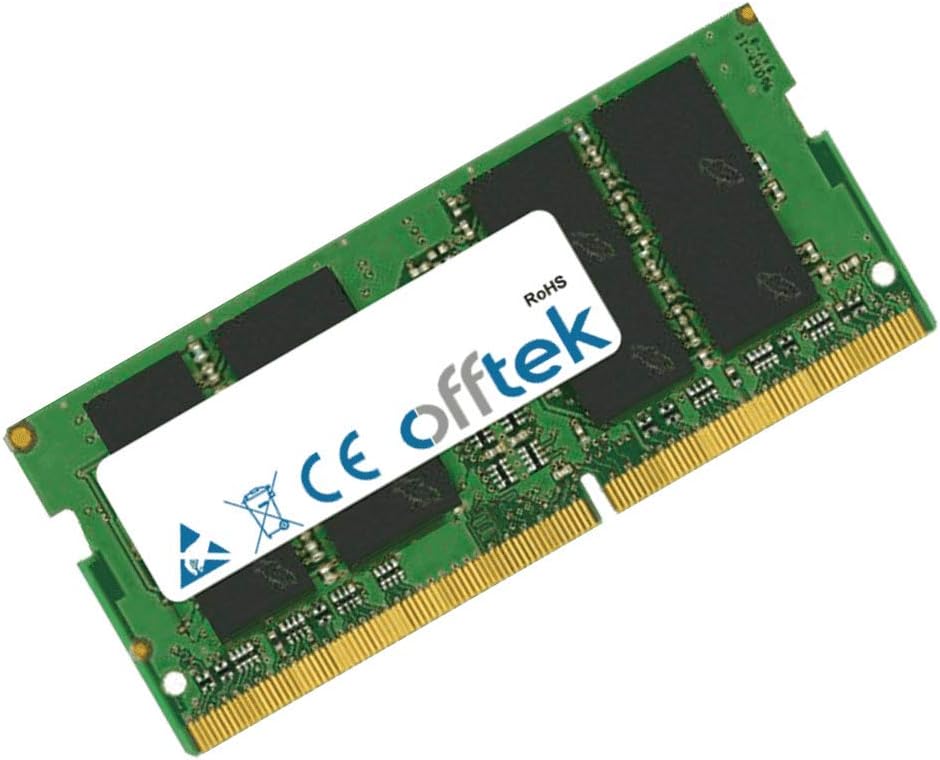
Image 1: The OFFTEK 8GB DDR4 SODIMM memory module. This module is designed for compact systems like all-in-one PCs and laptops, featuring a smaller form factor compared to standard desktop DIMMs.
4. Setup and Pre-installation
- Gather Tools: You may need a Phillips head screwdriver to open your computer case. An anti-static wrist strap is highly recommended.
- Power Down: Shut down your HP-Compaq Pavilion All-in-One computer completely.
- Disconnect Power: Unplug the power cord and any other connected cables (USB, Ethernet, etc.) from the computer.
- Access Internal Components: Carefully open the computer case according to your HP-Compaq Pavilion All-in-One 24-xa0903np's specific service manual. Refer to the manufacturer's documentation for precise instructions on how to open your model.
- Locate Memory Slots: Identify the existing memory slots on the motherboard. Your system may have one or two SODIMM slots.
5. Installation
Follow these steps to install the new memory module:
- Prepare the Slot: If you are replacing an existing module, gently push the small clips on either side of the memory slot outwards to release the old module. Remove the old module by pulling it away from the slot at an angle.
- Align the Module: Hold the new OFFTEK memory module by its edges. Align the notch on the module's gold connectors with the key in the memory slot. The module should only fit one way.
- Insert the Module: Insert the module into the slot at approximately a 45-degree angle. Apply firm, even pressure to both ends of the module until it is fully seated in the slot.
- Secure the Module: Gently push the module down until the clips on both sides of the slot snap into place, securing the module horizontally. Ensure the clips are fully engaged.

Image 2: A hand carefully inserting a SODIMM memory module into an open memory slot on a motherboard. Note the angle of insertion and the position of the securing clips.
- Close the Case: Once the memory module is securely installed, carefully reassemble your computer case.
- Reconnect Cables: Reconnect all power and peripheral cables to your computer.
6. Operating and Verification
After installation, power on your computer and verify that the new memory is recognized:
- Power On: Turn on your HP-Compaq Pavilion All-in-One computer.
- BIOS/UEFI Check: During startup, access your system's BIOS or UEFI settings (usually by pressing F2, Del, or another key indicated on screen). Navigate to the system information or memory section to confirm the total installed RAM.
- Operating System Check: Once the operating system loads, you can verify the installed RAM:
- Windows: Right-click on 'This PC' or 'My Computer', select 'Properties'. The installed RAM will be displayed.
- macOS: Click the Apple menu, select 'About This Mac'. The memory information will be listed.
- Linux: Open a terminal and type
free -horcat /proc/meminfo.
If the new memory is recognized, the installation was successful.
7. Maintenance
RAM modules generally require minimal maintenance. To ensure optimal performance and longevity:
- Keep your computer's internal components free from dust by periodically cleaning with compressed air.
- Ensure adequate airflow within your computer case to prevent overheating.
- Avoid exposing the memory module to extreme temperatures or humidity.
8. Troubleshooting
If you encounter issues after installing the memory, consider the following:
- Computer Does Not Boot: Ensure the memory module is fully seated in its slot. Remove and reinsert it, making sure the clips snap into place.
- Incorrect RAM Amount Detected: Verify that the module is correctly installed. If you have multiple modules, try installing them one at a time to identify a potentially faulty module or slot.
- System Instability/Crashes: This could indicate a faulty module or incompatibility. Double-check your system's specifications for maximum supported RAM and compatibility.
- No Display: If the computer powers on but there is no display, ensure all internal connections are secure, especially the memory modules.
If problems persist, consult your computer's manufacturer support or OFFTEK customer service.
9. Specifications
| Feature | Specification |
|---|---|
| Capacity | 8GB Module |
| Form Factor | DIMM 260-pin (SODIMM) |
| Memory Type | DDR4 SDRAM |
| Bandwidth | DDR4-19200 (PC4-2400) |
| Memory Speed | 2400 MHz |
| Voltage | 1.2 Volts |
| Dimensions | 6.86 x 1.09 x 2.79 cm |
| Weight | 9.07 g |
| OFFTEK Part Number | FT8GSK64V7U-1925384 |
| Equivalent OEM Part | 1925384-HP-8192 |
10. Warranty and Support
OFFTEK memory modules come with a Limited Lifetime Warranty. This warranty guarantees that if your memory module should ever fail, OFFTEK will replace or repair the product free of charge, provided it is still manufactured.
For technical support, warranty claims, or further assistance, please visit the official OFFTEK website or contact their customer service department. Refer to your purchase documentation for specific contact details.


