1. Introduction
The G-MARK PTM-4 is a versatile 4-channel analog audio mixer designed for various applications including DJ setups, studio recording, karaoke, PC use, live performances, KTV, home, and stage music effects. It features Bluetooth connectivity for wireless streaming, a USB audio interface for recording, 48V phantom power for condenser microphones, and a 3-band EQ on all channels for precise sound control. This manual provides detailed instructions to help you get the most out of your mixer.

Figure 1: Front view of the G-MARK PTM-4 Analog Mixer, showcasing its compact design and control layout.
2. Package Contents
Before you begin, please verify that all items are included in your package:
- G-MARK PTM-4 Analog Mixer
- USB Power Cord
- Instruction Manual (this document)
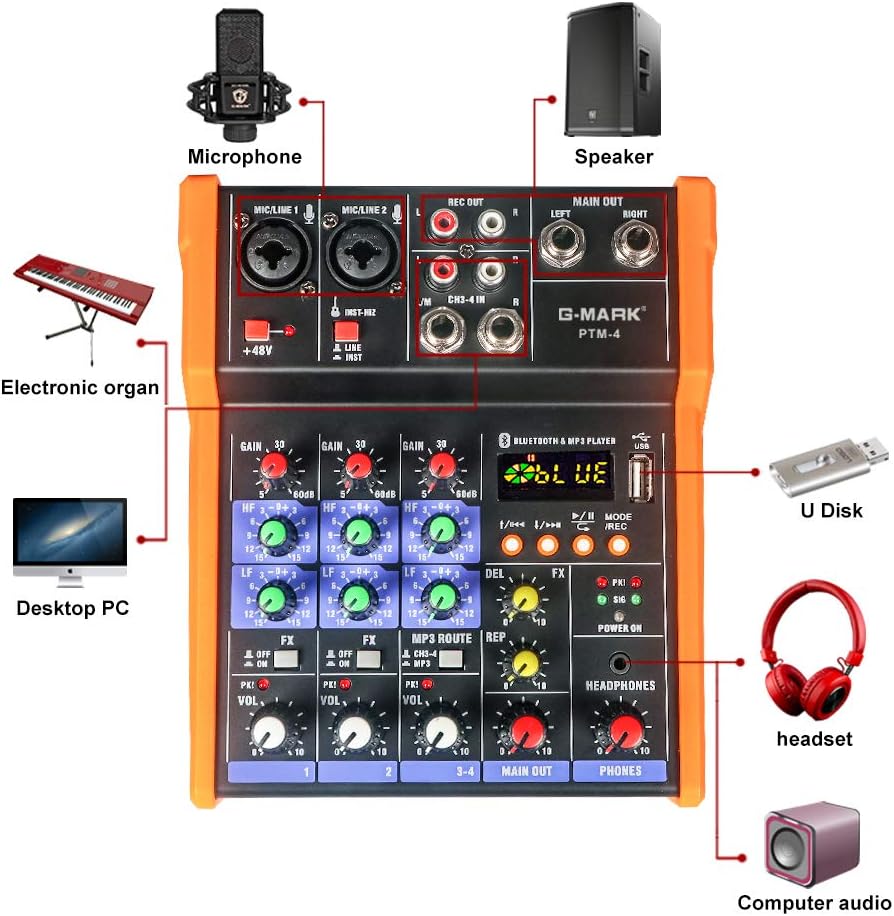
Figure 2: The G-MARK PTM-4 Analog Mixer and its included USB power cord.
3. Setup
3.1 Power Connection
Connect the provided USB power cord to the mixer's power input port. The mixer can be powered via a computer's USB port or a standard 5V USB charger.
3.2 Input Connections
The PTM-4 offers various input options:
- MIC/LINE 1 & 2: XLR/6.35mm combo jacks for microphones (dynamic or condenser with 48V phantom power) or line-level instruments.
- CH3-4 IN: RCA inputs for stereo line-level devices.
- USB: For MP3 playback from a USB drive or connection to a computer for audio interface functions.

Figure 3: Detailed view of the G-MARK PTM-4's input and output connections, including microphone/line inputs, RCA inputs, and main outputs.
3.3 Output Connections
- MAIN OUT (Left/Right): 6.35mm jacks for connecting to effectors, power amplifiers, or sound boxes.
- REC OUT (Left/Right): RCA outputs for recording.
- HEADPHONES: 6.35mm jack for monitoring audio.
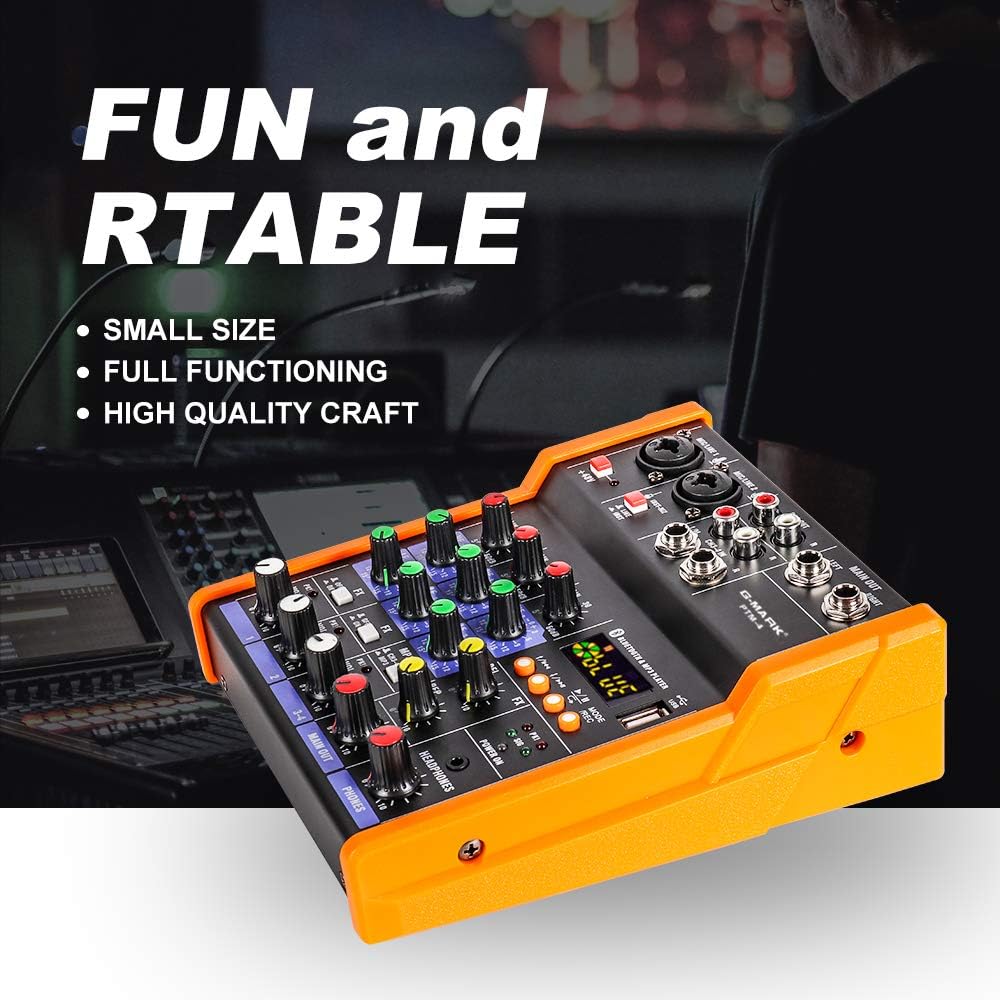
Figure 4: Diagram illustrating various connection possibilities for the G-MARK PTM-4 mixer, including computers, speakers, and other audio equipment.
4. Operating Instructions
4.1 Basic Controls
Familiarize yourself with the main controls:
- Gain Knobs: Adjust input sensitivity for each channel.
- Treble and Bass Knobs (HF/LF): Adjust high and low frequencies for each channel.
- FX Knobs: Control the amount of effect applied to each channel.
- Volume Knobs (VOL): Adjust the output volume for each channel.
- Main Output Volume Knob (MAIN OUT): Controls the overall output volume.
- Headphone Volume Knob (PHONES): Adjusts headphone monitoring volume.
- 48V Phantom Power Switch: Activates 48V phantom power for condenser microphones.
- MODE/REC Button: Switches between different modes (Bluetooth, MP3, PC) and initiates recording.

Figure 5: Labeled diagram of the G-MARK PTM-4 mixer's controls, indicating the function of each knob and button.

Figure 6: The 48V Phantom Power feature of the G-MARK PTM-4, essential for condenser microphones.
4.2 Bluetooth Operation
- Press the MODE/REC button until "BLUE" appears on the display, indicating Bluetooth mode.
- On your device (phone, tablet), search for "BT56" or "MIX-MP3 BT" in the Bluetooth settings and pair.
- Once paired, you can stream audio wirelessly to the mixer.

Figure 7: Demonstrates connecting the G-MARK PTM-4 mixer to a mobile phone via Bluetooth for wireless audio streaming.
4.3 MP3 Playback and USB Recording
- Insert a USB flash drive with MP3 files into the USB port.
- Press the MODE/REC button to switch to MP3 playback mode.
- Use the playback controls (previous/next track, play/pause) to navigate your music.
- To record to the USB drive, press and hold the MODE/REC button. The display will show "REC" and the recording time. Press again to stop recording.
4.4 Computer Recording (USB Audio Interface)
Connect the mixer to your computer via the USB port. The mixer will be recognized as an audio input/output device. You can then use your preferred digital audio workstation (DAW) software to record audio from the mixer's inputs.
Video 1: A comprehensive demonstration of the G-MARK PTM-4 Analog Mixer. This video covers the front and rear panels, power connection, mode switching (PC/MP3), various input and output connections (phone, PC, guitar, electronic organ, capacitor mic, wireless mic, karaoke, effectors, power amplifier, sound box), detailed control functions (gain, soprano, bass, effect sending switch, level indicator, volume adjustment), Bluetooth pairing, MP3 playback, USB recording, 48V phantom power activation, computer recording with a microphone and DAW, effect delay and echo count adjustment, master volume control, headphone output, and examples of computer, vocal, and musical instrument recording.
5. Maintenance
- Keep the mixer clean by wiping it with a soft, dry cloth. Avoid using liquid cleaners or solvents.
- Protect the mixer from dust, moisture, and extreme temperatures.
- Ensure proper ventilation to prevent overheating.
- Regularly check all cables and connections for wear and tear.
6. Troubleshooting
| Problem | Possible Cause | Solution |
|---|---|---|
| No power | Power cable not connected or faulty; power source issue. | Ensure USB power cable is securely connected. Try a different USB port or power adapter. |
| No sound output | Volume knobs too low; incorrect input/output connections; faulty cables. | Check all volume knobs (channel, main, headphone). Verify all audio cables are correctly connected to inputs and outputs. Test with different cables. |
| Bluetooth pairing failure | Mixer not in Bluetooth mode; device not discoverable; interference. | Press MODE/REC to ensure "BLUE" is displayed. Make sure your device's Bluetooth is on and discoverable. Move closer to the mixer. |
| USB recording not working | USB drive not formatted correctly; insufficient space; faulty USB drive. | Ensure USB drive is formatted to FAT32. Check available space. Try a different USB drive. |
| Microphone not working with phantom power | 48V phantom power not activated; faulty microphone or cable. | Ensure the +48V switch is engaged. Verify the microphone and XLR cable are functional. | `
7. Specifications
- Brand: G-MARK
- Model: PTM-4
- Number of Channels: 4
- Connectivity Technology: Interface, USB, Bluetooth
- Power Source: Corded Electric (5V)
- Item Weight: 2.13 pounds
- Product Dimensions: 7.28"D x 6.1"W x 2.36"H
- Phantom Power: 48V (switchable)
- EQ: 3-band (High, Mid, Low) per channel
8. Warranty and Support
For warranty information and technical support, please refer to the official G-MARK website or contact their customer service. Keep your purchase receipt as proof of purchase.
G-MARK Store: Visit the G-MARK Store on Amazon


