1. Introduction
This manual provides essential information for the safe and efficient operation of your Philips 240B9 24-inch WUXGA Monitor. Please read these instructions thoroughly before using the product and retain them for future reference.
2. Safety Information
Observe the following safety precautions to prevent damage to the monitor or injury to yourself.
- Do not expose the monitor to rain or moisture to avoid fire or shock hazards.
- Do not open the monitor casing. There are no user-serviceable parts inside. Refer all servicing to qualified service personnel.
- Place the monitor on a stable, flat surface to prevent it from falling.
- Ensure proper ventilation around the monitor. Do not block ventilation openings.
- Use only the power cord and adapter supplied with the monitor.
- Disconnect the power plug from the outlet if the monitor will not be used for an extended period.
3. Package Contents
Verify that all items are present in the package:
- Philips 240B9 Monitor
- Monitor Stand (Base and Neck)
- Power Cable
- HDMI Cable
- DisplayPort Cable
- USB Upstream Cable
- User Documentation
4. Setup
4.1 Assembling the Stand
- Place the monitor face down on a soft, clean surface to prevent scratches.
- Attach the stand neck to the monitor's VESA mounting area. Secure with screws if provided.
- Attach the stand base to the stand neck. Tighten the thumb screw or screws from the bottom of the base.
- Carefully lift the assembled monitor and place it upright on a stable desk.
4.2 Connecting the Monitor
Connect the necessary cables to the monitor and your computer.

Figure 1: Rear view of the Philips 240B9 monitor, illustrating the available input ports including HDMI, DisplayPort, DVI, VGA, and USB upstream/downstream ports.
- Power Connection: Connect the power cable to the monitor's power input and then to a power outlet.
- Video Connection: Connect one end of an HDMI, DisplayPort, DVI, or VGA cable to the corresponding port on the monitor and the other end to your computer's graphics card. For optimal performance, DisplayPort or HDMI is recommended.
- USB Hub Connection: To enable the integrated USB 3.2 hub, connect the supplied USB upstream cable from the monitor's USB upstream port to an available USB port on your computer.
- Audio Output: If desired, connect headphones or external speakers to the monitor's headphone output jack.
4.3 Initial Power On
Press the power button located on the monitor to turn it on. The monitor should automatically detect the active video input. If not, you may need to select the input source via the On-Screen Display (OSD) menu.

Figure 2: Front view of the Philips 240B9 monitor, showcasing its display and slim bezels.
5. Operating Instructions
5.1 Power On/Off
Press the power button on the monitor's front bezel to turn the monitor on or off. The monitor also features a PowerSensor for energy saving.
5.2 On-Screen Display (OSD) Menu
The OSD menu allows you to adjust various monitor settings. Use the control buttons located on the monitor's bezel to navigate the menu.
- Brightness/Contrast: Adjust image luminance.
- Input Select: Manually switch between HDMI, DisplayPort, DVI, or VGA inputs.
- Audio: Control volume for integrated speakers or headphone output.
- Picture Mode: Select predefined display settings for different content types.
- SmartImage: Philips' exclusive technology that analyzes content and dynamically optimizes display performance.
5.3 Ergonomic Adjustments
The Philips 240B9 monitor offers several ergonomic adjustments for comfortable viewing:
- Height Adjustment: The stand allows for 150 mm of height adjustment. Gently push or pull the monitor up or down.
- Tilt: Tilt the screen forward or backward to find your preferred viewing angle.
- Swivel: Rotate the monitor left or right on its base.
- Pivot (Rotation): Rotate the screen 90 degrees for portrait mode viewing. Ensure sufficient clearance before rotating.
5.4 USB Hub Usage
The integrated USB 3.2 hub provides convenient access to USB ports for connecting peripherals.
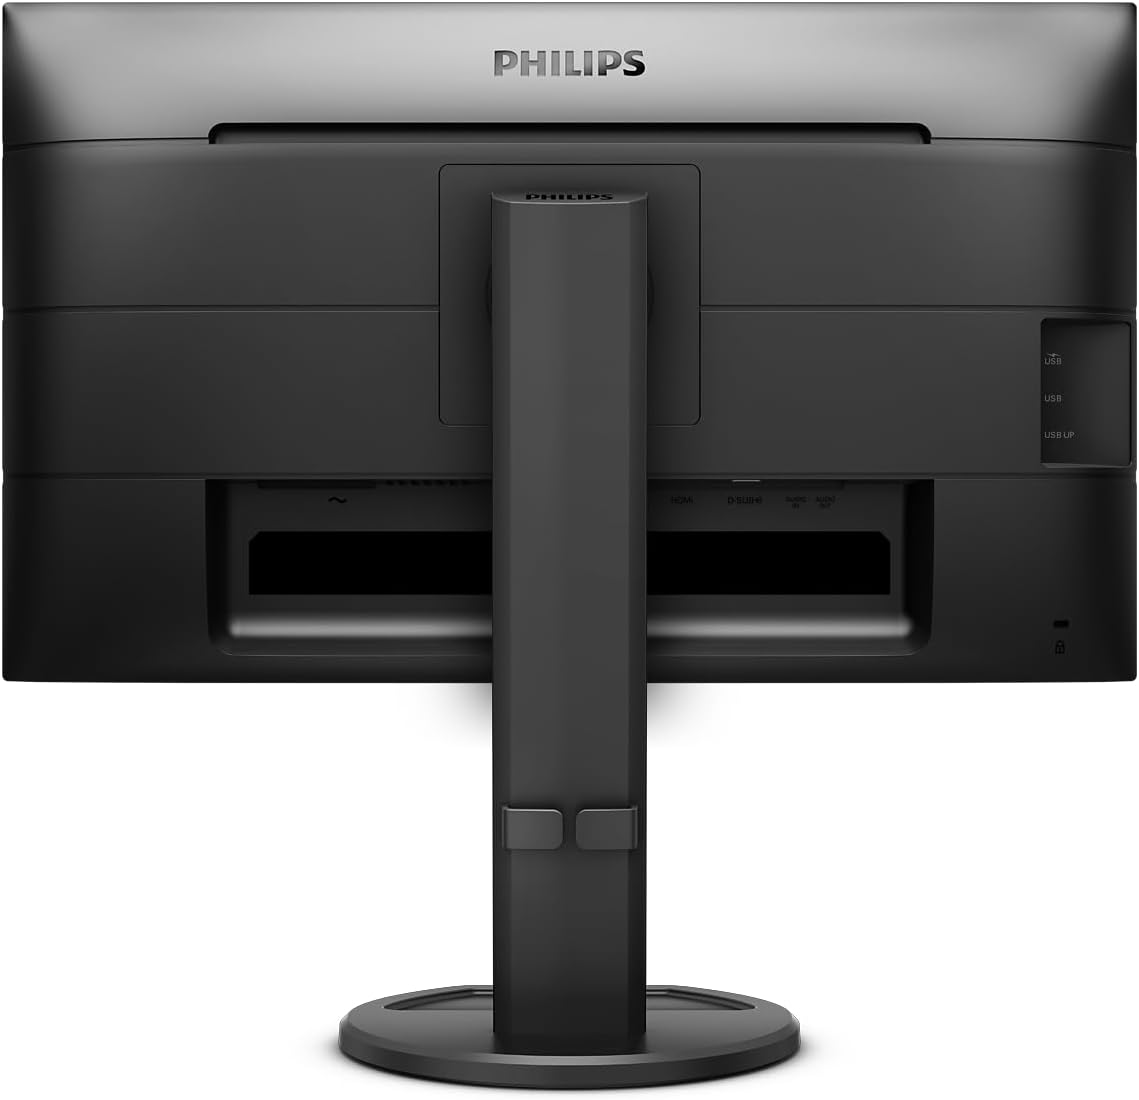
Figure 3: Side view of the Philips 240B9 monitor, highlighting the easily accessible USB 3.2 downstream ports.
- Connect the USB upstream cable from the monitor to your computer (refer to Section 4.2).
- Plug your USB devices (e.g., keyboard, mouse, USB drive) into the downstream USB ports on the monitor.
- One of the USB ports supports fast charging for compatible devices.
5.5 Special Features
- IPS Panel Technology: Provides wide viewing angles (178 degrees) and consistent color reproduction.
- Flicker-Free Technology: Reduces eye strain by regulating brightness and minimizing screen flicker.
- LowBlue Mode: Reduces harmful shortwave blue light emissions to protect eyes during extended use.
- PowerSensor: Detects user presence and automatically reduces monitor brightness when the user steps away, saving energy.
6. Maintenance
6.1 Cleaning the Screen
Gently wipe the screen with a soft, lint-free cloth. For stubborn marks, dampen the cloth with a mild, non-abrasive screen cleaner. Do not spray cleaner directly onto the screen.
6.2 Cleaning the Casing
Wipe the monitor casing with a soft, dry cloth. Avoid using strong detergents or abrasive cleaners.
7. Troubleshooting
If you encounter issues with your monitor, refer to the following common problems and solutions:
| Problem | Possible Cause | Solution |
|---|---|---|
| No image on screen | Power cable disconnected; Video cable disconnected; Incorrect input source selected. | Check power and video cable connections; Select correct input source via OSD menu. |
| Image is blurry or distorted | Incorrect resolution; Loose video cable. | Set display resolution to 1920x1200; Ensure video cable is securely connected. |
| USB ports not working | USB upstream cable not connected. | Connect the USB upstream cable from the monitor to your computer. |
| Monitor flickers | Refresh rate issue; External interference. | Ensure refresh rate is set to 75Hz; Check for nearby electronic devices causing interference. |
If the problem persists after trying these solutions, contact Philips customer support.
8. Specifications
Key technical specifications for the Philips 240B9 monitor:
- Screen Size: 24 Inches
- Display Resolution: 1920 x 1200 (WUXGA)
- Panel Type: IPS
- Refresh Rate: 75Hz
- Response Time: 4ms
- Brightness: 300 cd/m²
- Contrast Ratio: 1,000:1 (Typical)
- Viewing Angle: 178° (H) / 178° (V)
- Connectivity: 1x HDMI 1.4, 1x DisplayPort 1.2, 1x DVI, 1x VGA, 4x USB 3.2 (downstream, 1x fast charge), 1x USB 3.2 (upstream), Headphone out
- Ergonomics: Height adjustable (150 mm), Tilt, Swivel, Pivot
- VESA Mount: 100x100 mm
- Dimensions (with stand): 21 x 38 x 49 cm (L x W x H)
- Weight (with stand): 5.7 kg
9. Warranty and Support
For warranty information, please refer to the warranty card included in your product packaging or visit the official Philips website. For technical support, driver downloads, or further assistance, please visit the Philips support page or contact their customer service.
Philips Official Website: www.philips.com


