
1. Introduction
This manual provides instructions for the installation, operation, maintenance, and troubleshooting of the BlueStars 3412D024-09 Gas Range Sealed Burner Head & Igniter Assembly. This replacement part is designed to restore proper function to compatible gas ranges.
2. Safety Information
- Always disconnect power and turn off the gas supply to the range before attempting any repairs or maintenance.
- Wear appropriate personal protective equipment, such as gloves and eye protection.
- If you are unsure about any step, consult a qualified technician.
- Ensure proper ventilation when working with gas appliances.
- After installation, check for gas leaks using a soap and water solution on all connections. Do not use an open flame.
3. Product Overview
The BlueStars 3412D024-09 Gas Range Sealed Burner Head & Igniter Assembly is a replacement component for various gas range models. It is constructed from durable stainless steel.
Compatibility:
This part is compatible with many top brands, including Magic Chef, Maytag, Admiral, Crosley, Hardwick, Jenn-Air, Norge, and Amana ranges. It replaces part numbers: 2500050, 3412D007-00, 3412D007-09, 3412D014-09, 3412D015-09, 3412D016-09, 3412D017-09, 3412D018-09, 3412D024-09, 74003963, WP3412D024-09VP.
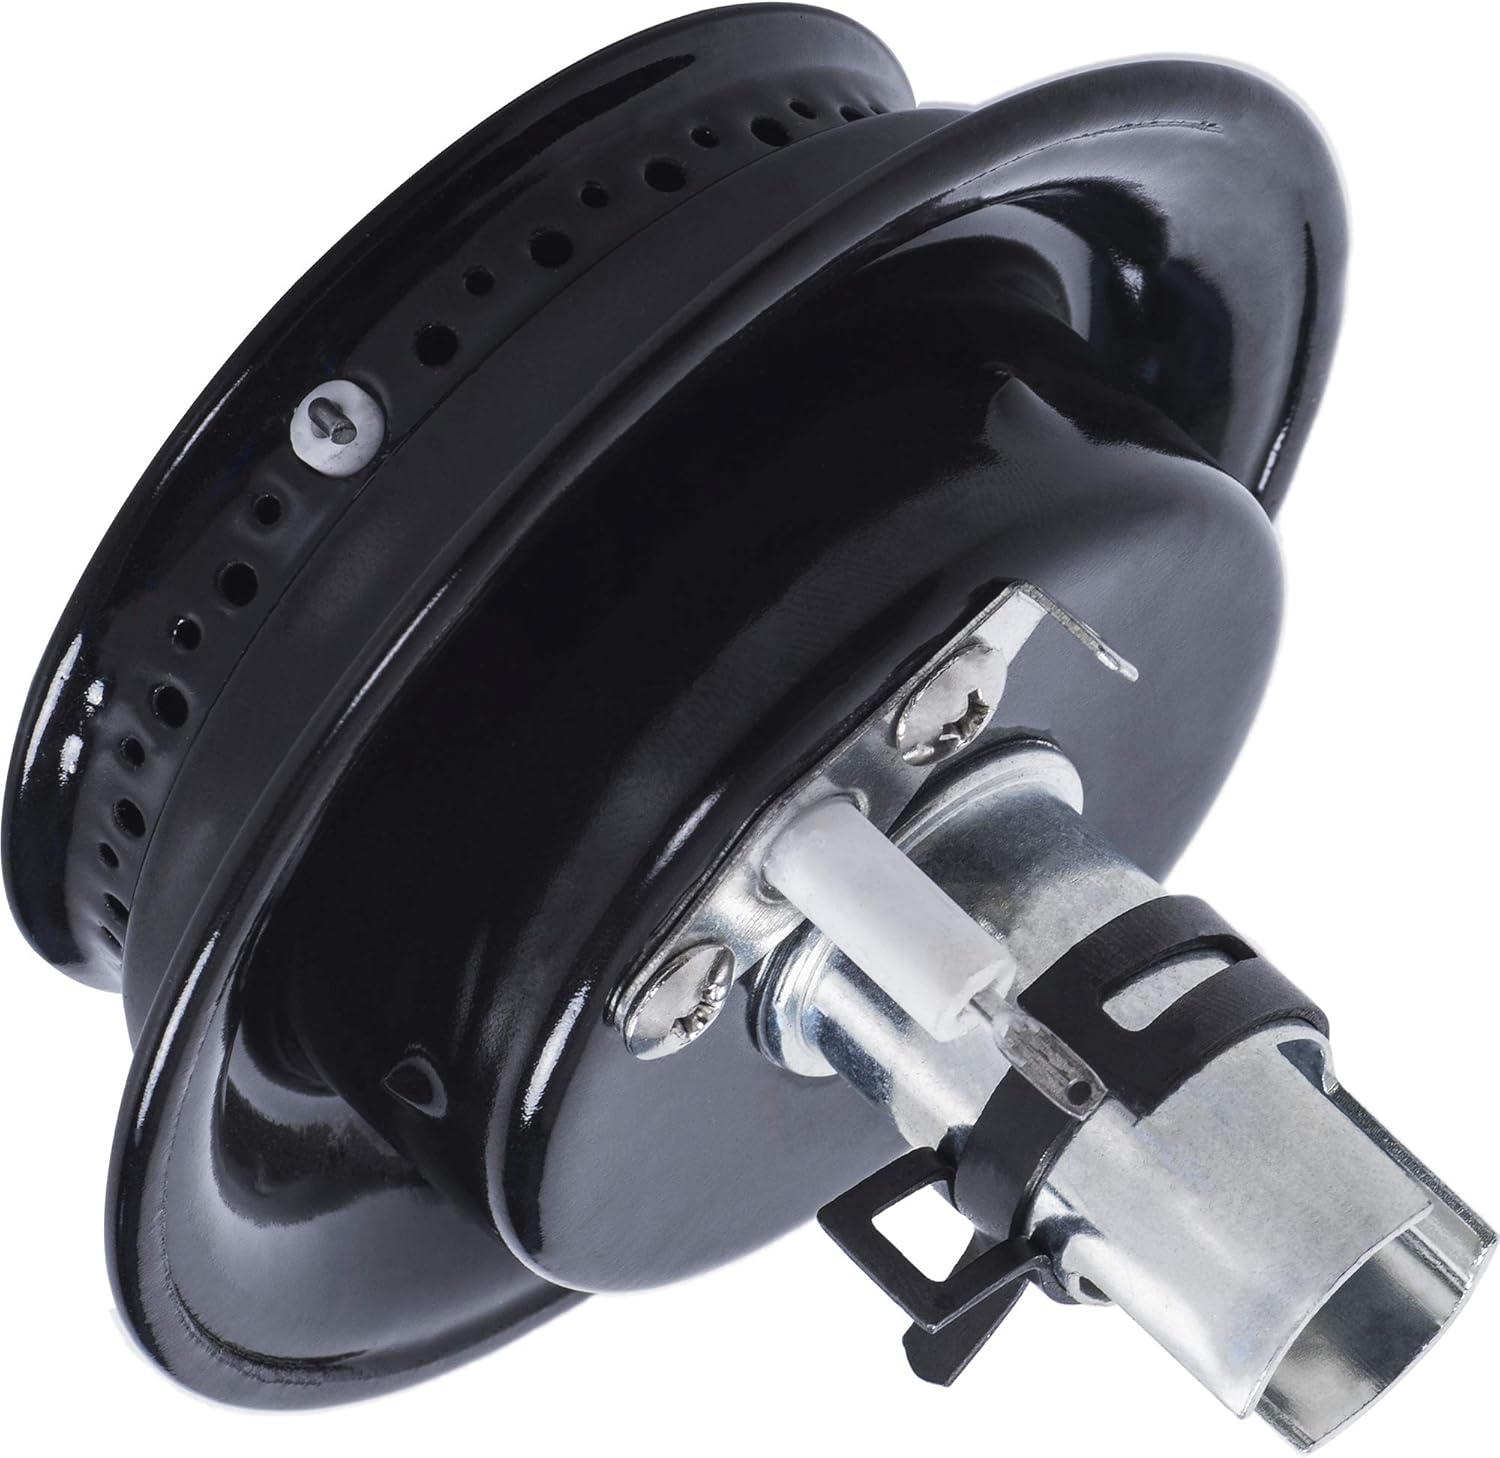
Image 3.1: The BlueStars 3412D024-09 Gas Range Sealed Burner Head & Igniter Assembly. This image shows the complete burner head and igniter unit from a slightly elevated angle, highlighting its black finish and the integrated igniter component.

Image 3.2: Close-up view of the spark electrode. This image provides a detailed look at the firmly attached spark electrode, which is crucial for ignition.

Image 3.3: Burner head highlighting its high-grade material. This image emphasizes the sturdy metal construction designed for durability and a long lifespan.

Image 3.4: Burner head with approximate dimensions. This image illustrates the general size of the burner head, showing a diameter of approximately 4 inches and a height of 3 inches, useful for checking compatibility.
4. Setup and Installation
The following steps outline a general procedure for replacing a gas range burner head and igniter assembly. Specific steps may vary depending on your range model. Always refer to your appliance's service manual if available.
- Preparation: Disconnect the range from its power source and turn off the gas supply valve. Allow the cooktop to cool completely.
- Access the Burner: Remove the grates and burner caps from the cooktop. Depending on your model, you may need to lift the cooktop or remove screws to access the burner assembly.
- Disconnect Old Igniter: Carefully disconnect the wiring from the old igniter. Note the routing of the wires for reassembly.
- Remove Old Burner Assembly: Unscrew or unclip the old burner head and igniter assembly from its mounting.
- Install New Burner Assembly: Position the new BlueStars 3412D024-09 assembly and secure it with the appropriate screws or clips.
- Connect New Igniter: Connect the igniter wiring to the new assembly. Ensure connections are secure.
- Reassemble: Replace any removed cooktop components, burner caps, and grates.
- Test: Restore gas supply and power to the range. Carefully test each burner for proper ignition and flame appearance. Check for gas leaks around connections with a soap and water solution.
Video 4.1: General overview of various appliance repair parts. This short video provides a broad look at different replacement parts for home appliances, including some that resemble range components. While not specific to this exact burner head installation, it illustrates the concept of DIY appliance repair.
5. Operating Instructions
Once the BlueStars 3412D024-09 burner head and igniter assembly is correctly installed, operate your gas range as usual. The new igniter should reliably spark to light the gas, providing a consistent flame for cooking. Ensure the burner flame is blue and stable, indicating proper combustion.
6. Maintenance
- Regularly clean the burner head and igniter to prevent grease and food debris buildup, which can obstruct gas flow or igniter function.
- Use a soft brush or cloth to clean the burner ports and igniter tip. Avoid using abrasive cleaners.
- Ensure the burner cap is correctly seated after cleaning to maintain proper flame distribution.
7. Troubleshooting
If you experience issues after installing the new burner head and igniter assembly, consider the following:
| Symptom | Possible Cause | Solution |
|---|---|---|
| Burner will not start | No gas supply, igniter not sparking, clogged burner ports, loose wiring. | Check gas valve, verify igniter wiring, clean burner ports, ensure igniter is positioned correctly. |
| Gas smell | Gas leak at connections, improper burner seating. | Immediately turn off gas supply. Check all gas connections with a soap and water solution. Ensure burner head is seated correctly. If smell persists, evacuate and contact a professional. |
| Gas igniter glows, but will not light | Clogged burner ports, igniter too far from gas, low gas pressure. | Clean burner ports, ensure igniter tip is close enough to the gas ports, verify gas supply. |
8. Specifications
- Manufacturer: BlueStars
- Part Number: 3412D024-09 PO4
- Item Weight: 8.4 ounces (0.24 Kilograms)
- Package Dimensions: 4.21 x 4.21 x 3.43 inches
- Material: Stainless Steel
- Style: 1-Pack
9. Warranty and Support
The BlueStars 3412D024-09 Gas Range Sealed Burner Head & Igniter Assembly comes with a 100% Lifetime Protection. This ensures reliable performance and covers any defects or issues that may arise with the product. For support or warranty claims, please contact BlueStars customer service.