JMT Saker 610mm, Saker 675mm
JMT Saker 610mm/675mm 6-Axis Carbon Fiber Folding Hexacopter Frame Kit Instruction Manual
Model: Saker 610mm, Saker 675mm
Introduction
This manual provides comprehensive instructions for the assembly, setup, and maintenance of your JMT Saker 610mm or 675mm 6-Axis Carbon Fiber Folding Hexacopter Frame Kit. This kit is designed for DIY enthusiasts and requires additional components (flight controller, motors, ESCs, propellers, battery) to become a fully functional drone. Please read these instructions carefully before beginning assembly to ensure correct and safe operation.
Safety Information
Always prioritize safety when working with RC components and flying drones. Failure to follow safety guidelines can result in injury or damage to property.
- Adult Supervision: This product is intended for adults. Keep out of reach of children.
- Tools: Use appropriate tools for assembly. Ensure all screws are tightened securely but do not overtighten.
- Electrical Components: Be cautious when handling electrical components. Ensure proper insulation and connections to prevent short circuits.
- Battery Safety: Always use batteries according to manufacturer specifications. Improper battery handling can lead to fire or explosion.
- Propellers: Propellers can cause serious injury. Always remove propellers during assembly, maintenance, and testing.
- Flight Environment: Once assembled, operate the hexacopter in open areas, away from people, animals, and obstacles. Adhere to local regulations regarding drone operation.
- Pre-Flight Checks: Always perform thorough pre-flight checks to ensure all components are secure and functioning correctly.
Package Contents
Verify that all components listed below are present in your package. If any parts are missing or damaged, please contact customer support.
- 1x Saker 675mm/Saker 610mm 6-Axis Carbon Fiber Frame Kit (main frame plates, arms)
- 2x 16mm Motor Mount (Red)
- 4x 16mm Motor Mount (Black)
- 6x Z16mm Aluminum Alloy Folding Arm/Tripod Arm Seat
- 1x Landing Skid Kit
- 1x 5V 12V BEC Power Distribution Board
- 1x Accessories Kit (screws, standoffs, small parts)
Note: This kit does not include a flight controller, motors, ESCs, propellers, or battery. These items must be purchased separately.
Assembly Instructions
Follow these steps carefully to assemble your JMT Saker Hexacopter Frame Kit. Refer to the diagrams and images for visual guidance.
1. Main Frame Assembly
Begin by identifying the top and bottom carbon fiber plates of the main frame. Attach the standoffs between the plates using the provided screws. Ensure the orientation is correct for mounting the power distribution board and flight controller later.
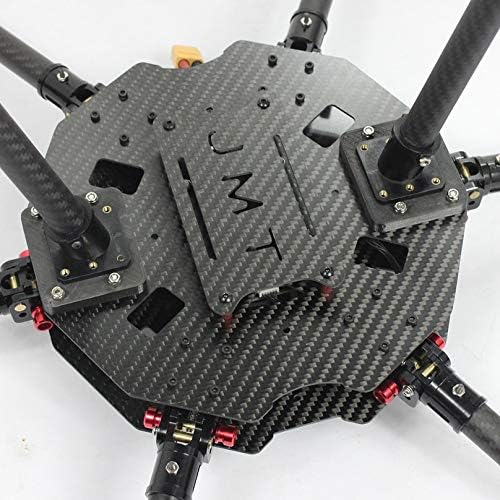
Image: Central carbon fiber frame plates. This shows the main body structure where components like the flight controller and power distribution board will be mounted.
2. Arm and Motor Mount Installation
Attach the six Z16mm Aluminum Alloy Folding Arm/Tripod Arm Seats to the main frame plates. These seats allow the arms to fold for transport. Secure them firmly with the appropriate screws.
Next, insert the carbon fiber arms into these seats. At the end of each arm, attach a 16mm motor mount. Note that two motor mounts are red and four are black; typically, the red ones are used for the front arms for orientation, but you can choose your preferred setup. Ensure all motor mounts are securely fastened to the arms.
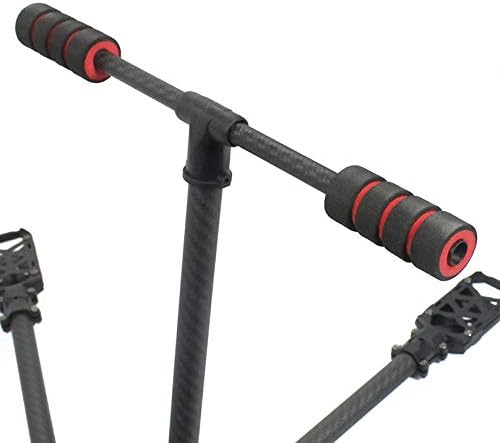
Image: Detail of a carbon fiber arm with a red motor mount. This illustrates how the motor mounts attach to the arms.
3. Landing Skid Kit Installation
Assemble the landing skid components according to the kit's specific design. Attach the completed landing skid assembly to the designated mounting points on the main frame or arms. Ensure it is stable and provides adequate ground clearance for your propellers and camera (if applicable).

Image: Bottom view of the hexacopter frame. This image displays the folding arm mechanism and the attachment points for the landing skids.
4. Power Distribution Board (PDB) Installation
Mount the 5V 12V BEC Power Distribution Board onto the main frame. This board will distribute power from your battery to the Electronic Speed Controllers (ESCs) and other components. Ensure it is securely mounted and properly insulated to prevent short circuits.
5. Final Checks
Before installing any additional electronics, perform a thorough check of all assembled parts. Ensure all screws are tight, arms are securely attached, and there is no wobble in the frame. The frame should be rigid and stable.

Image: Fully assembled JMT Saker hexacopter frame. This provides an overview of the completed frame structure.
Operating Principles (Once Assembled)
This section outlines general operating principles for a hexacopter built using this frame kit. Specific operational details will depend on the flight controller, motors, ESCs, and radio system you choose to integrate.
- Component Integration: After assembling the frame, install your chosen flight controller, motors, ESCs, and battery. Follow the respective manufacturers' instructions for these components.
- Wiring: Carefully wire all components to the power distribution board and flight controller. Double-check all connections for correct polarity and secure fit.
- Flight Controller Setup: Configure your flight controller software according to its manual. This includes calibration of sensors, ESCs, and radio.
- Propeller Installation: Install propellers only after all electronic setup and testing is complete. Ensure propellers are balanced and mounted correctly (clockwise/counter-clockwise as required by your motor/ESC setup).
- First Flight: Conduct your first flight in a safe, open area. Start with short, low-altitude flights to verify stability and control.
Maintenance
Regular maintenance ensures the longevity and safe operation of your hexacopter frame.
- Inspect Frame: Before and after each flight, inspect the carbon fiber frame for any cracks, delamination, or damage.
- Check Screws: Periodically check all screws and fasteners for tightness. Vibrations during flight can cause screws to loosen.
- Cleanliness: Keep the frame and components clean from dirt, dust, and debris. Use a soft, dry cloth.
- Arm Hinges: If the folding arms become loose or stiff, inspect the hinge mechanisms and apply appropriate lubricant if necessary, ensuring it does not affect carbon fiber integrity.
- Wiring: Check wiring for any signs of wear, fraying, or loose connections. Repair or replace as needed.
Troubleshooting
This section addresses common issues related to the frame kit. For issues related to flight controllers, motors, or ESCs, refer to their respective manuals.
- Loose Arms: If folding arms feel loose, check the tightness of the screws in the Z16mm Aluminum Alloy Folding Arm Seats.
- Frame Vibrations: Excessive frame vibrations can indicate loose components or structural damage. Inspect all connections and the carbon fiber plates for damage.
- Damaged Carbon Fiber: If a carbon fiber arm or plate is cracked or broken, it must be replaced immediately to ensure flight safety. Do not attempt to repair structural carbon fiber components.
- Power Issues: If you experience power issues, first check the connections to the 5V 12V BEC Power Distribution Board. Ensure all solder joints (if applicable) are solid.
Specifications
| Feature | Saker 610mm | Saker 675mm |
|---|---|---|
| Wheelbase | 610 mm | 675 mm |
| Weight | 835 g | 855 g |
| Material | Carbon Fiber, Aluminum Alloy | |
| Color | Matte Twill (Carbon Fiber) | |
| Body Diameter | 16 mm | |
| Recommended Flight Control | APM, PIX, A2, A3, NAZA | |
| Recommended Propeller Size | 11 inch | 11-12 inch |
| Recommended Motor | 5010-3508 700-750kv | |
| Recommended ESC | 30-60A | |
| Recommended Battery | 3-6S within 8000mah | 3-6S within 10000mah |
Warranty and Support
Information regarding specific warranty terms for the JMT Saker Hexacopter Frame Kit is not provided in this manual. For warranty claims or technical support, please contact the retailer or manufacturer directly with your purchase details.
Always retain your proof of purchase for any warranty-related inquiries.
Ask a question about this manual
Ask about setup, troubleshooting, compatibility, parts, safety, or missing instructions. Manuals+ will review the question and use this page’s manual context to help answer it.