GALAWAY-US AC1200
GALAWAY-US G1208 WiFi Extender User Manual
Model: AC1200
1200Mbps WiFi Repeater Wireless Signal Booster
1. Introduction
This manual provides detailed instructions for the setup, operation, and maintenance of your GALAWAY-US G1208 WiFi Extender. This device is designed to extend your existing WiFi network coverage, providing a stronger and more reliable signal throughout your home or office.
The G1208 is a 1200Mbps WiFi Repeater with dual-band capabilities (2.4GHz and 5GHz) and an Ethernet port, ensuring 360-degree full coverage.
2. Product Features
- High Compatibility: This WiFi range extender works with all 802.11 a/b/g/n/ac standards of router or gateway.
- Stable Signal Boosts: With dual band technology, this WiFi range extender can automatically choose high quality band for better performance. It offers up to 300Mbps for 2.4GHz and 867Mbps for 5GHz, totally 1167Mbps is available for your use, maximizing reduces the loss of data transmission.
- Convenient Design: Convenient wall-plug design that works with any WiFi router. And great design with 4 external antennas to ensure a strong and stable WiFi network signal.
- Quick & Easy Set up: Intelligent signal indicator LED ring helps you find the best spot to set up for better WiFi, set up via browser website based configuration in almost any device, including iOS and Android mobile platforms.
- Wireless Security: Supports WPA, WPA2 wireless connection. Enable wireless security encryption.
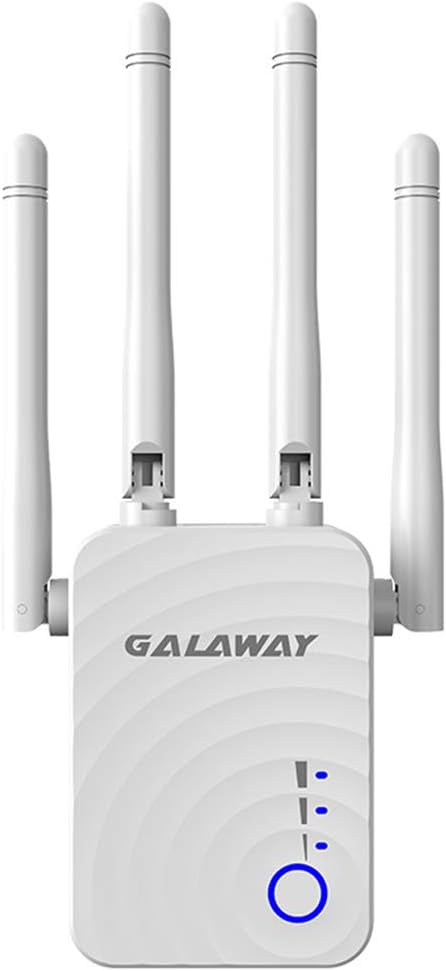
Figure 2.1: Front view of the GALAWAY-US G1208 WiFi Extender, showing the GALAWAY logo and signal indicator lights.
3. Package Contents
Please check the package contents upon opening to ensure all items are present:
- 1 x WiFi Range Extender (GALAWAY-US G1208)
- 1 x Quick Installation Guide
- 1 x RJ45 Cable
4. Setup Guide
4.1. Physical Overview

Figure 4.1: Diagram illustrating the components of the G1208 Extender, including high gain antennas, signal indicator, US/EU plug, dissipating heat holes, three mode switch button, power light switch/WPS button, WAN port, and LAN port.
- High Gain Antenna: Four external antennas for enhanced signal reception and transmission.
- Signal Indicator: LEDs indicating signal strength.
- US/EU Plug: Integrated power plug for direct wall socket connection.
- Dissipating Heat Holes: Designed for efficient heat dissipation to ensure stable performance.
- Three Mode Switch Button: Allows selection between Repeater, AP, or Router modes.
- Power Light Switch + WPS Button: Controls power and initiates WPS pairing.
- Reset Button: Small button for resetting the device to factory defaults (requires a pin).
- WAN/LAN Ports: Ethernet ports for wired connections.
4.2. Initial Power On and Mode Selection
- Plug the extender into a power socket.
- Ensure the power button is set to "on".
- Set the Mode Selector switch to "Repeater" for extending an existing WiFi network.
- Wait for the power LED and WiFi signal indicator to light up.
4.3. Configuration Steps (Repeater Mode)
The G1208 can be configured via a web browser. Follow these general steps:
- Connect your computer or mobile device to the extender's default WiFi network (e.g., "GALAWAY_Extender" or similar, check the Quick Installation Guide for the exact name).
- Open a web browser (e.g., Chrome, Firefox, Edge) and enter the default IP address or domain name provided in the Quick Installation Guide (commonly 192.168.1.1 or extender.local).
- Log in using the default username and password (usually "admin" for both, refer to the guide).
- Follow the on-screen wizard to select "Repeater Mode".
- Scan for available WiFi networks and select your home/office WiFi network.
- Enter the password for your existing WiFi network.
- Configure the extended network's name (SSID) and password. It's recommended to use a different name to distinguish it from your main network.
- Save the settings and wait for the extender to restart.
- Once restarted, connect your devices to the new extended WiFi network.
4.4. Intelligent Signal Indicator
The signal indicator LEDs help you find the optimal placement for your WiFi repeater. Observe the lights to determine signal strength:
- 3 lights bright: Strong signal. Ideal placement.
- 2 lights bright: General signal. Acceptable placement.
- 1 light bright: Weak signal. Consider moving the extender closer to your main router.

Figure 4.2: Diagram illustrating the intelligent signal indicator, showing how the number of lit LEDs corresponds to signal strength.
Note: If the signal is very weak (only one light or no lights), the device may be too far or too close to the main router. Adjust the position according to the signal indicator for best performance.
5. Operating the Extender
5.1. Automatic Setting Memory
Once successfully configured, the G1208 WiFi Extender retains its settings. There is no need to repeat the setup process if you unplug the device and move it to another location within your home or office. Simply plug it into a new power socket, and it will automatically connect to the previously configured network.

Figure 5.1: Illustration demonstrating the automatic setting memory feature, allowing the extender to be moved to different rooms (Bedroom, Living Room, Kitchen, Balcony, Washing Room) without re-configuration after initial setup.
5.2. Optimizing Placement for Coverage
To maximize coverage and minimize dead zones, consider the following:
- Place the extender roughly halfway between your main router and the area where you need improved WiFi coverage.
- Avoid placing the extender near large metal objects, concrete walls, or appliances that emit electromagnetic interference (e.g., microwaves, cordless phones).
- Use the intelligent signal indicator to fine-tune the placement for the best signal strength.
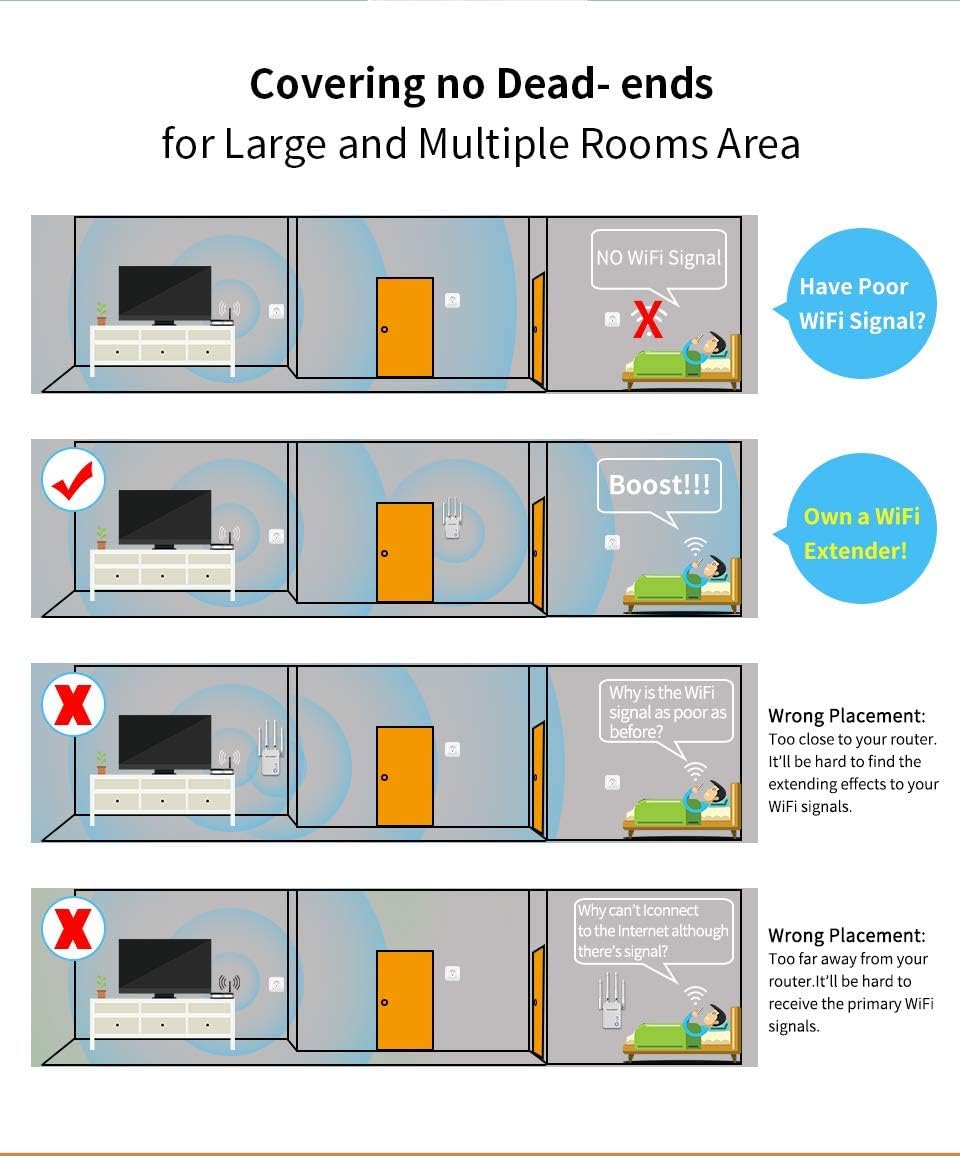
Figure 5.2: Diagrams illustrating effective and ineffective placement of the WiFi extender to cover dead zones and improve signal strength in large and multi-room areas.
6. Maintenance
To ensure the longevity and optimal performance of your GALAWAY-US G1208 WiFi Extender, follow these simple maintenance guidelines:
- Cleaning: Gently wipe the device with a soft, dry cloth. Do not use liquid cleaners or aerosols.
- Ventilation: Ensure the heat dissipation holes are not obstructed. Do not place the device in enclosed spaces that prevent airflow.
- Power Cycle: If you experience minor connectivity issues, try unplugging the extender from the power outlet for 10-15 seconds, then plug it back in. This can often resolve temporary glitches.
- Firmware Updates: Periodically check the manufacturer's official website for any available firmware updates. Updating firmware can improve performance, add features, or fix bugs.

Figure 6.1: Image highlighting the isolated side heat dissipation design and dissipating heat holes of the G1208 Extender, crucial for stable and long-term operation.
7. Troubleshooting
This section addresses common issues you might encounter with your WiFi Extender.
7.1. How to Reset the Device to Factory Default Setting?
If you need to reset the extender or restore it to its factory default settings, follow these steps:
- Ensure the power button is "on" and the Mode Selector is in "Repeater" mode.
- Plug the extender into a power socket.
- Once the power LED and WiFi signal indicator light up, use a sim card removable needle or a paperclip to press the reset button (located in a small hole, refer to Figure 4.1) for 3-6 seconds.
- Release the button and wait for several seconds. All LED lights will turn on momentarily, indicating a successful reset.
- The extender is now reset and ready for re-configuration.
7.2. No Internet on Extended Network After Setup?
If your extended network is successfully set up but has no internet access, consider the following:
- Incorrect WiFi Password: You may have entered your main router's WiFi password incorrectly during the extender's installation. Reset the extender (refer to 7.1) and go through the configuration process again, carefully entering the correct password.
- Router Encryption: Ensure that your main router's encryption algorithm is at least WPA. Older or incompatible encryption types might prevent proper connection.
- Distance/Placement: The distance between your main router and the extender might be too far, resulting in a weak signal for the extender to boost effectively. Adjust the extender to an ideal location, using the Intelligent Signal Indicator (refer to 4.4) to find the best spot.
8. Specifications
| Feature | Detail |
|---|---|
| Model Number | AC1200 |
| Antenna | 4*2dBi External Omni-directional Antenna |
| Wireless Standard | IEEE802.11ac/a/b/g/n |
| Transmission Rate (2.4GHz) | 11b: 1/2/5.5/11 Mbps; 11g: 6/9/12/18/24/36/48/54 Mbps; 11n: 300Mbps |
| Transmission Rate (5GHz) | 11ac: 867Mbps |
| Total Data Transfer Rate | 1200 Megabits Per Second |
| RF Output Power (Max) | 100Mw (20dBm) |
| Receiver Sensitivity (Max) | -96dBm |
| Frequency | 2.412 ~2.472GHz; 5.180~5.825GHz |
| Power Input | 100~240V, 50/60HZ |
| Channel Bandwidth | 20/40/80 MHz Auto |
| Encryption | WPA-PSK/WPA2-PSK; WPA/WPA2 |
| Item Weight | 7 ounces |
| Package Dimensions | 7.56 x 3.7 x 2.52 inches |
| Manufacturer | GALAWAY-US |
9. Warranty and Support
For warranty information and technical support, please refer to the official GALAWAY-US website or contact their customer service directly. Keep your purchase receipt as proof of purchase for warranty claims.
For further assistance, you may also refer to the product page on Amazon for updated information or community support.
Ask a question about this manual
Ask about setup, troubleshooting, compatibility, parts, safety, or missing instructions. Manuals+ will review the question and use this page’s manual context to help answer it.