Introduction
This manual provides essential information for the safe and efficient operation of your Aikoper KOP-DW2605A Compact Portable Countertop Dishwasher. Please read all instructions carefully before initial use and retain this manual for future reference.
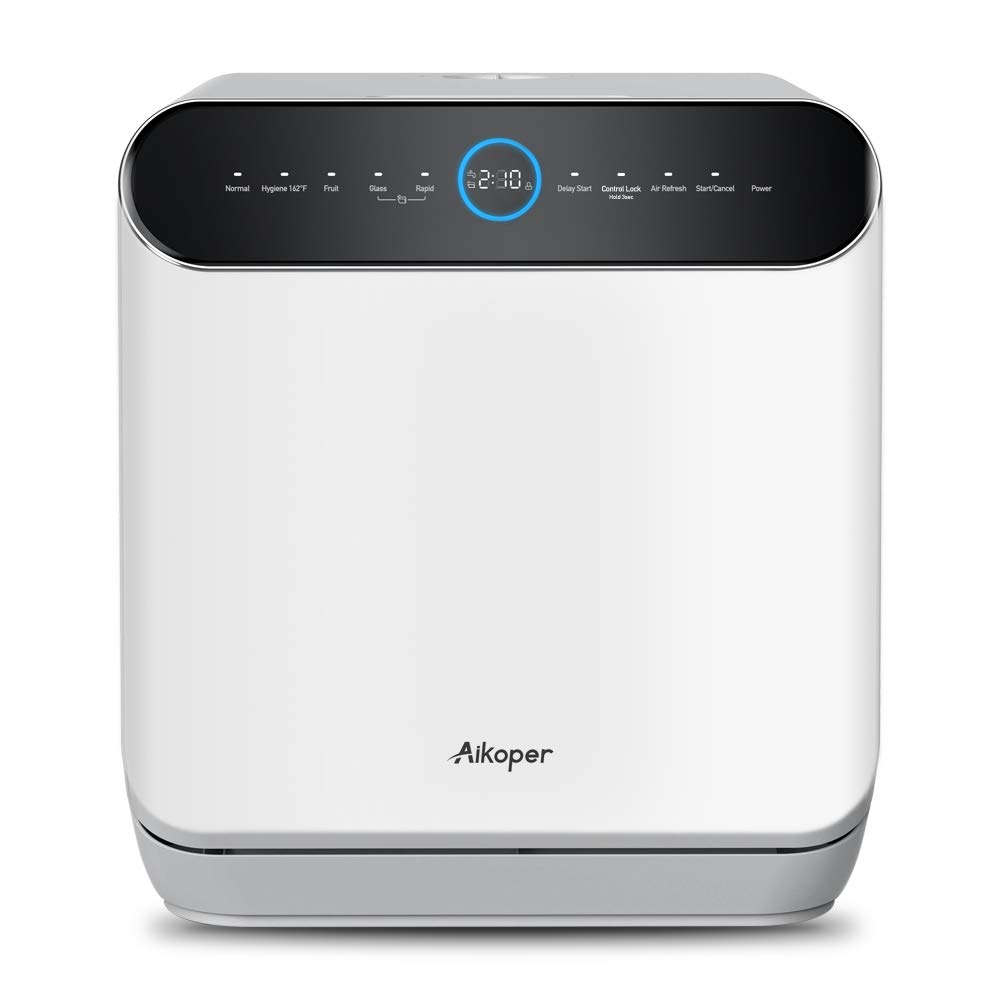
Image: Aikoper KOP-DW2605A Countertop Dishwasher showing its compact design and dimensions (17.13"W x 16.54"D x 18.42"H).
Safety Instructions
- Ensure the dishwasher is connected to a properly grounded electrical outlet.
- Do not operate the dishwasher if the power cord is damaged.
- Keep children away from the dishwasher during operation.
- Use only detergents specifically designed for automatic dishwashers.
- Avoid touching the heating element during or immediately after a wash cycle.
- The unit has been tested with water before leaving the factory; a small amount of residual water is normal.
What's in the Box
Verify that all components are present upon unpacking your new dishwasher:

Image: Illustration of the Aikoper KOP-DW2605A dishwasher and its included accessories.
- Aikoper KOP-DW2605A Dishwasher Unit
- Dish Rack / Basket
- Fruit Basket
- Drain Pipe
- Inlet Pipe
- Pouring Water Assistant
- Water Bottle (for manual filling)
- Adapter (for water hose connection)
Setup
1. Unpacking and Placement
- Carefully remove all packaging materials.
- Place the dishwasher on a stable, level surface. Ensure adequate space around the unit for ventilation and access.
- The compact design (17.13"W x 16.54"D x 18.42"H) makes it suitable for small kitchens, apartments, dorms, garages, office rooms, and RVs.
2. Water Connection
The dishwasher offers dual water input methods:
- Built-in 6L Water Tank: Manually pour water into the designated opening using the provided pouring water assistant until the tank is full.
- Water Hose Inlet: Connect the inlet pipe to a water source for automatic water supply. Ensure all connections are secure to prevent leaks.
3. Drainage Connection
The dishwasher requires proper drainage for used water:
- Direct to Sink Drain: Connect the drain pipe to a standard dishwasher drain connection under your sink. This typically requires a 90-degree elbow and a splitter to integrate with your existing plumbing. Ensure all connections are clamped securely to prevent leaks.
- Temporary Bucket Drainage: For portable use, the drain pipe can be directed into a bucket. Ensure the bucket is large enough to hold the drained water from a full cycle and is emptied regularly.
Operating Instructions
1. Control Panel Overview
The touch control panel features the following options:
- Wash Cycles: Normal, Hygiene (162°F), Fruit, Glass, Rapid
- Functions: Delay Start, Control Lock, Air Refresh
- Operation: Start/Cancel, Power
2. Loading Dishes
Proper loading ensures optimal cleaning performance. The dishwasher has a 3 place setting capacity and can accommodate 12-inch diameter plates when angled correctly.

Image: Examples of loading cookware, a pot, and fruit into the dishwasher basket.
- Scrape off large food particles before loading.
- Place larger items and pots in the lower rack.
- Arrange glasses, cups, and smaller bowls in the upper rack.
- Ensure items do not block the spray arms.
3. Adding Detergent
Use only dishwasher detergent powder for best results. Follow the detergent manufacturer's recommendations for quantity.
4. Selecting a Wash Cycle
Choose the appropriate cycle based on your dishwashing needs:
- Normal: For everyday dishes with normal soil.
- Hygiene (162°F): Provides thorough cleaning and sanitization, ideal for stubborn stains and oil pollution with high-temperature washing and rinsing.
- Fruit: A gentle cycle for washing fruits and vegetables.
- Glass: Optimized for delicate glassware.
- Rapid: A quick wash cycle for lightly soiled dishes.
5. Starting a Cycle
- Close the dishwasher door securely.
- Press the 'Power' button.
- Select your desired wash cycle.
- Press 'Start/Cancel' to begin the cycle.
6. Drying Features
- Automatic Door Opening: The dishwasher is designed to automatically open the door after the wash cycle finishes to facilitate drying.
- Fan Motor: The fan motor continues to run when the door is opened to enhance drying and ventilation.
- Air Refresh: This function can be selected after a cycle to keep the interior dry, clean, ventilated, and prevent odors.
Maintenance
1. Cleaning Filters
Regularly clean the filters to maintain optimal performance. Refer to the diagram in the manual for filter location and removal instructions.
2. Cleaning Interior
Wipe down the interior with a damp cloth periodically. For hard water stains, use a dishwasher cleaner or a solution of vinegar.
3. Descaling
If you notice mineral buildup, perform a descaling cycle using a suitable descaling agent or white vinegar. Consult the manufacturer's guidelines for descaling frequency.
Troubleshooting
- Dishwasher not starting: Ensure the power cord is securely plugged in and the door is fully closed. Check the circuit breaker.
- Water leaks: Verify all water inlet and drain connections are tight and properly sealed. Check the door seal for any obstructions or damage.
- Dishes not clean: Ensure dishes are loaded correctly and not blocking spray arms. Use the recommended amount of dishwasher detergent powder. Select an appropriate wash cycle for the soil level.
- Unpleasant odors: Run the 'Air Refresh' function. Clean filters and the interior of the dishwasher.
- Residual water in unit: This is normal due to factory testing. If excessive, check drain hose for kinks or blockages.
Specifications
| Brand | Aikoper |
| Model Name | KOP-DW2605A |
| Product Dimensions (D x W x H) | 16.54" x 17.13" x 18.42" |
| Capacity | 6 Liters (Built-in Water Tank) |
| Installation Type | Countertop / Portable |
| Material | Stainless Steel (Inner Material) |
| Voltage | 120 Volts |
| Number of Cycle Options | 5 (Normal, Hygiene, Fruit, Glass, Rapid) |
| Controls Type | Touch |
| Special Features | Built-In Water Tank, Compact, Portable, Automatic Door Opening, Air Refresh |
Warranty and Support
For warranty information, please refer to the documentation included with your product at the time of purchase. An extended warranty card may be available for registration.
For technical support or service inquiries, please contact Aikoper customer service through their official website or the contact information provided in your product packaging.


