1. Introduction
The WANPTEK DPS3010U is a high-precision, four-digit, three-window switching DC regulated power supply designed to simultaneously display voltage, current, and power. This device is suitable for various applications, including mobile phone and computer maintenance, educational settings, and production lines. It offers continuously adjustable output voltage and current within its rated range, ensuring excellent power supply stability and low ripple coefficient. Equipped with a USB fast charging function and comprehensive short-circuit protection, the DPS3010U is compact, aesthetically pleasing, and user-friendly, capable of operating for extended periods under full load.
2. Specifications
This section details the technical specifications of the DPS3010U power supply.
| Parameter | Value |
|---|---|
| Model | DPS3010U |
| Output Voltage | 0-30V |
| Output Current | 0-10A |
| Output Power | 300W |
| Auxiliary Output | USB Quick Charge 18W (supports multiple fast charging protocols) |
| Input Voltage | AC220V, 50 Hz |
| Operating Temperature | 0-40 ℃; Humidity: ≤ 80% RH |
| Storage Temperature | -10-70 ℃; Humidity: < 70% RH |
| Constant Voltage (C.V) Mode Stability | Voltage: ≤ 0.1% + 3 mV; Load: ≤ 0.1% + 3 mV |
| C.V Mode Ripple Noise | ≤ 20 mVrms (RMS value) |
| Constant Current (C.C) Mode Stability | Current: ≤ 0.1% + 3 mA; Load: ≤ 0.2% + 3 mA |
| C.C Mode Ripple Noise | ≤ 5 mArms (RMS value) |
| Protection Mode | Current limiting protection / Short-circuit alarm stop output and self-recovery |
| Display | Four-digit digital tube, three-window display |
| Accuracy | 0.5% + 3 digits |
| Resolution | Voltage 0.01 V; Current 0.001 A |
| Product Size (L x W x H) | 225mm x 90mm x 145mm |
| Weight | 1.8 kg |
| Fuse | 3A (for DPS3010U) |
3. Setup
Before operating the power supply, ensure it is placed on a stable, level surface with adequate ventilation. Connect the provided power cord to the AC input on the rear of the unit and then to a suitable AC220V, 50Hz power outlet.
3.1 Package Contents
Verify that all items are present in the package:
- 1 x WANPTEK DPS3010U Power Supply Unit
- 1 x Power Cord
- 1 x Output Load Cable
- 1 x Instruction Manual

4. Operating Instructions
Follow these steps for safe and effective operation of your DPS3010U power supply.
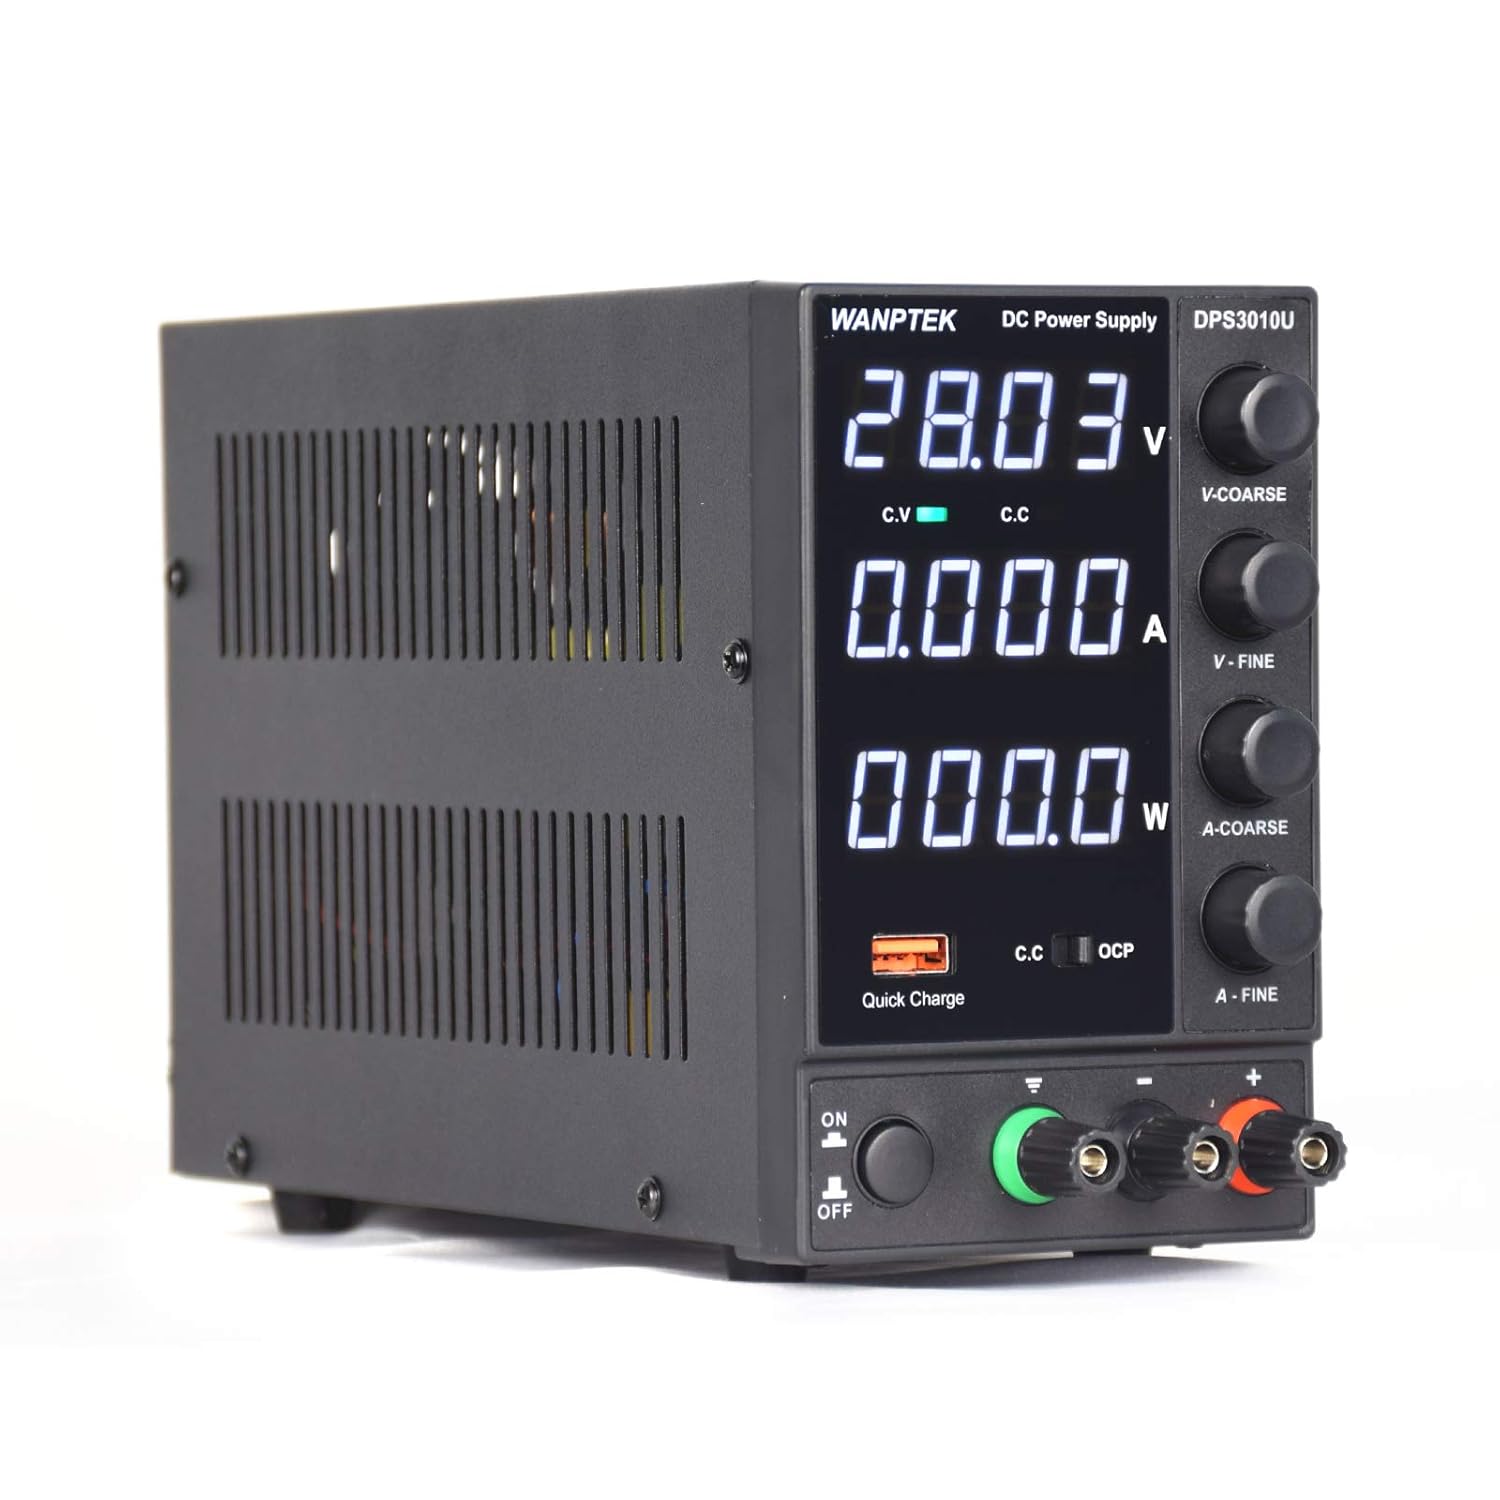
4.1 Front Panel Controls and Display
The front panel features a three-window digital display for voltage (V), current (A), and power (W). Control knobs for coarse and fine adjustment of voltage (V-COARSE, V-FINE) and current (A-COARSE, A-FINE) are located on the right side. An ON/OFF switch, USB Quick Charge port, and output terminals (positive, negative, and ground) are at the bottom.

4.2 Basic Operation
- Power On: Flip the ON/OFF switch to the 'ON' position. The display will illuminate.
- Connect Load: Connect your load to the output terminals. Ensure correct polarity: red for positive (+), black for negative (-), and green for ground.
- Adjust Voltage: Use the V-COARSE knob for large voltage changes and the V-FINE knob for precise adjustments. Observe the voltage reading on the display.
- Adjust Current: The current limit can be set before connecting a load or while operating. Refer to section 4.3 for detailed current regulation.
- Power Off: Disconnect the load, then flip the ON/OFF switch to the 'OFF' position.
4.3 Current Regulation (Setting Current Limit)
To adjust the output current limit:
- Set the voltage to approximately 5-10V using the voltage adjustment knobs.
- Short-circuit the positive (+) and negative (-) output terminals with a suitable wire. Ensure the C.C (Constant Current) indicator on the display is active, indicating the unit is in current limiting mode.
- Adjust the A-COARSE knob for rough current setting, then use the A-FINE knob for precise adjustment to the desired current limit value. The display will show the set current.
- After setting the current, disconnect the short-circuit wire.
- Now, adjust the voltage to your required operating voltage. The unit is ready to connect your load, and the output current will not exceed the set limit.

4.4 USB Quick Charge Function
The integrated USB Quick Charge port (18W) supports multiple fast charging protocols. Simply connect your compatible USB device to this port for rapid charging.
5. Maintenance
Proper maintenance ensures the longevity and reliable operation of your power supply.
- Cleaning: Regularly clean the exterior of the unit with a soft, dry cloth. Do not use liquid cleaners or solvents. Ensure ventilation openings are free from dust and debris.
- Ventilation: Always ensure adequate airflow around the unit. Do not block the ventilation grilles on the sides.
- Storage: When not in use for extended periods, store the power supply in a cool, dry environment within the specified storage temperature and humidity ranges (-10-70 ℃; < 70% RH).
- Fuse Replacement: If the unit fails to power on, check the fuse. Replace it only with a fuse of the same type and rating (3A for DPS3010U). Refer to the specifications for fuse details.

6. Troubleshooting
This section provides solutions to common issues you might encounter.
| Problem | Possible Cause | Solution |
|---|---|---|
| Unit does not power on | No power from outlet; Power cord not connected; Blown fuse | Check power outlet; Ensure power cord is securely connected; Replace fuse with correct rating (3A) |
| No output voltage/current | Output terminals not connected; Voltage/current set to zero; Overload protection active | Ensure load is properly connected; Adjust voltage/current knobs; Reduce load or check for short circuit |
| Output current is limited (C.C indicator on) | Load resistance is too low; Current limit set too low | Increase current limit (refer to section 4.3); Check load for short circuit or excessive current draw |
| Unit overheats | Blocked ventilation; Excessive ambient temperature; Prolonged operation at maximum load | Ensure clear ventilation paths; Operate in a cooler environment; Reduce load or operating time |
7. Warranty and Support
For warranty information or technical support, please refer to the documentation provided at the time of purchase or contact your retailer. Keep your purchase receipt as proof of purchase.