Important Safety Instructions
Please read all instructions carefully before using the projector and retain this manual for future reference. Failure to follow these instructions may result in electric shock, fire, or other injuries or damage.
- Do not block any ventilation openings. Ensure adequate space around the projector for proper airflow.
- Do not expose the projector to rain or moisture to reduce the risk of fire or electric shock.
- Use only attachments/accessories specified by the manufacturer.
- Unplug the projector during lightning storms or when unused for long periods.
- Refer all servicing to qualified service personnel.
- Avoid direct eye exposure to the projector lens when the lamp is on.
Package Contents
Verify that all items listed below are included in your package:
- EKASN Creative E450 Mini Projector
- Remote Control
- Power Cable
- HDMI Cable
- AV Cable
- User Manual
Product Overview
Familiarize yourself with the components and interfaces of your EKASN Creative E450 projector.

Image: The EKASN Creative E450 Mini Projector, showcasing its compact design, front lens, and included remote control and connection cables.
Interfaces and Ports
The projector features multiple ports for versatile connectivity with various devices.

Image: Side view of the EKASN Creative E450 Mini Projector highlighting its various input and output ports, including VGA, Headset, Power, USB, AV, and HDMI.
- VGA Port: For connecting to computers or laptops with a VGA output.
- Headset/Audio Out: 3.5mm audio jack for connecting external speakers or headphones.
- Power Input: Connects to the power adapter.
- USB Port: Supports USB flash drives for media playback. Note: Does not support cord connection or data transfer from devices.
- AV Port: For connecting devices using an AV cable (e.g., DVD players).
- HDMI Port: For high-definition video and audio input from devices like TV sticks, Apple TV, Roku, PCs, PS4, laptops, and MacBooks.
Setup Guide
1. Initial Placement and Screen Size
Place the projector on a stable, flat surface. The projection size can be adjusted by changing the distance between the projector and the screen/wall. For optimal viewing, use the projector in a relatively dark environment.

Image: A diagram illustrating various projection screen sizes (38" to 160") achievable at different projection distances (3.9ft to 13.3ft) with the EKASN Creative E450 Mini Projector.
- Minimum Projection Size: Approximately 33 inches (at 3.7 feet distance).
- Maximum Projection Size: Up to 170 inches (at 19.7 feet distance).
- Recommended Distance: Adjust to achieve desired screen size and clarity.
2. Powering On
- Connect the power cable to the projector's power input port.
- Plug the other end of the power cable into a power outlet.
- Press the power button on the projector or the remote control to turn on the device.
3. Focus and Keystone Correction
To achieve a clear and rectangular image, adjust the focus and keystone correction.

Image: A visual representation of keystone correction, showing how the projected image can be adjusted by ±15 degrees to achieve a perfectly rectangular display.
- Keystone Correction: Locate the keystone adjustment ring/knob near the lens. Rotate it to correct any trapezoidal distortion in the image, making it rectangular. The projector supports manual keystone correction of ±15 degrees.
- Focus Adjustment: After correcting the keystone, rotate the focus ring/knob around the lens until the image appears sharp and clear.
4. Connecting Devices
The EKASN Creative E450 supports various input sources.
- HDMI Connection: Connect your TV Stick, Apple TV, Roku, PC, PS4, DVD player, laptop, or MacBook to the projector's HDMI port using an HDMI cable.
- Smartphone Connection:

Image: A visual guide demonstrating how to connect an iPhone (via Lightning to HDMI adapter) and an Android phone (via Micro USB/Type C to HDMI adapter) to the EKASN Creative E450 Mini Projector. Adapters are not included.
- For iPhone: An external Lightning to HDMI adapter is required (not included).
- For Android Phone: A Micro USB/Type C to HDMI adapter is required (not included).
- After connecting the adapter and HDMI cable, ensure you select HDMI as the input source on the projector.
- USB Connection: Insert a USB flash drive containing your media files into the USB port. Navigate to the USB input source and select the desired file for playback. Supported formats may vary.
- AV Connection: Use the provided AV cable to connect devices with AV output.
- VGA Connection: Connect to a computer or laptop using a VGA cable.
5. Multiple Installation Methods
The projector offers flexible installation options to suit your environment.
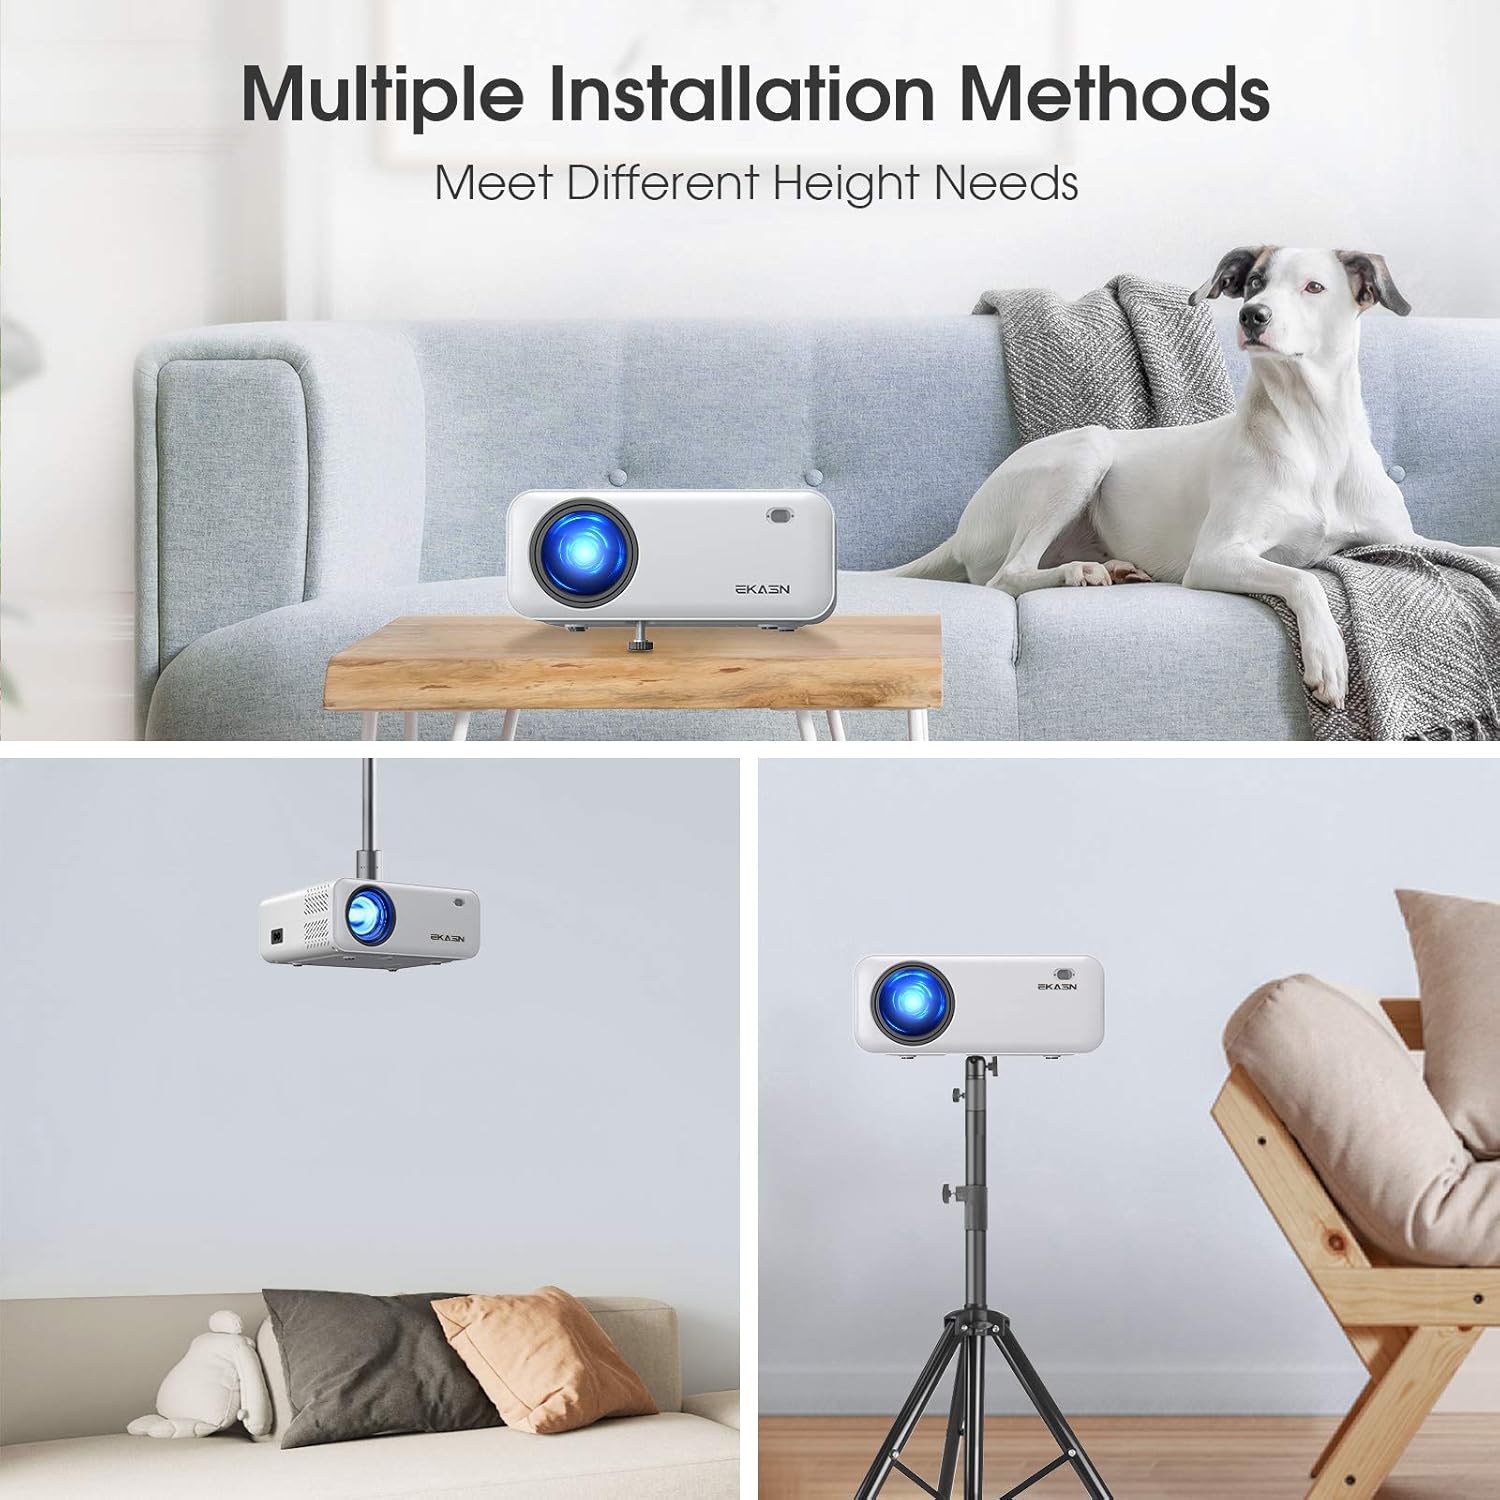
Image: Three examples of installation methods for the EKASN Creative E450 Mini Projector: tabletop placement, ceiling mount, and tripod mount.
- Tabletop Mount: Place the projector directly on a table or flat surface. You can adjust the height using the screw on the bottom.
- Ceiling Mount: The projector has a screw hole on its bottom for universal tripod or ceiling mounting. Ensure proper mounting hardware is used (not included).
- Tripod Mount: Attach the projector to a compatible tripod using the screw hole on the bottom.
Operating Instructions
1. Basic Operation and Menu Navigation
Use the included remote control or the buttons on the projector to navigate the menu and control playback.
- Power Button: Turns the projector on/off.
- Source Button: Selects the input source (HDMI, AV, USB, VGA).
- Menu Button: Accesses the projector's settings menu.
- Navigation Buttons (Arrow Keys): Move through menu options.
- OK Button: Confirms selections.
- Volume Buttons: Adjust audio volume.
2. Input Source Selection
After connecting your device, press the "Source" button on the remote or projector to select the corresponding input (e.g., HDMI1, AV, USB, VGA).
3. Audio Settings
The projector has built-in stereo speakers. For enhanced audio, you can connect external speakers or headphones via the 3.5mm audio output jack.
Important Note on Dolby Sound: The projector does NOT support Dolby sound. If you experience no sound while playing videos from streaming services like Netflix or Amazon Prime Video, you must turn off Dolby sound in the settings of your connected device (e.g., TV Stick, media player). Typically, this setting can be found under: Settings > Display & Sounds > Audio > Dolby Digital Output > Turn Dolby Digital Plus OFF.
4. Media Playback from USB
Insert a USB flash drive containing your media files into the USB port. Navigate to the USB input source and select the desired file for playback. Supported formats may vary.
Maintenance
Regular maintenance helps ensure the longevity and optimal performance of your projector.
- Cleaning the Lens: Use a soft, lint-free cloth specifically designed for optical lenses. Do not use abrasive cleaners or cloths that could scratch the lens.
- Cleaning the Projector Body: Wipe the exterior with a soft, dry cloth. For stubborn stains, a slightly damp cloth can be used, followed by a dry wipe.
- Ventilation: Ensure the ventilation openings are clear of dust and debris. Do not block them during operation. Periodically clean the vents with a soft brush or compressed air.
- Storage: When not in use for extended periods, store the projector in a cool, dry place, away from direct sunlight and extreme temperatures.
Troubleshooting
If you encounter issues with your projector, refer to the following common problems and solutions:
| Problem | Possible Cause / Solution |
|---|---|
| Blurry Image |
|
| No Sound from Streaming Apps (e.g., Netflix, Amazon Prime Video) | The projector does not support Dolby sound. Turn off Dolby sound output in the audio settings of your connected streaming device (e.g., TV Stick, media player). |
| No Signal / No Picture |
|
| USB Port Not Working for Phone Connection/Data Transfer | The USB port only supports USB flash drives for media playback. It does NOT support cord connection for smartphones or data transfer. For smartphone mirroring, an external HDMI adapter is required. |
| Image is Trapezoidal | Adjust the keystone correction knob until the image is rectangular. |
Specifications
Detailed technical specifications for the EKASN Creative E450 Mini Projector.
| Feature | Detail |
|---|---|
| Brand | EKASN |
| Model | Creative E450 |
| Display Technology | LCD |
| Native Resolution | 1280 x 720 Pixels |
| Supported Resolution | Up to 1920 x 1080 Pixels (1080P Full HD) |
| Brightness | 5500 LUX |
| Contrast Ratio | 2000:1 |
| Image Aspect Ratio | 16:9 |
| Projection Size | 33" to 170" |
| Projection Distance | 3.7ft to 19.7ft |
| Keystone Correction | Manual ±15° |
| Hardware Interface | 3.5mm Audio, HDMI, USB, VGA, AV |
| Compatible Devices | iPhone, Android Phones, TV Box, TV Stick, PCs, PS4, DVD, Laptops, Tablets, MacBook, USB Flash Drive, Media Players |
| Audio Output | Built-in Stereo Speakers, 3.5mm Audio Out |
| Wattage | 60 watts |
| Form Factor | Portable |
| Mounting Type | Tabletop Mount, Ceiling Mount, Tripod Mount |
| Product Dimensions | 19.28 x 16.48 x 7.62 cm; 1.51 kg |
Warranty and Support
EKASN provides comprehensive support for your projector.
- Warranty: The EKASN Creative E450 Mini Projector comes with a 2-year warranty.
- Technical Support: Lifetime professional technical support is available.
- For any problems or inquiries, please contact EKASN customer service. Refer to your product packaging or the official EKASN website for specific contact details.