Introduction
This manual provides detailed instructions for the installation, operation, maintenance, and troubleshooting of your new EAGLEGGO Dryer Heating Element. Designed as a direct replacement for various Samsung dryer models, this high-quality component restores your dryer's performance and efficiency. Please read all instructions carefully before proceeding with installation or maintenance.
Important Safety Information
Always prioritize safety when working with electrical appliances.
- Before beginning any work on the dryer, ensure the power supply is completely disconnected. Turn off the circuit breaker for the dryer and unplug the appliance from the wall outlet.
- Wear appropriate personal protective equipment, such as gloves and safety glasses.
- If you are unsure about any step, consult a qualified appliance technician.
- Keep children and pets away from the work area.
Product Specifications
- Brand: EAGLEGGO
- Model Compatibility: Samsung DV422EWHDWR/AA, DV42H5400EF/A3, DV50F9A8EVP/A2, and other compatible models (refer to your dryer's manual for specific part numbers).
- Part Number: DC47-00019A
- Voltage: 240V
- Wattage: 5300W
- Included Components: Heating Element, Thermal Fuse, Thermistor, Thermostat.

Figure 1: Overview of the EAGLEGGO Dryer Heating Element.

Figure 2: Dimensions of the heating element, approximately 10.2 inches in length and 6.5 inches in width.

Figure 3: Cross-reference part numbers for the heating element, including 2068550, PS4205218, DC47-00019A, and B001ICYB2M.
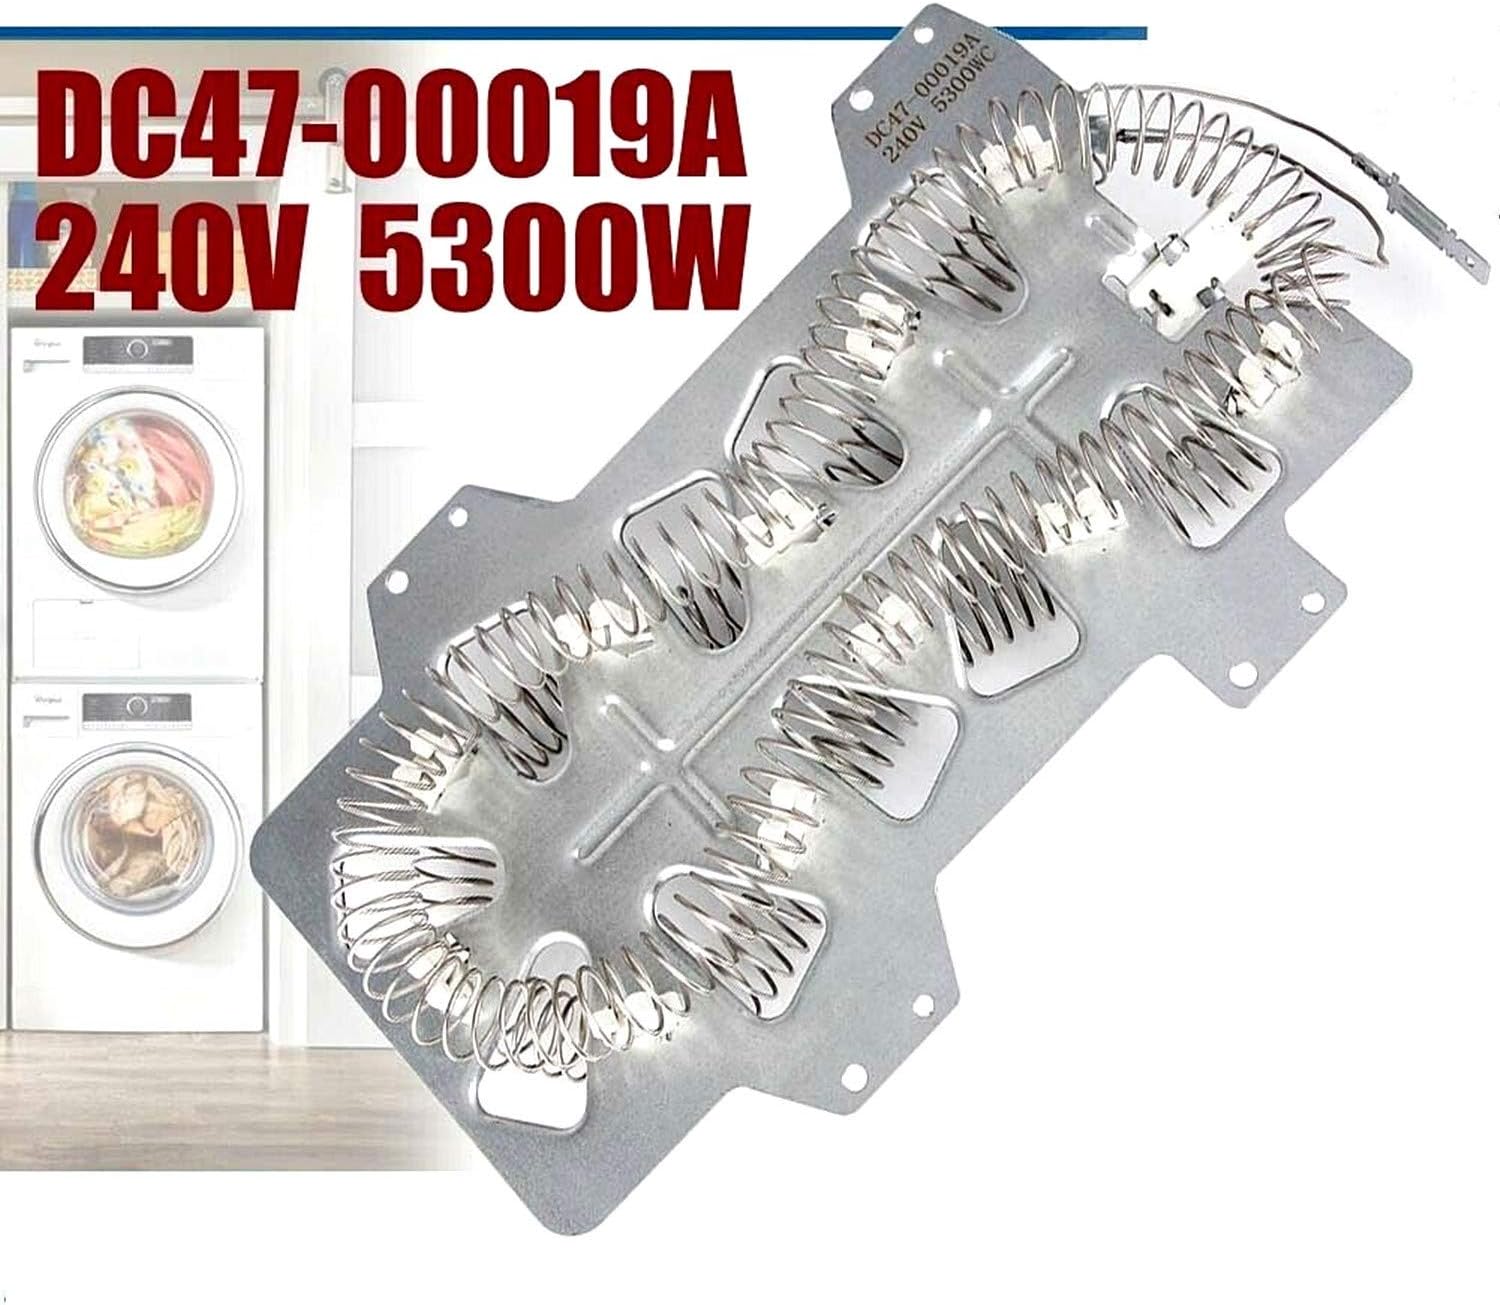
Figure 4: The heating element is rated for 240V and 5300W.

Figure 5: A partial list of compatible Samsung, Maytag, and Whirlpool dryer models. Always verify compatibility with your specific dryer model.
Setup and Installation
Replacing the dryer heating element requires careful disassembly and reassembly. Follow these general steps, but always refer to your specific dryer model's service manual for precise instructions.
Tools Required:
- Screwdriver (Phillips and/or flathead, depending on your dryer model)
- Nut driver or socket set (for hex head screws, if applicable)
- Pliers (for disconnecting wires)
- Multimeter (for testing components)
- Work gloves
Disassembly Steps:
- Disconnect Power: Ensure the dryer is unplugged and the circuit breaker is off.
- Move Dryer: Carefully pull the dryer away from the wall to access the rear panel.
- Remove Rear Panel: Unscrew and remove the screws securing the rear panel of the dryer. Set the panel aside.
- Remove Top Panel: Depending on your model, you may need to remove screws from the top rear to lift and remove the top panel.
- Access Heating Element: The heating element is typically located in a housing at the bottom rear of the dryer. You may need to remove additional panels or components to gain access.
- Disconnect Wires: Carefully disconnect all electrical wires connected to the heating element assembly. Note their positions for reassembly.
- Remove Old Heating Element: Unscrew and remove the old heating element assembly from its housing.

Figure 6: Visual guide showing various stages of dryer disassembly and heating element access.
Installation Steps:
- Install New Heating Element: Place the new EAGLEGGO heating element assembly into the dryer housing and secure it with screws.
- Connect Wires: Reconnect all electrical wires to their correct terminals on the new heating element. Ensure connections are secure.
- Reassemble Dryer: Reattach any panels or components removed during disassembly in reverse order.
- Restore Power: Plug the dryer back into the wall outlet and turn on the circuit breaker.
- Test Dryer: Run a short cycle to ensure the dryer heats properly and functions as expected.
Helpful Installation Videos:
Dryer Heating Element Assembly Overview (Seller: VNAPARTS)
This video provides a general overview of a dryer heating element assembly, demonstrating its components and how it fits into a dryer.
Funmit DC47-00019A Dryer Heating Element Kit (Seller: Funmit SUPPLIER)
A brief video showcasing the Funmit DC47-00019A Dryer Heating Element Kit, highlighting its components.
AZ4UPARTS Dryer Heating Element Assembly (Seller: AZ4UPARTS)
This video presents the AZ4UPARTS Dryer Heating Element Assembly, demonstrating its features and components.
Operating the Dryer with New Heating Element
Once the new heating element is installed, your dryer should resume normal operation, providing consistent heat for efficient drying. The heating element works by generating heat that is then circulated through the dryer drum to evaporate moisture from your clothes.
Monitor the first few drying cycles to ensure proper heating and drying times. If issues persist, refer to the troubleshooting section.
Maintenance
Regular maintenance is crucial to prolong the life of your dryer and its components, including the heating element. The most common cause of heating element failure is restricted airflow due to lint buildup.
- Clean Lint Trap: Always clean the lint trap before or after every load.
- Inspect Dryer Vent: Periodically inspect and clean the dryer vent hose and external vent cap. Lint can accumulate in these areas, restricting airflow and causing the dryer to overheat.
- Check for Bent Coils: If you ever need to access the heating element, visually inspect the coils for any signs of bending or touching the metal frame. Bent coils can cause short circuits or uneven heating.
Troubleshooting Common Issues
If your dryer is not heating or experiencing other issues after replacing the heating element, consider the following:
1. Dryer Not Heating at All:
- Check Thermal Fuse: The thermal fuse is a safety device that blows if the dryer overheats. If the heating element is good, the thermal fuse might be faulty. Use a multimeter set to ohms to test for continuity across the thermal fuse terminals. A good fuse will show continuity (a low resistance reading or a beep). No continuity indicates a blown fuse, which needs replacement.
- Check Thermostat/Thermistor: These components regulate temperature. A faulty thermostat or thermistor can prevent the heating element from activating or cause it to overheat. Test for continuity or resistance according to your dryer's service manual.
- Verify Wiring: Ensure all electrical connections to the heating element and other components are secure and correctly attached.
2. Dryer Takes Too Long to Dry:
- Restricted Airflow: This is a common cause. Check for lint buildup in the lint trap, dryer vent hose, and external vent cap. Clear any obstructions.
- Partial Heating Element Failure: Although less common with a new element, sometimes a section of the coil might not be heating. Test the element for continuity across its terminals.
3. Heating Element is Grounded (Coil Touching Frame):
- Visual Inspection: Carefully inspect the heating coils to ensure none are bent or touching the metal housing.
- Multimeter Test: With the dryer unplugged, place one probe of a multimeter on one of the heating element terminals and the other probe on the metal frame of the heating element assembly. There should be no continuity (open circuit). If there is continuity, the element is grounded and needs replacement.
Testing the Heating Element and Thermal Fuse with a Multimeter:
Quick Check of Samsung Heating Element (Seller: wsh supplier)
This video demonstrates how to quickly check a dryer heating element and thermal fuse for continuity using a multimeter. It also highlights the importance of checking for grounded elements and proper dryer ventilation.
Warranty Information
Please refer to the product packaging or manufacturer's website for specific warranty information regarding your EAGLEGGO Dryer Heating Element.
Customer Support
For further assistance, technical support, or inquiries about your EAGLEGGO Dryer Heating Element, please contact EAGLEGGO customer support through their official channels.