AMTIFO A6
User Manual for AMTIFO A6 HD 1080P Wireless Backup Camera System
Model: A6 | Brand: AMTIFO
1. Introduction

Image: The AMTIFO A6 wireless backup camera system, featuring a 5-inch HD monitor displaying a vehicle, and a compact license plate camera.
This manual provides detailed instructions for the installation, operation, and maintenance of your AMTIFO A6 HD 1080P Wireless Backup Camera System. Please read this manual thoroughly before using the product to ensure proper function and safety.
The AMTIFO HD 1080P Wireless Backup Camera System is designed to simplify parking and enhance vehicle safety. It features stable digital wireless transmission, a 5-inch split-screen monitor, and an IP69 waterproof license plate camera with a 150-degree wide-angle view and clear night vision. The system supports up to two cameras and offers adjustable guide lines for precise maneuvering.
2. Product Features
- Stable Digital Wireless Transmission: Utilizes the latest point-to-point digital wireless technology for a clear, interference-free image, superior to analog signals. Effective for vehicles up to 30 meters (approximately 98 feet) in length, suitable for cars, SUVs, minivans, RVs, and more.
- Dual Camera Support: The system allows for the addition of a second camera (sold separately, search B08N547Q8J and B08N47LCJJ). The upgraded 5-inch monitor can display feeds from two cameras simultaneously.
- High-Definition 1080P Display: The 1080p high-bitrate transmission ensures clear image quality, even in low-light conditions.
- Multifunction Wireless Backup Camera: Includes features such as adjustable auxiliary parking guide lines and horizontal/vertical image flip. Users can customize the width and height of the guide lines for optimal parking assistance.
- IP69 Waterproof HD License Plate Camera: The camera is rated IP69 for waterproofing, ensuring durability in various weather conditions. Its 150-degree viewing angle provides a wide visible area for improved safety, day or night. The design integrates discreetly with the license plate without obstructing information.
- Upgraded Power Cord: Features a built-in wide voltage range (12V-35V) with voltage adjustment via the circuit board on the extension cable, extending service life by 4-5 years.
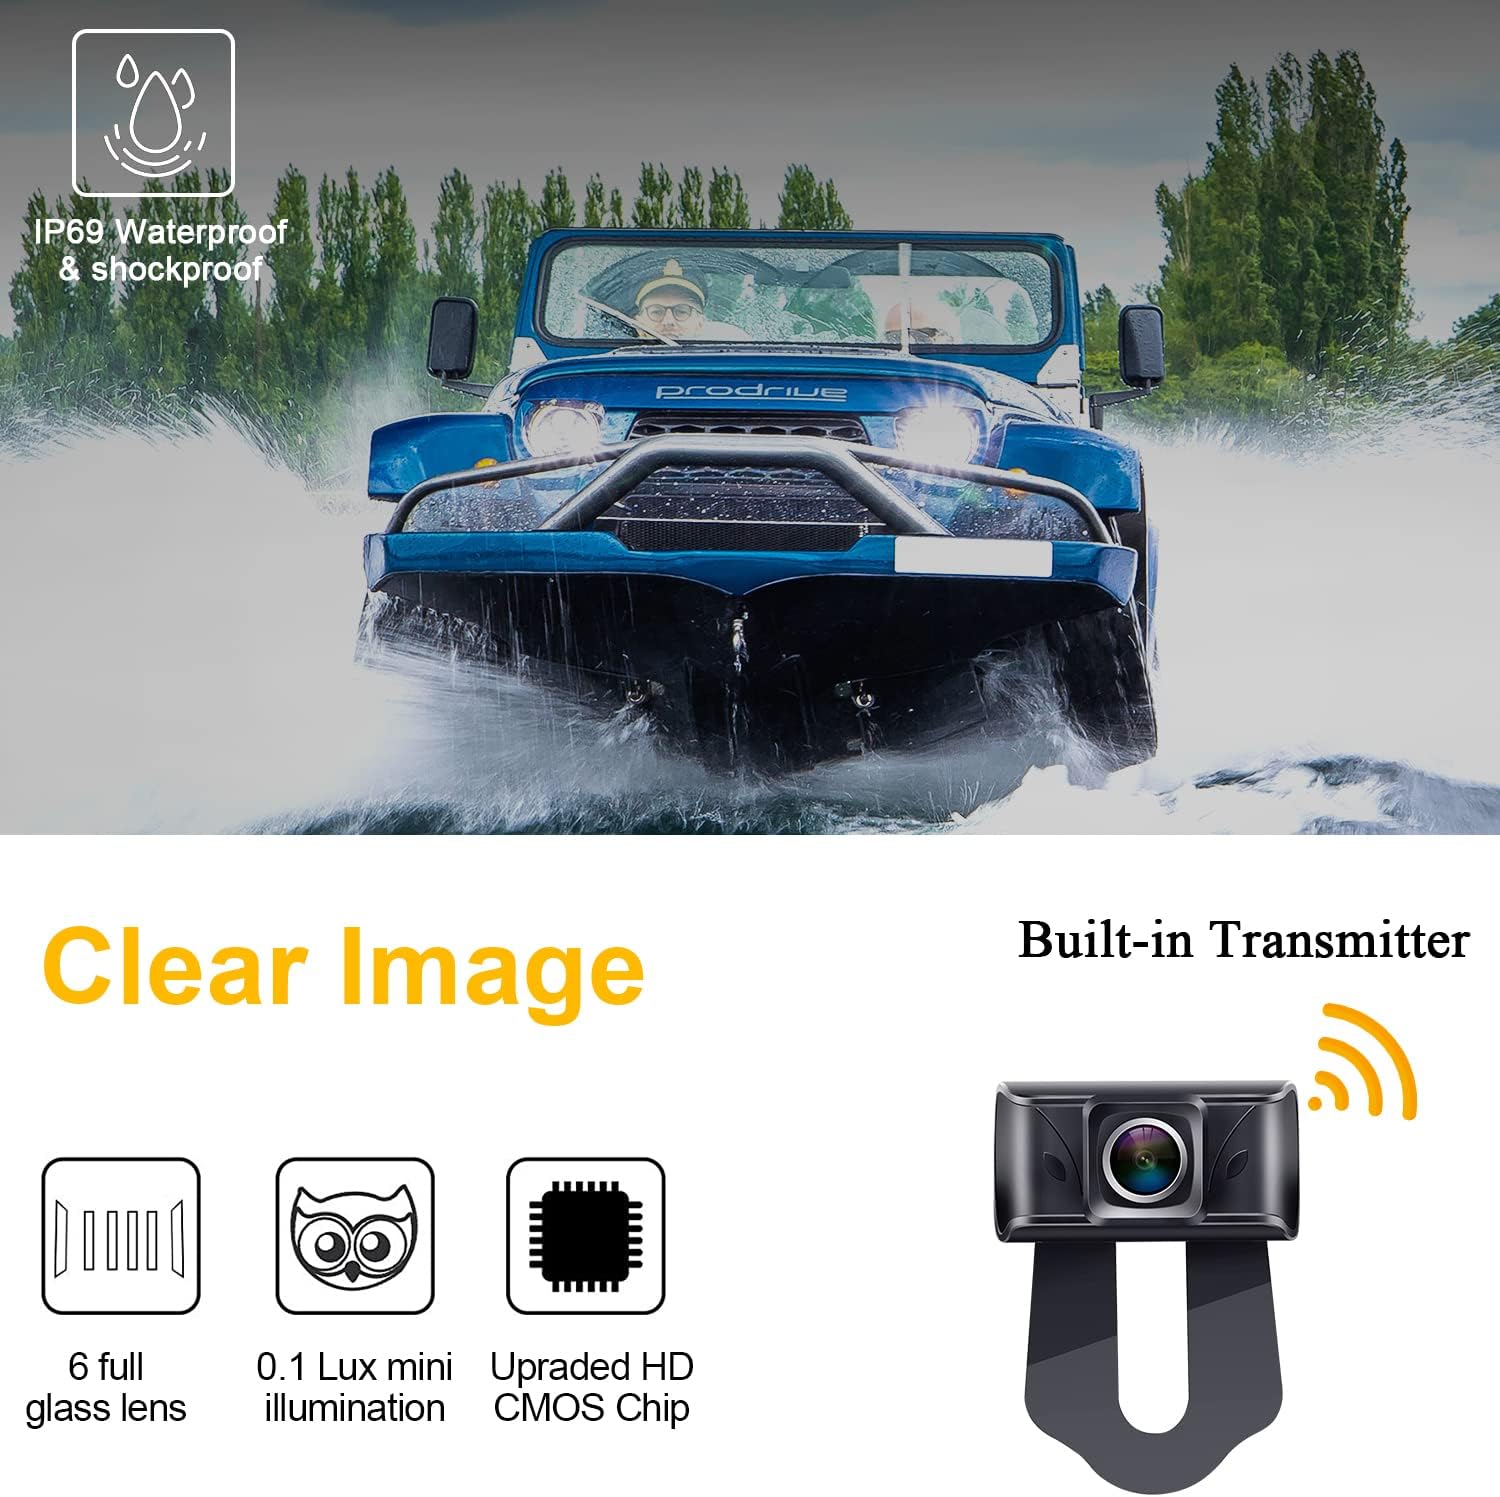
Image: An off-road vehicle driving through water, illustrating the IP69 waterproof and shockproof capabilities of the camera. Below, icons highlight features like a 6 full glass lens, 0.1 Lux mini illumination, and an upgraded HD CMOS chip for clear images.
3. Package Contents
Please check the package for the following items:
- 1x Wireless License Plate Camera
- 1x Digital Wireless Monitor (5-inch)
- 2x Power Cords
- 1x Monitor Mount/Bracket
- 1x Cigarette Lighter Adapter
- 1x AC Power Adapter
- 1x T-Tap Adapter
- 1x Antenna Adapter
- Mounting Screws
- 1x User Manual
4. Setup and Installation
4.1 Monitor Installation
The monitor can be mounted in various positions on your dashboard or windshield using the provided bracket. Ensure the monitor is placed in a location that does not obstruct your view of the road.
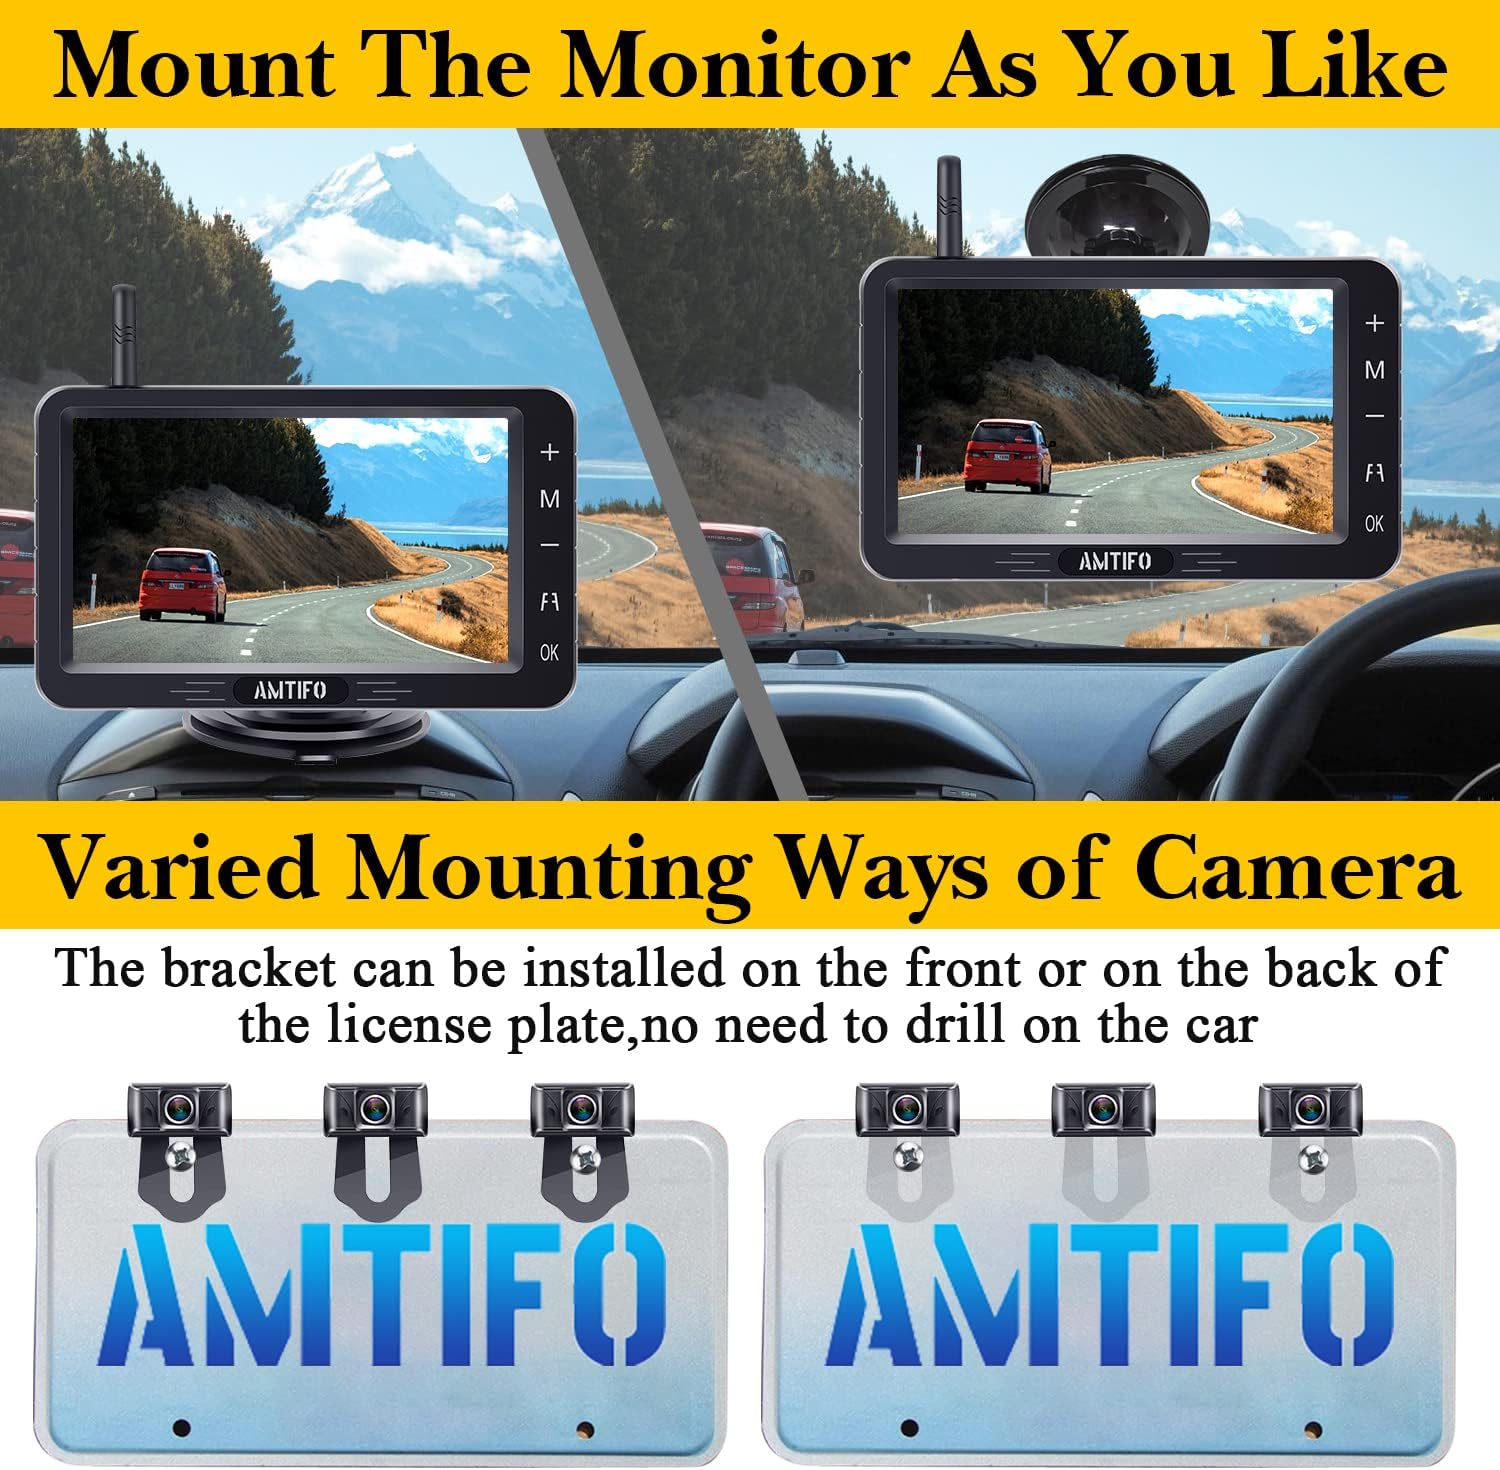
Image: Various mounting positions for the 5-inch monitor on a vehicle dashboard. The image shows the monitor attached to the dashboard in different orientations, demonstrating flexibility in placement.
- Attach the monitor to the suction cup or adhesive mount.
- Secure the mount to your desired location on the dashboard or windshield.
- Connect the monitor's power cord to the cigarette lighter adapter or directly to a 12V power source.
4.2 Camera Installation
The camera is designed to be installed on the license plate bracket. No drilling is required for standard license plate mounting.
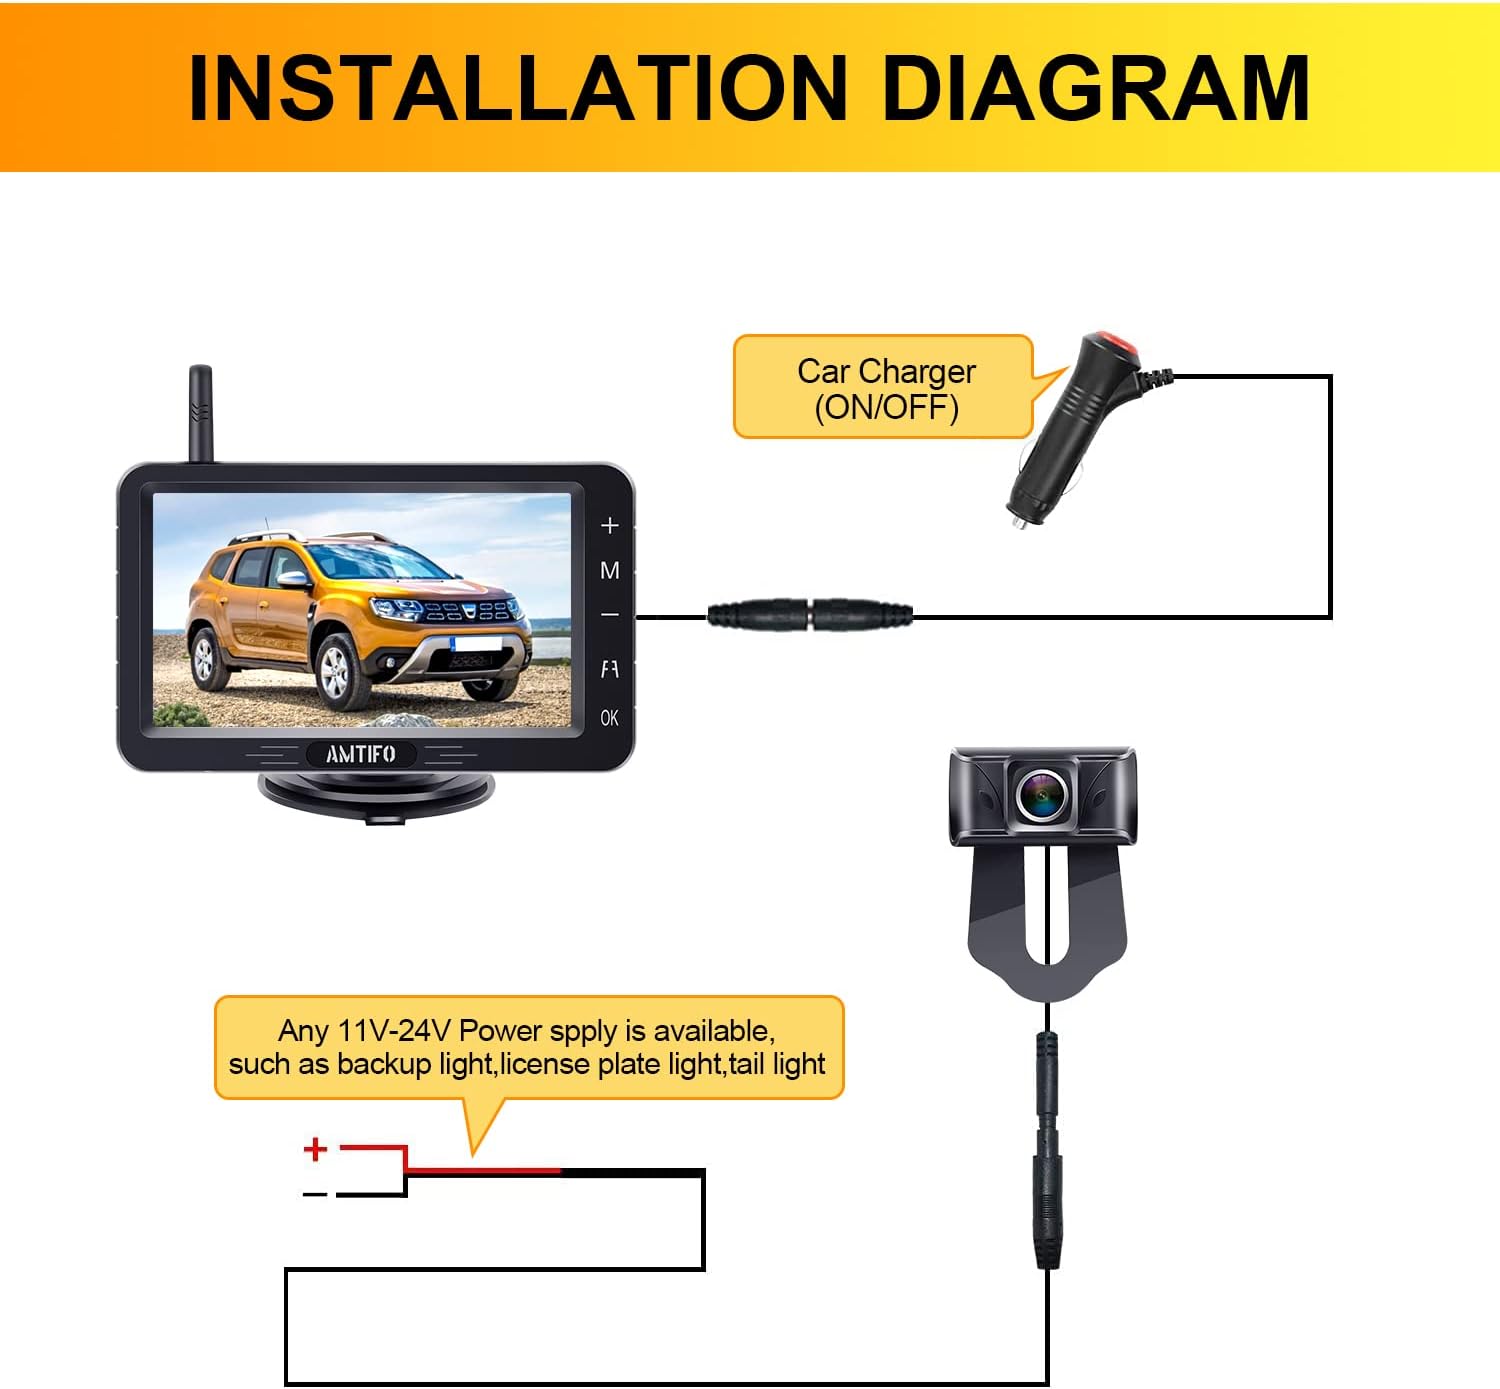
Image: A diagram illustrating the connection of the camera and monitor. The camera connects to a power source (e.g., backup light, license plate light, tail light) and wirelessly transmits to the monitor, which is powered by a car charger.
- Remove your vehicle's license plate.
- Position the camera bracket behind the license plate, ensuring the camera lens is unobstructed.
- Re-attach the license plate with the camera bracket in place using the provided screws.
- Connect the camera's power wire to a 12V-24V power source. Common connection points include:
- Reverse Light: For activation only when reversing. Connect the red wire to the positive (+) wire of your reverse light and the black wire to ground (-).
- Running Light/Tail Light: For continuous operation. Connect the red wire to the positive (+) wire of your running light/tail light and the black wire to ground (-).
- License Plate Light: Another option for continuous power.
- Ensure all connections are secure and insulated to prevent short circuits.
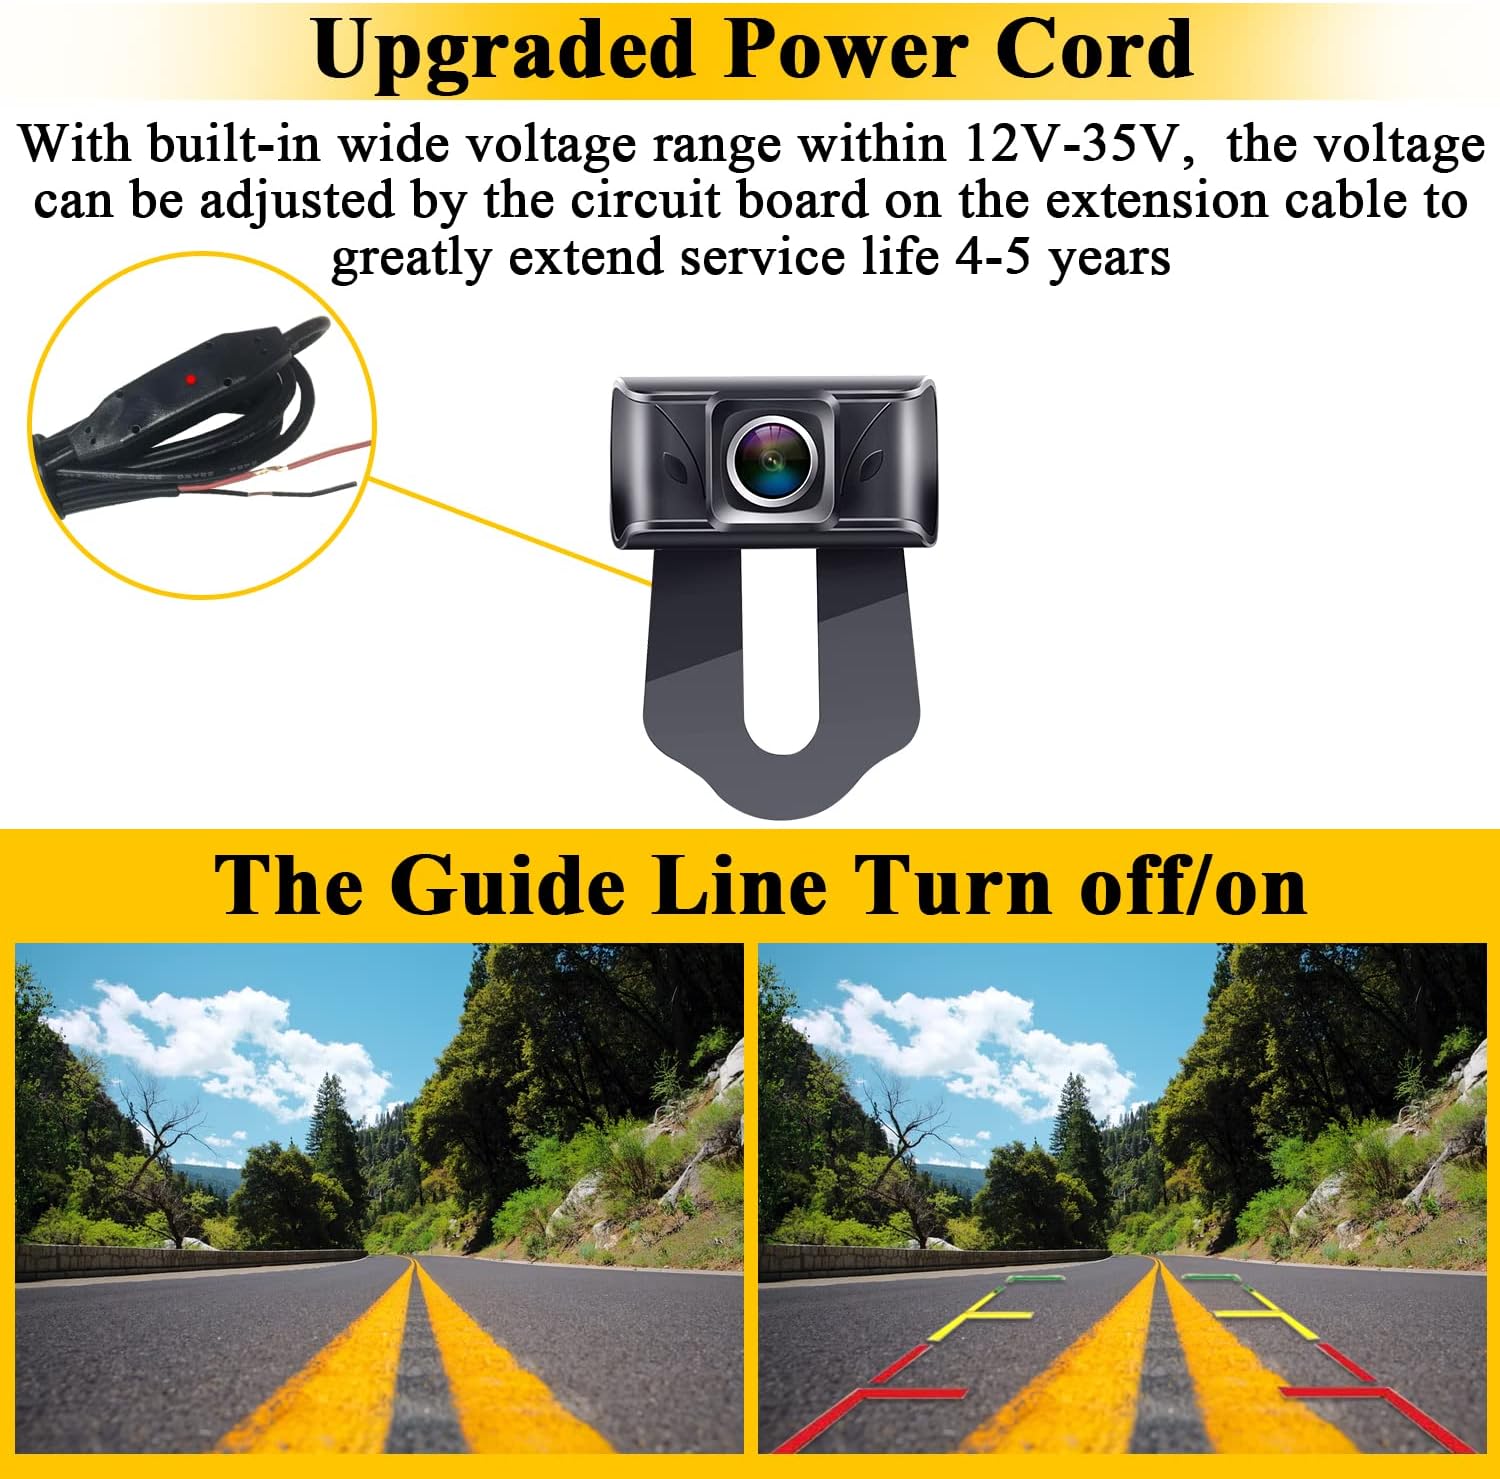
Image: Illustration of the upgraded power cord with a wide voltage range (12V-35V) and a visual representation of how parking guide lines can be toggled on or off on the monitor display.
The upgraded power cord supports a wide voltage range (12V-35V) and has a built-in circuit board for voltage adjustment, enhancing durability.
5. Operating Instructions
5.1 Powering On/Off
- The monitor will automatically power on when it receives power (e.g., when the vehicle is started or reverse gear is engaged, depending on wiring).
- To manually turn off the monitor, press and hold the power button (usually labeled "OK" or a power icon) on the monitor.
5.2 Basic Monitor Functions
The monitor features touch keys for easy navigation:
- '+' / '-' Buttons: Adjust brightness, contrast, or navigate menu options.
- 'M' Button: Access the menu for settings adjustments.
- 'OK' Button: Confirm selections or toggle power.
5.3 Adjusting Parking Guide Lines
The system allows for customization of the parking guide lines:

Image: Four panels demonstrating various adjustments for parking guide lines: turning them on/off, adjusting their width, moving them left or right, and moving them up or down.
- Access the menu using the 'M' button.
- Navigate to the "Guide Line" or "Parking Line" settings.
- You can toggle the guide lines on/off, adjust their width, and move them horizontally (left/right) or vertically (up/down) to match your vehicle's dimensions and preferences.
- Confirm your settings with the 'OK' button.
5.4 Dual Camera View (If Second Camera Installed)
If a second camera is installed, the 5-inch monitor supports split-screen viewing.

Image: Three monitor displays showing different camera views: Front View, Front View/Rear View (split screen), and Rear View. This illustrates the system's capability to support and display feeds from two cameras simultaneously.
You can switch between single camera view (front or rear) or a split-screen view displaying both cameras simultaneously. Refer to the monitor's menu for options to switch camera inputs or activate split-screen mode.
6. Maintenance
- Cleaning the Camera Lens: Regularly clean the camera lens with a soft, damp cloth to ensure a clear image. Avoid abrasive cleaners.
- Cleaning the Monitor Screen: Use a soft, lint-free cloth to clean the monitor screen. For stubborn smudges, a screen cleaner designed for electronics can be used.
- Cable Inspection: Periodically check all cables and connections for signs of wear, damage, or loose connections. Ensure all wiring is securely insulated.
- Waterproofing: The camera is IP69 waterproof. However, avoid directing high-pressure water jets directly at the camera for extended periods.
7. Troubleshooting
7.1 No Image on Monitor
- Check Power: Ensure both the monitor and camera are receiving power. Verify the cigarette lighter adapter is firmly plugged in and the camera's power connection is secure.
- Check Connections: Confirm all power cables are correctly connected.
- Signal Interference: While the system uses digital wireless technology to minimize interference, strong electromagnetic fields nearby can sometimes affect the signal. Try repositioning the monitor or camera slightly if possible.
- Pairing: If the system was recently installed or disconnected, ensure the camera and monitor are properly paired. Refer to the pairing instructions in the full manual (if applicable).
7.2 Image is Blurry or Distorted
- Clean Lens: Clean the camera lens for any dirt, dust, or moisture.
- Check Resolution Settings: Ensure the monitor's display settings are optimized for 1080P resolution.
- Signal Strength: Weak signal can cause distortion. Ensure the transmission distance is within the specified range (up to 30m/98ft for vehicles, up to 180ft in open areas).

Image: Diagram illustrating the anti-interference wireless technology, stable digital signal, quick pairing, and high-quality picture. It also shows the transmission distance (up to 33ft in vehicles, 180ft in open areas) and compatibility with various vehicle types like cars, pickups, RVs, vans, trucks, and trailers.
7.3 Guide Lines Not Displaying or Incorrect
- Enable Guide Lines: Check the monitor's menu settings to ensure parking guide lines are enabled.
- Adjust Settings: Use the guide line adjustment options (width, height, position) to calibrate them correctly for your vehicle.
8. Specifications
| Feature | Detail |
|---|---|
| Brand | AMTIFO |
| Model Number | A6 |
| Screen Size | 5 Inches |
| Effective Fixed Resolution | 1920 x 1080 (2 Megapixels) |
| Installation Type | Aftermarket |
| Operating Voltage | 9V - 35V DC (Monitor), 9V - 14V DC (Camera) |
| Optical Sensor Technology | CMOS |
| Lens Type | Wide Angle |
| Actual View Angle | 150 Degrees |
| Field of View | 150 Degrees |
| Waterproof Rating | IP69k (Camera) |
| Signal Format | PAL/NTSC Compatible |
| UPC | 783103856117 |
9. Warranty and Support
AMTIFO provides a 2-year warranty for this product. If you encounter any issues or require technical assistance, please contact AMTIFO customer support. Details for contacting support can typically be found on the AMTIFO website or on the packaging.
For further assistance, please visit the official AMTIFO website or refer to the contact information provided with your purchase.
Ask a question about this manual
Ask about setup, troubleshooting, compatibility, parts, safety, or missing instructions. Manuals+ will review the question and use this page’s manual context to help answer it.