
1. Introduction
This manual provides detailed instructions for the safe and efficient operation of your DREAMVAN 8-in-1 Heat Press Machine. Please read thoroughly before use to ensure proper setup, operation, and maintenance. This versatile machine is designed for heat transfer onto various items including T-shirts, hats, caps, mugs, and plates.
2. Safety Instructions
Your safety is paramount. Please adhere to the following guidelines:
- The machine features 2 layers of thermal insulation cotton, resulting in a surface temperature of approximately 50-70°C when the working temperature reaches 210°C. This design enhances safety by reducing the risk of burns compared to traditional machines (70-100°C surface temperature).
- An overheat protection function is integrated to automatically power off the machine for heat dissipation, ensuring user safety.
- The 360° swing-away design allows the heating element to be moved aside, minimizing accidental contact with the hot platen.
- Always use caution when handling hot components. Wear heat-resistant gloves (included) if necessary.
- Ensure the machine is placed on a stable, flat, and heat-resistant surface.
- Keep children and pets away from the operating machine.
- Do not touch hot surfaces directly.
- Ensure proper ventilation during operation.
3. Product Components
Your DREAMVAN 8-in-1 Heat Press Machine includes the following components:
- Main Heat Press Unit with Teflon-coated platen (12"x15")
- Mug Press Attachments (11oz, 9oz, 12oz, and 16cm lengthened heating pad)
- Cap Heating Pad
- Plate Heating Plates (5" & 6")
- Power Cord
- User Manual
- Heat-resistant Gloves (1 pair)
- Sublimation Paper (50 Pcs)
- Heat Tape

Image: All components included with the DREAMVAN 8-in-1 Heat Press Machine.
4. Setup
Follow these steps to set up your heat press machine:
- Unpack all components and ensure they are intact.
- Place the main heat press unit on a stable, flat, and heat-resistant surface.
- Connect the power cord to the machine and a grounded electrical outlet (110V).
- Familiarize yourself with the digital control panel and its functions.
- For specific attachments (mug, cap, plate), ensure they are securely installed before use. The reinforced aluminum alloy rotating shaft allows for smooth operation and high durability.
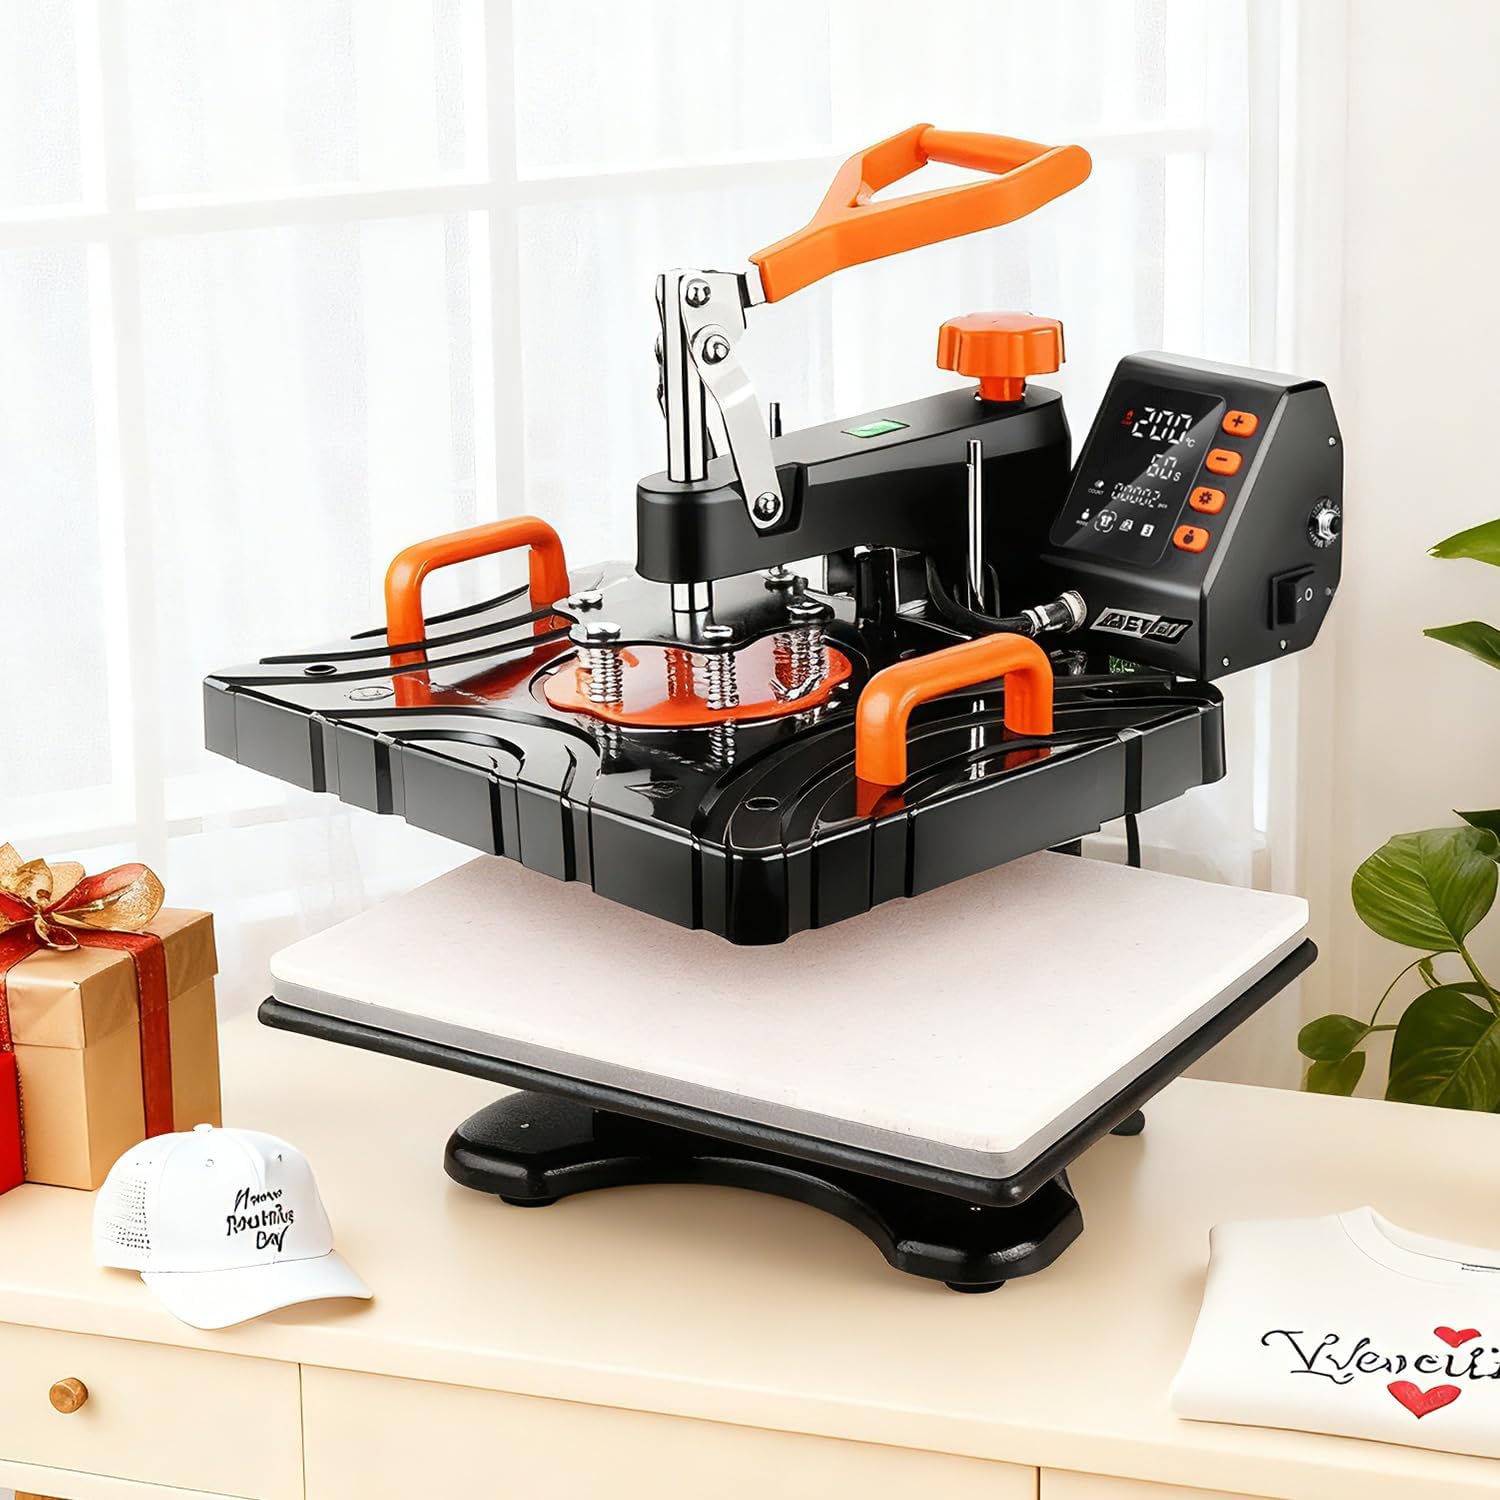
Image: The main heat press unit set up on a workstation.
5. Operating Instructions
Digital Control Panel
The digital control panel allows precise setting of temperature and time for optimal transfer results:
- Power On/Off: Use the red switch on the side of the control box.
- Temperature Setting: Press the "SET" button once. Use "+" or "-" to adjust the desired temperature (0-450°F / 0-232°C). Press "SET" again to confirm.
- Time Setting: Press the "SET" button twice. Use "+" or "-" to adjust the desired time (0-999 seconds). Press "SET" again to confirm.
- Fahrenheit/Celsius Switch: Press the (+/-) buttons simultaneously to switch between °C and °F.
- Start/Pause: Use the "START" button to begin the heating process or timer countdown.
- Transfer Modes: The unit is equipped with 3 transfer modes for quick start.
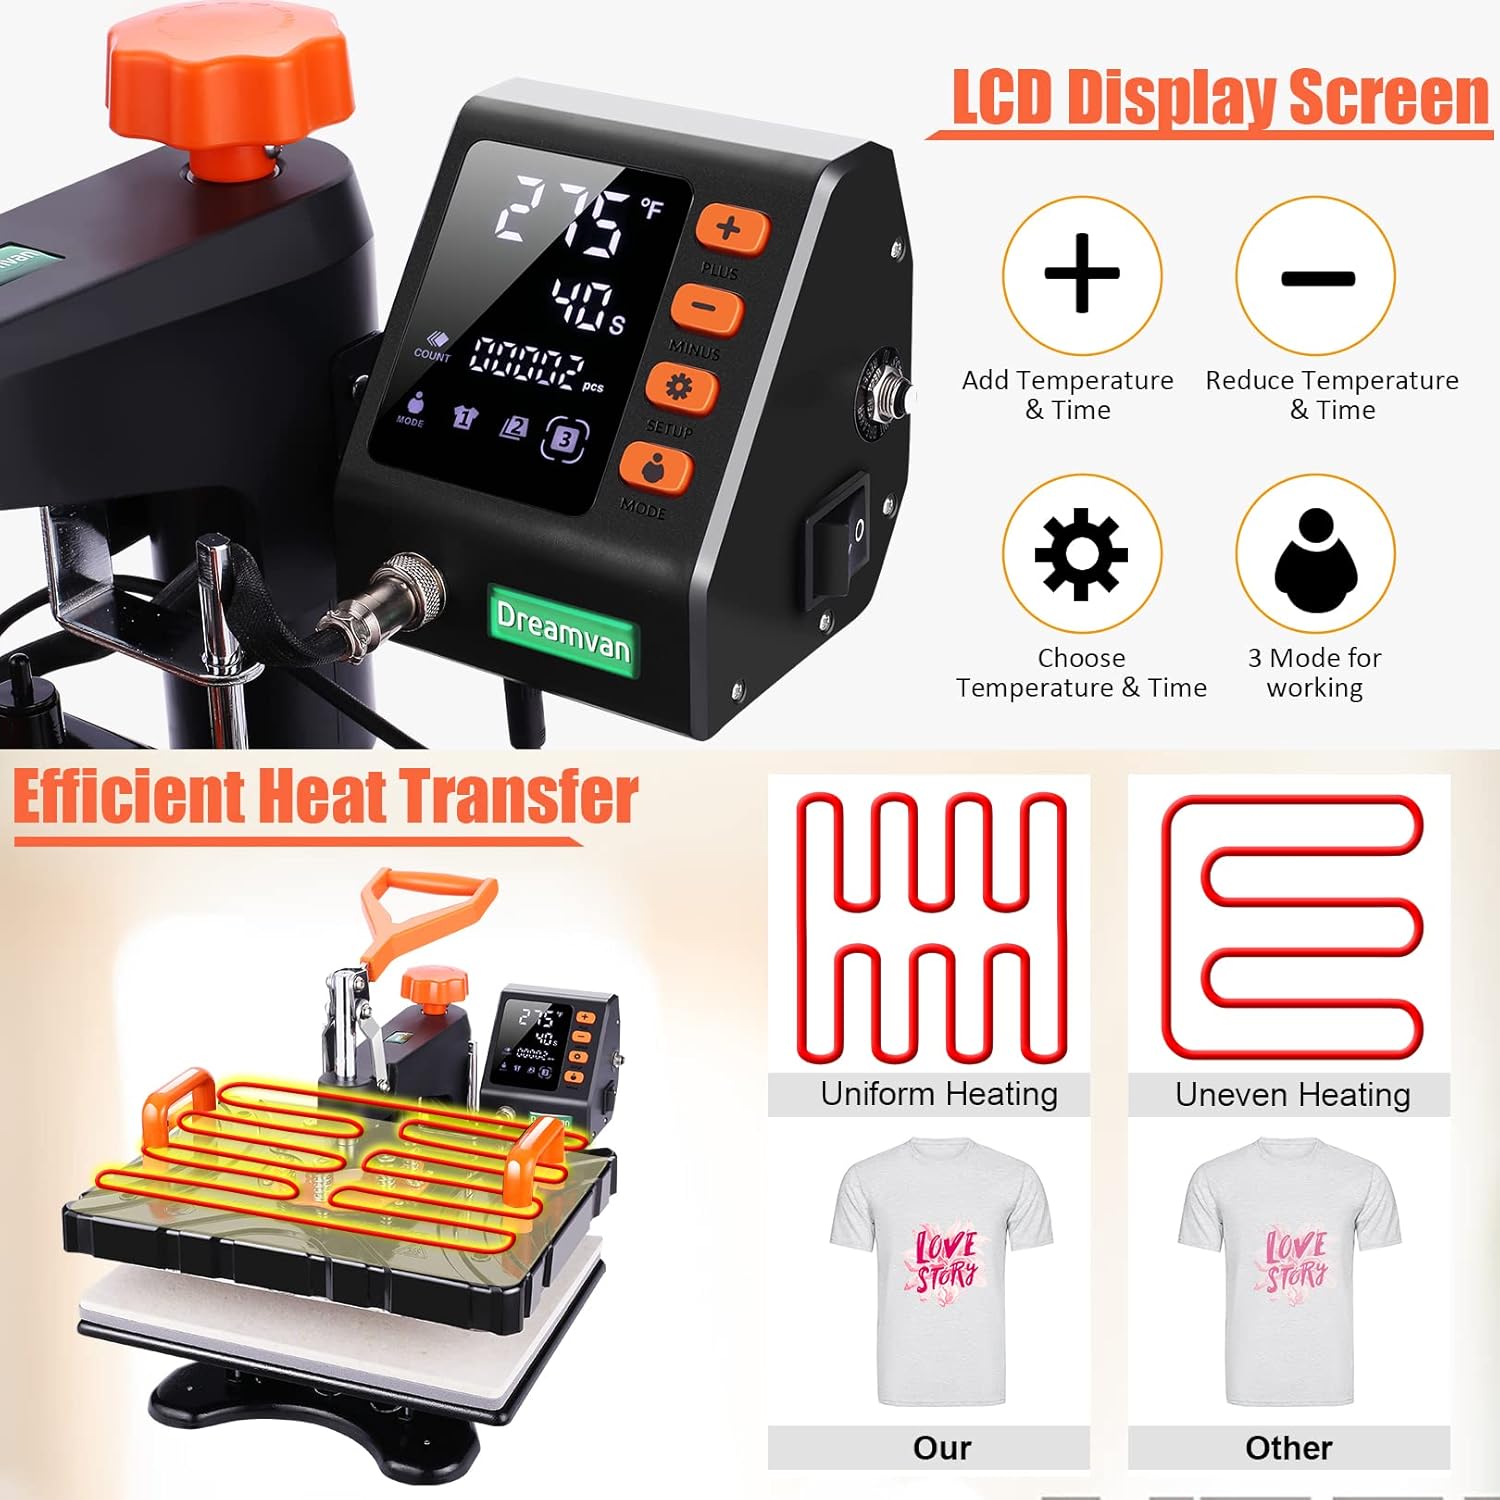
Image: Digital control panel for setting temperature and time.
General Pressing Procedure (T-Shirts)
This procedure applies to the main platen for items like T-shirts:
- Power on the machine and set the desired temperature and time according to your transfer material's requirements.
- Once the set temperature is reached, the machine will beep.
- Place your garment (e.g., T-shirt) onto the lower platen, ensuring it is flat and centered.
- Position your transfer design onto the garment.
- Swing the upper platen over the garment using the 360° rotation feature.
- Lower the handle to apply pressure. The machine will automatically start the timer.
- Once the timer reaches zero, an audible alarm will sound. Lift the handle and swing the upper platen away.
- Carefully remove the transferred item.
Video: Operation Manual of DREAMVAN 8 in 1 Heat Press Combo. This video demonstrates the general operation of the heat press, including setting temperature and time, and pressing a t-shirt.

Image: Main steps for heat pressing a design onto a t-shirt.
Using Different Attachments
The DREAMVAN 8-in-1 machine allows for easy interchangeability of heating elements for various items. Always ensure the machine is powered off and cooled before changing attachments.
Cap Press
To use the cap press, replace the flat platen with the cap attachment. Secure the cap onto the curved platen and apply heat as per your design's specifications.
Mug Press
Connect the desired mug press attachment to the main unit. Place the mug with the transfer design into the mug press, ensuring even contact. Set the appropriate temperature and time.
Plate Press
Replace the flat platen with the plate attachment. Secure the plate with the transfer design onto the platen. Apply heat and pressure.
Video: Heat Press Combo for T Shirts Hat Mug Plate Bags. This video demonstrates the use of various attachments for different items.
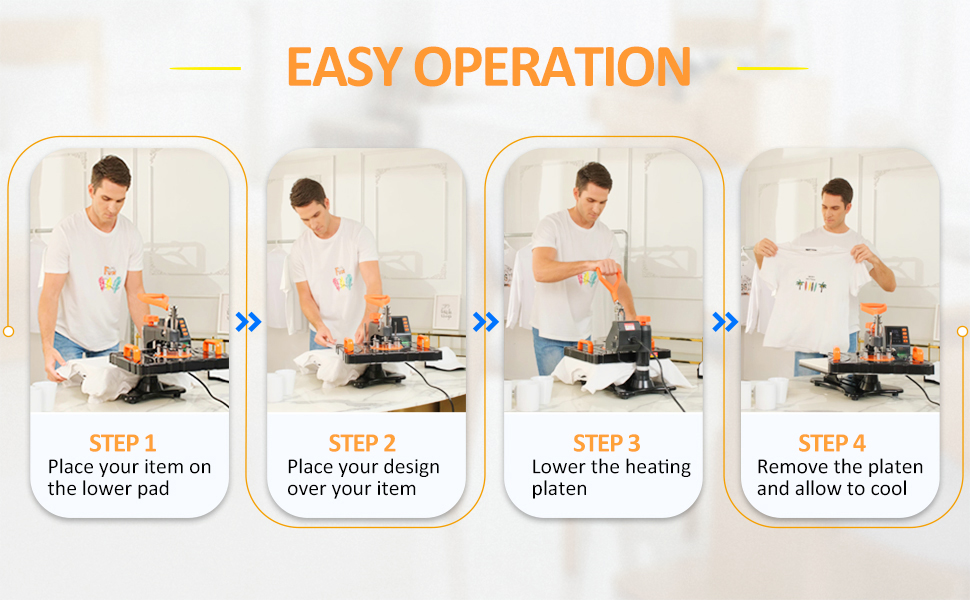
Image: Examples of items that can be customized using the different attachments.
6. Maintenance
Proper maintenance ensures the longevity and optimal performance of your heat press machine:
- Regularly clean the Teflon-coated platen with a soft, damp cloth after it has cooled down. Avoid abrasive cleaners.
- Inspect all connections and moving parts periodically for wear and tear.
- Store the machine in a dry, dust-free environment when not in use.
- The reinforced aluminum alloy rotating shaft is designed for high durability and increased corrosion resistance, requiring minimal maintenance.
7. Troubleshooting
If you encounter any issues, refer to the following common troubleshooting tips:
- Uneven Heating: The double heating tube design ensures more even heat distribution. If uneven heating occurs, check the pressure settings and ensure the item is flat on the platen.
- Machine Not Heating: Verify the power connection and ensure the power switch is on. Check temperature settings on the digital control panel.
- Poor Transfer Quality: Ensure correct temperature and time settings for your specific transfer material. Verify even pressure application. Ensure the garment is free of moisture (pre-press if necessary).
- Overheat Protection Activated: If the machine powers off unexpectedly, allow it to cool down. The overheat protection is a safety feature. If the issue persists, contact customer support.
8. Specifications
- Upper Temperature Rating: 450 Degrees Fahrenheit (232°C)
- Voltage: 110 Volts
- Wattage: 850 watts
- Product Dimensions: 15"L x 12"W x 18"H
- Platen Size: 12"x15"
- Item Weight: 48.5 Pounds
- Material: Aluminum, Ceramic, Metal, Vinyl
- Color: Orange
- Timer Control: 0 - 999 seconds
- Rotation: 360 Degree Swing Away

Image: Product dimensions of the DREAMVAN Heat Press Machine.
9. Warranty and Support
The DREAMVAN Heat Press Machine comes with a 1-year warranty.
For any problems or questions regarding your product, please feel free to contact customer support. Our after-sales service staff will reply to your message within 24 hours.
