
1. Overview
The BOYO Vision VTL422CLS is a bar-type, short-length license plate camera designed to enhance rear visibility for your vehicle. It features a high-sensitivity 1/4-inch DSP color CMOS sensor with a wide 170° viewing angle, providing clear images for safe maneuvering. The camera includes 3-watt LEDs for improved low-light performance, ensuring visibility even in challenging conditions.
Key Features:
- Short-length license plate camera design for discreet installation.
- High-sensitivity 1/4-inch color CMOS PC7080 image sensor (NTSC).
- Wide 170° viewing angle for comprehensive rear coverage.
- 640 x 480 resolution with 600 TV lines for clear video output.
- Integrated 3-watt LEDs for enhanced low-light visibility.
- Weatherproof design for reliable performance in various conditions.

This image displays the front of the BOYO Vision VTL422CLS camera, highlighting its compact design and integrated camera lens.
2. What's in the Box
The BOYO Vision VTL422CLS package includes all necessary components for installation and operation:
- Camera unit with integrated license plate mount
- Video extension cable (RCA)
- Power cable with trigger wire
- Mounting screws
- Instruction manual
- Warranty card
- Registration card

This image shows the rear of the camera unit, detailing the mounting points and cable connections.
Unboxing and Contents Overview Video
This video provides a detailed unboxing and overview of the BOYO Vision VTL422CLS camera, including all components and accessories found in the package.
3. Setup & Installation
Before permanent installation, it is highly recommended to perform a bench test to ensure all components are functioning correctly and meet your expectations. This simplifies troubleshooting if any issues arise after installation.
3.1. Bench Test Procedure
A bench test allows you to verify the camera's functionality, video output, and LED operation before routing cables through your vehicle. You will need a 12V DC power source and a compatible monitor with an RCA input.
- Connect Camera to Extension Harness: Connect the camera's pigtail connector to the video extension harness. Ensure the connectors are aligned and firmly pressed together.
- Connect RCA to Monitor's Camera Input: Connect the male RCA connector from the video extension cable to the female RCA camera input on your monitor.
- Connect Red Trigger Wire to Monitor's Trigger Input: Connect the red trigger wire, typically found at the base of the RCA jack on the extension cable, to the monitor's rear camera trigger input. This wire signals the monitor to switch to the camera view.
- Connect Black Wire to 12V Negative (Ground): Connect the black power wire from the camera's harness to the 12V negative (ground) terminal of your power source.
- Connect Red Wire to 12V Positive (Simulate Reverse): Connect the red power wire from the camera's harness to the 12V positive terminal of your power source. This simulates the camera receiving power when the vehicle is in reverse.
- Verify Operation: The camera should power on, and the monitor should display the camera's view. If your camera has LEDs, cover the light sensor (if applicable) to check if they activate in low light.
Bench Test and Wiring Diagram Video
This video demonstrates the bench testing procedure and provides a detailed wiring diagram for the VTL17 series, which shares similar connection principles with the VTL422CLS.
3.2. Physical Installation
The VTL422CLS is designed for a bar-type license plate mount, offering a concealed and integrated look.
- Remove License Plate: Carefully remove your vehicle's rear license plate.
- Position Camera: Place the camera unit behind your license plate, aligning the mounting holes of the camera bracket with the license plate holes.
- Secure Camera: Use the provided mounting screws to secure the camera and license plate to your vehicle. Ensure the camera is centered and positioned to provide the best possible view.
- Route Cables: Carefully route the camera's video and power cables into the vehicle's interior. This may involve drilling a small hole if one is not already present. Ensure cables are protected from sharp edges and heat.
- Connect to Vehicle Wiring: Connect the camera's power wires (red to 12V positive from reverse light, black to ground) and the video extension cable to your monitor's input. Refer to your vehicle's wiring diagram for specific reverse light and ground locations.
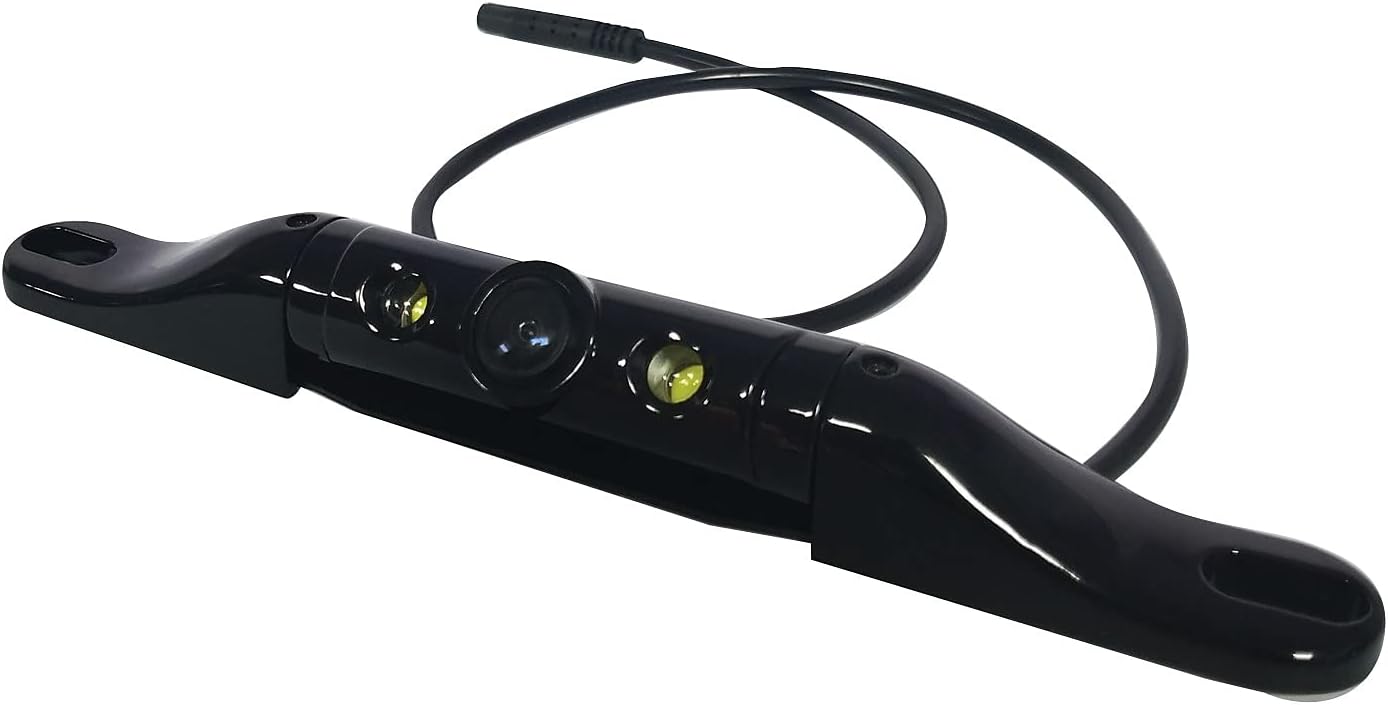
This image provides an angled perspective of the camera, showing its discreet placement within the license plate frame.
4. Operating Instructions
Once installed and wired correctly, the BOYO Vision VTL422CLS camera operates automatically when your vehicle is shifted into reverse.
- Automatic Activation: When you engage reverse gear, the camera will automatically send a video signal to your connected monitor, displaying the rear view.
- Wide Viewing Angle: The 170° wide viewing angle provides a broad perspective of the area behind your vehicle, minimizing blind spots.
- Low-Light Vision: The integrated 3-watt LEDs activate automatically in low-light conditions, providing clear visibility during nighttime or in dimly lit areas.
- Parking Guidelines: The camera displays static parking guidelines on the screen to assist with parking and maneuvering. These lines help estimate distance and trajectory.

This image visually represents the expansive 170-degree field of view provided by the camera, crucial for comprehensive rear visibility.

This image shows how the parking guidelines appear on your monitor, assisting with accurate parking and obstacle avoidance.
5. Maintenance
To ensure the longevity and optimal performance of your BOYO Vision VTL422CLS camera, follow these maintenance guidelines:
- Cleaning the Lens: Regularly clean the camera lens with a soft, damp cloth to remove dirt, dust, or water spots that may obstruct the view. Avoid abrasive cleaners.
- Cable Inspection: Periodically check all cables and connections for any signs of wear, damage, or corrosion. Ensure they are securely fastened.
- Weatherproof Design: The camera is designed to be weatherproof, but extreme conditions or direct high-pressure water jets should be avoided to prevent potential damage.
- Avoid Harsh Chemicals: Do not use harsh chemicals or solvents on the camera body or lens, as this can damage the materials and coatings.

This image illustrates the camera's weatherproof construction, designed to withstand various environmental conditions.

This image highlights the camera's resistance to corrosion, ensuring durability and a longer lifespan.
6. Troubleshooting
If you encounter issues with your BOYO Vision VTL422CLS camera, refer to the following common problems and solutions:
| Problem | Possible Cause | Solution |
|---|---|---|
| No image on monitor | Loose video connection, no power to camera, monitor not triggered. | Check all RCA and power connections. Ensure the red trigger wire is connected to the monitor's trigger input and receiving power from the reverse light. Verify 12V power to the camera. |
| Distorted or flickering image | Poor video connection, electrical interference, faulty cable. | Ensure RCA connections are secure. Check for proper grounding. Reroute cables away from high-voltage wires if possible. Perform a bench test to isolate the issue. |
| Night vision (LEDs) not working | Insufficient power to LEDs, faulty light sensor, LEDs damaged. | Verify power connections to the camera. Ensure the light sensor is not obstructed. Test in a completely dark environment. |
| Parking lines incorrect or missing | Camera angle incorrect, monitor settings. | Ensure the camera is mounted horizontally and not tilted excessively. Check your monitor's settings for parking line options. |
If the problem persists after attempting these solutions, please contact BOYO VISION customer support for further assistance.
7. Specifications
| Feature | Detail |
|---|---|
| Model Number | VTL422CLS |
| Image Sensor | High-sensitivity 1/4 inch Color CMOS PC7080 |
| Video System | NTSC |
| Resolution | 640 x 480 pixels |
| TV Lines | 600 TVL |
| Viewing Angle | 170 Degrees (Real Angle of View) |
| Lens Type | Wide Angle |
| Illumination | 3-watt LEDs for low-light vision |
| Waterproof Rating | IP68 (from video, implied by weatherproof description) |
| Connectivity Technology | Radio Frequency (for signal transmission) |
| Connector Type | RCA |
| Installation Type | Surface Mount (License Plate) |
| Product Dimensions | 7.5 x 0.75 x 1 inches |
| Item Weight | 6.9 ounces |
8. Warranty & Support
8.1. Limited Warranty
The BOYO Vision VTL422CLS camera comes with a 1-Year Limited Warranty. Please refer to the included warranty card for detailed terms and conditions regarding coverage, duration, and claims procedures. Retain your proof of purchase for warranty validation.
8.2. Customer Support
For technical assistance, installation questions, or warranty claims, please contact BOYO VISION customer support:
- Website: Visit the official BOYO VISION website for FAQs and support resources.
- Email: Refer to your product manual or warranty card for specific email contact information.
- Phone: Refer to your product manual or warranty card for specific phone contact information.
Please have your product model number (VTL422CLS) and proof of purchase ready when contacting support.

