1. Introduction and Safety Information
Thank you for choosing the NETTA 10000 BTU Portable Air Conditioner. This manual provides essential information for the safe and efficient operation of your appliance. Please read it thoroughly before use and retain it for future reference.
Important Safety Instructions:
- Always operate the unit on a flat, stable surface.
- Ensure the power supply matches the voltage specified on the rating label.
- Do not block air inlets or outlets. Maintain at least 30cm clearance around the unit.
- Do not insert objects into the air vents.
- Unplug the unit before cleaning or maintenance.
- Keep the unit away from heat sources, direct sunlight, and water.
- This appliance uses R290 refrigerant, which is flammable. Handle with care and ensure proper ventilation.
2. Product Overview
The NETTA 10000 BTU Portable Air Conditioner is a versatile 3-in-1 unit offering cooling, fan, and dehumidification functions. It is designed for efficient cooling in rooms up to 20 square meters (215 sq ft).
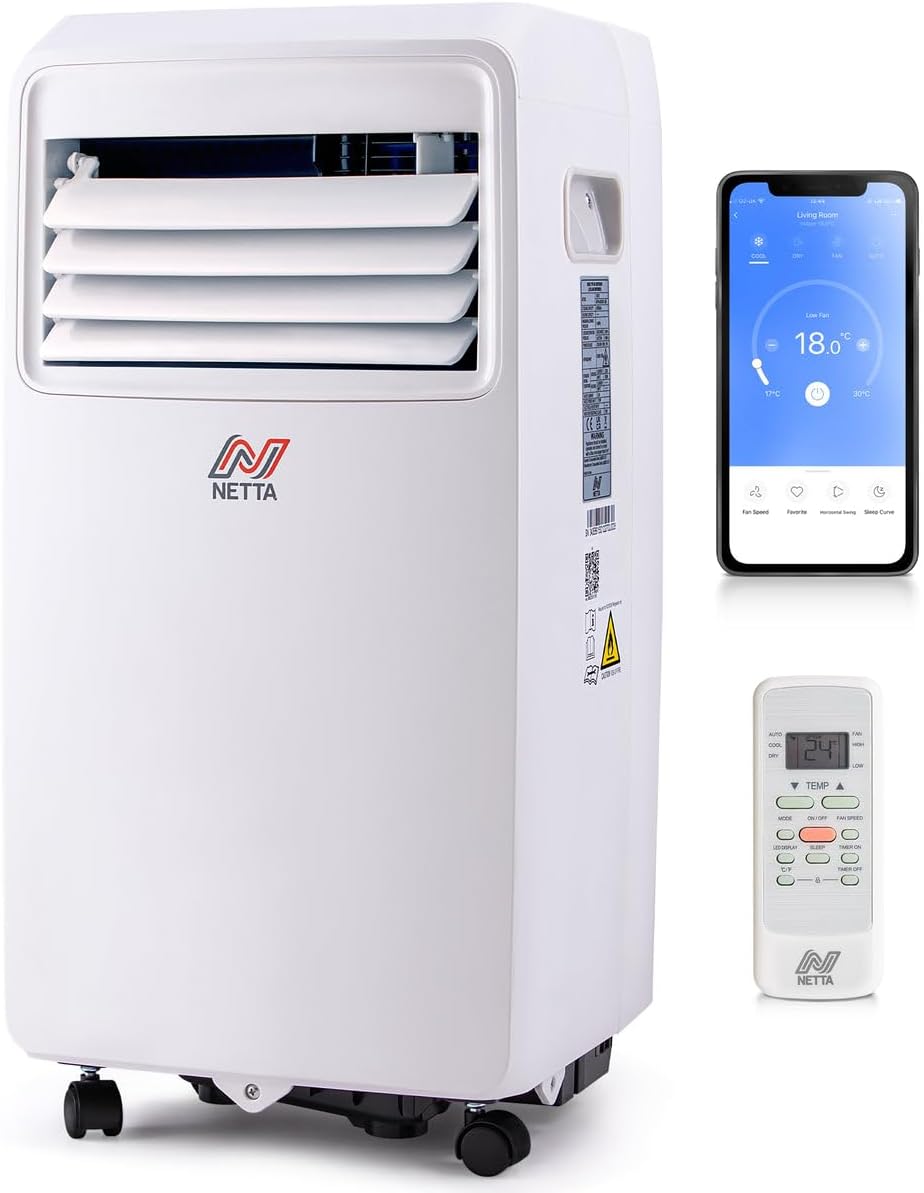
Image: The NETTA portable air conditioner shown with its remote control and a smartphone displaying the control app.
Key Features:
- Powerful Cooling: 10,000 BTU cooling capacity, effective for areas up to 20m², achieving temperatures as low as 16°C.
- Dehumidification: Extracts up to 24 liters of moisture per day.
- Multi-Speed Fan: Three fan speed options (High, Low, Sleep).
- 24-Hour Timer: Programmable timer for automatic operation.
- Smart Control: Wi-Fi enabled for control via the Smart Life app, compatible with Amazon Alexa and Google Home.
- Portability: Equipped with castor wheels for easy movement.
- Energy Efficient: Class A energy rating with R290 eco-friendly refrigerant.

Image: A visual representation of the unit's three operational modes: cooling, fan, and dehumidifier.
3. Setup and Installation
3.1 Unpacking
Carefully remove the air conditioner from its packaging. Check for any damage. Retain the packaging for future storage or transport.
3.2 Exhaust Hose Installation
The unit requires an exhaust hose to vent hot air outside. A 150cm hose kit is included.
- Attach the hose connector to one end of the exhaust hose.
- Attach the window kit adapter to the other end of the exhaust hose.
- Connect the hose connector to the exhaust outlet on the back of the air conditioner.
- Extend the exhaust hose and place the window kit adapter in a window opening, ensuring hot air is expelled outdoors.
3.3 Drainage Setup
For continuous dehumidification or cooling in high humidity, connect the continuous drainage pipe.
- Locate the continuous drainage outlet at the back of the unit.
- Connect the provided drainage hose to this outlet.
- Direct the other end of the hose to a suitable drain or container, ensuring it is lower than the unit's outlet for gravity drainage.
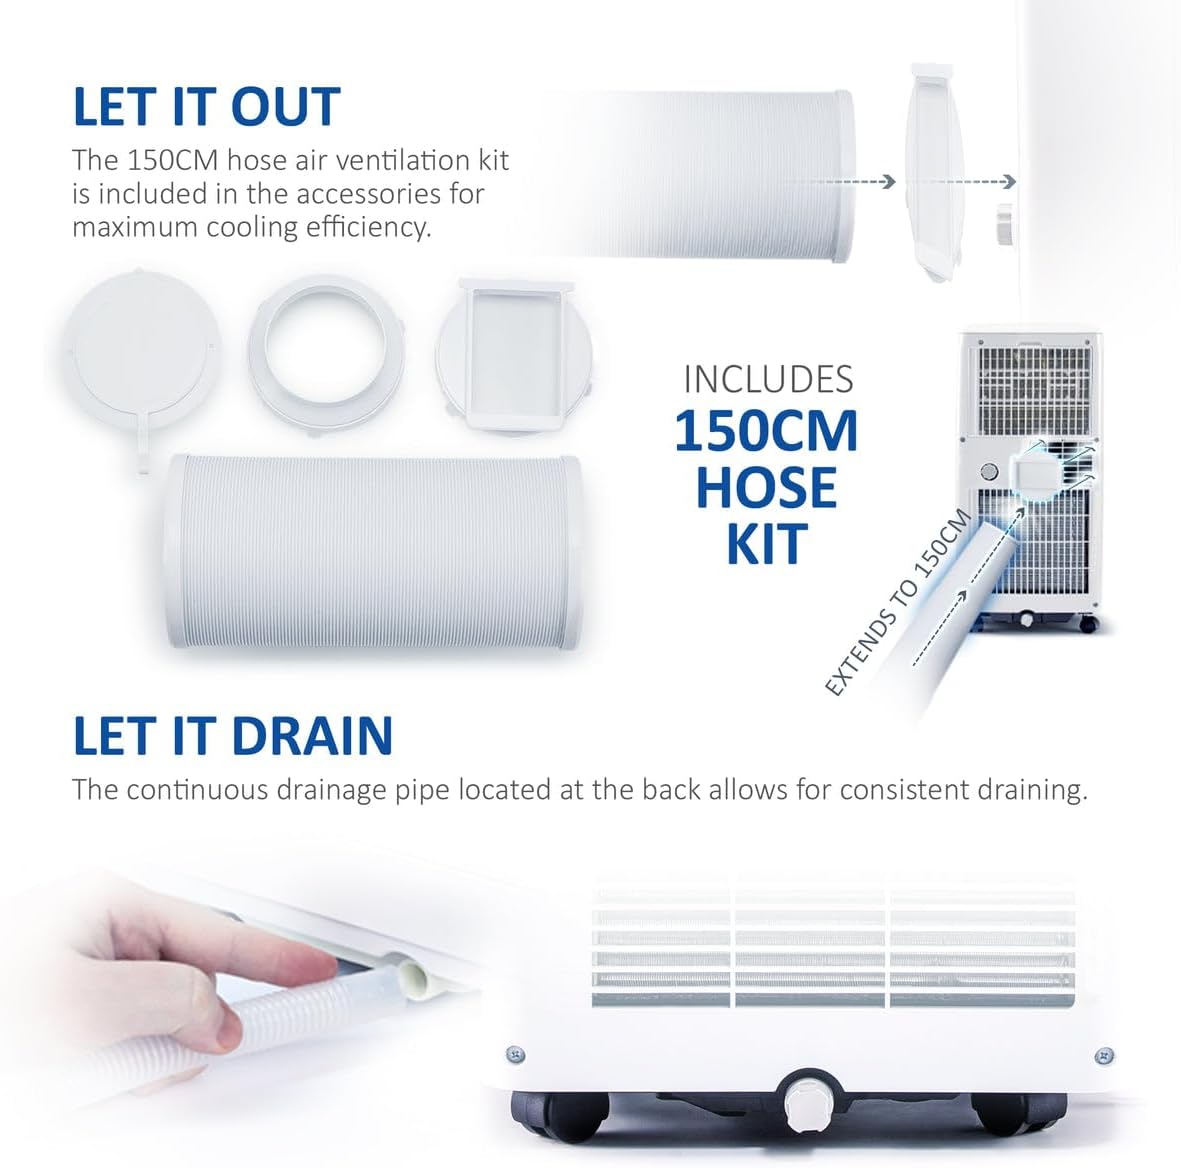
Image: The exhaust hose kit components and the continuous drainage pipe connection point on the unit.
3.4 Unit Placement
Position the air conditioner on a firm, level surface. Ensure there is adequate space around the unit for proper airflow. The integrated castor wheels allow for easy repositioning.
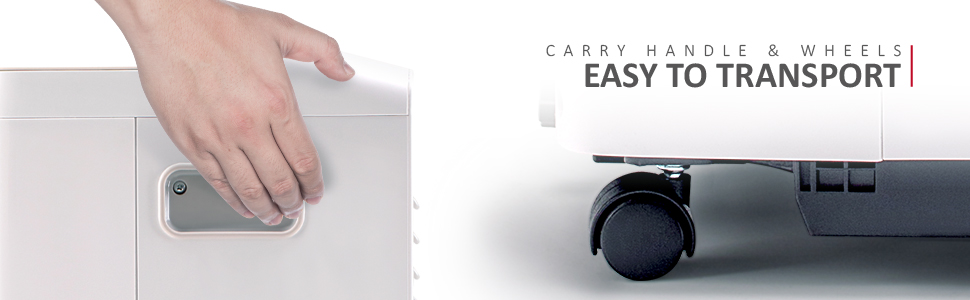
Image: Detail of the unit's carry handle and castor wheels, highlighting its portability.
4. Operating Instructions
4.1 Control Panel and Remote Control
The unit can be operated via the integrated LED control panel or the included remote control.

Image: The air conditioner, remote control, and smartphone app interface, demonstrating various control options including Wi-Fi.
4.2 Operating Modes
Press the 'Mode' button to cycle through the available functions:
- Cooling Mode: Sets the desired room temperature between 16°C and 32°C.
- Fan Mode: Operates as a fan with three speed settings (Low, Medium, High) without cooling.
- Dehumidifier Mode: Removes excess moisture from the air.
4.3 Temperature and Fan Speed Adjustment
- Use the 'Temperature Up' and 'Temperature Down' buttons to set the desired temperature in Cooling Mode.
- Use the 'Fan Speed' button to select Low, Medium, or High fan speed in Cooling or Fan Mode.
4.4 Timer Function
The 24-hour timer allows you to program the unit to turn on or off automatically.
- Press the 'Timer' button.
- Use the temperature adjustment buttons to set the desired delay in hours (1-24).
- The unit will turn on/off after the set time.

Image: The 24-hour timer feature, allowing scheduled operation for comfort day and night.
4.5 Wi-Fi and Smart App Control
Connect your air conditioner to the Smart Life app for remote control and advanced scheduling.
- Download the 'Smart Life' app from your smartphone's app store.
- Follow the in-app instructions to pair your device.
- Once connected, you can control temperature, modes, fan speed, and set schedules from your phone.
- The unit is also compatible with Amazon Alexa and Google Home for voice control (power and temperature settings only).
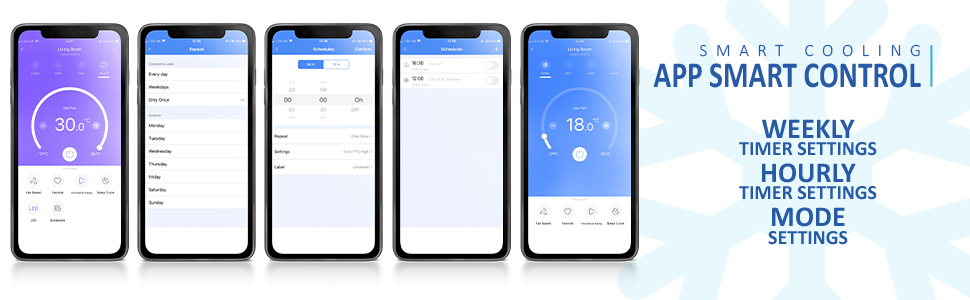
Image: Multiple screenshots of the Smart Life application, demonstrating its various control and scheduling features.
5. Maintenance
Regular maintenance ensures optimal performance and longevity of your air conditioner.
5.1 Cleaning the Air Filter
The air filter should be cleaned every two weeks or more frequently depending on usage.
- Unplug the air conditioner from the power outlet.
- Remove the filter from the back of the unit.
- Wash the filter with warm, soapy water. Rinse thoroughly and allow it to air dry completely before reinserting.
5.2 Draining Accumulated Water
When the internal water tank is full, the unit will stop operating and display an error code. Drain the water as follows:
- Unplug the air conditioner.
- Place a shallow pan or tray under the drainage outlet.
- Remove the rubber stopper from the drainage outlet.
- Allow all water to drain out.
- Replace the rubber stopper firmly.
5.3 Storage
If storing the unit for an extended period:
- Ensure all water is drained from the unit.
- Clean the air filter.
- Run the unit in fan mode for a few hours to dry the interior.
- Store the unit upright in a dry, cool place, preferably in its original packaging.
6. Troubleshooting
Before contacting customer support, please refer to the following common issues and solutions:
| Problem | Possible Cause | Solution |
|---|---|---|
| Unit does not turn on | No power supply; Power cord not plugged in; Full water tank. | Check power connection; Plug in securely; Drain water tank. |
| Insufficient cooling | Windows/doors open; Exhaust hose not properly installed; Air filter dirty; Room size too large. | Close all openings; Ensure hose is sealed; Clean air filter; Verify room size is within unit's capacity. |
| Unit is noisy | Unit not on a level surface; Air filter dirty. | Place on a flat surface; Clean air filter. |
| Water leakage | Drain plug loose; Continuous drainage hose blocked or improperly connected. | Secure drain plug; Check and clear drainage hose. |
| Wi-Fi connection issues | Incorrect Wi-Fi password; Router too far; App not updated. | Verify password; Move unit closer to router; Update Smart Life app. |
7. Specifications
| Feature | Specification |
|---|---|
| Brand | NETTA |
| Model Number | 103973 |
| Cooling Capacity | 10,000 BTU |
| Dehumidification Capacity | Up to 24 L/day |
| Dimensions (L x W x H) | 33.5 x 32.5 x 70 cm |
| Weight | 25 kg |
| Noise Level | 48.2 dB |
| Energy Efficiency Class | A |
| Refrigerant | R290 |
| Voltage | 230V |
| Power | 1100 Watts |
| Special Features | Wi-Fi, Remote Control, 24-Hour Timer, Alexa & Google Assistant Compatible |

Image: A visual comparison of the unit's operating noise level (48.2dB) against common sounds.

Image: The unit highlighting its 'A' energy efficiency rating and use of R290 eco-friendly refrigerant.
8. Warranty and Support
For warranty information or technical support, please refer to the documentation provided with your purchase or contact NETTA customer service. Keep your proof of purchase for warranty claims.