1. Product Overview
The ECO-WORTHY PWM Solar Charge Controller is designed to manage the power flow from your solar panel to your battery, ensuring efficient charging and protecting the battery from overcharge and over-discharge. It features an LCD display for real-time monitoring and dual USB ports for charging small electronic devices.

Figure 1: Front view of the ECO-WORTHY PWM Solar Charge Controller, showing the LCD display, control buttons, USB ports, and terminal connections.
Key Features:
- PWM Charging: Efficiently charges various battery types.
- LCD Display: Provides clear indication of working status and operating data, including battery voltage, load state, panel state, and battery state.
- Multiple Protections: Integrated short-circuit protection, open-circuit protection, reverse protection, and overload protection.
- Dual USB Ports: Convenient for charging mobile phones and other USB-powered devices.
- Battery Compatibility: Suitable for lead-acid batteries (OPEN, AGM, GEL) and lithium batteries (Li-ion).

Figure 2: Visual representation of key features such as cell phone charging capability, real-time display, battery protection, and a single button switch for operation.
2. Setup and Installation
Proper wiring sequence is crucial for the safe and correct operation of the solar charge controller. Please follow the steps below carefully.
Wiring Sequence:
- Connect the Battery: First, connect the battery to the charge controller. Ensure correct polarity (positive to positive, negative to negative). The controller will automatically detect the battery voltage (12V or 24V). The LCD display and USB ports will only become active after the battery is connected.
- Connect the Solar Panel: Next, connect the solar panel to the charge controller. Ensure correct polarity.
- Connect the Load: Finally, connect your DC load (e.g., lights, fan) to the load terminals of the charge controller.
Important: The disassembly sequence is the reverse of the wiring order: first disconnect the load, then the solar panel, and finally the battery.

Figure 3: Diagram illustrating the correct wiring sequence: 1. Battery, 2. Solar Panel, 3. Load. Note that the display and USB ports activate only when the battery is connected.
Physical Characteristics:
- ABS Plastic Shell: Constructed from high-strength, anti-aging, corrosion-resistant ABS material for improved product life and safety.
- Large Gap Connection Port: Designed with large gap connection ports to increase the reliability of insulation performance and ease of installation.

Figure 4: Detailed view highlighting the LED display, durable ABS plastic shell, and the spacious connection terminals designed for secure wiring.
3. Operating Instructions
The controller features an intuitive LCD display and simple controls for monitoring and adjusting settings.
LCD Display Information:

Figure 5: The LCD screen displays critical information: 1. Battery Voltage, 2. Load State, 3. Panel State, and 4. Battery State.
- Battery Voltage: Displays the current voltage of the connected battery.
- Load State: Indicates whether a load is connected and active.
- Panel State: Shows the status of the solar panel connection and power input.
- Battery State: Provides an icon indicating the battery's charge level.
Battery Type Selection:
The charge regulator is compatible with various battery types. You can select the appropriate battery type (GEL, Lead-acid, AGM, LiFePO4) via the controller's settings. Refer to the specific instructions provided with your controller for detailed steps on changing battery type settings.
USB Charging Ports:
The controller is equipped with dual USB ports, allowing you to charge compatible electronic devices such as mobile phones. These ports are active when the battery is connected to the controller.
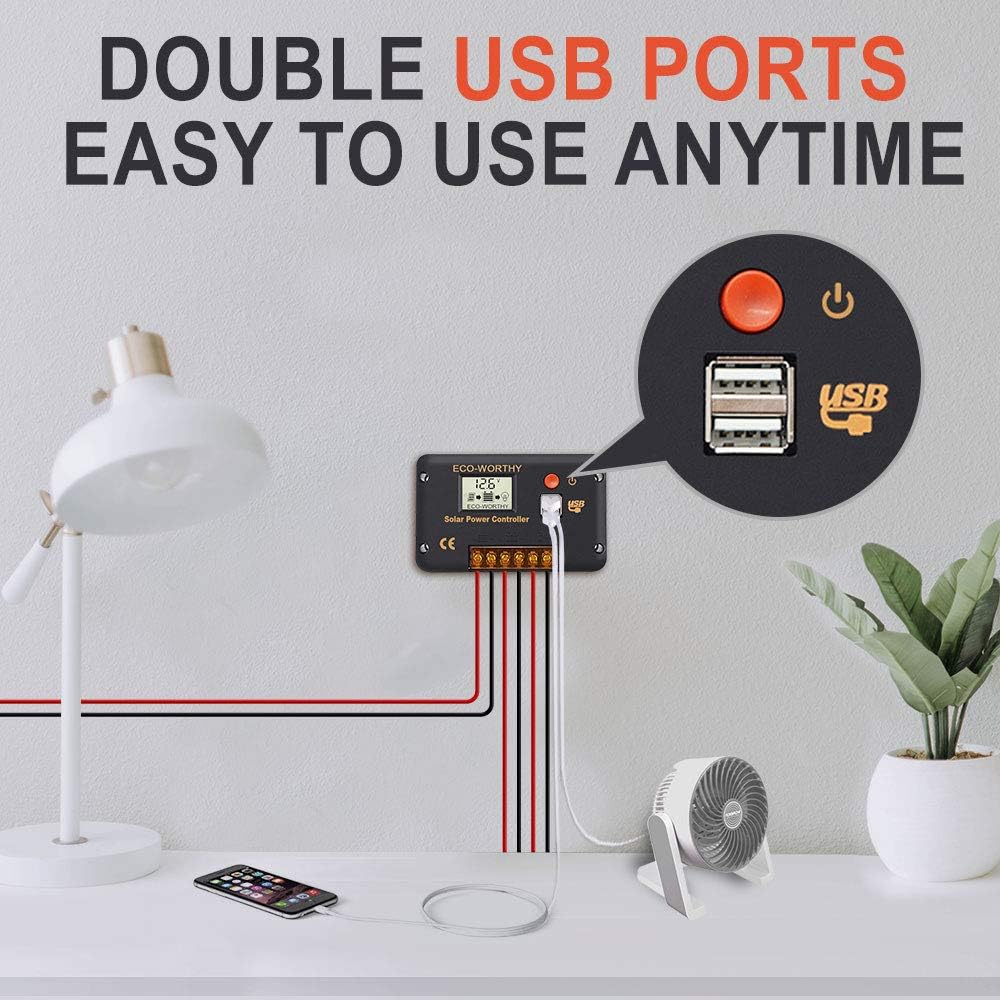
Figure 6: The dual USB ports provide convenient charging for various devices, such as a mobile phone or a small fan, anytime.
4. Maintenance
Regular maintenance ensures the longevity and optimal performance of your solar charge controller.
- Cleaning: Periodically clean the controller's exterior with a dry, soft cloth. Do not use abrasive cleaners or solvents.
- Connection Check: Annually inspect all wiring connections to ensure they are secure and free from corrosion. Loose connections can lead to power loss or overheating.
- Ventilation: Ensure the controller is installed in a well-ventilated area to prevent overheating. Do not block any ventilation openings.
- Environmental Conditions: Avoid exposing the controller to excessive moisture, dust, or extreme temperatures outside its operating range.
5. Troubleshooting
This section addresses common issues you might encounter with your solar charge controller.
| Problem | Possible Cause | Solution |
|---|---|---|
| No Display/USB Power | Battery not connected or reverse polarity. | Ensure the battery is connected first and with correct polarity. The display and USB ports only activate when the battery is connected. |
| Battery Not Charging | Solar panel not connected, insufficient sunlight, or reverse polarity on solar panel. | Check solar panel connections and polarity. Ensure adequate sunlight. Verify solar panel is functioning. |
| Load Not Working | Load not connected, overload, or short circuit. | Check load connections. Reduce load if it exceeds controller's capacity. Check for short circuits in the load wiring. The controller has built-in overload and short-circuit protection. |
| Overcharge/Over-discharge Protection Active | Battery voltage reached protection threshold. | This is normal operation. The controller protects the battery. Charging will resume when voltage drops, and load will reconnect when voltage rises. |
The controller features integrated protection against short circuits, open circuits, reverse polarity, and overloads. If an issue persists after checking these points, please contact customer support.
6. Specifications
| Parameter | Value |
|---|---|
| Brand | ECO-WORTHY |
| Model Number | FBA-L030302030001-1 |
| ASIN | B08MT56C79 |
| Color | Controller 20 A |
| Package Dimensions | 14 x 9.6 x 4.4 cm; 190 grams |
| Batteries Required | No (for the controller itself) |
| Manufacturer | ECO-WORTHY |
7. Warranty and Support
For warranty information or technical support, please contact ECO-WORTHY customer service through their official website or the retailer where the product was purchased. Please have your model number (FBA-L030302030001-1) and purchase details ready when contacting support.
You can visit the ECO-WORTHY store for more information: ECO-WORTHY Store