1. Introduction
This manual provides detailed instructions for the installation, operation, and maintenance of your lychee 7-inch Digital HD Car TFT LCD Monitor. Please read this manual thoroughly before using the product to ensure proper function and to prevent damage.
2. Safety Information
- Ensure the monitor is securely mounted and does not obstruct the driver's view or vehicle controls.
- Connect the power cable correctly to the positive and negative poles of the vehicle's power supply (DC 12-24V). Incorrect wiring can cause damage.
- Do not expose the monitor to extreme temperatures, direct sunlight for prolonged periods, or excessive moisture.
- Avoid disassembling or modifying the unit, as this will void the warranty and may cause electrical hazards.
- Clean the monitor screen with a soft, dry cloth. Do not use liquid cleaners or abrasive materials.
3. Package Contents
Verify that all items are present in the package:
- 7-inch TFT LCD Monitor
- Power Cable
- IR Remote Controller
- User Manual
- Mounting Stand
- Adhesive Pad
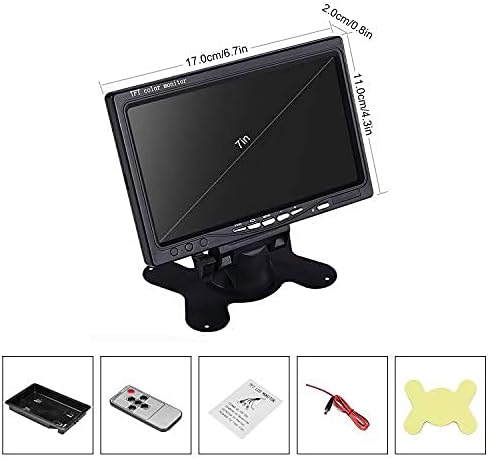
Figure 3.1: Included accessories and monitor dimensions.
4. Product Features
- 7-inch Digital TFT LCD Monitor: Compatible with PAL/NTSC systems.
- Dual Video Inputs: V1 for DVD players, TV boxes, or side cameras; V2 for backup cameras. V2 input has priority and switches automatically when a signal is detected.
- Image Rotation: Adjustable horizontally or vertically (left, right, upside down) to suit installation needs.
- High Definition Display: 1024 x 600 pixel resolution with color enhancement function for clearer images and reduced noise.
- Easy Operation: Includes an IR remote controller for convenient adjustments.
- Versatile Installation: Supports both standing and mounting options, suitable for various vehicles.
- Blue Screen Feature: Displays a blue screen when no input signal is detected.
5. Setup and Installation
5.1 Mounting the Monitor
The monitor offers two installation methods: standing on a flat surface or mounting. Choose the method that best suits your vehicle and ensures a clear, unobstructed view.
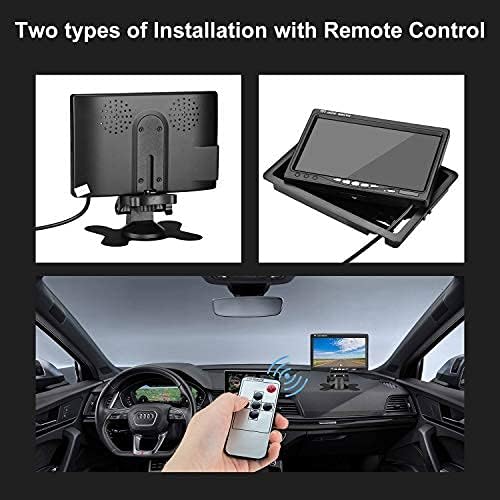
Figure 5.1: Examples of standing and mounted installations.
5.2 Wiring Connections
Follow the diagram below to connect the monitor to your vehicle's power supply and video sources. Ensure all connections are secure.
- Power Cable (DC 12-24V): Connect the red wire to ACC+ (positive) and the black wire to ACC- (negative) of your vehicle's power supply.
- AV1 Input (Yellow RCA): Connect to a DVD player, TV box, or side camera.
- AV2 Input (White RCA): Connect to a rear view camera. This input has priority.
- Trigger Wire (Green): Connect this wire to the positive pole of your vehicle's backup light. This enables automatic switching to AV2 when reversing.

Figure 5.2: Detailed wiring diagram for the monitor.

Figure 5.3: Monitor connector types.
6. Operating Instructions
6.1 Monitor Controls and Remote Control
The monitor can be operated using the buttons on the front panel or the included IR remote control.

Figure 6.1: Monitor and remote control button functions.
- Power Switch: Turns the monitor on or off.
- Video Switch / Video Select: Cycles between AV1 and AV2 inputs.
- Screen Switch / Mode Select: Adjusts display modes or aspect ratio.
- Menu: Accesses the on-screen display (OSD) menu for settings.
- Volume+/-: Adjusts the volume (if an audio input is connected, though this monitor primarily handles video).
6.2 Switching Video Inputs
The monitor supports two video inputs, V1 and V2. You can manually switch between them using the 'Video Switch' button on the monitor or 'Video Select' on the remote control. When a signal is detected on the V2 input (typically from a backup camera and triggered by the reverse light), the monitor will automatically switch to V2, overriding V1.
6.3 Image Rotation and Flip
The monitor allows you to rotate or flip the image horizontally or vertically. This feature is useful for adjusting the view based on camera orientation or mounting position.

Figure 6.2: Image rotation options.
6.4 Color Enhancement
The monitor features a color enhancement function designed to reduce image noise and improve picture clarity and detail.
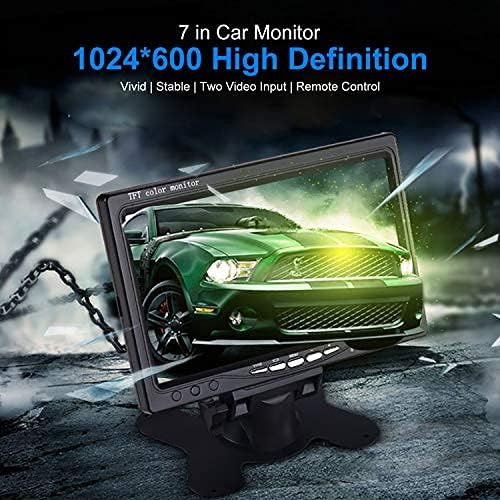
Figure 6.3: Effect of color enhancement.
7. Maintenance
- Cleaning: Use a soft, dry, lint-free cloth to clean the monitor screen and casing. Do not use chemical cleaners, solvents, or abrasive cloths, as these can damage the surface.
- Storage: When not in use for extended periods, store the monitor in a cool, dry place away from direct sunlight and extreme temperatures.
- Cable Inspection: Periodically check all cables for signs of wear or damage. Replace any damaged cables immediately to prevent electrical issues.
8. Troubleshooting
| Problem | Possible Cause | Solution |
|---|---|---|
| Monitor does not power on. | Incorrect power connection, blown fuse, or faulty power cable. | Check power cable connections (ACC+ and ACC-). Ensure the vehicle's power source is active. Inspect vehicle fuse. Try a different power source if available. |
| Blue screen displayed. | No video input signal. | Ensure the video source (camera, DVD player) is powered on and correctly connected to the AV1 or AV2 input. Check the video cable for damage. |
| No image from backup camera (AV2). | Backup camera not powered, trigger wire not connected, or faulty camera. | Verify the backup camera is receiving power. Ensure the green trigger wire is correctly connected to the positive pole of the backup light. Check camera functionality. |
| Image is upside down or mirrored. | Image flip/rotation setting is incorrect. | Access the monitor's menu or use the remote control to adjust the image rotation/flip settings. |
| Distorted or poor image quality. | Loose video connection, interference, or faulty video source. | Check all video cable connections for tightness. Ensure cables are not routed near strong electrical interference sources. Test with a different video source if possible. |
9. Specifications
| Feature | Specification |
|---|---|
| Screen Size | 7 Inches |
| Display Resolution | 1024 x 600 pixels |
| Product Dimensions | 6.85"L x 4.49"W x 0.79"H (17.4 x 11.4 x 2.0 cm) |
| Item Weight | 6.7 ounces (190 grams) |
| Voltage | 12 Volts |
| Compatible Devices | Cameras, DVD Players, TV Boxes |
| Installation Type | Surface Mount |
| Connector Type | RCA |
| Batteries Required | 1 Lithium Ion battery (for remote, included) |
10. Warranty Information
This lychee monitor comes with a 1-year manufacturer's warranty from the date of purchase. This warranty covers defects in materials and workmanship under normal use. It does not cover damage caused by improper installation, accident, misuse, abuse, neglect, unauthorized modification, or natural disasters.
Please retain your purchase receipt as proof of purchase for warranty claims.
11. Support
If you encounter any issues or have questions regarding your lychee 7-inch Digital HD Car TFT LCD Monitor that are not addressed in this manual, please contact the manufacturer's customer service for assistance. Refer to your product packaging or the seller's information for specific contact details.