1. Introduction
This manual provides essential information for the safe and efficient use of your VBESTLIFE MY6812 12V 120W DC Brush High Speed Motor. This motor is designed for applications such as electric scooters and other small electric vehicles. Please read this manual thoroughly before installation and operation to ensure proper function and longevity of the product.
2. Safety Information
Always observe the following safety precautions to prevent injury or damage to the motor and connected equipment:
- Ensure the power supply voltage matches the motor's rated voltage (12V DC).
- Disconnect power before performing any installation, maintenance, or troubleshooting.
- Avoid touching moving parts during operation.
- Do not expose the motor to water or excessive moisture.
- Ensure proper ventilation to prevent overheating.
- Use appropriate personal protective equipment (PPE) during installation and maintenance.
- Consult a qualified technician if you are unsure about any installation or wiring procedures.
3. Package Contents
Verify that all items are present in the package:
- 1 x VBESTLIFE MY6812 Brushed Motor

Figure 1: VBESTLIFE MY6812 Brushed Motor. This image shows the overall appearance of the motor with its integrated wires and shaft.
4. Specifications
Refer to the table below for detailed technical specifications of the MY6812 motor:
| Parameter | Value |
|---|---|
| Model | MY6812 |
| Material | Aluminum, Metal |
| Rated Power | 120W |
| Rated Voltage | 12V DC |
| Rated Current | <8.5A |
| Rated Speed | 2500±5% RPM |
| Maximum Speed | 3500±5% RPM |
| No-load Current | <0.9A |
| Rated Torque | 0.56 Nm |
| Transmission | Belt Pulley, Metal Shaft |
| Shaft Diameter | 8mm (Single Milling Slot 1mm) |
| Motor Length | 100mm (3.9 inches) |
| Motor Diameter | 68mm (2.7 inches) |
| Motor Fixed Holes Distance | 36mm (1.4 inches) |
| Efficiency | > 68% |
5. Setup & Installation
Proper installation is crucial for the motor's performance and safety. Follow these steps carefully:
5.1 Mounting the Motor
The motor features fixed holes for secure mounting. Ensure the mounting surface is stable and capable of supporting the motor's weight and operational forces.
- Identify the mounting holes on the motor's end plate. The distance between these holes is 36mm (1.4 inches).
- Align the motor with the desired mounting location on your application (e.g., scooter frame).
- Secure the motor using appropriate fasteners (screws, bolts, nuts) that fit the mounting holes. Ensure the motor is firmly attached to prevent vibration and movement during operation.

Figure 2: Motor showing mounting holes and shaft with sprocket. This view highlights the motor's mounting points and the output shaft for power transmission.
5.2 Electrical Connections
The motor operates on 12V DC. Correct wiring is essential to avoid damage.
- Identify Wires: The motor comes with two wires, typically red and black (or blue). The red wire is usually positive (+), and the black/blue wire is negative (-).
- Connect to Power Supply: Connect the motor's positive wire to the positive terminal of your 12V DC power source (e.g., battery). Connect the motor's negative wire to the negative terminal of the power source.
- Secure Connections: Ensure all electrical connections are secure and insulated to prevent short circuits. Use appropriate connectors or solder joints.
- Controller Integration (Optional): If using a motor controller, refer to the controller's manual for specific wiring instructions. The motor's wires will connect to the motor output terminals of the controller.
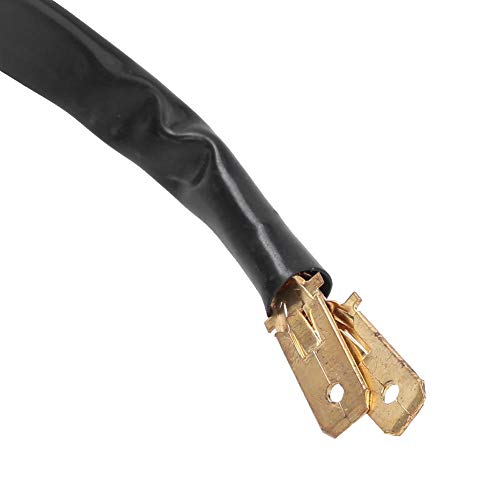
Figure 3: Close-up of motor wire terminals. This image shows the spade connectors on the motor's power wires, ready for connection.
5.3 Belt Pulley / Sprocket Installation
The motor shaft is designed for a belt pulley or sprocket. Ensure it is correctly installed and aligned.
- Slide the appropriate belt pulley or sprocket onto the 8mm diameter motor shaft.
- Align the keyway or set screw with the 1mm milling slot on the shaft.
- Secure the pulley/sprocket firmly using its set screw or other fastening mechanism. Ensure it is tight to prevent slippage during operation.
- Verify proper alignment with the driven component (e.g., wheel sprocket) to prevent excessive wear on the belt or chain.
6. Operating Instructions
Once installed, the motor is ready for operation. Follow these guidelines:
- Power On: Apply 12V DC power to the motor. The motor should begin to rotate.
- Direction of Rotation: The direction of rotation depends on the polarity of the DC power supply. Reversing the polarity will reverse the motor's direction.
- Speed Control: For variable speed applications, a compatible 12V DC motor speed controller is required (not included). Connect the controller between the power source and the motor according to the controller's instructions.
- Load: Avoid exceeding the motor's rated torque of 0.56 Nm to prevent overheating and damage.
- Monitoring: During initial operation, monitor the motor for unusual noises, excessive heat, or vibrations. Discontinue use if any abnormalities are detected.
7. Maintenance
Regular maintenance helps ensure the longevity and optimal performance of your motor.
- Cleaning: Periodically clean the exterior of the motor to remove dust, dirt, and debris. Use a dry cloth or soft brush. Do not use water or solvents directly on the motor.
- Inspection: Regularly inspect the motor for any signs of wear, damage, or loose connections. Check the mounting bolts for tightness.
- Brush Inspection (Advanced): As a brushed motor, the carbon brushes will wear over time. If performance degrades significantly, brush inspection and replacement may be necessary by a qualified technician.
- Bearing Lubrication: The motor's bearings are typically sealed and pre-lubricated for life. If unusual noises from the bearings occur, consult a professional.
8. Troubleshooting
If you encounter issues with your motor, refer to the following troubleshooting guide:
| Problem | Possible Cause | Solution |
|---|---|---|
| Motor does not run | No power supply Incorrect wiring Faulty power supply/battery Motor overload | Check power connections and source Verify correct polarity (+/-) Test power supply voltage Reduce load on motor |
| Motor runs slowly or with low power | Low voltage Excessive load Worn brushes (after extended use) Internal damage | Check power supply voltage Reduce load Consult technician for brush inspection/replacement Contact support |
| Motor overheats | Excessive load Insufficient ventilation Prolonged operation at maximum load | Reduce load Ensure adequate airflow around motor Allow motor to cool down periodically |
| Unusual noise or vibration | Loose mounting Damaged bearings Misaligned pulley/sprocket | Check and tighten mounting bolts Consult technician Verify pulley/sprocket alignment |
9. Warranty & Support
VBESTLIFE provides a commitment to product quality.
- Return Policy: If you are not satisfied with your motor, you may be eligible for an unconditional return and refund within 180 days of purchase. Please refer to your purchase platform's return policy for specific details.
- Technical Support: For any problems or questions regarding this product, please contact the seller or VBESTLIFE customer support through your purchase channel. Provide your order number and a detailed description of the issue for prompt assistance.