1. Introduction
Thank you for choosing the Inscabin P2 Portable DAB/DAB+FM Digital Radio and Bluetooth Speaker. This device combines multiple audio functionalities, including DAB/DAB+ digital radio, FM radio, Bluetooth connectivity, and playback from USB drives and TF cards. It also features a dual alarm clock, sleep timer, and snooze function. This manual provides detailed instructions to help you set up, operate, and maintain your device.
Please read this manual thoroughly before using the product and retain it for future reference.
2. Safety Information
- Power Source: Use only the specified power adapter or USB charging cable. Ensure the voltage is compatible with your region.
- Water and Moisture: Do not expose the device to rain, moisture, or immerse it in water. Avoid placing liquid-filled objects on the device.
- Heat: Keep the device away from heat sources such as radiators, heat registers, stoves, or other heat-producing appliances.
- Ventilation: Ensure proper ventilation. Do not block any ventilation openings.
- Cleaning: Disconnect the power before cleaning. Use a soft, dry cloth. Do not use liquid cleaners or aerosol cleaners.
- Servicing: Do not attempt to service this product yourself. Refer all servicing to qualified service personnel.
- Battery: The device contains a built-in rechargeable battery. Do not expose it to excessive heat or direct sunlight. Dispose of batteries responsibly according to local regulations.
3. Product Overview
Familiarize yourself with the various parts and controls of your Inscabin P2 radio.
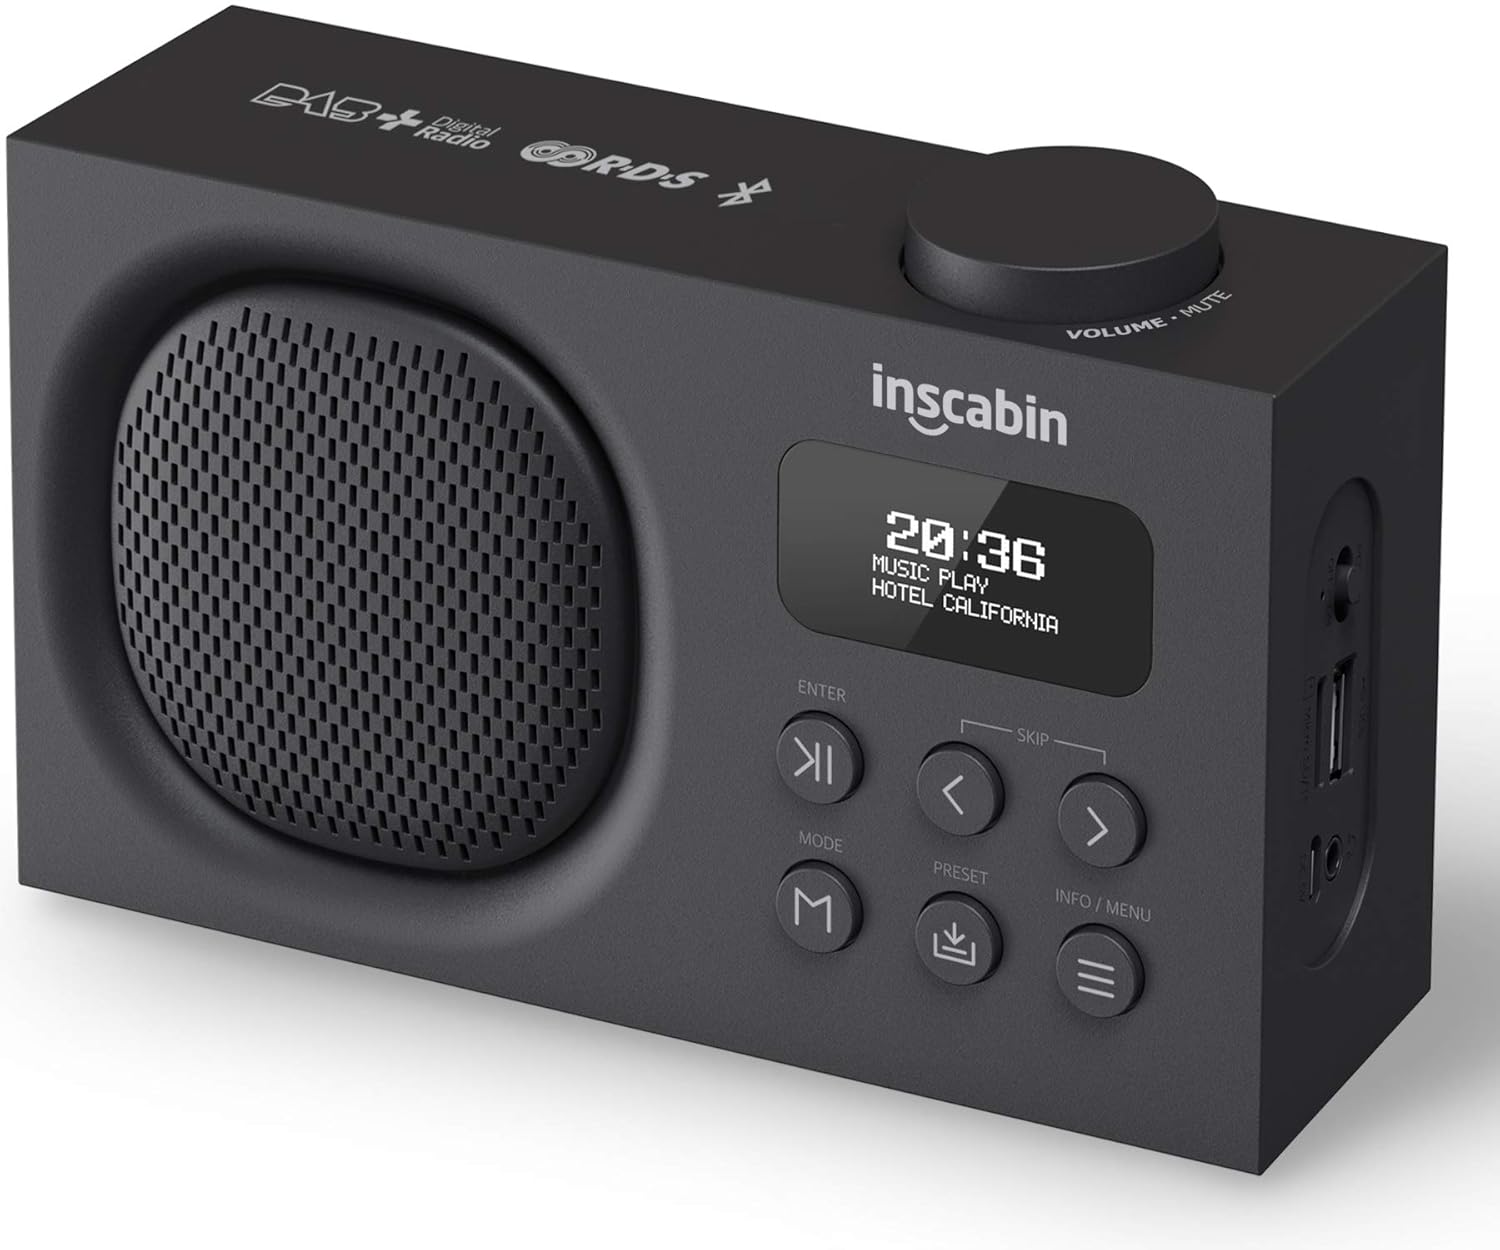
This image displays the front of the Inscabin P2 radio, highlighting its speaker grille, LCD display, control buttons, and the volume knob on top. It provides a clear view of the device's compact design.

This detailed side view of the Inscabin P2 radio clearly labels its various ports: Power Switch, Micro SD/TF card slot, USB input port, Headphone insert slot, and Micro USB charging slot. This helps users identify connection points.
Controls and Ports:
- Volume/Mute Knob: Rotate to adjust volume, press to mute/unmute.
- LCD Display: Shows time, station information, mode, and menu options.
- ENTER Button: Confirms selections.
- SKIP Buttons (< / >): Navigate menus, skip tracks, or tune stations.
- MODE Button: Switches between DAB, FM, Bluetooth, USB, and TF card modes.
- PRESET Button: Accesses or saves preset stations.
- INFO/MENU Button: Displays information or accesses the system menu.
- Power Switch: Turns the device on or off.
- Micro SD/TF Card Slot: For playing audio files from a TF card.
- USB Input Port: For playing audio files from a USB drive.
- Headphone Insert Slot: For private listening.
- Micro USB Charging Slot: For charging the internal battery.
4. Setup
4.1 Charging the Battery
- Connect the provided Micro USB cable to the Micro USB charging slot on the side of the radio.
- Connect the other end of the USB cable to a USB power adapter (not included) or a powered USB port.
- The charging indicator on the display will show the charging status. A full charge typically takes several hours.
- Once fully charged, disconnect the charging cable. The built-in 1800mAh battery provides over 10 hours of playback.
4.2 Initial Power On
- Ensure the radio is charged or connected to power.
- Slide the Power Switch to the 'ON' position.
- The display will light up, and the device will typically start in DAB mode or the last used mode.
4.3 Antenna Positioning
For optimal reception in DAB and FM modes, extend the telescopic antenna fully and adjust its position. Experiment with different angles to find the best signal strength.
5. Operating Instructions
5.1 Power On/Off
- To turn on, slide the Power Switch to 'ON'.
- To turn off, slide the Power Switch to 'OFF'.
5.2 Mode Selection
Press the MODE button repeatedly to cycle through the available modes: DAB, FM, Bluetooth, USB, and TF Card.
5.3 DAB/DAB+ Radio Mode
- Switch to DAB mode using the MODE button.
- Upon first use or if no stations are found, the radio will automatically perform a full scan for available DAB/DAB+ stations. This may take a few minutes.
- Once the scan is complete, the first available station will begin playing.
- Use the SKIP (< / >) buttons to navigate through the list of available stations. Press ENTER to select a station.
- Saving Presets: To save a station, tune to the desired station, then press and hold the PRESET button. Use the SKIP (< / >) buttons to select a preset number (1-10), then press ENTER to confirm.
- Recalling Presets: Briefly press the PRESET button, then use the SKIP (< / >) buttons to select your desired preset, and press ENTER.
- DAB Information: Press the INFO/MENU button to cycle through various information displays such as program type, signal strength, bit rate, and date/time.
5.4 FM Radio Mode
- Switch to FM mode using the MODE button.
- Auto Scan: To automatically scan and save FM stations, press and hold the INFO/MENU button. The radio will scan and store stations with strong signals.
- Manual Tuning: Briefly press the SKIP (< / >) buttons to fine-tune the frequency in small increments. Press and hold the SKIP (< / >) buttons to automatically scan for the next available station.
- Saving Presets: Similar to DAB mode, tune to the desired FM station, then press and hold the PRESET button. Use the SKIP (< / >) buttons to select a preset number, then press ENTER.
- Recalling Presets: Briefly press the PRESET button, then use the SKIP (< / >) buttons to select your desired preset, and press ENTER.
5.5 Bluetooth Mode
- Switch to Bluetooth mode using the MODE button. The display will show "Bluetooth Pairing" or similar, indicating it's ready to connect.
- On your Bluetooth-enabled device (smartphone, tablet), enable Bluetooth and search for available devices.
- Select "Inscabin P2" from the list of devices.
- Once paired, the radio will confirm the connection, and you can now stream audio from your device to the Inscabin P2.
- Use your connected device or the radio's SKIP (< / >) buttons to control playback (play/pause, next/previous track).
5.6 USB/TF Card Playback Mode
- Insert a USB drive into the USB input port or a TF card into the Micro SD/TF card slot.
- Switch to USB or TF Card mode using the MODE button. The radio will automatically detect and begin playing compatible audio files.
- Use the SKIP (< / >) buttons to navigate between tracks. Press ENTER to play/pause.
5.7 Alarm Clock, Sleep Timer, and Snooze
The Inscabin P2 features two independent alarms, a sleep timer, and a snooze function.
- Setting Alarms: Access the alarm settings via the INFO/MENU button. You can set two separate alarms with options for alarm source (DAB, FM, or Buzzer) and volume.
- Sleep Timer: Set a duration after which the radio will automatically turn off. This is typically found in the system settings menu.
- Snooze Function: When an alarm sounds, press the ENTER button (or another designated button) to activate snooze, which will temporarily silence the alarm for a short period before it sounds again.
5.8 System Settings
Press and hold the INFO/MENU button to access the system settings. Here you can adjust:
- Time/Date: Manually set or synchronize with DAB/FM broadcast.
- Language: Select from nine supported languages.
- Backlight: Adjust brightness and timeout.
- Factory Reset: Resets all settings to default.
6. Maintenance
6.1 Cleaning
- Always disconnect the power cable before cleaning.
- Use a soft, dry, lint-free cloth to wipe the exterior surfaces of the radio.
- Do not use abrasive cleaners, waxes, or solvents as they may damage the finish.
6.2 Battery Care
- To prolong battery life, avoid fully discharging the battery frequently.
- If storing the device for an extended period, charge it to approximately 50% and recharge every few months.
- Do not expose the battery to extreme temperatures.
6.3 Storage
When not in use, store the radio in a cool, dry place, away from direct sunlight and excessive dust.
7. Troubleshooting
If you encounter issues with your Inscabin P2 radio, please refer to the following common problems and solutions:
| Problem | Possible Cause | Solution |
|---|---|---|
| No power/Device won't turn on | Battery is depleted; Power switch is off; Faulty charging cable/adapter. | Charge the battery; Ensure power switch is 'ON'; Try a different charging cable/adapter. |
| Poor DAB/FM reception | Antenna not extended; Weak signal area; Interference. | Fully extend and adjust the telescopic antenna; Move the radio to a location with better signal; Avoid placing near other electronic devices. |
| Bluetooth won't connect | Radio not in Bluetooth mode; Device not discoverable; Already connected to another device. | Ensure radio is in Bluetooth mode; Make sure your device's Bluetooth is on and searching; Disconnect from other devices; Try restarting both devices. |
| No sound from USB/TF card | Incorrect mode; Incompatible file format; Corrupted media. | Ensure radio is in USB/TF mode; Check if audio files are in a supported format (e.g., MP3); Try a different USB drive/TF card. |
| Alarm not sounding | Alarm not set correctly; Alarm volume too low; Device powered off. | Verify alarm settings (time, source, volume); Ensure the device is on or in standby mode. |
8. Specifications
Detailed technical specifications for the Inscabin P2 Portable DAB/DAB+FM Digital Radio and Bluetooth Speaker.
| Feature | Specification |
|---|---|
| Brand | Inscabin |
| Model Number | 054114293711 |
| Product Dimensions | 16 x 9 x 5 cm |
| Item Weight | 540 g |
| Tuner Technology | DAB Plus, FM |
| DAB/DAB+ Frequency | Band III 174.928-239.20MHz |
| FM Frequency | Band II 87.5-108MHz |
| Bluetooth Version | Bluetooth 5.0 |
| Connectivity Technology | Auxiliary, Bluetooth, USB |
| Display Type | LCD |
| Speaker Output Power | 7 Watts RMS |
| Power Source | Battery Powered |
| Battery Type | 1 Lithium Polymer (included) |
| Battery Capacity | 1800mAh (approx. 10+ hours playback) |
| Special Features | Lightweight, Portable, Rechargeable, Dual Alarm Clock, Sleep/Snooze Function, USB/TF Card Playback |
| Supported Languages | Nine languages for system operation |
9. Warranty and Support
The Inscabin P2 Portable DAB/DAB+FM Digital Radio and Bluetooth Speaker comes with a standard manufacturer's warranty. Please refer to the warranty card included in your product packaging for specific terms and conditions, including warranty duration and coverage details.
For technical support, troubleshooting assistance, or warranty claims, please contact Inscabin customer service through the contact information provided on your purchase receipt or the official Inscabin website. When contacting support, please have your model number (P2) and purchase date ready.