1. Introduction
The ULANZI ULS01 Camera Desk Mount Stand is a versatile and robust solution designed for mounting various photographic and video equipment directly onto your desk. Its flexible, articulated arm and 360° rotatable ball head allow for precise positioning, making it ideal for overhead shots, live streaming, product photography, and more. Constructed from aviation aluminum alloy, this stand offers exceptional stability and durability.
2. What's in the Box
Please ensure all the following components are present in your package:
- Main Pole
- Flexible Articulated Arm (multi-segment)
- Desk Clamp
- 360° Rotatable Ball Head with 1/4" screw
- 1/4" to 1/4" Screw Adapter (for additional accessories)
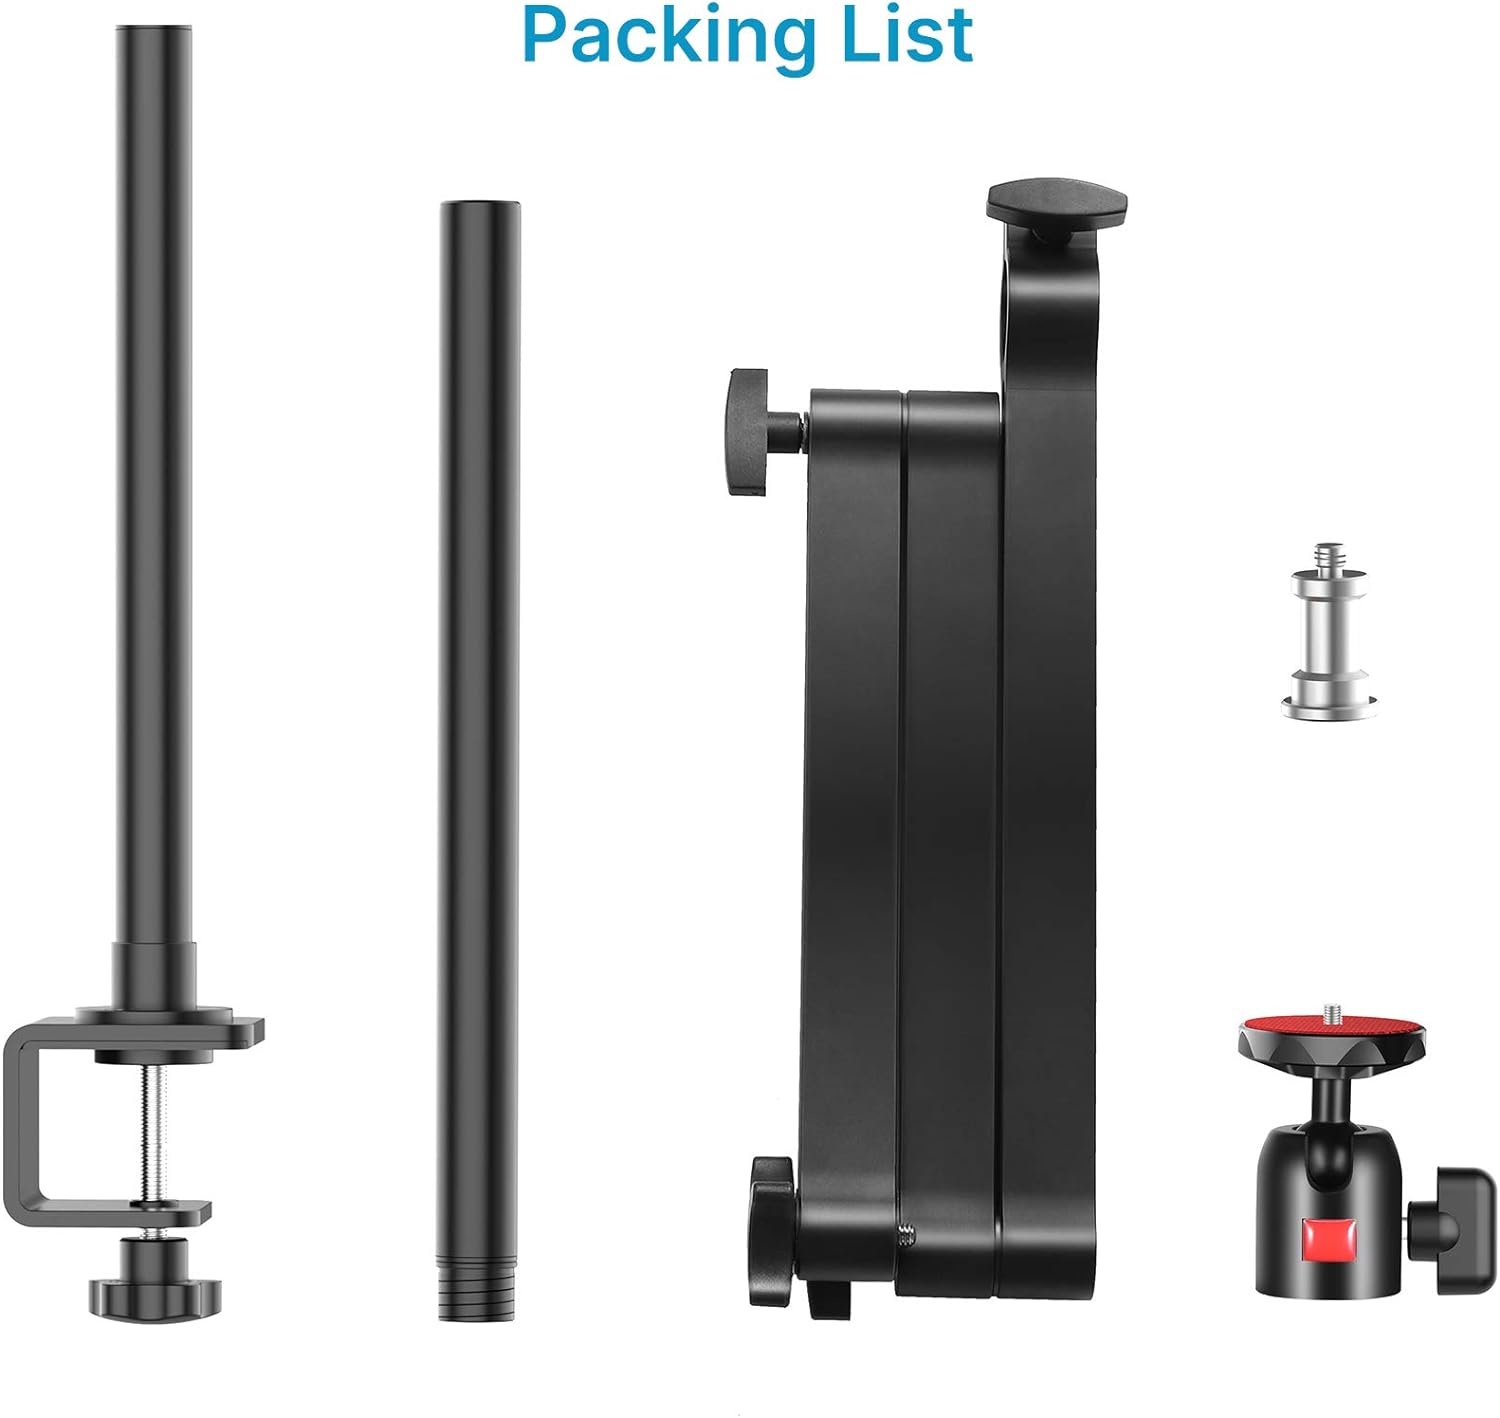
Figure 1: All components included in the ULS01 package.
3. Setup
3.1. Mounting the Desk Clamp
- Identify a stable surface on your desk or workbench. The desk clamp can expand up to 5cm (1.96 inches) to accommodate various desk thicknesses.
- Position the desk clamp on the edge of your desk.
- Tighten the screw on the clamp until it is securely fastened to the desk. Ensure it is firm and does not wobble. The clamp features padded surfaces to protect your desk.
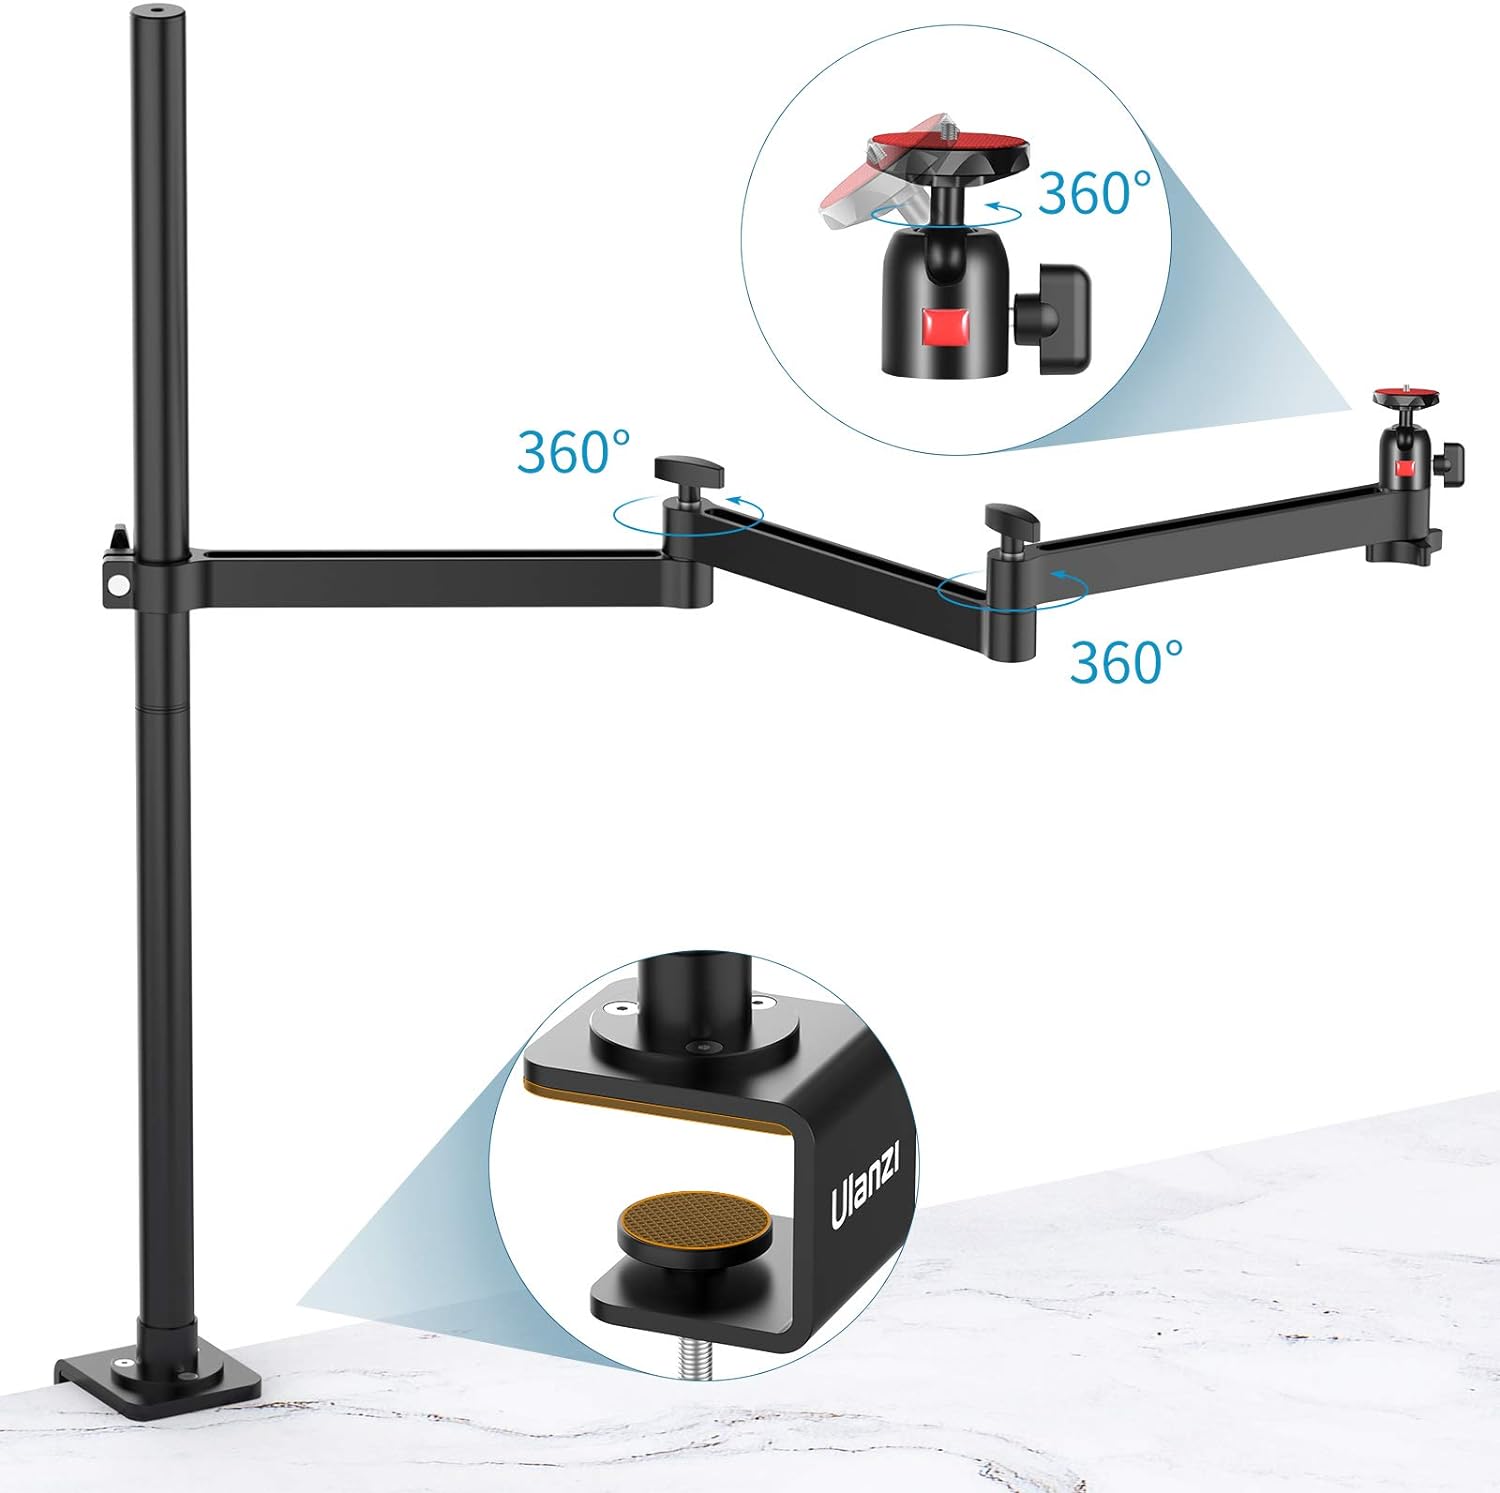
Figure 2: Securely attaching the desk clamp to a table surface.
3.2. Assembling the Main Pole and Arm
- Insert the main pole into the designated slot on the desk clamp.
- Tighten the knob on the desk clamp to secure the main pole in place.
- Attach the flexible articulated arm to the main pole. The arm segments can be adjusted and locked into position using the thumb screws.
- Screw the 360° rotatable ball head onto the end of the flexible arm.
Video 1: This video demonstrates the unboxing and assembly process of the ULANZI Camera Desk Mount Stand, including attaching the clamp and assembling the arm components.
3.3. Attaching Your Device
- Screw your camera, ring light, webcam, or panel light onto the 1/4" screw of the ball head. Ensure it is tightened securely.
- The top of the main pole also features a 1/4" screw hole, allowing you to mount additional equipment such as a ring light or another accessory.
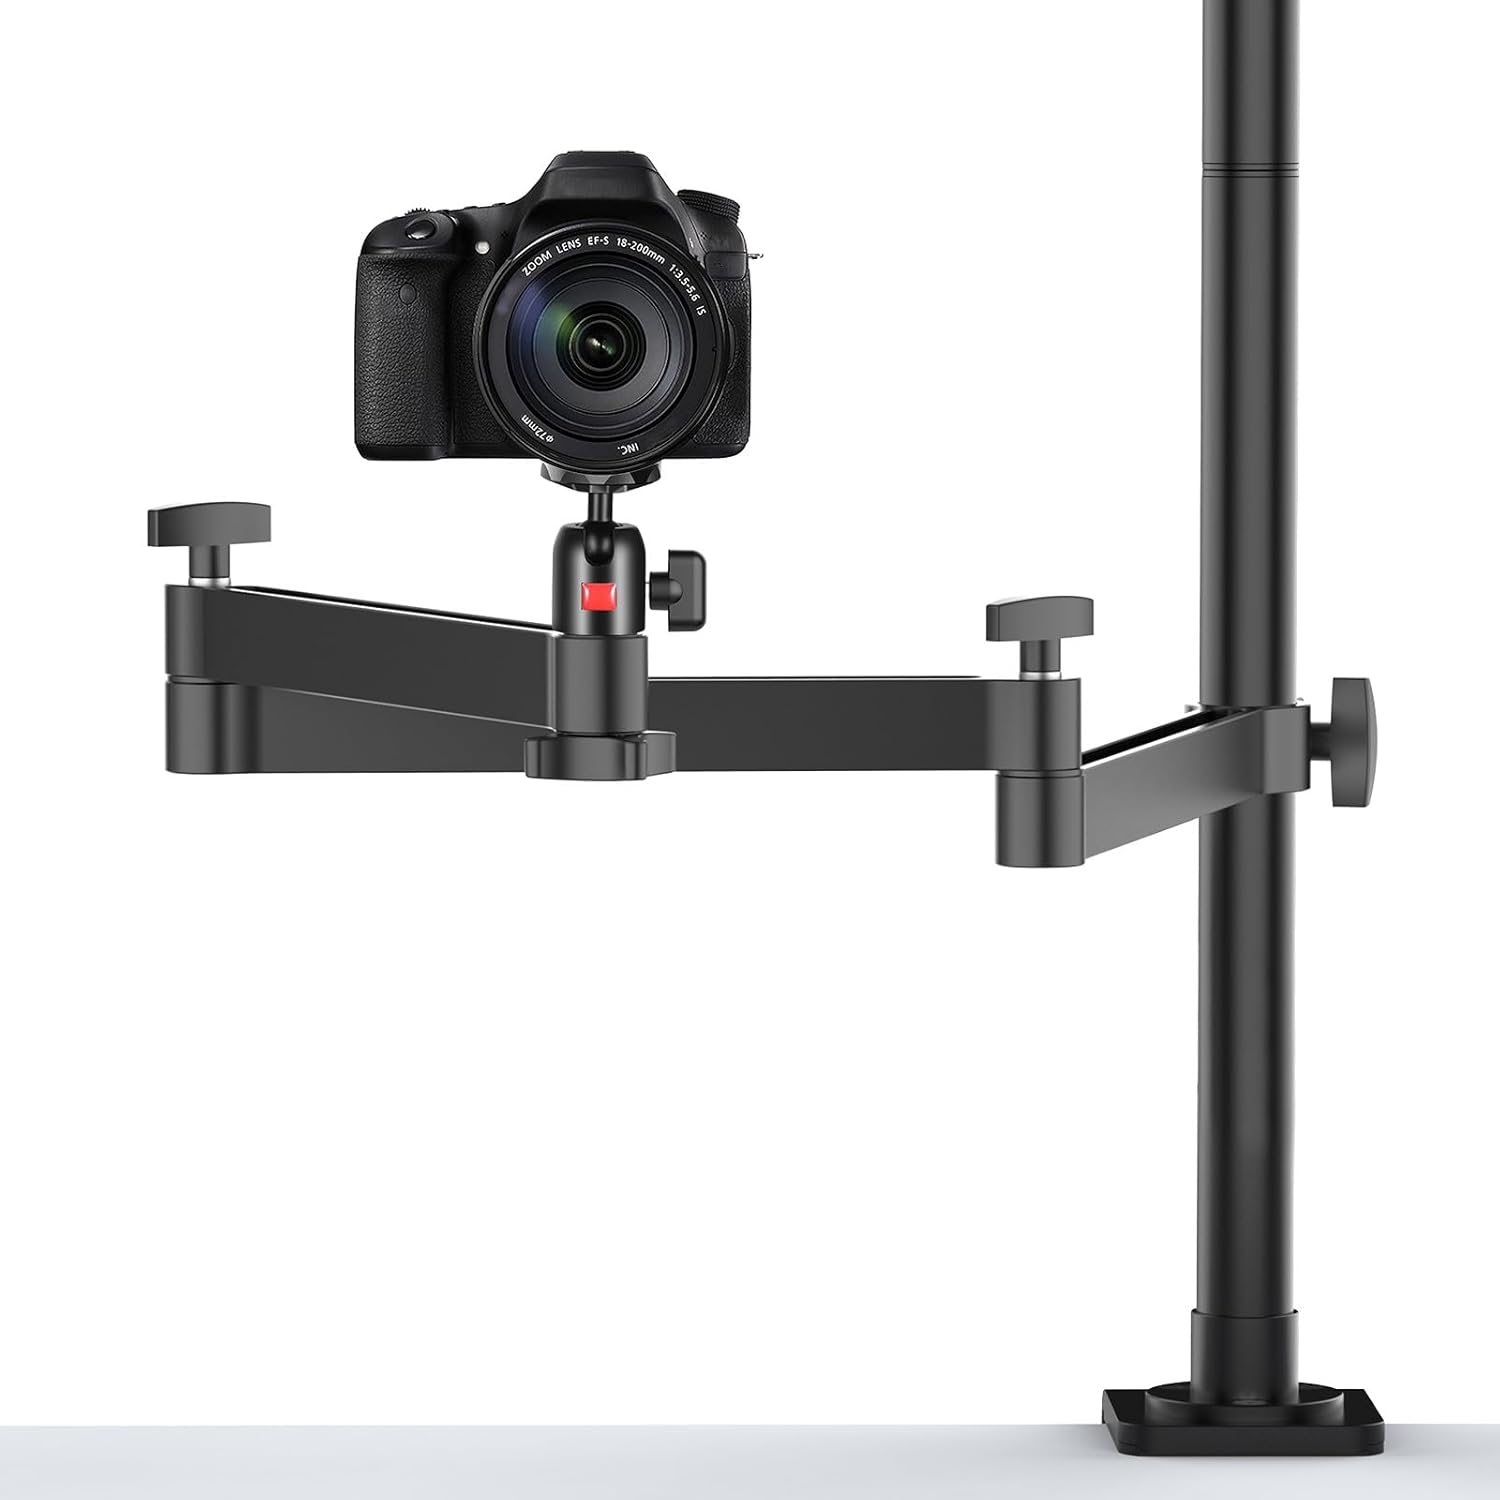
Figure 3: A camera mounted on the stand, ready for use.

Figure 4: The 1/4" screw hole at the top of the main pole for accessory expansion.
4. Operating the Mount
4.1. Adjusting Height
To adjust the vertical height of the flexible arm, loosen the main thumb screw on the clamp that holds the arm to the central pole. Slide the arm up or down to your desired position (up to 27.56 inches center shaft height) and then re-tighten the thumb screw to secure it.
4.2. Adjusting Arm Position
The articulated arm features three stages of adjustment, allowing for a super long extension of up to 29.53 inches. Each joint has a thumb screw that can be loosened to reposition the arm segments. Once the desired angle and reach are achieved, tighten all thumb screws to lock the arm firmly in place.
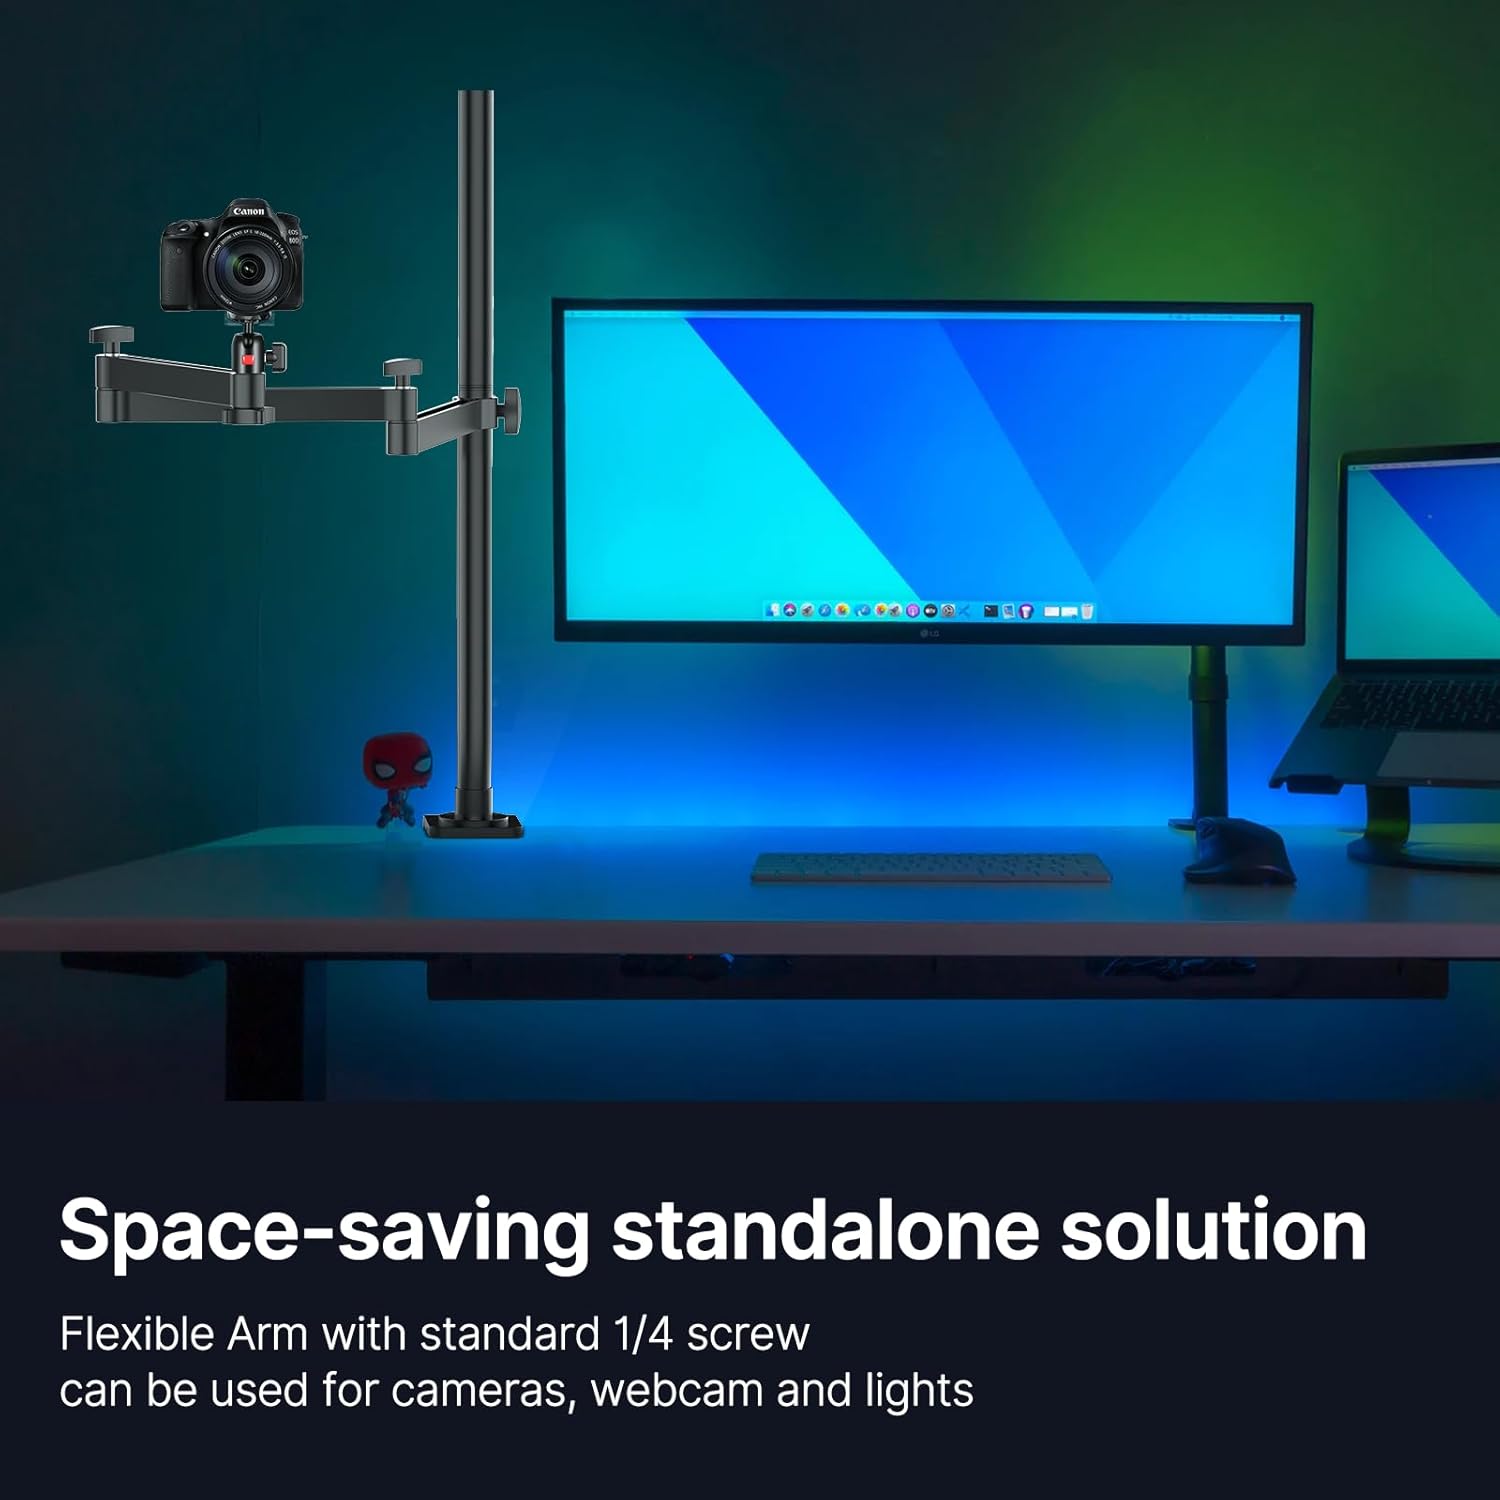
Figure 5: The multi-segment flexible arm for extensive reach and positioning.
4.3. Ball Head Rotation
The 360° rotatable ball head allows for versatile camera angles, including perfect overhead shots. Loosen the small knob on the ball head to adjust your device's angle, then tighten it to secure. This feature is particularly useful for top-down video recording, product reviews, or cooking tutorials.
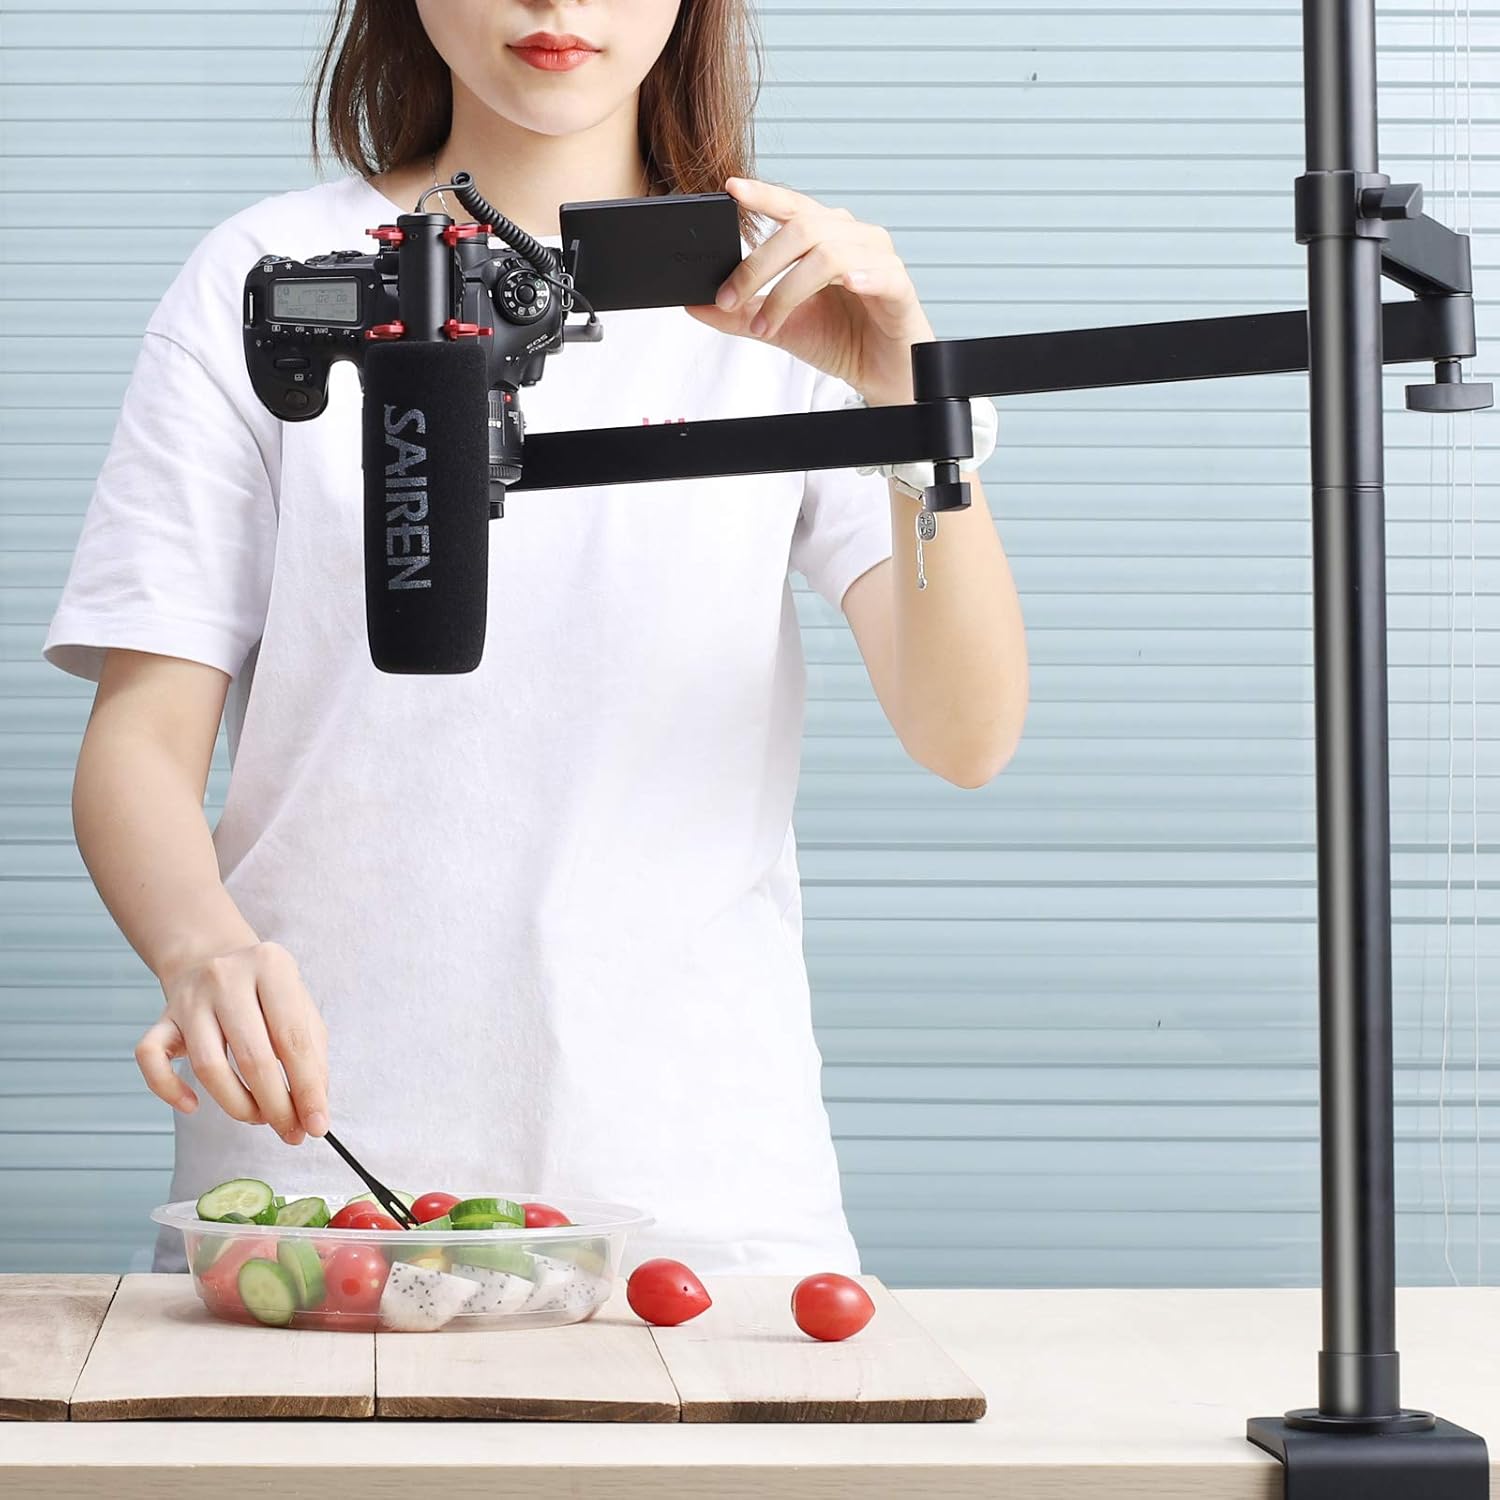
Figure 6: Demonstrating an overhead shot setup using the flexible arm and ball head.
Video 2: This video illustrates the flexibility of the arm and ball head, showcasing various adjustments for different shooting angles, including top-down views.
5. Key Features
- Flexible Articulated Arm: Offers up to 29.53 inches of extension with three-stage free adjustments for optimal positioning.
- Wide Compatibility: Suitable for ring lights, DSLR cameras, video cameras, panel lights, key lights, webcams, and more.
- 360° Rotatable Ball Head: Allows for precise angle adjustments and easy switching between horizontal and vertical orientations, perfect for overhead shots.
- Sturdy Desk Clamp: Padded clamp expands up to 5cm (1.96 inches) for secure attachment to most desktops.
- Durable Construction: Made from aviation aluminum alloy, ensuring extreme sturdiness and durability.
- High Load-Bearing Capacity: Single arm can support up to 2KG (4.41lbs), suitable for most cameras and accessories.
- Versatile Applications: Ideal for baking, crafting, online lessons, document display, live stream broadcasting, and video recording.
Video 3: A short promotional video highlighting the key features and versatile applications of the ULANZI Camera Desk Mount Stand.
6. Specifications
| Feature | Detail |
|---|---|
| Brand | jusmo |
| Model | ULS01 |
| Color | Black |
| Compatible Devices | Camera, Light, Phone (phone clamp not included) |
| Mounting Type | Desk Tabletop Clamp Mount |
| Max. Center Shaft Height | 27.56 inches |
| Max. Arm Extension | 29.53 inches |
| Max. Desk Clamp Opening | 5cm (1.96 inches) |
| Single Arm Load Capacity | Up to 2KG (4.41lbs) |
7. Maintenance
- Regularly check all screws and knobs to ensure they are tightened securely, especially before mounting valuable equipment.
- Clean the stand with a soft, dry cloth. Avoid abrasive cleaners or solvents that could damage the finish.
- Store the stand in a dry environment when not in use to prevent corrosion.
8. Troubleshooting
- Wobbling/Instability: Ensure the desk clamp is fully tightened to a stable surface. Check all arm joint screws and the ball head knob for tightness.
- Difficulty Adjusting Arm: Loosen the relevant thumb screws sufficiently before attempting to reposition the arm segments or adjust height. Do not force adjustments.
- Equipment Not Fitting: Verify that your equipment uses a standard 1/4" screw mount. If mounting a phone, a separate phone clamp (not included) is required.
9. Warranty and Support
For warranty information or technical support, please refer to the manufacturer's official website or contact their customer service directly. Keep your purchase receipt for any warranty claims.