1. Product Overview
The Kitchen HQ Speed Grater and Slicer with Suction Base II is a manual kitchen tool designed for efficient grating and slicing of various fruits, vegetables, and cheeses. It operates without electricity or batteries, offering versatility for diverse kitchen environments. The unit features a secure suction base for stability during use and includes interchangeable stainless steel drums for different cutting needs.
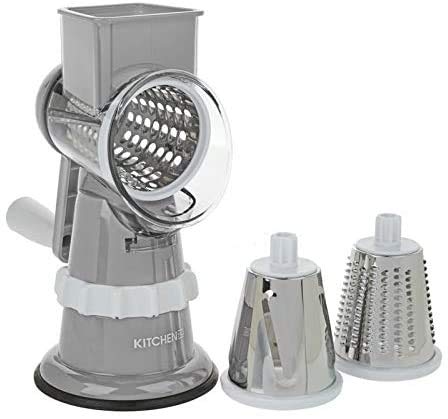
Image 1.1: The Kitchen HQ Speed Grater and Slicer with Suction Base II. This image displays the main red grater unit assembled with one drum, alongside two additional interchangeable blade drums. The suction base is visible at the bottom of the unit.
2. What's Included
Verify that all components are present in the packaging:
- 1 x Grater unit with suction base
- 3 x Stainless steel blade drums (1 fine grating, 1 thick grating, 1 slicing)
- 1 x Turning handle
- 1 x Food pusher
- 1 x Instruction manual (this document)
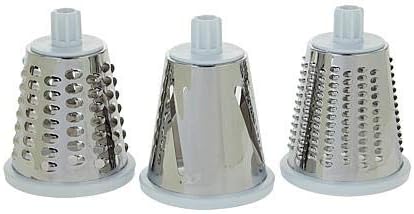
Image 2.1: The three interchangeable stainless steel blade drums. From left to right, these are typically the fine grater, slicer, and thick grater drums, each designed for specific food preparation tasks.
3. Setup and Assembly
- Clean Components: Before first use, wash all parts that will come into contact with food using warm water and dish soap. Rinse thoroughly and dry.
- Attach Suction Base: Place the grater unit on a clean, smooth, non-porous countertop. Press down firmly on the unit while turning the base clockwise until the suction cup engages and the unit is securely fixed to the surface. Ensure it does not move.
- Insert Blade Drum: Select the desired stainless steel blade drum (fine, thick, or slicing). Insert the drum into the transparent cylinder of the grater unit, ensuring it is seated correctly.
- Attach Handle: Slide the turning handle into the opening on the side of the blade drum until it clicks into place. Ensure it is firmly attached and rotates freely.
- Prepare Food Pusher: Keep the food pusher nearby for safe feeding of ingredients into the chute.
4. Operating Instructions
- Secure the Unit: Ensure the suction base is firmly attached to a clean, dry, flat surface before beginning.
- Prepare Ingredients: Cut fruits, vegetables, or cheese into pieces that fit comfortably into the feeding chute.
- Load Food: Place the prepared food into the feeding chute.
- Operate: While holding the unit steady with one hand, use the other hand to turn the handle clockwise. Simultaneously, use the food pusher to gently guide the ingredients down into the blade drum. Apply even, consistent pressure.
- Collect Output: Position a bowl or plate beneath the grater's output opening to collect the grated or sliced food.
- Change Drums: To change drums, first detach the handle by pulling it out. Then, carefully remove the current blade drum and insert the new one, reattaching the handle.
Important: Always use the food pusher to guide ingredients. Never use your fingers or other utensils to push food into the blade drum while operating, as blades are sharp.
5. Maintenance and Care
- Disassembly: After each use, disassemble the grater by detaching the handle, removing the blade drum, and releasing the suction base.
- Cleaning: Hand wash all components with warm water and mild dish soap. Use a brush to safely clean the blade drums. Rinse thoroughly to remove all soap residue.
- Drying: Dry all parts completely before reassembling or storing to prevent rust on stainless steel components and to maintain hygiene.
- Storage: Store the grater and its components in a clean, dry place. Keep blade drums in a safe location to prevent accidental cuts.
- Dishwasher Safety: While some components may be dishwasher safe, hand washing is recommended to prolong the life and sharpness of the blades and the integrity of plastic parts.
6. Troubleshooting
| Problem | Possible Cause | Solution |
|---|---|---|
| Unit does not suction to countertop. | Countertop is not clean, smooth, or dry. Suction mechanism not fully engaged. | Ensure countertop is clean, dry, and smooth. Press down firmly and turn the base clockwise until the suction cup is fully engaged. Avoid porous or textured surfaces. |
| Food is not grating/slicing effectively. | Incorrect blade drum for food type. Food pieces are too large or too small. Insufficient pressure on food pusher. | Ensure the correct blade drum is selected for the desired result. Cut food into appropriate sizes. Apply consistent, firm pressure with the food pusher. |
| Handle is difficult to turn. | Food is jammed in the drum. Handle not properly attached. | Disassemble and clear any jammed food. Ensure the handle is fully inserted and clicked into place. Do not force the handle; excessive force can damage the unit. |
7. Specifications
- Model: Speed Grater and Slicer with Suction Base II
- Dimensions: Approximately 9.5"L x 5"W x 10.5"H (24.1 cm L x 12.7 cm W x 26.7 cm H)
- Weight: Approximately 2.16 pounds (0.98 kg)
- Material: Plastic (body), Stainless Steel (blade drums)
- Color: Gray (as per product specifications, actual product color may vary)
- Operation: Manual
- Care: Hand wash recommended
- UPC: 707785297532
8. Safety Information
- Sharp Blades: The stainless steel blade drums are very sharp. Handle with extreme care to avoid injury. Always use the food pusher.
- Children: Keep out of reach of children. This product is not a toy.
- Stable Surface: Always operate the grater on a stable, flat, and dry surface with the suction base securely engaged.
- Proper Use: Use only for its intended purpose of grating and slicing food. Do not attempt to process hard items that may damage the blades or unit.
- Inspection: Before each use, inspect the unit for any damage. Do not use if any parts are broken or damaged.
9. Warranty and Support
Specific warranty information for the Kitchen HQ Speed Grater and Slicer with Suction Base II is not provided in this document. For warranty details or customer support, please refer to the product packaging or contact Kitchen HQ directly through their official website or customer service channels.