1. Introduction
This manual provides essential information for the safe and efficient operation of your Cecotec Ready Warm 800 Thermal Connected 600W Digital Heater. Please read these instructions carefully before using the appliance and retain them for future reference. This heater is designed to provide supplementary heating for indoor spaces and features Wi-Fi connectivity for remote control.
2. Safety Instructions
WARNING: Failure to follow these safety instructions may result in fire, electric shock, or injury.
- Ensure the voltage indicated on the rating label matches your mains voltage before connecting the appliance.
- Do not cover the heater. Overheating can occur if the heater is covered or obstructed.
- Keep flammable materials such as furniture, curtains, and bedding at least 1 meter (3 feet) away from the heater.
- Do not operate the heater with a damaged cord or plug, or after the appliance malfunctions or has been dropped or damaged in any manner.
- This appliance is not intended for use by persons (including children) with reduced physical, sensory or mental capabilities, or lack of experience and knowledge, unless they have been given supervision or instruction concerning use of the appliance by a person responsible for their safety.
- Children should be supervised to ensure that they do not play with the appliance.
- Do not use the heater in the immediate surroundings of a bath, a shower or a swimming pool.
- Always unplug the heater when not in use or before cleaning.
- Do not insert any objects into the ventilation or exhaust openings as this may cause electric shock, fire, or damage to the heater.
3. Product Overview
Familiarize yourself with the components of your Cecotec Ready Warm 800 Digital Heater.

This image shows the Cecotec Ready Warm 800 Digital Heater from a side angle, highlighting its slim profile and the integrated control panel on the right side. The heater is white with black vents at the top and stands on two white feet.

The heater is shown in a home environment, positioned on a wooden floor next to a person seated on a black armchair, illustrating its compact size and how it fits into a living space.
Control Panel and Display
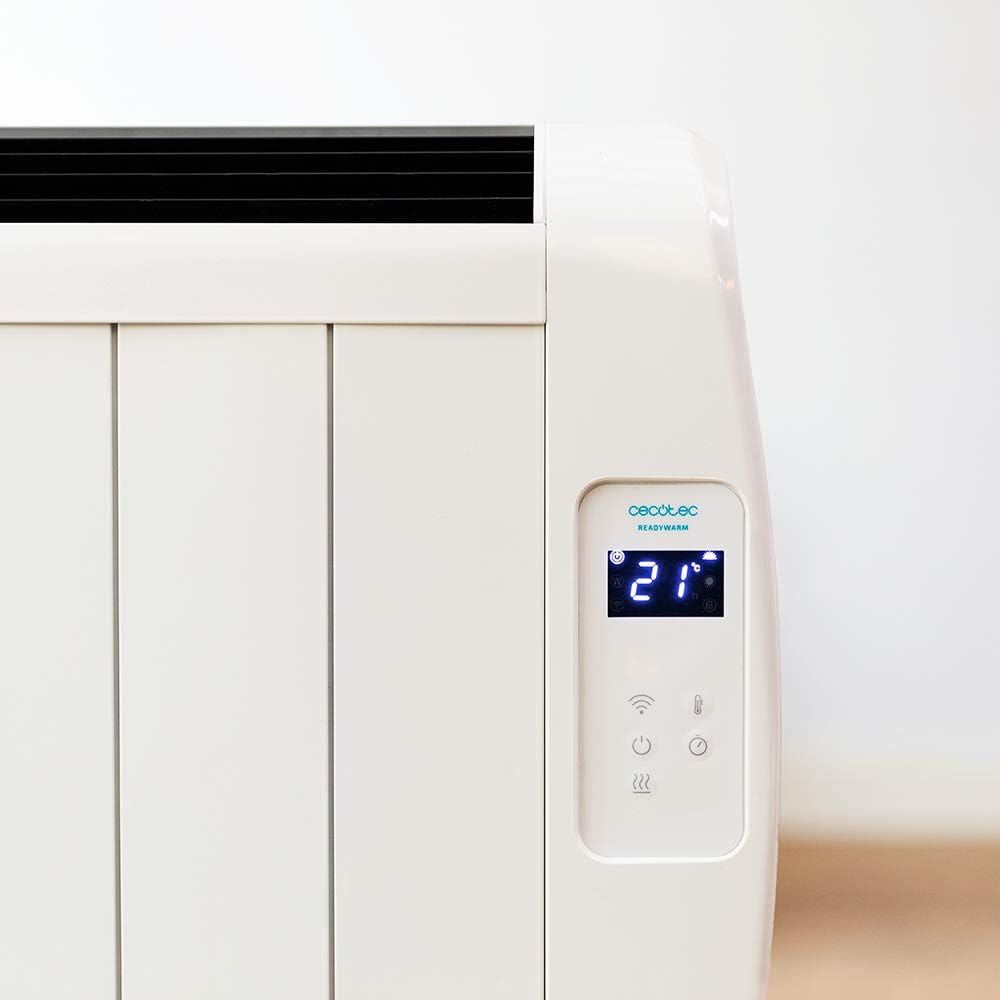
A detailed view of the heater's digital control panel, featuring a clear LCD screen showing '21' degrees Celsius, indicating the current temperature setting. Below the screen are touch-sensitive buttons for power, Wi-Fi, mode selection, and temperature adjustment.

This image focuses on the digital control panel, showing the LCD screen set to a timer function, displaying '04' hours. This indicates the heater is programmed to operate for a specific duration.
The digital display shows the current temperature, timer settings, and Wi-Fi status. The touch-sensitive buttons allow for easy control of the heater's functions.
Power Switch

A close-up shot of the heater's base, revealing the physical on/off power switch. This switch provides a direct way to cut power to the unit.
A physical power switch is located at the base of the unit for complete power disconnection.
4. Setup
- Unpacking: Carefully remove the heater from its packaging. Retain packaging for storage or transport.
- Placement: Place the heater on a firm, level surface. Ensure there is at least 1 meter (3 feet) of clear space around the heater from walls, furniture, and other objects. Do not place it directly under a power outlet.
- Power Connection: Plug the power cord into a suitable 230V AC power outlet. Ensure the main power switch at the base of the unit is in the 'OFF' position before plugging in.
- Initial Power On: Flip the main power switch at the base of the unit to the 'ON' position. The digital display on the control panel should illuminate.
Dimensions for Placement

This image provides a clear diagram of the heater's physical dimensions: 63 cm in width, 10.5 cm in depth, and 53.5 cm in height, useful for planning placement.
5. Operating Instructions
Basic Operation
- Power On/Off: Press the power button (U) on the control panel to turn the heater on or off.
- Temperature Adjustment: Use the temperature up (+) and down (-) buttons to set your desired room temperature. The display will show the set temperature.
- Mode Selection: Press the mode button to cycle through available heating modes (e.g., Low, Medium, High, or Eco, depending on the model's specific programming).
- Timer Function: Press the timer button to set an operating duration. Use the temperature adjustment buttons to set the desired hours (e.g., 0-24 hours). The heater will automatically turn off after the set time.
Wi-Fi Connectivity and App Control
The Cecotec Ready Warm 800 features Wi-Fi connectivity, allowing you to control the heater remotely via a smartphone application.

A hand holding a smartphone with the Cecotec Ready Warm mobile application open. The app interface shows a large dial indicating '33°C' and various control options, demonstrating remote control capabilities.
- Download the App: Search for the 'Cecotec Ready Warm' app in your smartphone's app store (iOS or Android).
- Register/Log In: Create an account or log in if you already have one.
- Add Device: Follow the in-app instructions to add your Ready Warm 800 heater. This typically involves putting the heater into pairing mode (often by pressing and holding the Wi-Fi button on the control panel) and connecting it to your home Wi-Fi network.
- Remote Control: Once connected, you can control the heater's power, temperature, modes, and timer functions from your smartphone.
6. Maintenance
Regular maintenance ensures optimal performance and longevity of your heater.
- Cleaning: Always unplug the heater and allow it to cool completely before cleaning. Use a soft, damp cloth to wipe the exterior surfaces. Do not use abrasive cleaners or solvents.
- Dust Removal: Periodically use a vacuum cleaner with a brush attachment to remove dust from the air intake and exhaust vents.
- Storage: If storing the heater for an extended period, unplug it, clean it thoroughly, and store it in a cool, dry place, preferably in its original packaging.
- No User-Serviceable Parts: Do not attempt to open or repair the heater yourself. Refer all servicing to qualified personnel.
7. Troubleshooting
If you encounter issues with your heater, refer to the following table for common problems and solutions.
| Problem | Possible Cause | Solution |
|---|---|---|
| Heater does not turn on. | No power supply. Main power switch off. | Check if the power cord is securely plugged in. Ensure the main power switch at the base is ON. Check the wall outlet. |
| No heat output. | Temperature setting too low. Overheat protection activated. | Increase the desired temperature setting. Unplug the heater, let it cool for 30 minutes, then plug it back in. Ensure vents are not blocked. |
| Wi-Fi connection fails. | Incorrect Wi-Fi password. Heater too far from router. App issues. | Verify Wi-Fi password. Move heater closer to the router. Restart the app and heater. Ensure your router is 2.4GHz compatible. |
| Heater turns off unexpectedly. | Timer function activated. Overheat protection. | Check if the timer is set. If not, unplug the heater, let it cool, and check for obstructions. |
8. Specifications
| Feature | Detail |
|---|---|
| Brand | Cecotec |
| Model Number | 05372 |
| Power / Wattage | 600W |
| Voltage | 230 Volts |
| Product Dimensions | 63 x 10.5 x 53.5 cm |
| Weight | 3.4 kg |
| Special Features | Portable, Wireless (Wi-Fi Control), LCD Screen |
| Heating Method | Radiant |
| Indoor/Outdoor Usage | Indoor |
| Mounting Type | Wall Mount (optional, accessories not included) / Freestanding |
9. Warranty and Support
Your Cecotec Ready Warm 800 Digital Heater is covered by a manufacturer's warranty. Please refer to the warranty card included with your purchase for specific terms and conditions, including the warranty period and coverage details.
For technical support, troubleshooting assistance beyond this manual, or warranty claims, please contact Cecotec customer service. Contact information can typically be found on the Cecotec official website or on your product packaging.
When contacting support, please have your product model number (05372) and proof of purchase readily available.


