Introduction
This manual provides essential instructions for the safe and efficient operation, maintenance, and troubleshooting of your Caso Selection C10 Thermal Coffee Maker. Please read it thoroughly before first use and keep it for future reference.
Safety Instructions
- Always ensure the coffee maker is placed on a stable, level, heat-resistant surface.
- Do not immerse the appliance, cord, or plug in water or other liquids.
- Keep out of reach of children.
- Unplug from the outlet when not in use and before cleaning.
- Do not operate any appliance with a damaged cord or plug, or after the appliance malfunctions or has been damaged in any manner.
- Use only accessories recommended by the manufacturer.
- Avoid contact with hot surfaces. Use handles or knobs.
- Do not use outdoors.
Product Overview
The Caso Selection C10 is a thermal coffee maker designed for optimal coffee brewing. Key components include:
- Water Tank with Level Indicator: Clearly shows the water volume, up to 10 cups.
- 17-Hole Brewing Head: Ensures even saturation of coffee grounds for optimal aroma.
- Permanent Filter: An eco-friendly alternative to paper filters, included for convenience.
- Thermal Carafe (1.2L): Keeps coffee warm for extended periods thanks to stainless steel insulation.
- Control Panel with Timer: Allows for easy setting of brewing time.
- Drip Stop Feature: Prevents dripping when the carafe is removed, keeping the brewing area clean.

Image: Front view of the Caso Selection C10 Thermal Coffee Maker, showcasing its sleek stainless steel and black design.
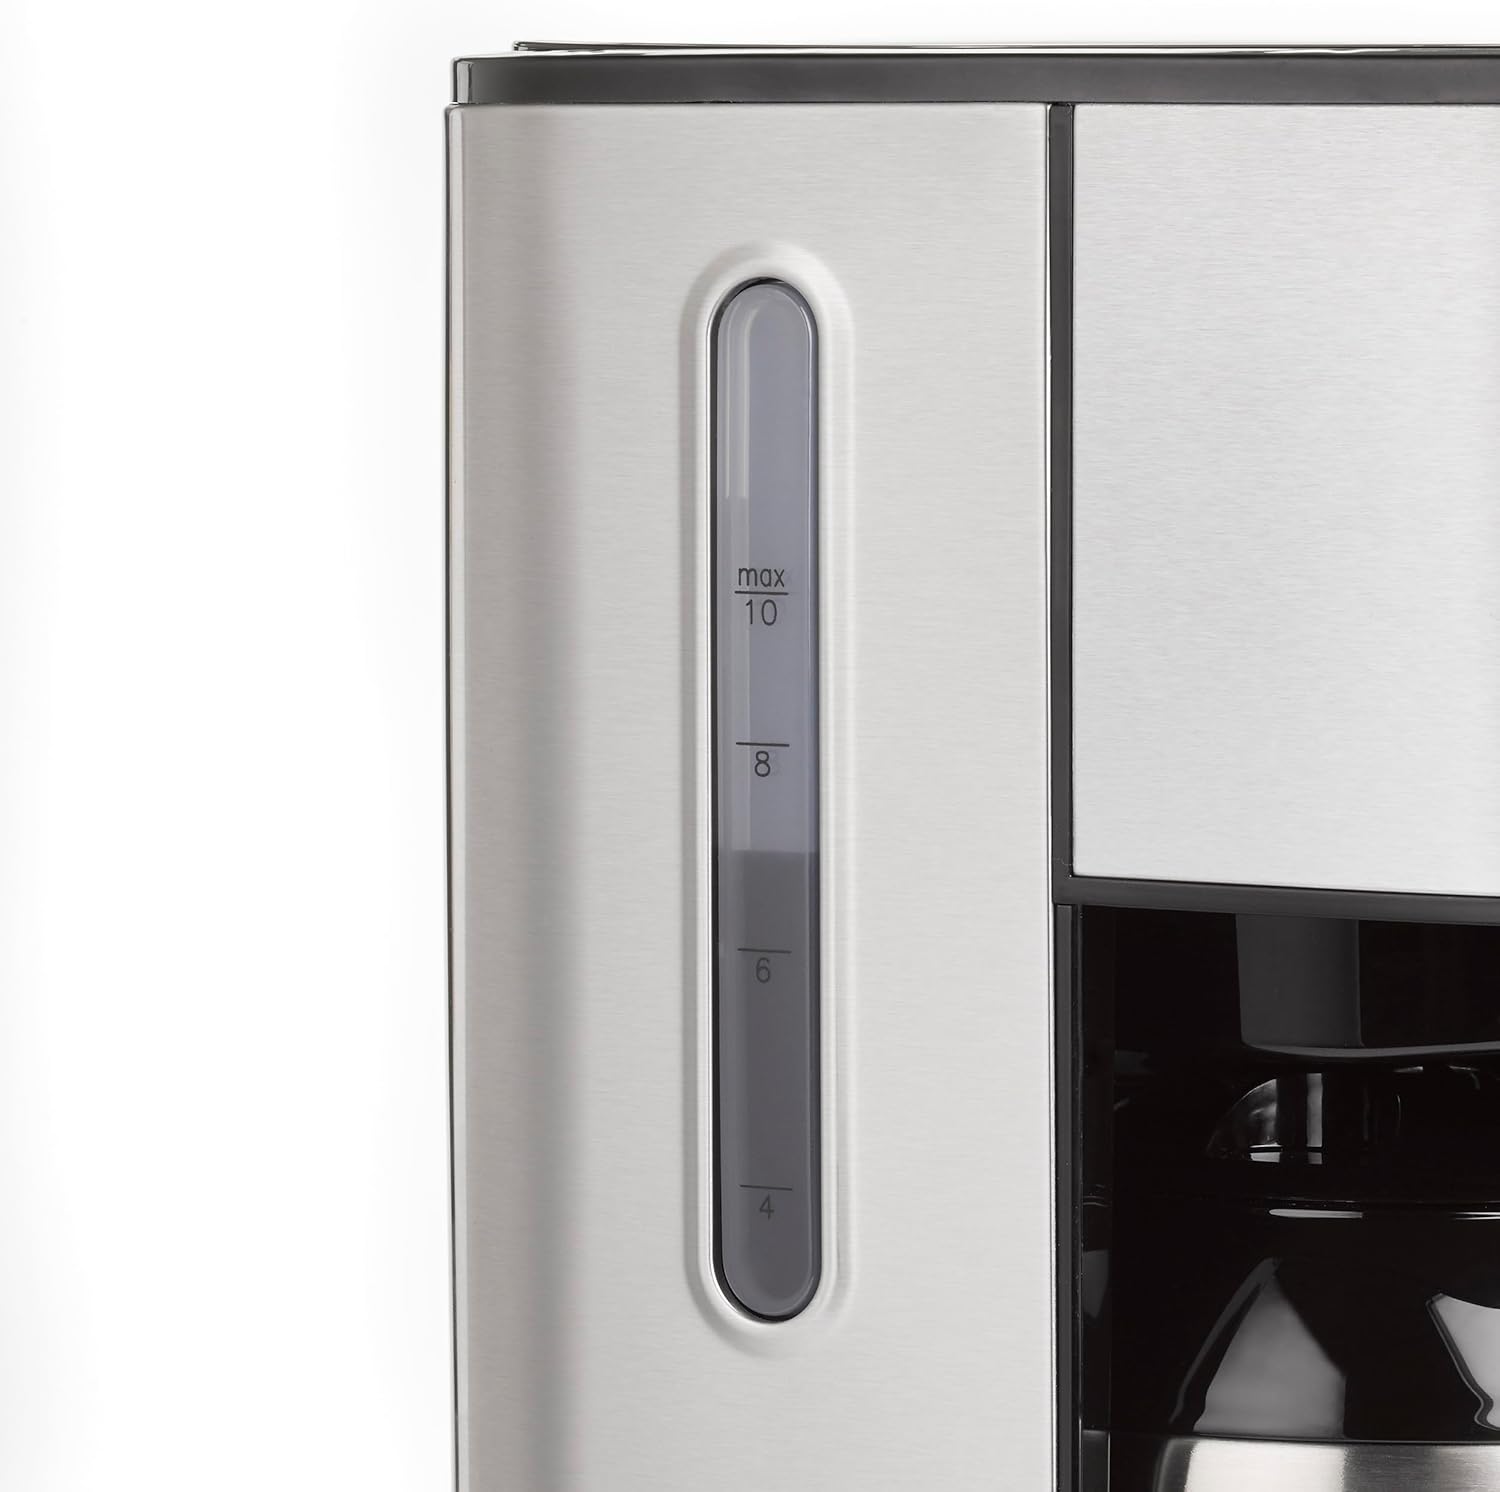
Image: Close-up of the water level indicator on the side of the coffee maker, showing markings up to 10 cups.
Setup
- Unpacking: Carefully remove all packaging materials and ensure all parts are present.
- Initial Cleaning: Before first use, wash the thermal carafe, permanent filter, and filter holder in warm, soapy water. Rinse thoroughly and dry. Wipe the exterior of the coffee maker with a damp cloth.
- First Brew Cycle (without coffee):
- Fill the water tank to the MAX level with fresh, cold water.
- Place the empty permanent filter into the filter holder, and ensure the thermal carafe is correctly positioned on the warming plate.
- Plug the coffee maker into a suitable power outlet.
- Press the power button to start a brewing cycle. Allow the full cycle to complete.
- Discard the water from the carafe. This process cleans the internal components and removes any manufacturing residues.
Operating Instructions
- Fill Water Tank: Open the lid and fill the water tank with fresh, cold water up to the desired number of cups, using the water level indicator. Do not exceed the MAX line.
- Add Coffee Grounds: Place the permanent filter into the filter holder. Add the desired amount of ground coffee. A general guideline is one tablespoon of coffee per cup, but adjust to your taste. Close the lid securely.

Image: A hand adding ground coffee into the permanent filter, which is placed in the filter holder of the coffee maker.
- Position Carafe: Ensure the thermal carafe is correctly placed on the base. The drip stop will engage when the carafe is removed and disengage when it's in place.
- Start Brewing Immediately: Press the power button (⏻) to begin brewing. The indicator light will illuminate. The optimal brewing temperature of 92-96°C ensures excellent aroma.
- Using the Timer Function:
- To set the current time, press the settings button (⚙) and use the dial to adjust hours and minutes. Press the settings button again to confirm.
- To set a delayed brew time, press the TIMER button. The display will show "TIMER". Use the dial to set the desired start time for brewing. Press the TIMER button again to activate. The timer indicator will light up. The coffee maker will start brewing automatically at the set time.

Image: A hand turning the dial on the coffee maker's control panel to set the timer for delayed brewing.
- After Brewing: Once the brewing cycle is complete, the coffee maker will automatically switch off. The thermal carafe will keep your coffee warm for an extended period.
Maintenance and Cleaning
Regular cleaning ensures optimal performance and extends the lifespan of your coffee maker.
- Daily Cleaning:
- Unplug the coffee maker and allow it to cool completely.
- Remove the permanent filter and filter holder. Discard used coffee grounds. Wash the filter, filter holder, and thermal carafe in warm, soapy water. Rinse thoroughly and dry. The filter can be easily removed using its handle.
- Wipe the exterior of the coffee maker with a soft, damp cloth. Do not use abrasive cleaners or scouring pads.
- Descaling: Mineral deposits from water can build up over time and affect performance. Descale your coffee maker every 2-3 months, or more frequently if you have hard water.
- Prepare a descaling solution according to the manufacturer's instructions (e.g., white vinegar and water, or a commercial descaling agent).
- Pour the solution into the water tank.
- Place the empty carafe on the base.
- Run a brewing cycle.
- After the cycle, let the solution sit in the carafe for 15-30 minutes.
- Discard the solution and rinse the carafe and water tank thoroughly with fresh water.
- Run 2-3 cycles with fresh water only to rinse out any remaining descaling solution.
Troubleshooting
| Problem | Possible Cause | Solution |
|---|---|---|
| Coffee does not brew. |
|
|
| Coffee tastes weak or too strong. |
|
|
| Coffee overflows from filter. |
|
|
| Coffee is not hot enough. |
|
|
Specifications
| Brand: | Caso |
| Model: | 1874 (C10) |
| Color: | Stainless steel, Black |
| Dimensions (L x W x H): | 24.5 x 17 x 32.5 cm |
| Weight: | 2.3 kg |
| Capacity: | 1.2 Liters (approx. 10 cups) |
| Power: | 900 W |
| Voltage: | 230 V |
| Material: | Stainless steel, Plastic |
| Special Features: | 17-hole brewing head, compact design, optimal brewing temperature (92-96°C), thermal carafe, timer function, permanent filter, drip stop. |
Warranty and Support
For warranty information and customer support, please refer to the warranty card included with your product or visit the official Caso Design website. Keep your proof of purchase for any warranty claims.
Official Product Videos
No relevant official product videos from the seller were found for this model.


