
1. Introduction
The Zoom R8 is a versatile audio production tool designed for musicians, producers, and audio enthusiasts. It integrates four key functions into a single compact device: an 8-track recorder, a rhythm machine and pad sampler, a DAW controller, and a computer audio interface. This bundle also includes essential accessories such as a Blucoil Boom Arm with Pop Filter, a balanced XLR cable, AA batteries, a 16GB SDHC memory card, and a Samson R21S Dynamic Microphone, providing a complete solution for your recording needs.
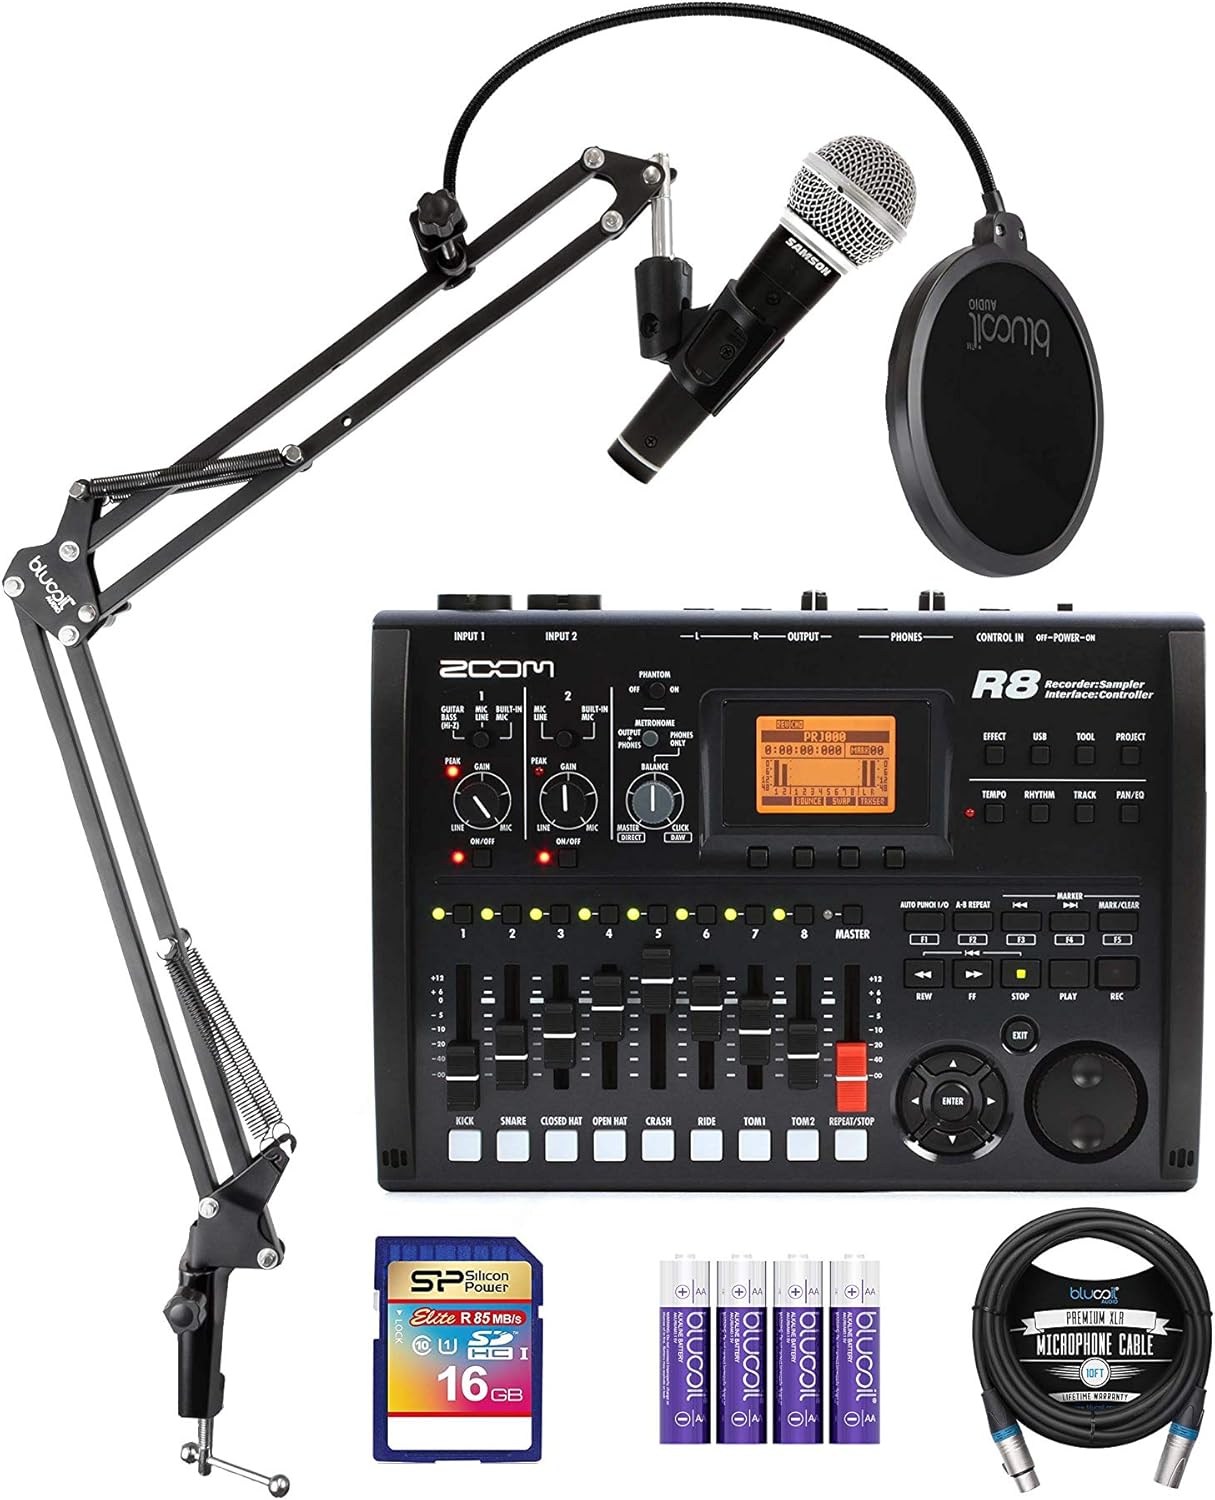
Image 1.1: The complete Zoom R8 bundle, including the R8 unit, Samson R21S microphone, Blucoil boom arm, pop filter, SD card, AA batteries, and XLR cable.
2. Package Contents
Please verify that all items listed below are included in your package:
- Zoom R8 Multitrack SD Recorder, Controller & Interface
- Zoom AD-17 AC Adapter
- Downloadable Cubase LE software
- Blucoil All-in-One Microphone Boom Arm Plus Pop Filter
- Blucoil 10-Foot Balanced XLR Cable (Male-to-Female)
- 4-Pack of Blucoil 1.5V AA Alkaline Batteries
- 16GB Class 10 SDHC SD Card
- Samson R21S Cardioid Dynamic Microphone
- XLR to 1/4" Microphone Cable (for Samson R21S)
- Removable Mic Clip (for Samson R21S)
3. Setup
3.1 Powering the R8
The Zoom R8 can be powered in two ways:
- AC Adapter: Connect the included Zoom AD-17 AC adapter to the DC 5V input on the R8 and plug it into a wall outlet.
- AA Batteries: Insert four AA batteries (included) into the battery compartment on the underside of the R8.
- USB Bus Power: When connected to a computer via USB, the R8 can draw power directly from the USB port.
3.2 Inserting the SD Card
Locate the SD card slot on the side of the R8. Insert the 16GB SDHC card until it clicks into place. This card is essential for recording and storing your projects.

Image 3.1: The Zoom R8 connected to a laptop via USB, demonstrating its use as an audio interface and showing the SD card slot.
3.3 Connecting the Microphone and Boom Arm
- Attach the Blucoil Boom Arm to a sturdy surface, such as a desk, using its clamp. Ensure it is installed vertically to support the microphone's weight.
- Mount the Samson R21S Dynamic Microphone onto the boom arm using the provided mic clip.
- Attach the Blucoil Pop Filter to the boom arm, positioning it in front of the microphone.
- Connect one end of the Blucoil 10-Foot Balanced XLR Cable to the Samson R21S microphone.
- Connect the other end of the XLR cable to one of the XLR/TRS inputs (Input 1 or Input 2) on the Zoom R8.

Image 3.2: A close-up view of the Samson R21S Dynamic Microphone, highlighting its cardioid polar pattern, on/off switch, and frequency response.
3.4 Connecting to a Computer (Optional)
To use the R8 as a DAW controller or audio interface, connect it to your computer using a USB cable. The R8 is compatible with popular DAWs like Ableton Live, Cubase, Logic, and Sonar, offering Mackie Control emulation for seamless integration.

Image 3.3: The Zoom R8 integrated into a home studio setup, connected to a laptop and headphones, demonstrating its use in a recording environment.
4. Operating the Zoom R8
4.1 Basic Recording
- Power on the R8 using the ON/OFF switch.
- Select the input source (e.g., microphone connected to Input 1).
- Adjust the input gain using the GAIN knob for the selected input to prevent clipping.
- Enable +24V/+48V phantom power if using a condenser microphone.
- Select the track you wish to record to.
- Press the REC button to arm the track.
- Press PLAY/STOP to start recording. Press again to stop.
- Use the faders to control playback levels for each track.
4.2 Using as an Audio Interface
Connect the R8 to your computer via USB. The R8 functions as a 2-in/2-out USB audio interface, supporting up to 24-bit/96kHz audio resolution. Install necessary drivers if prompted by your operating system or DAW.
4.3 DAW Controller Functionality
The R8 features Mackie Control emulation, allowing it to act as a control surface for your Digital Audio Workstation. This enables physical control over transport operations (play, stop, record) and provides tactile faders for mixing within your software.
4.4 Sampler and Rhythm Machine
The R8 includes an 8-pad, 8-voice sampler and a rhythm machine. Refer to the detailed R8 manual (available for download from Zoom's website) for in-depth instructions on creating and manipulating samples and rhythm patterns.
4.5 DSP Effects and Tuner
The R8 has over 140 built-in DSP effects that can be applied to your recordings. It also features a chromatic tuner for instruments.

Image 4.1: A side view of the Zoom R8, illustrating its various input and output ports, including XLR/TRS inputs, 1/4" outputs, and headphone jack.
5. Maintenance
To ensure the longevity and optimal performance of your Zoom R8 and its accessories, follow these maintenance guidelines:
- Cleaning: Use a soft, dry cloth to wipe down the unit. For stubborn dirt, a slightly damp cloth can be used, but ensure no moisture enters the device. Avoid abrasive cleaners or solvents.
- Storage: Store the R8 and accessories in a cool, dry place away from direct sunlight, extreme temperatures, and high humidity.
- Battery Care: If not using the R8 for an extended period, remove the AA batteries to prevent leakage and potential damage.
- Cable Care: Avoid sharp bends or kinks in cables. Store them neatly to prevent tangling and damage to connectors.
- SD Card: Handle the SD card carefully. Avoid touching the metal contacts. Always eject the card safely from the R8 or computer before removal.
6. Troubleshooting
If you encounter issues with your Zoom R8, consider the following common solutions:
- No Power: Ensure the AC adapter is securely connected and the power outlet is functional. If using batteries, check if they are inserted correctly and have sufficient charge. If using USB power, ensure the USB cable is connected to a powered port.
- No Sound Input: Verify that the microphone or instrument is properly connected to the correct input. Check the input gain levels and ensure phantom power is enabled for condenser microphones. Confirm the correct input is selected on the R8.
- No Sound Output: Check headphone or line output connections. Ensure volume levels (master fader, headphone knob) are turned up. Verify that the correct output is selected in your DAW if using the R8 as an interface.
- Recording Issues: Ensure an SD card is inserted and has sufficient free space. Check that the track is armed for recording.
- Computer Connection Problems: Try a different USB port or cable. Ensure the R8's USB mode is correctly set for audio interface or DAW control. Reinstall any necessary drivers if applicable.
- Boom Arm Stability: Ensure the boom arm clamp is tightened securely and installed vertically to properly support the microphone's weight.
For more complex issues, consult the full Zoom R8 operation manual or visit the Zoom support website.
7. Specifications
| Feature | Detail |
|---|---|
| Simultaneous Tracks | 2 Rec, 8 Play |
| Sample Rate/Bit Depth | 48kHz/24bit |
| No. of Mic Preamps | 2 Preamps with +24V/+48V Phantom Power |
| Built-In Mics | 2 Stereo Condenser |
| Connectors | 2 XLR/TRS Inputs, 2x1/4" Outputs, 1/4" Phones, USB-Mini-B |
| Expandable Storage | SD/SDHC Card |
| Faders | 8 + 1 Master (Fader/Encoder) |
| Power Source | 4 AA Batteries / USB 5V DC Power Supply |
| Dimensions (DxWxH) | 7.8 x 10 x 2 inches |
| Weight | 2 lb |
| Hardware Interface | USB 2.0 |
8. Warranty and Support
For detailed warranty information regarding your Zoom R8 and bundled accessories, please refer to the documentation included with your purchase or visit the official websites of Zoom and Blucoil. Warranty terms and conditions may vary by region and product.
For technical support, product registration, and software updates, please visit the manufacturer's official support pages:
Keeping your product registered can help you receive important updates and support.


