Introduction
This manual provides detailed instructions for the setup, operation, maintenance, and troubleshooting of your GoolRC Flysky FS-i6X 2.4GHz 10CH RC Transmitter and FS-iA10B Receiver. Please read this manual thoroughly before using the product to ensure safe and efficient operation.
The FS-i6X utilizes AFHDS 2A (Automatic Frequency Hopping Digital System Second Generation) technology, offering enhanced interference protection, low power consumption, and reliable receiver sensitivity. Each transmitter and receiver pair has a unique ID to prevent interference.
Package Contents
Verify that all items are present in your package:
- FS-i6X RC Transmitter
- FS-iA10B Receiver
- Bind Plug
- Instruction Manual
- Upgrade Cable

Image: The complete package contents including the FS-i6X transmitter, FS-iA10B receiver, bind plug, manual, and upgrade cable.
Setup
1. Transmitter Overview

Image: Labeled diagram of the FS-i6X transmitter showing controls like joysticks, switches, fine-tuning rods, and the LCD display.
Familiarize yourself with the transmitter's components:
- Antenna: Transmits the radio signal.
- Handle: For carrying and holding the transmitter.
- VRA/VRB: Rotary potentiometers for proportional control.
- Switches A, B, C, D: Toggle switches for various functions.
- Left/Right Joystick: Main control sticks for aircraft movement.
- Fine-tuning rods 1-4: Trim adjustments for precise control.
- UP/Down buttons: Navigation buttons for menu.
- OK/Cancel buttons: Menu selection and exit.
- Bind key: Used for pairing the transmitter with the receiver.
- Power button: Turns the transmitter on/off.
- LCD Display: Shows operational data and menu options.
2. Battery Installation
The FS-i6X transmitter requires 4 AA batteries (not included).
- Locate the battery compartment on the back of the transmitter.
- Open the battery compartment cover.
- Insert 4 AA batteries, ensuring correct polarity (+/-).
- Close the battery compartment cover securely.
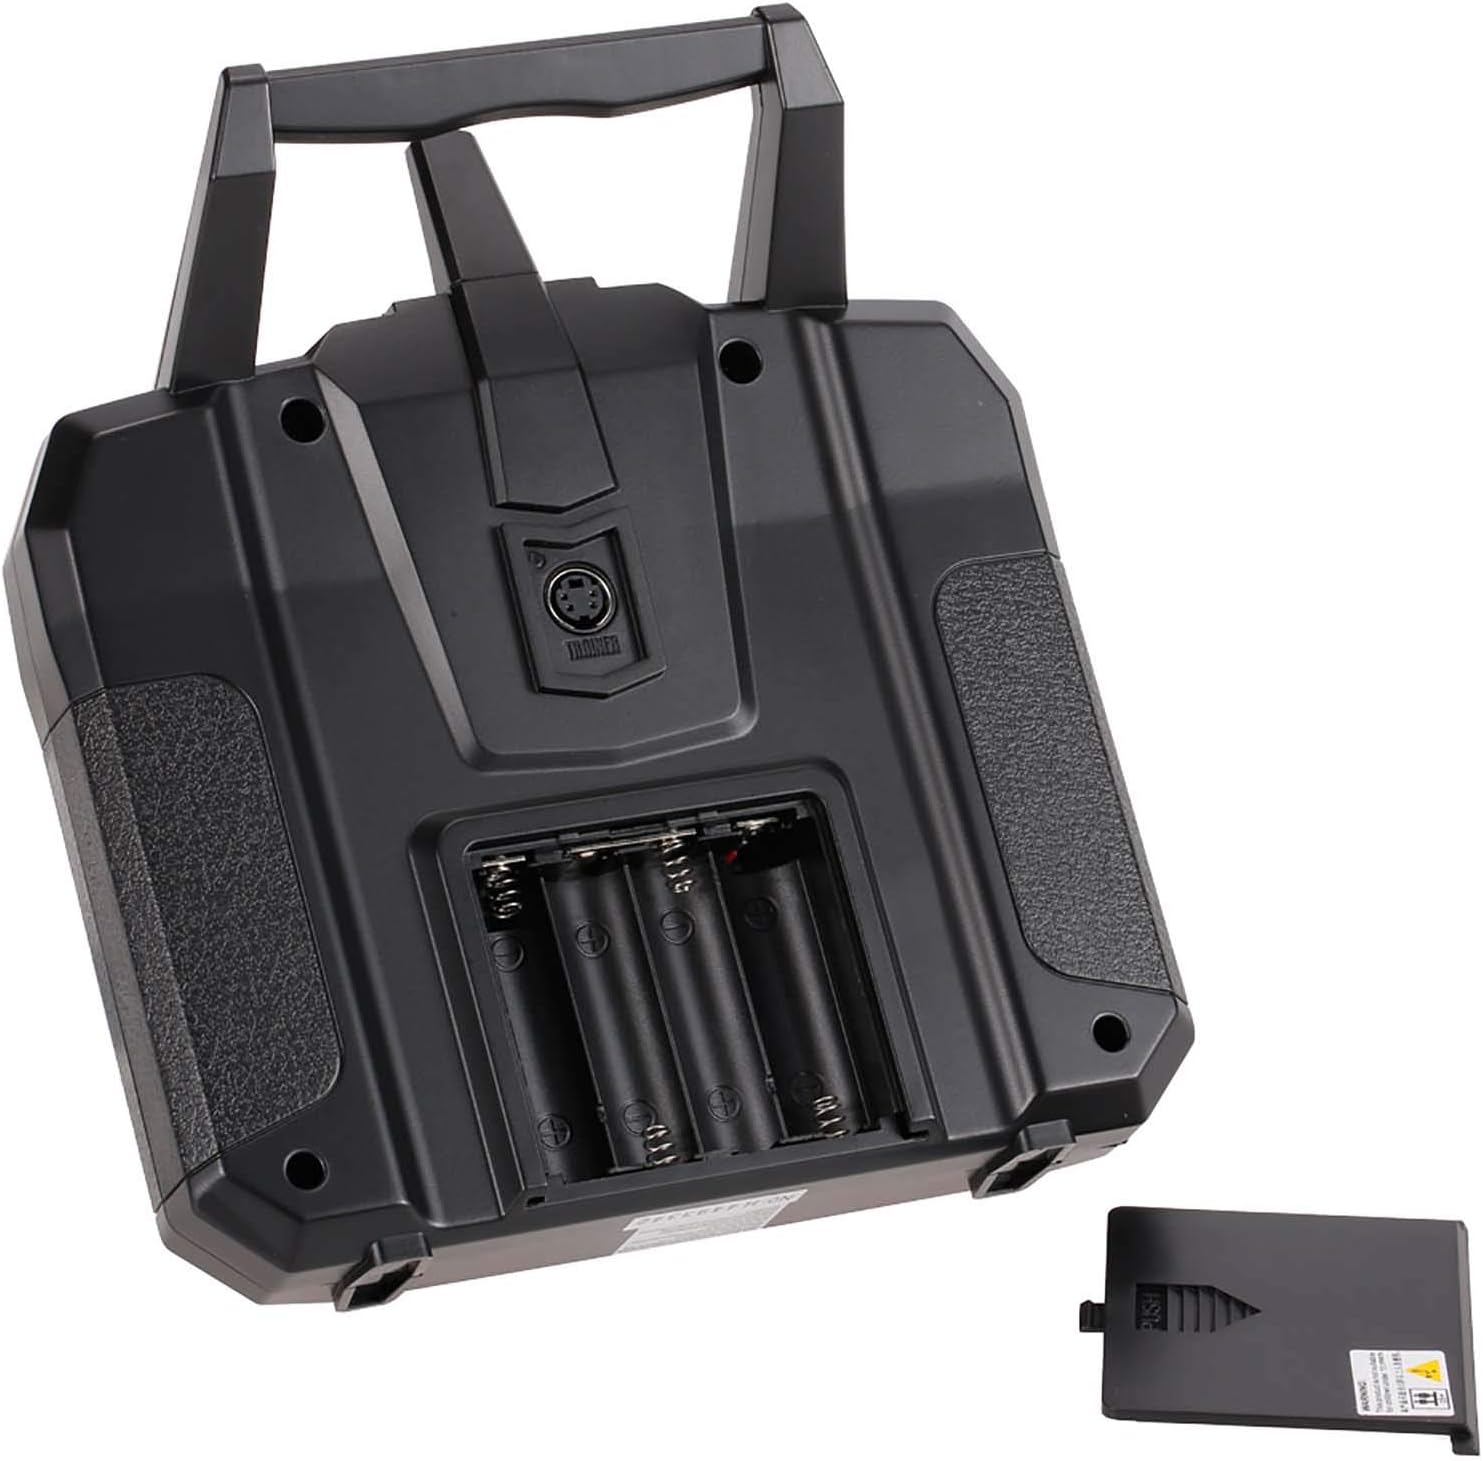
Image: The rear view of the FS-i6X transmitter showing the open battery compartment for 4 AA batteries.
3. Receiver Connection (FS-iA10B)
Connect the FS-iA10B receiver to your RC model's flight controller or servos. The receiver supports 10 PWM channels and features i-BUS serial interface and i-BUS sensor interface.

Image: A detailed wiring diagram illustrating how to connect the FS-iA10B receiver to various components like servos for rudder, throttle, elevator, and aileron, along with battery and bind cable connections.
Note: Do not power on the receiver during the setup process to prevent loss of control.
Ensure the receiver antennas are positioned correctly for optimal signal reception. The antennas should be at a 90-degree angle to each other and away from conductive materials.

Image: Diagrams showing recommended antenna placement for the FS-iA10B receiver, emphasizing a 90-degree orientation for optimal signal.
4. Binding the Transmitter and Receiver
To establish communication between the transmitter and receiver, a binding process is required:
- Ensure the transmitter is powered off.
- Connect the bind plug to the B/VCC port on the FS-iA10B receiver.
- Apply power to the receiver (e.g., from the flight controller or a separate battery). The receiver's LED should flash rapidly.
- While holding down the "Bind key" on the transmitter, power on the transmitter.
- The transmitter's LCD will display "Binding..." or similar. Once binding is successful, the receiver's LED will turn solid.
- Release the bind key on the transmitter.
- Power off both the receiver and the transmitter.
- Remove the bind plug from the receiver.
- Power on the transmitter first, then the receiver. The receiver's LED should now be solid, indicating a successful bind.
Operating Instructions
1. Powering On and Initial Checks
When powering on the transmitter, ensure the throttle stick is at its lowest position. If not, a "Throttle Warning" will appear on the LCD. Move the throttle stick to the lowest position or press any key to bypass the warning.
2. Basic Controls and Functions
The FS-i6X transmitter is designed for various RC models, including airplanes, gliders, and helicopters. Its 10 channels (6 default) provide extensive control capabilities.
- Joysticks: Control primary flight surfaces (aileron, elevator, rudder) and throttle.
- Switches: Activate auxiliary functions such as landing gear, flaps, or flight modes.
- Rotary Knobs (VRA/VRB): Provide proportional control for specific functions.
- Fine-tuning Rods: Used for minor adjustments to channel outputs to achieve neutral trim.

Image: The FS-i6X transmitter shown alongside various compatible RC models including an RC plane, drone, robot, car, helicopter, and boat.
3. AFHDS 2A Technology
The Automatic Frequency Hopping Digital System Second Generation (AFHDS 2A) ensures a robust and reliable connection:
- Interference Protection: Utilizes multi-channel hopping frequency to minimize interference from other radio sources.
- Low Power Consumption: Designed for extended battery life.
- Unique ID System: Each transmitter and receiver pair has a unique ID, preventing cross-interference with other systems.

Image: The FS-i6X transmitter display showing AFHDS 2A, emphasizing the advanced digital system for reliable communication.
4. LCD Screen and Menu Navigation
The dot matrix backlit LCD screen provides clear information and allows for easy menu navigation. Use the UP/DOWN buttons to scroll through options and the OK/CANCEL buttons to select or exit.

Image: Close-up of the FS-i6X transmitter's dot matrix backlit LCD screen displaying system information.
To save changes made in the menu, you typically need to hold the CANCEL button. Refer to the on-screen prompts for specific saving procedures.
Maintenance
- Cleaning: Use a soft, dry cloth to clean the transmitter and receiver. Avoid using solvents or abrasive cleaners.
- Storage: Store the unit in a cool, dry place away from direct sunlight and extreme temperatures. Remove batteries if storing for extended periods.
- Battery Care: Replace AA batteries when the low voltage alarm activates (below 4.2V).
- Firmware Updates: The transmitter supports online firmware updates via the upgrade cable. Check the manufacturer's website for the latest firmware versions and instructions.
Troubleshooting
| Problem | Possible Cause | Solution |
|---|---|---|
| "Throttle Warning" on startup | Throttle stick is not at the lowest position. | Move the throttle stick to the lowest position. Press any key to skip the warning. |
| Menu changes not saving | Incorrect save procedure. | After making changes, hold the CANCEL button to save. Refer to the specific menu's instructions. |
| Channels 7-10 not responding | Channels are turned off by default. | Access the transmitter's menu to manually enable channels 7-10 and assign them to desired switches. |
| Transmitter not binding with receiver | Incorrect binding procedure, receiver not powered, or bind plug not used. | Review the binding steps in the "Setup" section. Ensure the bind plug is correctly inserted and the receiver is powered during the binding process. |
| Firmware update cable not working | Faulty cable or driver issues. | Ensure correct drivers are installed. Try a different USB port or cable if available. Contact support if the issue persists. |
| Drift in control sticks | Calibration issue or wear. | Perform a stick calibration through the transmitter's menu. Use trim adjustments for minor corrections. For persistent issues, professional repair may be needed. |
Specifications
FS-i6X Transmitter Specifications:
| Feature | Detail |
|---|---|
| Product Model | FS-i6X |
| Channels | 6-10 (default 6) |
| Color | Black |
| Compatible Models | Fixed wing, glider, helicopter, boat |
| Wireless Frequency | 2.4GHz |
| Antenna Type | Dual antenna |
| Transmission Power | < 20dBm |
| Low Voltage Alarm | < 4.2V |
| Wireless Protocol | AFHDS 2A |
| Data Port | PS/2 (PPM) |
| Range | 500 ~ 1500m (in the air) |
| Channel Resolution | 4096 |
| Battery | 1.5V AA * 4 |
| Online Update | Yes |
| Language | Chinese and English |
| Display | STN transflective display, LCD 128x64 dot matrix |
| Temperature Range | -10 °C ~ +60 °C |
| Humidity Range | 20% - 95% |
| Dimensions | 174 x 89 x 190 mm |
| Body Weight | 392g |
| Certifications | CE certification, FCC ID: N4ZFLYSKYI6X |

Image: Visual representation of the FS-i6X transmitter and its detailed specifications.
FS-iA10B Receiver Specifications:
| Feature | Detail |
|---|---|
| Product Model | FS-iA10B |
| PWM Channels | 10 |
| Wireless Frequency | 2.4GHz |
| Wireless Protocol | AFHDS 2A |
| Range | 500 ~ 1500m (in the air) |
| Antenna Type | Dual copper tube antenna (150mm * 2) |
| Power | 4.0-6.5V/DC |
| RSSI | Supported |
| Data Port | PWM / i.bus / s.bus |
| Temperature Range | -10 °C ~ +60 °C |
| Humidity Range | 20% - 95% |
| Online Update | Yes |
| Dimensions | 47 * 33.1 * 14.7 mm |
| Weight | 19.3 g |
| Certifications | CE certification, FCC ID: N4ZFLYSKYIA10 |

Image: Visual representation of the FS-iA10B receiver and its detailed specifications.
Warranty Information
GoolRC provides a warranty for this product. If you encounter any problems, please contact the store where you purchased the product in a timely manner. The manufacturer is committed to providing a satisfactory solution.
Support
For further assistance, technical support, or additional resources, please refer to the official GoolRC website or contact their customer service department. Keep your purchase receipt for warranty claims.
Official GoolRC Store: GoolRC Amazon Store