Introduction
This manual provides detailed instructions for the safe and efficient operation of your NOVOPAL 1500W Pure Sine Wave Inverter, model DLCD1500PEU12. Please read this manual thoroughly before installation and use to ensure optimal performance and longevity of the device.
The NOVOPAL Pure Sine Wave Inverter converts 12V DC power from a battery into 220V/230V AC power, suitable for sensitive electronics. It features a continuous output of 1500 watts and a peak surge capacity of 3000 watts, making it ideal for various applications including vehicles, caravans, boats, camping, and travel.
Safety Precautions
Always observe the following safety guidelines to prevent injury or damage to the inverter and connected devices:
- Do not open the inverter casing. There are no user-serviceable parts inside.
- Ensure proper ventilation around the inverter to prevent overheating.
- Keep the inverter away from water, moisture, and flammable materials.
- Connect the inverter only to a 12V DC power source.
- Ensure the total power consumption of connected AC devices does not exceed the inverter's continuous power rating.
- Always disconnect the battery before performing any maintenance or connection changes.
- Use appropriate gauge cables for battery connections to avoid voltage drop and overheating.
Package Contents
Verify that all items are present in the package:
- 1x NOVOPAL 12V to 220/230V 1500W Pure Sine Wave Inverter
- 1x Set of Battery Connection Cables (Red and Black)
- 1x Wired Remote Control (5-meter length)
- 1x User Manual (English and French)
- Spare Fuses (Note: Fuses are soldered internally and require professional service for replacement.)

Image: The NOVOPAL 1500W Pure Sine Wave Inverter, showing the main unit, battery cables (red and black), and the wired remote control.
Setup
1. Connecting the Inverter to a Battery
- Ensure the inverter's power switch is in the "OFF" position.
- Connect the red battery cable to the positive (+) terminal of the inverter and then to the positive (+) terminal of your 12V battery.
- Connect the black battery cable to the negative (-) terminal of the inverter and then to the negative (-) terminal of your 12V battery.
- Ensure all connections are tight and secure to prevent arcing and ensure efficient power transfer.

Image: Rear view of the inverter, highlighting the DC 12V input terminals (positive and negative) and cooling fans.
2. Connecting the Remote Control
The inverter comes with a 5-meter wired remote control for convenient operation, especially when the inverter is installed in a less accessible location.
- Locate the RJ45 port on the inverter, typically near the AC outlets.
- Plug one end of the remote control cable into this port.
- The remote control unit can then be mounted or placed in a convenient location.

Image: The inverter and its remote control, demonstrating how the remote can be used to control the inverter from a distance within a vehicle or RV.
Operating Instructions
1. Powering On/Off
- To power on the inverter, flip the main power switch on the inverter to the "ON" position. Alternatively, use the ON/OFF button on the wired remote control.
- The LCD display will illuminate, showing operational status.
- To power off, flip the main power switch to "OFF" or press the ON/OFF button on the remote.
2. Understanding the LCD Display
The integrated LCD provides real-time information about the inverter's status:
- Battery Level Bar: Indicates the remaining battery charge.
- DC Input Voltage: Displays the current voltage from the 12V battery.
- AC Output Voltage: Shows the output AC voltage (220V/230V).
- Frequency: Displays the output frequency (50Hz).
- Working Indicator: Confirms the inverter is operating correctly.
- Load Level Bar: Shows the percentage of the inverter's capacity currently being used.
- Operating Temperature: Displays the internal temperature of the inverter.
- Error Indicator: Alerts to any faults or protection activations.
- Hours of Service: Tracks the operational time.

Image: A close-up of the inverter's LCD screen, detailing each indicator and its function, including battery level, input/output voltage, frequency, load, and temperature.
3. Connecting AC Devices
The inverter features two AC outlets and a 2.1A USB port. Connect your devices to these outlets. The pure sine wave output ensures compatibility with sensitive electronics such as laptops, cameras, and medical equipment, protecting them from damage.
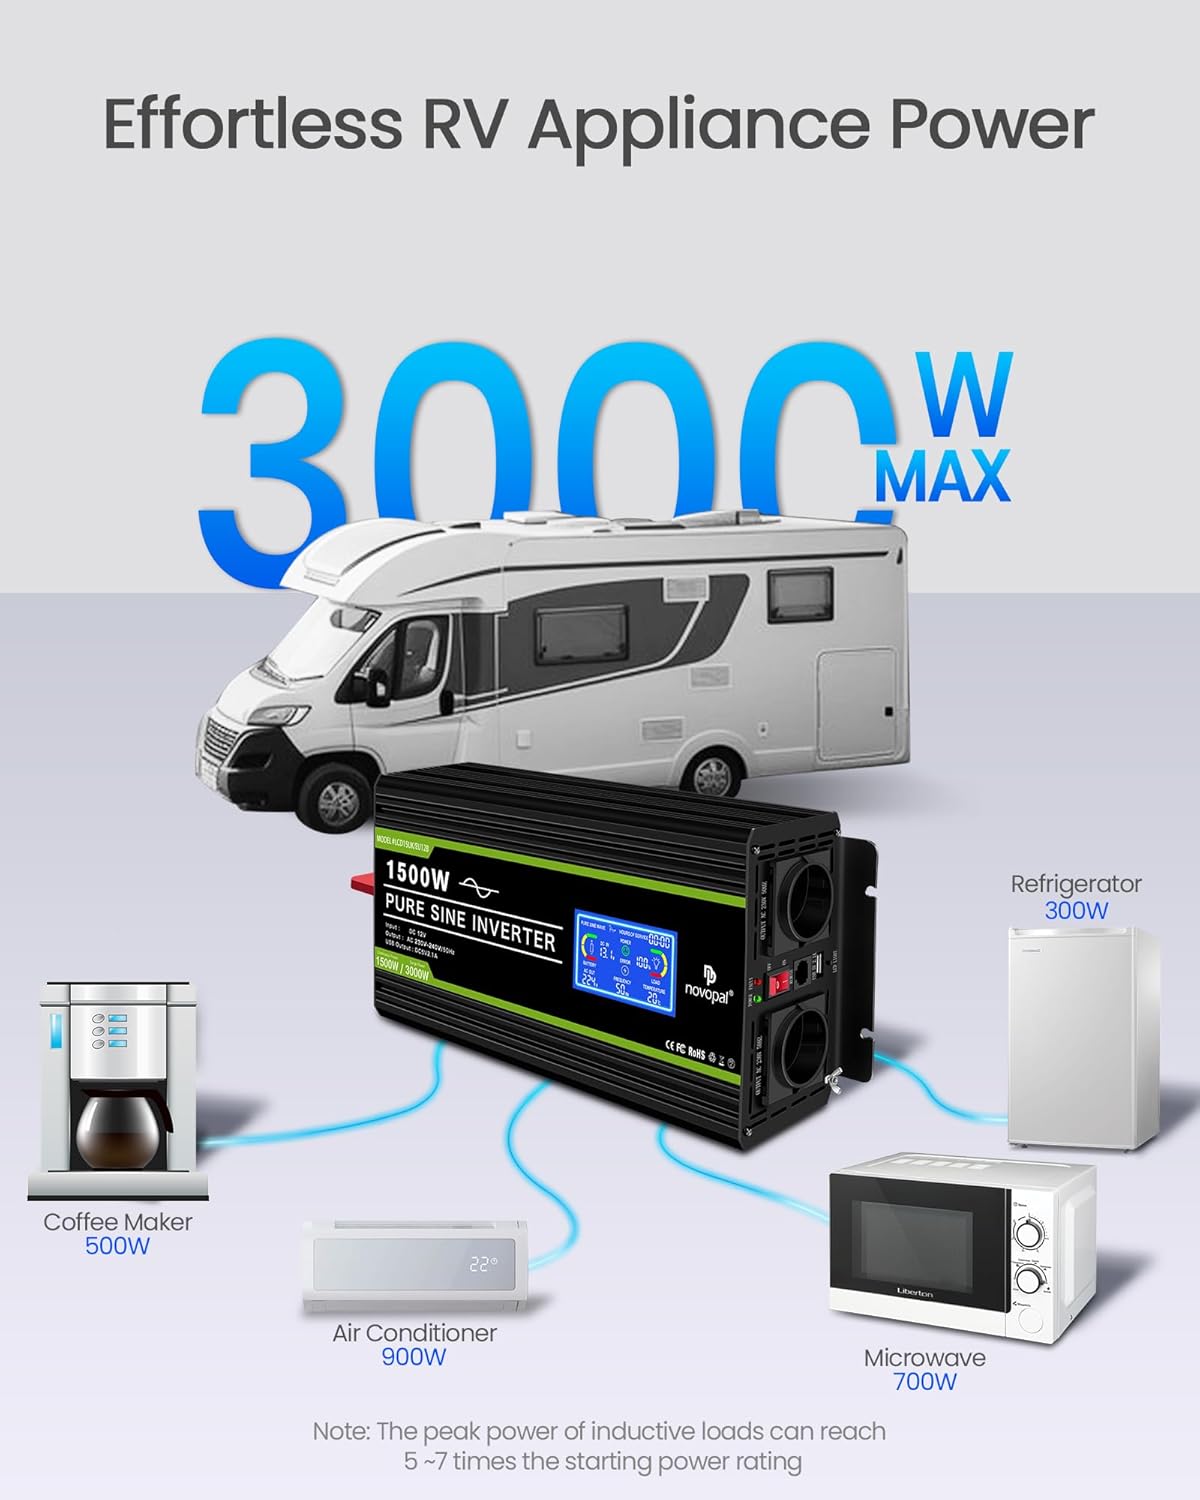
Image: An illustration showing the inverter connected to various household appliances like a coffee maker, air conditioner, microwave, and refrigerator, demonstrating its capability to power multiple devices simultaneously.
4. Recommended Battery Capacity
For optimal performance and battery life, ensure your 12V battery has sufficient capacity for the inverter's power rating. For the 1500W model, a recommended battery capacity is 200 Ampere-hours (AH).
| Inverter Power (Watts) | Recommended Battery Capacity (AH) |
|---|---|
| 1000W | 120AH |
| 1500W | 200AH |
| 2000W | 240AH |
| 3000W | 360AH |
| 4000W | 460AH |
The inverter is compatible with various battery types including Li (Lithium), GEL, SLA (Sealed Lead Acid), FLD (Flooded), AGM (Absorbent Glass Mat), CLA, and USER-defined settings.
Maintenance
1. Cooling System
The inverter features an intelligent cooling fan system. The fans activate when the internal temperature exceeds 45°C or when the inverter power usage is above 40%. They stop when the temperature drops below 45°C or power usage falls below 30%. Ensure the fan vents are clear of obstructions for proper airflow.
Image: The inverter's cooling fans, illustrating their operation across a temperature range from -20°C to 40°C, ensuring efficient heat dissipation.
2. Cleaning
Periodically clean the exterior of the inverter with a dry, soft cloth. Do not use liquid cleaners or solvents. Ensure the inverter is turned off and disconnected from the battery before cleaning.
3. Fuses
The inverter is equipped with internal fuses for protection against overloads and short circuits. These fuses are soldered directly onto the circuit board and are not user-replaceable. If a fuse blows, it indicates a significant internal fault or severe overload. In such cases, the unit requires professional service. Attempting to replace internal fuses without proper tools and expertise can void the warranty and pose a safety risk.
Troubleshooting
The inverter is designed with multiple protection features. If the inverter stops working or an error is indicated on the LCD, refer to the following table:
| Problem | Possible Cause | Solution |
|---|---|---|
| No output power / Inverter not turning on | Low battery voltage, loose connections, inverter switch off, internal fault. | Check battery voltage (should be above 11V). Tighten battery cable connections. Ensure inverter switch is ON. If problem persists, contact support. |
| Overload Protection (Error Indicator ON) | Connected load exceeds 1500W continuous or 3000W surge. | Reduce the total power of connected devices. Disconnect devices, turn inverter off, then on again. |
| Over-voltage Protection | Input DC voltage too high (above 15V). | Check battery charging system. Ensure input voltage is within 12V-15V range. |
| Under-voltage Protection | Input DC voltage too low (below 10.5V). | Recharge or replace the battery. Disconnect load to prevent deep discharge. |
| Over-temperature Protection | Inverter is overheating. | Ensure proper ventilation. Reduce load. Allow inverter to cool down. Clean fan vents. |
| Short Circuit Protection | Short circuit detected in AC output. | Disconnect all AC devices. Check AC cables and devices for shorts. Turn inverter off and on. |
| Inverter beeping | Warning for low battery, overload, or other protection activation. | Check LCD display for specific error code/indicator and refer to relevant troubleshooting steps. |
Specifications
| Feature | Detail |
|---|---|
| Model Number | DLCD1500PEU12 |
| Input Voltage | 12 Volts DC |
| Output Voltage | 220V/230V AC |
| Continuous Power | 1500 Watts |
| Surge Power | 3000 Watts |
| Output Waveform | Pure Sine Wave |
| Output Frequency | 50 Hz |
| USB Output | 2.1A |
| Remote Control Cable Length | 5 meters |
| Dimensions (L x W x H) | 29 cm x 16.5 cm x 10 cm |
| Weight | (Information not available in provided data) |
| Recommended Use | Camping, boat, RV use, off-grid work |
Warranty and Support
Warranty Information
This NOVOPAL inverter comes with a 1 Year Warranty Against Manufacturer Defects. Please retain your proof of purchase for warranty claims.
Customer Support
For technical assistance, troubleshooting beyond this manual, or warranty claims, please contact NOVOPAL customer support through the retailer where you purchased the product or visit the official NOVOPAL website for contact information.
For more information and product updates, you may visit the NOVOPAL Brand Store.


