1. Introduction
Thank you for choosing the Jenabom TY-0101 8-in-1 Rechargeable Electric Screwdriver. This versatile cordless tool is designed for various DIY projects, offering convenience and efficiency. Please read this manual carefully before operating the device to ensure safe and optimal performance. Keep this manual for future reference.
2. Safety Instructions
Always follow basic safety precautions when using electric tools to reduce the risk of fire, electric shock, and personal injury.
- Work Area Safety: Keep your work area clean and well-lit. Cluttered or dark areas invite accidents. Do not operate power tools in explosive atmospheres, such as in the presence of flammable liquids, gases, or dust.
- Electrical Safety: Avoid body contact with earthed or grounded surfaces (e.g., pipes, radiators, ranges, refrigerators). Do not expose power tools to rain or wet conditions. Water entering a power tool will increase the risk of electric shock.
- Personal Safety: Always wear eye protection. Use appropriate safety equipment such as dust masks, non-skid safety shoes, hard hats, or hearing protection when necessary. Dress properly; avoid loose clothing or jewelry that can get caught in moving parts.
- Tool Use and Care: Do not force the power tool. Use the correct power tool for your application. Disconnect the plug from the power source and/or the battery pack from the power tool before making any adjustments, changing accessories, or storing power tools.
- Battery Care: Recharge only with the charger specified by the manufacturer. Do not disassemble the battery pack. Do not short-circuit the battery terminals.
3. Package Contents
Verify that all items listed below are included in your package:
- 1 x Jenabom Electric Screwdriver (approx. 269g)
- 28 x CR-V Screwdriver Bits
- 8 x Socket Wrenches (5-12mm)
- 4 x Long Screwdriver Bits
- 2 x Twist Drills
- 1 x Curved Extended Rod
- 1 x Sleeve Connecting Rod
- 1 x Extended Screw Bit Extension Rod
- 1 x USB Charging Cable
- 1 x Portable Storage Case
4. Product Overview
Familiarize yourself with the components of your electric screwdriver:

Image 1: Key components of the Jenabom Electric Screwdriver. This diagram highlights the Durable Chuck, LED headlamp, Rotary Switch, Positive and Negative Switch, Switch Button, Handle, and Pilot Lamp for easy identification.
- Durable Chuck: Holds screwdriver bits and other accessories securely.
- LED Headlamp: Illuminates the work area for improved visibility.
- Rotary Switch: Used to change the screwdriver's grip position.
- Positive and Negative Switch (F/R Button): Controls the direction of rotation (forward/reverse).
- Switch Button: Activates the screwdriver's motor.
- Handle: Ergonomically designed for comfortable grip.
- Pilot Lamp: Indicates charging status or power.
5. Setup
5.1 Charging the Battery
The screwdriver is equipped with a 1300 mAh rechargeable lithium-ion battery. Before first use, fully charge the battery.
- Locate the micro-USB charging port on the screwdriver.
- Connect the provided USB charging cable to the screwdriver and to a compatible USB power source (e.g., laptop, car charger, USB wall adapter).
- The pilot lamp will indicate charging status.
- Charging time should not exceed 5 hours to prevent battery damage.

Image 2: The electric screwdriver being charged via a micro-USB cable connected to a laptop. This illustrates the convenient charging method for the device.
5.2 Attaching Screwdriver Bits and Socket Wrenches
To attach an accessory:
- Ensure the screwdriver is turned off and the F/R switch is in the neutral (locked) position.
- Insert the desired screwdriver bit directly into the durable chuck until it clicks into place.
- For socket wrenches, first insert the Sleeve Connecting Rod into the chuck. Then, attach the chosen socket wrench onto the Sleeve Connecting Rod.
- Pull gently on the bit or socket to ensure it is securely fastened.

Image 3: Step-by-step guide on how to attach socket wrenches to the electric screwdriver. It shows the screwdriver, the sleeve connecting rod, a selection of socket wrenches, and the fully assembled tool ready for use.
6. Operating Instructions
6.1 Changing Grip Position
The screwdriver offers two grip forms: straight and pistol (grab) grip, ideal for various working conditions.
- Hold the screwdriver firmly with one hand.
- Press the Rotary Switch (button on top of the tool) with your thumb.
- With your other hand, rotate the fuselage to switch between the straight and pistol grip positions.
- Release the Rotary Switch once the desired position is achieved.

Image 4: The Jenabom electric screwdriver demonstrating its two adjustable grip positions: straight grip and grab (pistol) grip. Arrows indicate the rotational movement required to switch between these configurations.
6.2 Forward/Reverse Rotation
Use the Positive and Negative Switch (F/R button) to control the direction of rotation.
- Push the F/R switch to the left for forward (clockwise) rotation, typically for driving screws.
- Push the F/R switch to the right for reverse (counter-clockwise) rotation, typically for removing screws.
- Position the F/R switch in the center to lock the trigger and prevent accidental activation.
6.3 Using the LED Light
The bright front LED light automatically activates when the Switch Button is pressed, illuminating your work area.
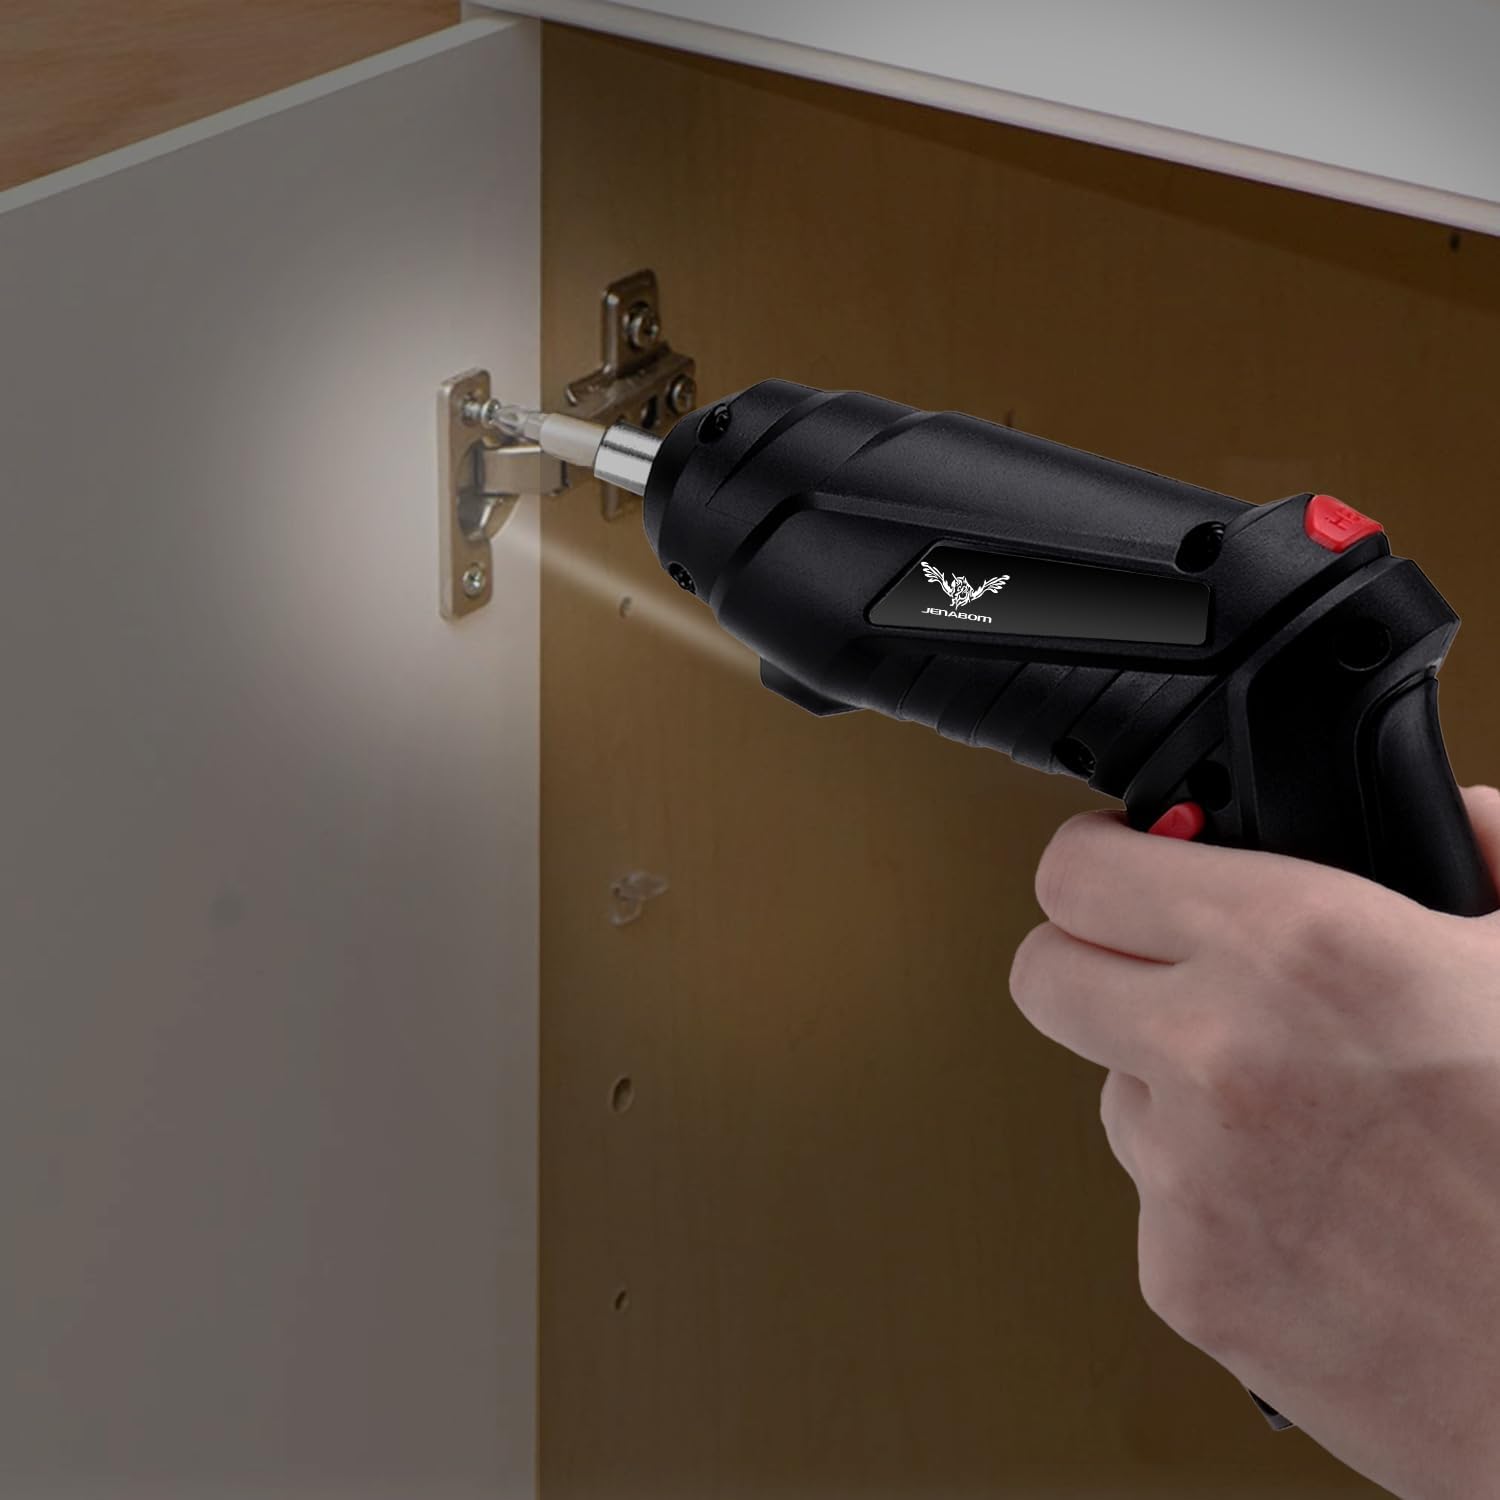
Image 5: A user operating the Jenabom electric screwdriver to secure a cabinet hinge. The integrated LED light is active, providing clear illumination of the fastening point.
6.4 General Usage Tips
- Always select the correct bit or socket size for the fastener to prevent stripping or damage.
- Apply steady, even pressure when driving or removing screws.
- Avoid over-tightening screws, especially in soft materials.
- This tool is suitable for light to medium-duty tasks in metal, plastic, and wood.

Image 6: A collage illustrating the versatility of the Jenabom electric screwdriver for various disassembly and maintenance tasks, including furniture assembly and wall mounting.
7. Maintenance
Regular maintenance ensures the longevity and performance of your screwdriver.
- Cleaning: Keep the tool's ventilation openings clean to prevent overheating. Wipe the tool with a soft, damp cloth. Do not use harsh chemicals or abrasive cleaners.
- Storage: Store the screwdriver and its accessories in the provided portable storage case in a dry, cool place, away from direct sunlight and moisture.
- Battery: For long-term storage, charge the battery to approximately 50% every 3-6 months to maintain battery health.
8. Troubleshooting
If you encounter issues, refer to the following common problems and solutions:
| Problem | Possible Cause | Solution |
|---|---|---|
| Screwdriver does not turn on. | Battery is depleted. F/R switch is in neutral (locked) position. | Charge the battery. Move the F/R switch to forward or reverse. |
| Screwdriver lacks power or stops during use. | Low battery charge. Overload. | Recharge the battery. Reduce pressure or use for lighter tasks. |
| Bit slips or strips screw head. | Incorrect bit size. Worn bit. Insufficient pressure. | Use the correct bit size. Replace worn bits. Apply firm, steady pressure. |
| LED light not working. | Tool not activated. Faulty LED. | Press the Switch Button. If still not working, contact customer support. |
If the problem persists after trying these solutions, please contact Jenabom customer support.
9. Specifications
| Brand | JENABOM |
| Model Number | TY-0101 |
| Reference | JGA0169-8PCS-UK |
| Product Dimensions (L x W x H) | 30.2 x 6.2 x 5.8 cm |
| Weight | 350 grams |
| Style | 8-in-1 |
| Power Source | Electric Cable (USB Charging) |
| Voltage | 3.6 Volts |
| Max Power | 4 Watt |
| Torque | 3.5 Newton-meters |
| Speed | 250 RPM |
| Battery Type | Lithium-Ion (Integrated 1300 mAh) |
10. Warranty and Support
Jenabom products are manufactured to high-quality standards. For warranty information or technical support, please refer to the documentation included with your purchase or contact Jenabom customer service directly. If you encounter any issues, please do not hesitate to send us an email.


