
BLACK+DECKER BCFK706
BLACK+DECKER 7.0 Cu. Ft. Chest Freezer Instruction Manual
Model: BCFK706
1. Important Safety Information
Please read all instructions carefully before using this appliance to ensure safe operation and to prevent injury or damage. Keep this manual for future reference.
- This appliance operates on 115 Volts. Ensure the power outlet matches the appliance's requirements.
- Do not store explosive substances such as aerosol cans with a flammable propellant in this appliance.
- This appliance is not intended for use by persons (including children) with reduced physical, sensory or mental capabilities, or lack of experience and knowledge, unless they have been given supervision or instruction concerning use of the appliance by a person responsible for their safety.
- Children should be supervised to ensure that they do not play with the appliance.
- Proposition 65 Warning: This product can expose you to chemicals which are known to the State of California to cause cancer and birth defects or other reproductive harm. For more information go to www.P65Warnings.ca.gov.
2. Product Overview
The BLACK+DECKER 7.0 Cu. Ft. Chest Freezer is designed to provide ample storage for frozen foods, offering convenience and efficient preservation. It features a compact design suitable for various living spaces.
Key Features:
- Impressive Capacity: 7.0 cubic feet capacity, capable of holding up to 245 lbs. of frozen food.
- Removable Organizer Basket: Facilitates easy organization and retrieval of items.
- Mechanical Temperature Control: Offers 7 control options for precise temperature management.
- Easy Opening & Installation: Features a convenient top opening, power-on indicator light, two adjustable leveling legs, and a space-saving back design.
- Manual Defrost: Equipped with an easy-access drain for manual defrosting.
- Refrigerant: Uses R600a refrigerant, which does not contribute to ozone depletion.
Product Components:

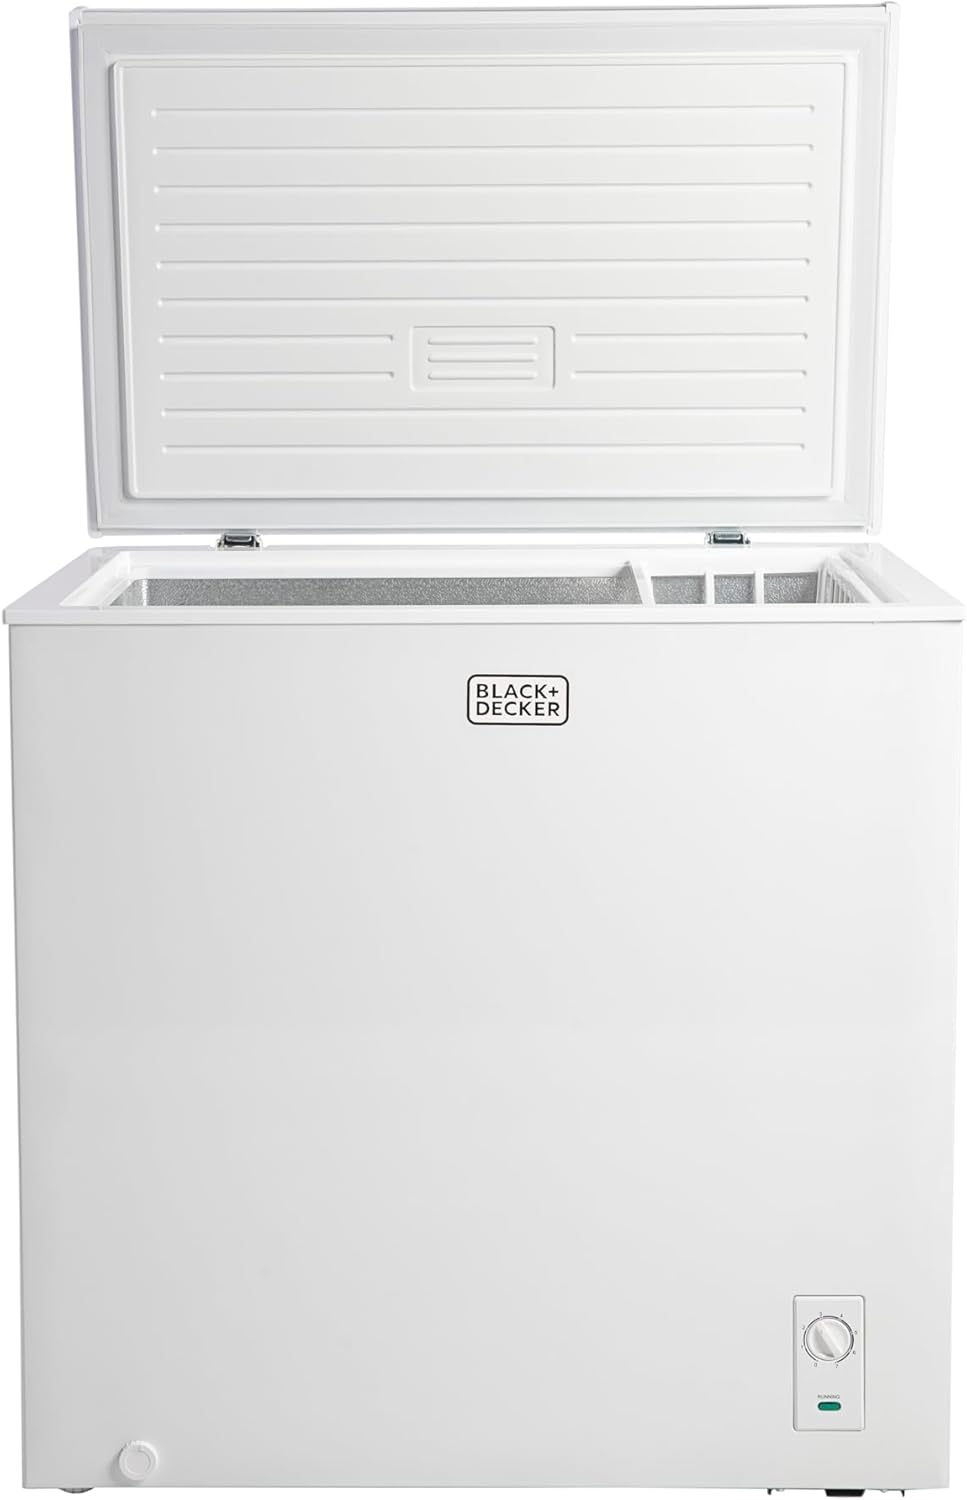
Front view of the BLACK+DECKER 7.0 Cu. Ft. Chest Freezer, showing its compact white design.

Rear view of the freezer, showing the power cord and compressor area.

Side view of the freezer, highlighting the temperature control dial and power indicator light.

Interior view of the freezer with the lid open, showing the storage space.
Interior view showing the removable storage organizer basket inside the freezer.

Bottom view of the freezer, showing the adjustable leveling feet.
3. Setup and Installation
Unpacking:
- Carefully remove the freezer from its packaging. The box is designed to be lifted off after cutting the tape on the bottom.
- Inspect the appliance for any shipping damage. If damage is found, contact your retailer immediately.
- Remove all packing materials, including any tape or protective films.
Placement:
- Place the freezer on a flat, stable surface strong enough to support the unit when fully loaded.
- Ensure adequate air circulation around the freezer. Allow at least 4 inches (10 cm) of space on the sides and back, and 12 inches (30 cm) at the top.
- Avoid placing the freezer in direct sunlight or near heat sources such as stoves, radiators, or heaters.
- Adjust the two leveling legs at the bottom of the freezer to ensure the unit is stable and level. This helps in proper door sealing and efficient operation.
Initial Setup:
- After placing the freezer in its desired location, allow it to stand upright for at least 24 hours before plugging it into a power outlet. This allows the refrigerant to settle, preventing potential compressor issues.
- Plug the freezer into a dedicated 115 Volt, 60 Hz grounded electrical outlet. Do not use extension cords or adapter plugs.
4. Operating Instructions
Temperature Control:
- The freezer is equipped with a mechanical temperature control dial, typically located on the lower right side of the front panel.
- The dial has settings from 1 (least cold) to 7 (coldest).
- To adjust the temperature, rotate the dial to your desired setting. A setting of 4 or 5 is generally recommended for normal use.
- Allow several hours for the freezer to reach the set temperature after initial plug-in or after adjusting the control.

A hand adjusting the temperature control dial on the freezer's front panel.
Power-On Indicator Light:
- A green power-on indicator light is located near the temperature control dial. This light illuminates when the freezer is receiving power and operating.
Loading the Freezer:
- For optimal performance, avoid overloading the freezer. Leave some space between items for proper air circulation.
- Utilize the removable storage organizer basket for smaller, frequently accessed items.
5. Maintenance and Cleaning
Manual Defrost:
This chest freezer requires manual defrosting. Defrost when the frost layer on the interior walls reaches approximately 1/4 inch (6 mm) thick.
- Unplug the freezer from the power outlet.
- Remove all food items and store them in another freezer or cooler to keep them frozen.
- Open the freezer lid and locate the easy-access drain plug at the bottom of the interior. Place a shallow pan or towel beneath the drain to collect water.
- Allow the frost to melt naturally. You can speed up the process by placing bowls of hot water inside the freezer (do not use sharp objects to chip away ice).
- Once all ice has melted, clean the interior with a mild detergent and warm water. Rinse thoroughly and dry completely.
- Close the drain plug, return food items, and plug the freezer back in.
Cleaning the Exterior:
- Wipe the exterior surfaces with a soft cloth dampened with mild soap and water. Dry thoroughly.
- Regularly clean the condenser coils at the back of the freezer using a soft brush or vacuum cleaner to ensure efficient operation.
Gasket Maintenance:
- Periodically inspect the door gasket for any signs of wear, cracks, or mold.
- Clean the gasket with a damp cloth and mild soap to ensure a tight seal, which is crucial for energy efficiency.
6. Troubleshooting
Before contacting customer service, please check the following common issues:
| Problem | Possible Cause | Solution |
|---|---|---|
| Freezer does not operate. | No power to the unit; power cord unplugged; circuit breaker tripped. | Check power supply; ensure cord is securely plugged in; reset circuit breaker. |
| Freezer is not cold enough. | Temperature control set too warm; excessive door openings; large amount of warm food added; poor air circulation. | Adjust temperature setting to a colder level; minimize door openings; allow time for new food to freeze; ensure adequate space around the unit. |
| Excessive noise. | Freezer is not level; objects vibrating against the unit; normal compressor operation. | Adjust leveling legs; ensure nothing is touching the freezer; some operational noise is normal. |
| Frost buildup. | Door not sealed properly; frequent door openings; high humidity. | Check door gasket for proper seal; reduce frequency of door openings; perform manual defrost. |
For more detailed troubleshooting steps, please refer to the official user manual PDF.
7. Specifications
| Specification | Detail |
|---|---|
| Model Number | BCFK706 |
| Capacity | 7.0 Cubic Feet |
| Dimensions (D x W x H) | 21.8 x 32.04 x 33.5 inches |
| Item Weight | 63.9 pounds |
| Color | White |
| Voltage | 115 Volts |
| Installation Method | Freestanding |
| Included Components | Removable food storage organizer basket |
| Certification | ETL |
| Refrigerant | R600a |
8. Warranty and Support
Warranty Information:
This BLACK+DECKER Chest Freezer comes with a 1 Year Limited Warranty. Please refer to the official user manual for full details regarding warranty coverage and terms.
Additional Resources:
- For a complete guide and detailed instructions, download the official User Manual (PDF): Download User Manual (PDF)
- Visit the official BLACK+DECKER Store for more products and support: BLACK+DECKER Store
Ask a question about this manual
Ask about setup, troubleshooting, compatibility, parts, safety, or missing instructions. Manuals+ will review the question and use this page’s manual context to help answer it.