1. Introduction
This manual provides detailed instructions for the installation, operation, and maintenance of your YOURLITE Rectangular Ceramic Vessel Sink. Please read these instructions carefully before installation and retain them for future reference. Proper installation and care will ensure the longevity and optimal performance of your sink.
2. Package Contents
Verify that all components are present before beginning installation. The package includes:
- Rectangular Ceramic Vessel Sink (19.3''L x 15.2''W x 5.3''H)
- Modern Single Hole Faucet (Oil Rubbed Bronze Finish, 12-inch high)
- Pop-Up Drain (8-inch, without overflow, Brass Structured)
- Hot/Cold Water Supply Lines (M10 with 1/2"-3/8" Brass Reducer)
- Faucet Hardware
- Edge Board Fixing
- Anti-shattering Structure

Figure 2.1: Included components of the YOURLITE Vessel Sink set.
3. Specifications
| Feature | Detail |
|---|---|
| Brand | YOURLITE |
| Model Number | USBA20070 |
| Material | Ceramic (4 layered glaze spraying) |
| Color | Black & White |
| Sink Dimensions | 19.3"L x 15.2"W x 5.3"H (Bowl thickness: 0.5") |
| Faucet Height | 12 inches |
| Faucet Finish | Oil Rubbed Bronze |
| Drain Type | Pop-Up (without overflow) |
| Installation Type | Countertop Vessel |
| Hole Count | 1 (for faucet) |


Figure 3.1: Basin and Faucet Dimensions.
4. Setup and Installation
Professional installation is recommended. Ensure all local plumbing codes are followed. Turn off the main water supply before starting installation.
4.1 Prepare Countertop
- Ensure your countertop is clean, level, and structurally sound to support the sink and faucet.
- Mark the desired location for the sink and the faucet hole. The faucet requires a single hole.
- Drill the necessary holes for the faucet and drain according to the product dimensions and your specific countertop material.
4.2 Install Faucet
- Insert the faucet into the drilled hole on the countertop.
- Secure the faucet from underneath the countertop using the provided hardware (washer and mounting nut). Tighten firmly but do not overtighten.
- Connect the hot and cold water supply lines to the faucet's inlet pipes. Use the 1/2"-3/8" brass reducer if needed for your existing plumbing.
4.3 Install Drain
- Apply a bead of plumber's putty or silicone sealant around the underside of the drain flange.
- Insert the drain assembly into the sink's drain hole.
- From underneath the sink, install the rubber washer, friction washer, and mounting nut onto the drain body. Tighten securely.
- Connect the drain tailpiece to your P-trap assembly.
4.4 Position and Seal Sink
- Carefully place the vessel sink onto the countertop, aligning it with the drain and faucet.
- Apply a continuous bead of silicone sealant around the base of the sink where it meets the countertop.
- Allow the sealant to cure completely according to the manufacturer's instructions before using the sink.
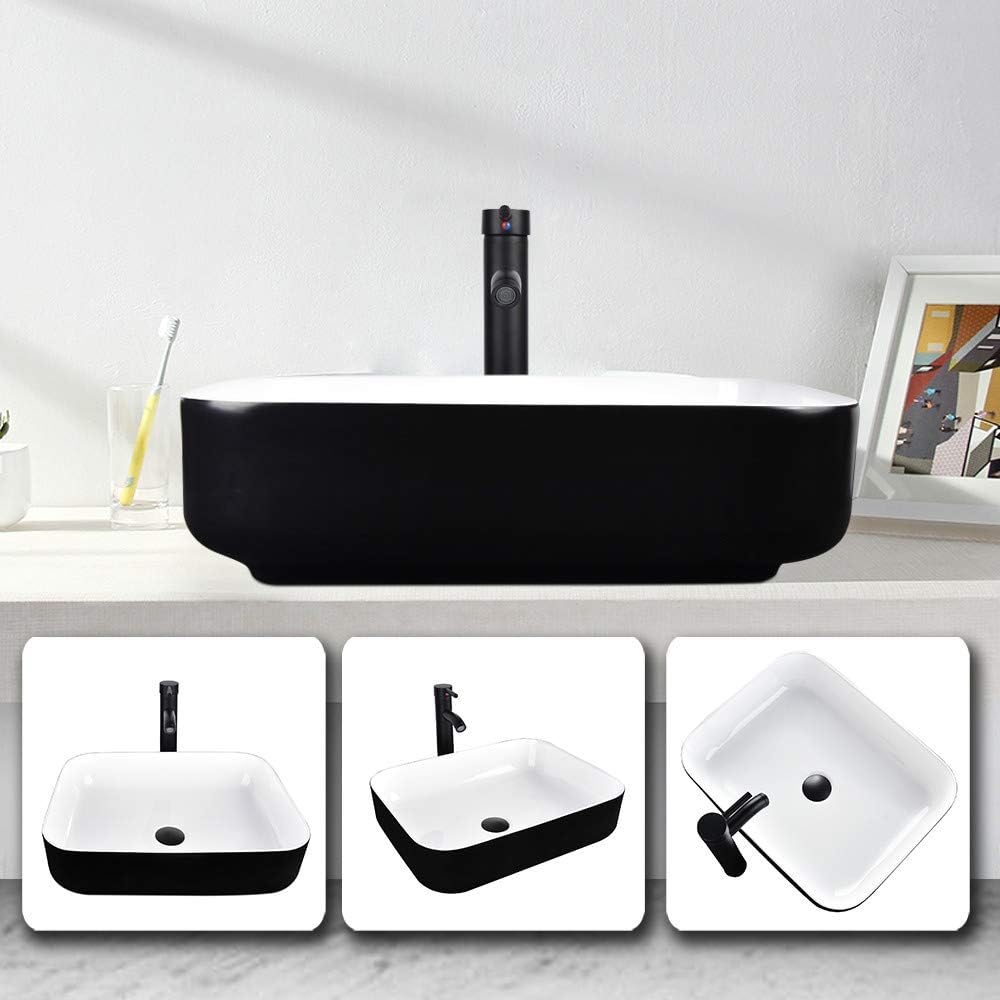
Figure 4.1: Example of an installed YOURLITE Vessel Sink.
5. Operation
The YOURLITE vessel sink operates like a standard bathroom sink. The single-handle faucet controls both water flow and temperature.
- Water Flow: Lift the faucet handle to turn on the water. The higher the handle is lifted, the greater the water flow.
- Temperature Control: Move the handle left for hot water and right for cold water. Adjust the handle position to achieve the desired water temperature.
- Drain Operation: The pop-up drain is operated by pressing down on the drain stopper to close it and pressing again to open it.
6. Maintenance
Regular cleaning and proper care will help maintain the appearance and functionality of your YOURLITE vessel sink.
- Daily Cleaning: Wipe the sink and faucet with a soft, dry cloth after each use to prevent water spots and mineral buildup.
- General Cleaning: For a more thorough cleaning, use a mild, non-abrasive cleaner and a soft sponge or cloth. Rinse thoroughly with water and dry immediately.
- Avoid Harsh Chemicals: Do not use abrasive cleaners, scouring pads, or harsh chemicals (e.g., bleach, ammonia-based cleaners) as these can damage the ceramic glaze and faucet finish.
- Faucet Care: Periodically check the faucet for leaks and ensure all connections are secure. Clean the aerator regularly to maintain optimal water flow.
7. Troubleshooting
If you encounter any issues with your sink, refer to the following common problems and solutions:
| Problem | Possible Cause | Solution |
|---|---|---|
| Leaking around sink base | Improperly sealed sink base | Ensure silicone sealant is applied correctly and has cured. Reapply if necessary. |
| Leaking around faucet base | Loose faucet mounting nut or worn O-rings | Tighten the mounting nut under the countertop. Inspect and replace O-rings if damaged. |
| Low water pressure | Clogged aerator or partially closed shut-off valves | Unscrew and clean the faucet aerator. Ensure hot and cold water shut-off valves are fully open. |
| Slow drainage | Clogged drain or P-trap | Remove and clean the pop-up drain stopper. Inspect and clear any blockages in the P-trap. |
| Water temperature issues | Incorrect water supply connections or faulty cartridge | Verify hot and cold supply lines are connected correctly. If issues persist, the faucet cartridge may need replacement. |
8. Warranty and Support
Specific warranty details for this product are not provided in this manual. For warranty information, technical support, or replacement parts, please contact YOURLITE customer service directly or visit their official website. Always provide your model number (USBA20070) and purchase date when seeking support.