Introduction
Thank you for choosing the Faroro Automatic Pet Feeder. This device is designed to provide a convenient and reliable feeding solution for your beloved pets, ensuring they receive their meals on a consistent schedule. Please read this manual carefully before operating the feeder to ensure proper setup and use.

Top view of the Faroro Automatic Pet Feeder, highlighting its sleek design and the visible food compartment.
Key Features
- Customized Feeding Plan: Easy-to-set built-in timer for a 24-hour schedule, allowing up to 5 meals per day with one instant feeding tray and four scheduled meal trays.
- Encourage Balanced Diet: Each compartment holds up to 8oz (1 cup) of food, suitable for both dry and wet food. Designed to keep refrigerated food fresh for up to 12 hours.
- Dual Power Supply: Operates with both 3 D batteries (not included) and a power adapter (included). Ensures continuous function during power outages.
- Humanized Design: Features a built-in voice recorder for a 10-second message, played 3 times during feeding times. Food tray and top cover are easily disassembled for cleaning and are dishwasher safe.
- Professional After-Sale Support: Includes a 2-year warranty upon activation with Faroro after-sales team.

Visual representation of the feeder's key functionalities, including its ability to dispense multiple meals and accommodate different food types.
Package Contents
- 1 x Automatic Pet Feeder
- 1 x Power Adapter
- 1 x USB Cable
- 1 x User Manual
Specifications
| Specification | Value |
|---|---|
| Material | ABS imported material |
| Programmable Meals | 5 portions (5 x 240g) |
| Power Supply | 3 x D Batteries (Not included) or Power Adapter |
| Dimensions (L x W x H) | 13.03ft x 12.67ft x 3.27ft (Product: 7.64 x 7.64 x 13.03 inches) |
| Weight | 1.4 kg (excluding batteries and food) / 3.3 pounds |
| Capacity | 1.2L Dry/Wet Food |
| Color | Grey |
| Warranty | 1 Year (2-Year upon activation) |
Setup
Power Supply
The feeder supports a dual power supply system for uninterrupted operation. You can power the device using the included power adapter or by installing 3 D batteries (not included).
- Connect the provided USB cable to the feeder and the power adapter. Plug the adapter into a standard wall outlet.
- For battery backup, open the battery compartment on the underside of the feeder and insert 3 D batteries, ensuring correct polarity.
- After installing batteries, turn the bottom button to the "I" position to activate battery power. It is recommended to use both the power adapter and batteries simultaneously to prevent the feeder from resetting during a power outage.

Illustration of the dual power supply setup, showing both adapter connection and battery installation.
Operation
Filling the Food Trays
The feeder has five compartments: one for immediate access and four for scheduled meals. It is suitable for both dry and wet food.
- To access the trays, pull the designated tab to open the lid.
- Fill each compartment with the desired amount of dry or wet food. Each compartment can hold up to 8oz (1 cup).
- If using wet food, completely freeze it first before placing it into the feeding tray to help maintain freshness for up to 24 hours.
- Close the lid securely after filling.
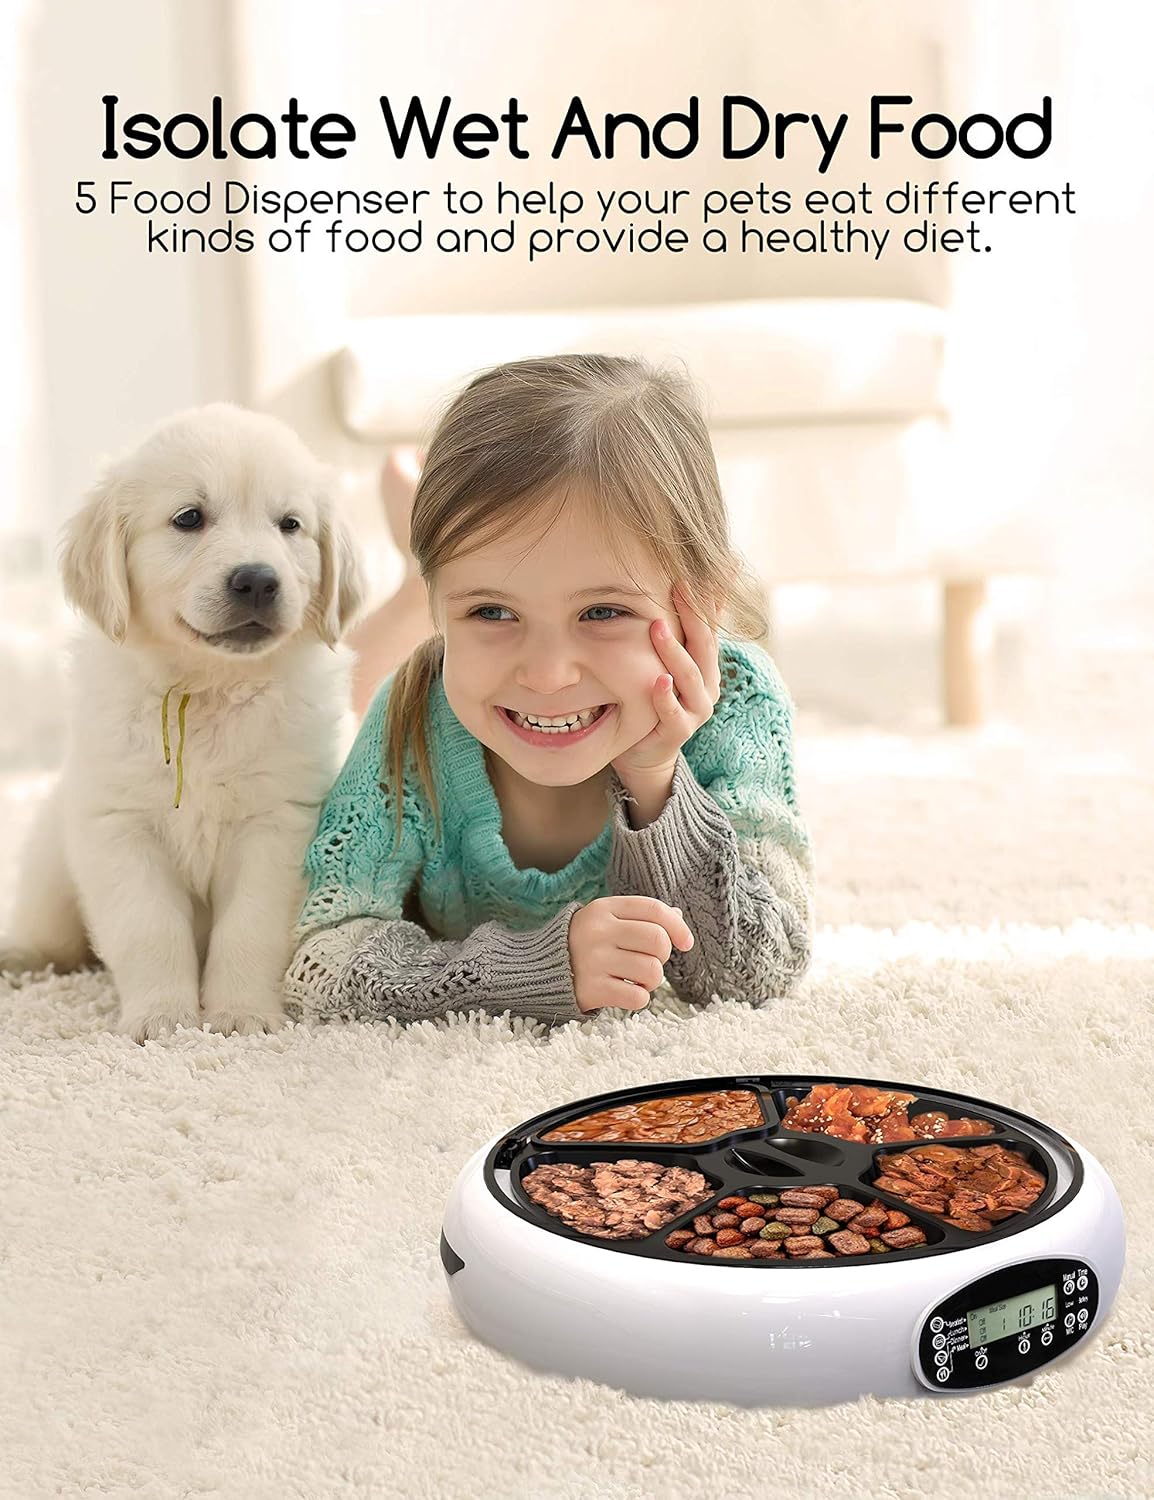
The feeder's five compartments allow for a variety of food types, promoting a balanced diet.
Programming Meal Times
The feeder operates on a 24-hour schedule (military time). You can program up to 4 different meal times.
- Use the control panel on the side of the feeder to set the current time and individual meal times.
- Press the 'Meal' buttons (Breakfast, Lunch, Dinner, Meal 4) to view and adjust the programmed times for each meal.
- Use the 'Hour' and 'Minute' buttons to set the desired feeding times.
- The feeder will automatically rotate to the next filled compartment at the scheduled time.

The programmable timer allows for a customized feeding schedule, providing convenience for pet owners.
Voice Recording Function
Record a personalized 10-second message to call your pet at meal times.
- Locate the 'MIC' button on the control panel.
- Press and hold the 'MIC' button to begin recording your message. Release the button when finished.
- The recorded message will play 3 times during each scheduled feeding time.
- To play back the recorded message, press the 'Play' button.

The voice recording feature allows you to personalize meal calls for your pets.
Manual Feeding
You can manually dispense a meal at any time.
- Press and hold the 'Manual Time' button on the control panel. The feeder will rotate to the next available meal compartment.
Maintenance
Cleaning the Feeder
Regular cleaning is essential to maintain hygiene and ensure your pet's health.
- Unplug the feeder from the power source and remove any batteries before cleaning.
- Disassemble the food tray and top cover. These parts are dishwasher safe for easy cleaning.
- Wipe the main unit with a damp cloth. Do not submerge the main unit in water.
- Ensure all parts are completely dry before reassembling the feeder.

The removable food tray and top cover are designed for easy cleaning, promoting pet hygiene.
Troubleshooting
- Feeder not dispensing food: Check if the power adapter is securely plugged in or if the batteries are correctly installed and have sufficient charge. Ensure the bottom button is set to "I" for battery operation.
- Food not fresh: Ensure wet food is completely frozen before placing it in the tray. Consider cleaning the tray regularly, especially with wet food.
- Buttons not responding: Verify the power supply. If using batteries, check for low battery indicator.
- Feeder resetting: Always use both the power adapter and batteries simultaneously to prevent settings from being lost during power interruptions.
- Voice message not playing: Ensure the message was recorded correctly. Check volume settings if available.
Warranty and Support
The Faroro Automatic Pet Feeder comes with a 1-year warranty. You can activate a 2-YEAR warranty by contacting the Faroro after-sales team after purchase. Faroro provides 24/7/365 professional service and technical support.
For further assistance, please visit the Faroro Store on Amazon or search "Faroro Official" on YouTube for more operating instructions.


