1. Product Overview
This manual provides comprehensive instructions for the installation, operation, and maintenance of your GW Security 32 Channel 4K NVR 5MP AI Human Vehicle Detection Security Camera System. This system is designed for advanced surveillance, offering high-resolution video, intelligent detection capabilities, and robust recording features.

Image: Overview of the GW Security 32 Channel 4K NVR system, showing multiple dome cameras, NVR unit, PoE switches, and a hard drive, alongside a smartphone displaying live view.
The system includes a 32-channel Ultra HD 4K H.265 NVR with a pre-installed 8TB hard drive, 32 x 5.0 Megapixel 1920P dome IP PoE cameras, and two 16-port PoE switches. Key features include Power Over Ethernet (PoE) for simplified installation, Super HD 1920P resolution, 2.8-12mm varifocal lenses, built-in microphones for audio recording, AI Human & Vehicle Detection, and remote access via smartphone, PC, or tablet devices.
2. Package Contents
Verify that all items listed below are present in your package. If any items are missing or damaged, please contact GW Security support.
- 1 x GW4232S: 32 Channel 4K H.265 NVR with pre-installed 8TB Hard Drive
- 32 x GW5071IP: 5MP IP dome cameras
- 2 x GWSW1602G: 16 Ports PoE Switch
- 16 x GWCAT60: 60ft Ethernet Cables
- 16 x GWCAT100: 100ft Ethernet Cables

Image: Detailed view of the NVR unit, two PoE switches, and an 8TB hard drive, which are core components of the security system.
3. Key Features
- Power Over Ethernet (PoE): Simplifies installation by providing both power and data through a single Ethernet cable for each IP camera. The NVR includes built-in 10/100 Mbps PoE switches.
- Super HD 1920P Resolution: Capture high-definition video at 2592 x 1920 pixels, offering significantly sharper and larger images compared to 1080p systems.

Image: A visual comparison demonstrating the clarity difference between various video resolutions, highlighting the superior detail of 5MP (2592x1920) compared to lower resolutions like 1080P, 720P, and D1.
- 2.8mm-12mm Varifocal Lens: Each camera features a manual zoom varifocal lens, allowing adjustment of the angle of view from 115 degrees (wide) to 22 degrees (narrow) for optimal coverage.

Image: An illustration showing a dome camera with a 2.8-12mm varifocal lens and examples of how different focal lengths (2.8mm, 4mm, 6mm, 8mm, 10mm, 12mm) affect the field of view, from wide to narrow.
- Built-in Microphone: Cameras include integrated microphones for audio recording, enhancing surveillance capabilities.

Image: A dome camera with a visible microphone icon, indicating its audio recording capability, shown in a meeting room setting.
- AI Human & Vehicle Detection: Advanced artificial intelligence technology differentiates between human and vehicle movement, reducing false alarms and providing more accurate alerts.

Image: A scene demonstrating AI Human and Vehicle Detection, with green boxes highlighting a person and a car, indicating the system's ability to identify specific objects.
- H.265 Video Compression: Utilizes H.265 compression technology for efficient storage and bandwidth usage, allowing for longer recording times and faster loading speeds compared to H.264.

Image: A comparison chart illustrating the benefits of H.265 video compression over H.264, showing H.265 requires less storage space and bandwidth while offering faster loading speeds and longer recording times.
- Network Remote Access: Supports remote viewing and playback via smartphone (iOS/Android), PC (Windows/Mac), and tablet devices using the dedicated application.
- Night Vision: Equipped with 30 infrared LEDs, providing night vision up to 100 feet for clear surveillance in low-light conditions.
- Weatherproof & Vandal-Proof Cameras: Durable camera design suitable for outdoor installation.
4. Setup Guide
4.1 NVR and PoE Switch Connection
- Unpack Components: Carefully remove the NVR, PoE switches, cameras, and cables from their packaging.
- Connect NVR to Monitor: Connect the NVR to a monitor using an HDMI or VGA cable.
- Connect NVR to Network: Connect the NVR's WAN port to your router or network switch using an Ethernet cable for internet access and remote viewing capabilities.
- Connect PoE Switches: Connect the included 16-port PoE switches to the NVR's LAN ports. Ensure the switches are powered on.
- Power On NVR: Connect the NVR to a power source using the provided power adapter. The system will boot up.

Image: Front view of the GW Security NVR, showing status indicators and a USB port for peripheral connections.
4.2 Camera Installation
- Mount Cameras: Choose appropriate locations for your 32 dome cameras, ensuring optimal viewing angles and coverage. Securely mount each camera.
- Connect Cameras to PoE Switches: Use the provided 60ft and 100ft Ethernet cables to connect each IP camera directly to the PoE ports on the PoE switches. The cameras will receive both power and data through these cables.
- Adjust Varifocal Lens: After mounting, manually adjust the 2.8-12mm varifocal lens on each camera to achieve the desired field of view. This can be done by rotating the lens mechanism.
- Verify Camera Feed: Once connected, the NVR should automatically detect and display the camera feeds on the connected monitor.

Image: A close-up view of a GW Security 5MP dome camera, highlighting its robust design and lens.
5. Operating Instructions
5.1 Initial Setup and Configuration
- NVR Interface: Navigate the NVR's on-screen menu using a USB mouse (not included).
- Network Settings: Configure network settings to ensure the NVR has internet access. DHCP is typically enabled by default.
- Date and Time: Set the correct date and time for accurate recording timestamps.
- User Accounts: Create or modify user accounts and passwords for system security.
5.2 Recording Modes
The NVR supports various recording modes:
- Manual Recording: Start and stop recording manually.
- Time Scheduled Recording: Set specific schedules for continuous recording.
- Alarm Triggered Recording: Recording starts when an alarm event (e.g., motion detection) is triggered.
- Motion Detect Recording: Recording starts when motion is detected by the cameras.
5.3 AI Human & Vehicle Detection
To utilize the AI detection features:
- Enable AI Detection: Access the NVR's camera settings and enable AI Human & Vehicle Detection for desired channels.
- Configure Detection Zones: Define specific areas within the camera's view where detection should be active.
- Set Up Alerts: Configure the system to send app alerts or email notifications when human or vehicle activity is detected.
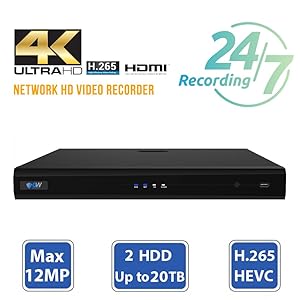
Image: A graphic highlighting the NVR's capabilities, including 4K Ultra HD, H.265 compression, 24/7 recording, support for up to 12MP cameras, and 2 HDDs up to 20TB.
5.4 Remote Access (Mobile/PC)
The system supports remote viewing and playback through the GWVIEW mobile application and PC software.
- Download App: Download the "GWVIEW" app from your smartphone's app store (iOS or Android).
- Scan QR Code: Use the app to scan the QR code displayed on the NVR's monitor or found on the NVR unit itself to add your device.
- Live View & Playback: Once added, you can access live camera feeds and review recorded footage from anywhere with an internet connection.
Image: A diagram illustrating the mobile view setup process, showing QR codes for iPhone and Android apps, and a smartphone displaying live surveillance footage.
6. Maintenance
- Regular Cleaning: Periodically clean camera lenses and housings to ensure clear image quality. Use a soft, damp cloth.
- Firmware Updates: Check the GW Security website for available firmware updates for your NVR and cameras to ensure optimal performance and security.
- Hard Drive Health: Monitor the health of the pre-installed 8TB hard drive through the NVR's system settings. Replace if signs of failure appear.
- Cable Inspection: Inspect all Ethernet cables for wear or damage, especially those exposed to outdoor elements.
- Backup Recordings: Regularly back up important recordings to an external USB drive or network storage. The NVR supports USB 3.0 for backup.
7. Troubleshooting
- No Camera Feed:
- Check if the camera is properly connected to the PoE switch.
- Verify the Ethernet cable is not damaged.
- Ensure the PoE switch is powered on.
- Restart the NVR and the camera.
- No Remote Access:
- Ensure the NVR is connected to the internet.
- Check network settings on the NVR and your router.
- Verify the GWVIEW app is updated to the latest version.
- Confirm correct device ID/QR code was used for adding the NVR to the app.
- Poor Image Quality:
- Clean the camera lens.
- Adjust the varifocal lens for optimal focus.
- Ensure sufficient lighting for night vision.
- False AI Detections:
- Adjust detection sensitivity in the NVR settings.
- Refine detection zones to exclude areas with irrelevant movement (e.g., trees swaying).
8. Specifications
| Feature | Detail |
|---|---|
| NVR Model | GW4232S |
| Camera Model | GW5071IP |
| Number of Channels | 32 Channels |
| Video Capture Resolution | 5MP (2592 x 1920P) for cameras, 4K (8MP) for NVR recording |
| Lens Type | 2.8-12mm Varifocal Manual Zoom |
| Viewing Angle | 115 Degrees (wide) to 22 Degrees (narrow) |
| Night Vision Range | Up to 100 feet (30 infrared LEDs) |
| Special Features | AI Human & Vehicle Detection, Built-in Microphone, PoE, Weatherproof, Vandal-proof |
| Video Compression | H.265/H.264 |
| Hard Drive Capacity | Pre-installed 8TB (Supports up to 20TB via 2 SATA interfaces) |
| Recording Modes | Manual, Time Scheduled, Alarm Triggered, Motion Detect |
| Network Interface | Ethernet (NVR built-in 8 Ports 10/100 Mbps PoE Switch) |
| Video Output | HDMI, VGA |
| Remote Access | Smartphone (iOS/Android), PC (Windows/Mac), Tablet |
| Operating System (NVR) | Linux-based (internal) |
| Dimensions (NVR) | Approximately 20 x 20 x 15 inches (Product Dimensions) |
| Item Weight | 149.7 pounds (Total system weight) |
9. Warranty and Support
Your GW Security 32 Channel 4K NVR Security Camera System comes with a 2-Year Warranty.
GW Security provides Free US-based Tech Support for the lifetime of the product. For technical assistance, troubleshooting, or warranty claims, please contact GW Security customer service.
For the latest support information, drivers, and firmware updates, please visit the official GW Security website.