Introduction
This manual provides detailed instructions for the setup, operation, and maintenance of your Aluratek Wireless Charging Clock Radio (ABQC02F). This device combines an FM radio, Bluetooth speaker, alarm clock, Qi wireless charging pad, and a USB charging port into a single unit, designed for convenience and versatility.
Product Features
- Integrated Qi wireless charging pad for compatible smartphones.
- Dual 3W channel speakers for clear audio.
- Bluetooth connectivity for wireless audio streaming from smartphones, tablets, and other Bluetooth-enabled devices.
- Built-in FM radio tuner.
- USB charging port for additional device charging.
- Easy-to-use push-button controls for time, alarm, pairing, volume, and track selection.
- LED display with adjustable brightness.
- Portable design with a built-in rechargeable lithium-ion battery (up to 6 hours of audio streaming).
Package Contents
- Aluratek Wireless Charging Clock Radio (ABQC02F)
- USB Charging Cable
- Owner's Manual (this document)
Controls and Ports
Familiarize yourself with the device's controls and connection ports for optimal use.

Image: Top View with Controls. This image displays the top surface of the Aluratek clock radio, highlighting the control buttons for snooze/dimmer, set, mode, sleep, volume, track selection, and play/pause. The central area indicates the wireless charging pad.

Image: Rear View with Ports. This image shows the back panel of the Aluratek clock radio, featuring the AUX input port, USB charging port, and DC IN power input port. These ports are used for wired audio connections, charging external devices, and powering the unit, respectively.
- SNOOZE / DIMMER: Press to snooze an alarm; press and hold to adjust display brightness.
- SET: Used to enter time and alarm setting modes.
- MODE: Cycles through FM Radio, Bluetooth, and AUX input modes.
- SLEEP: Activates the sleep timer function.
- +/- Buttons: Adjust volume, navigate menu options, or change radio frequencies.
- Track Skip Buttons: Skip tracks in Bluetooth mode or navigate radio presets.
- Play/Pause Button: Play or pause audio in Bluetooth mode.
- Power Button: Press and hold to turn the unit on/off.
- AUX IN Port: Connect external audio devices via a 3.5mm audio cable.
- USB Charging Port: Charge external USB-powered devices.
- DC IN Port: Connect the power adapter to power the unit and charge its internal battery.
Setup
1. Power Connection
- Connect the provided USB charging cable to the DC IN port on the back of the clock radio.
- Plug the other end of the USB cable into a standard USB power adapter (not included) and then into a wall outlet.
- The unit will power on automatically or can be turned on by pressing and holding the Power button.
Important Note: This device does not have a backup battery or memory for settings. In the event of a power failure or if the unit is unplugged, the time and alarm settings will need to be reset.
2. Setting the Time
- With the unit powered on, press and hold the SET button until the hour digits begin to flash.
- Use the +/- buttons to adjust the hour. Press SET to confirm.
- The minute digits will flash. Use the +/- buttons to adjust the minutes. Press SET to confirm.
- The time is now set. If adjusting for Daylight Saving Time, simply follow these steps to set the time forward or back one hour.
Operating Instructions
1. FM Radio Operation
- Press the MODE button repeatedly until 'FM' appears on the display.
- Press the Play/Pause button to auto-scan and save available FM stations. The unit will scan and store stations automatically.
- Use the Track Skip buttons to navigate through the saved stations.
- Use the +/- buttons to manually fine-tune the frequency.
2. Bluetooth Pairing
- Press the MODE button repeatedly until 'BT' appears on the display and the Bluetooth icon flashes. This indicates the unit is in pairing mode.
- On your smartphone or Bluetooth-enabled device, enable Bluetooth and search for new devices.
- Select 'ABQC02F' from the list of available devices.
- Once paired, the Bluetooth icon on the clock radio's display will stop flashing and remain solid. You can now stream audio from your device.

Image: Bluetooth Streaming. This image illustrates a smartphone wirelessly connected to the Aluratek clock radio via Bluetooth, with music playing on the phone's display. Pink sound wave icons indicate the wireless audio transmission.
3. Wireless Charging (Qi)
- Ensure the clock radio is powered on and connected to an external power source.
- Place your Qi-enabled smartphone directly onto the wireless charging pad located on the top surface of the clock radio.
- Align your phone centrally on the pad. Charging will begin automatically, and your phone's display should indicate that it is charging.
- If charging does not start, slightly adjust the position of your phone on the pad to find the 'sweet spot' for optimal contact.

Image: Wireless Charging in Progress. This image shows a hand carefully placing a smartphone onto the top wireless charging pad of the Aluratek clock radio. The clock radio's display shows the current time, and the phone's screen indicates it is charging wirelessly.
4. USB Charging
- Connect a USB charging cable (not included) to the USB charging port on the back of the clock radio.
- Connect the other end of the cable to your USB-powered device (e.g., smartphone, tablet).
- Charging will begin automatically. You can charge a device via USB simultaneously with wireless charging.
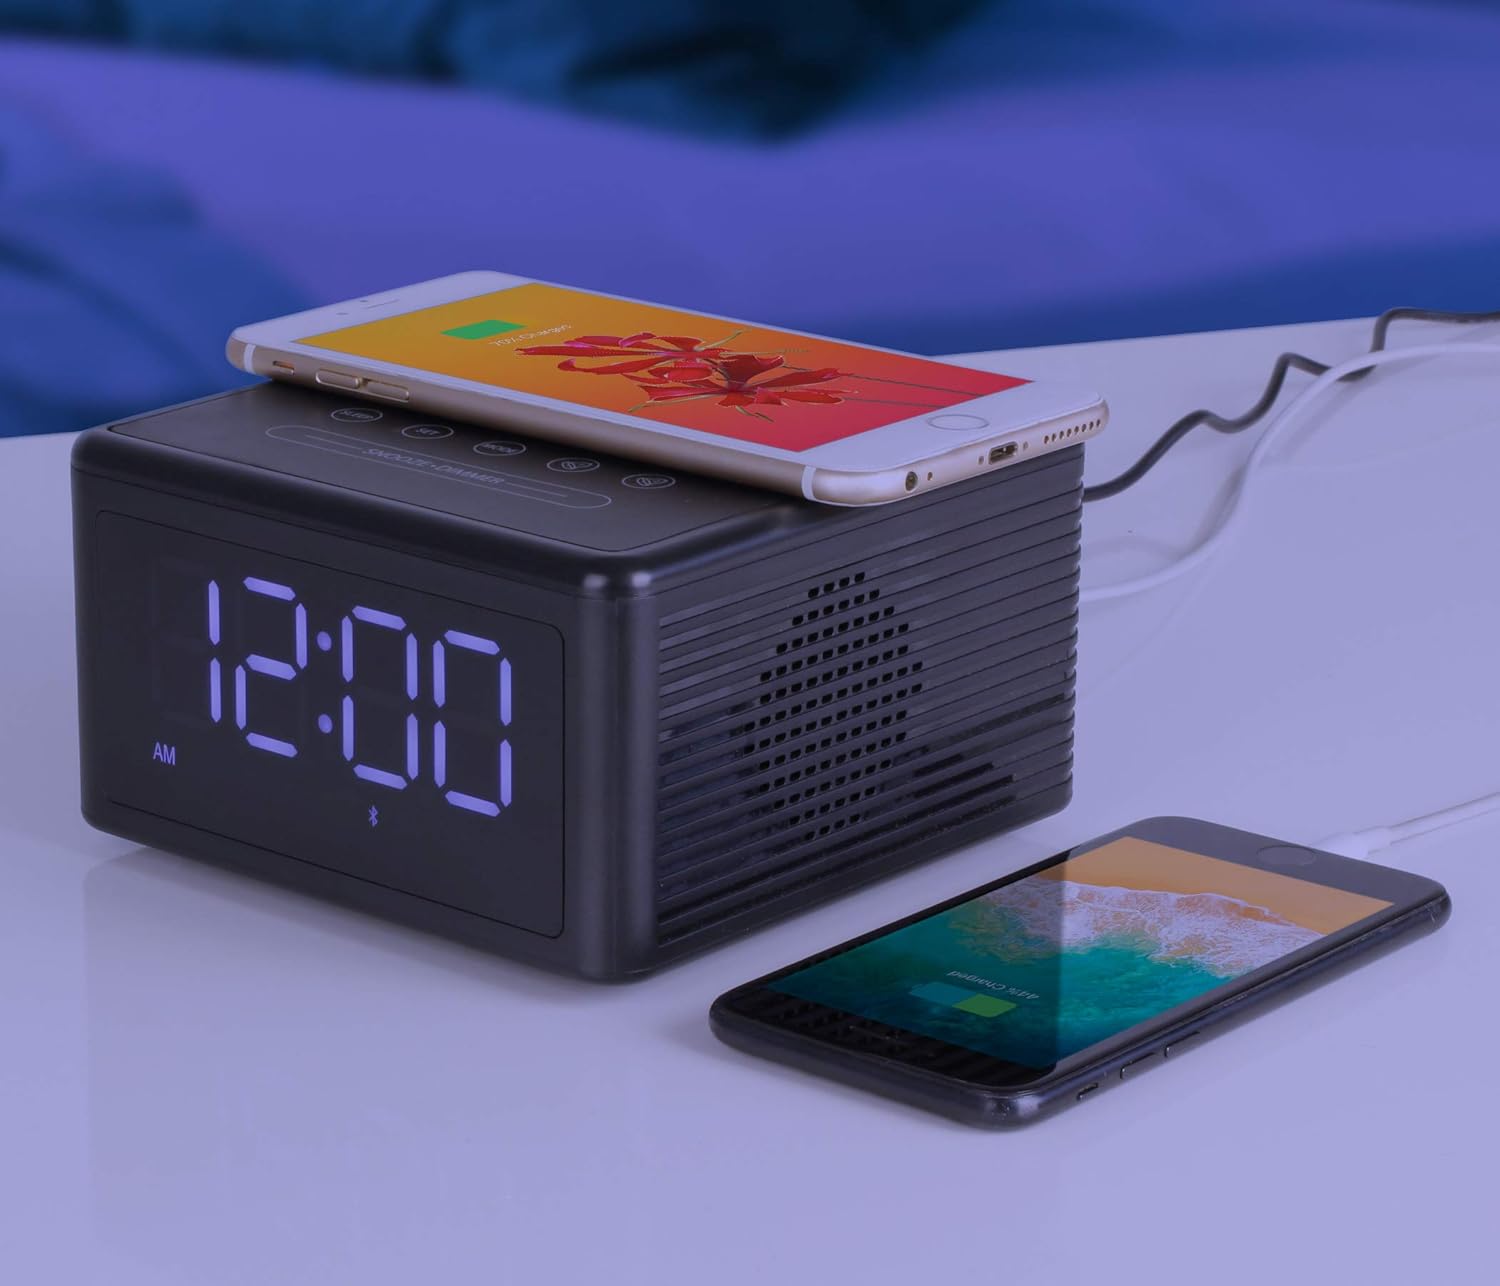
Image: Dual Device Charging. This image displays the Aluratek clock radio simultaneously charging two smartphones. One phone is charging wirelessly on the top pad, while another is connected and charging via the USB port on the back of the unit.
5. Alarm Clock Functions
- Setting the Alarm: Press the SET button once to enter alarm setting mode. The alarm time will flash. Use the +/- buttons to adjust the hour, then press SET. Adjust the minutes, then press SET.
- Alarm Source: After setting the time, you can select the alarm source (Buzzer, FM Radio, or Bluetooth). Use the +/- buttons to cycle through options and press SET to confirm.
- Activating/Deactivating Alarm: Press the SET button repeatedly until the alarm icon appears or disappears from the display.
- Snooze Function: When the alarm sounds, press the SNOOZE / DIMMER button to temporarily silence it. The alarm will sound again after a few minutes.
- Stopping the Alarm: To turn off the alarm for the day, press any button other than SNOOZE / DIMMER. The alarm will reset for the next day.
Note on Alarm Source: For the alarm to function reliably with the radio or buzzer, it is recommended to set the unit to Bluetooth mode when the alarm is active. If the alarm is set to FM mode, the alarm indicator may blink but the radio may not turn on. If set to buzzer, pressing snooze may activate the FM radio instead of snoozing the buzzer.
6. Display Dimmer
Press and hold the SNOOZE / DIMMER button to cycle through different brightness levels for the LED display.
Maintenance
- Keep the device dry. Moisture can damage the internal circuits.
- Do not use harsh chemicals, cleaning solvents, or strong detergents to clean the device. Wipe it with a soft, slightly damp cloth.
- Avoid exposing the device to extreme temperatures.
- Do not drop, knock, or shake the device. Rough handling can break internal circuit boards and fine mechanics.
Troubleshooting
| Problem | Possible Cause | Solution |
|---|---|---|
| Unit does not power on. | Not connected to power; internal battery depleted. | Ensure the power cable is securely connected to the DC IN port and a working power outlet. Allow the internal battery to charge for at least 2 hours. |
| No sound from speakers. | Volume too low; incorrect mode selected; device not paired (Bluetooth). | Increase volume using the +/- buttons. Press MODE to select the correct input (FM, BT, AUX). For Bluetooth, ensure your device is paired and connected. |
| Bluetooth device cannot pair. | Unit not in pairing mode; device too far; interference. | Ensure the clock radio is in Bluetooth mode (BT icon flashing). Move your device closer to the clock radio. Turn off other Bluetooth devices to reduce interference. |
| Wireless charging is inconsistent or not working. | Phone not properly aligned; phone case too thick; foreign objects on pad. | Adjust the position of your phone on the charging pad to find the 'sweet spot'. Remove any thick phone cases or metallic objects. Ensure the clock radio is connected to external power. |
| Alarm does not sound or acts unexpectedly. | Incorrect alarm source setting; unit mode conflict. | Ensure the alarm is activated (alarm icon visible). For reliable alarm function, set the unit to Bluetooth mode when the alarm is active. If set to FM, the radio may not activate. If set to buzzer, snooze may activate FM radio. |
| Time/Alarm settings lost after power outage. | No backup battery for settings. | This is normal behavior. The unit requires manual resetting of time and alarm after a power interruption. |
Specifications
- Brand: Aluratek
- Model Number: ABQC02F
- Connectivity Technology: Bluetooth, USB
- Display Type: LED
- Power Source: Battery Powered (internal rechargeable), Corded Electric (via DC IN)
- Special Features: Portable, Wireless Charging, FM Radio, Bluetooth Speaker, USB Charging Port, Alarm Clock
- Material: Acrylonitrile Butadiene Styrene (ABS)
- Color: Black
- GTIN/UPC: 812658014496
Warranty and Support
The Aluratek Wireless Charging Clock Radio (ABQC02F) comes with a limited warranty. For detailed warranty information, terms, and conditions, please refer to the manufacturer's official website or contact Aluratek customer support directly.
For technical assistance or further inquiries, please visit the Aluratek support section on their website.