1. Introduction
Thank you for choosing the PULUZ 80cm Portable Folding Photo Studio. This professional photo studio is designed to provide a consistent and well-lit environment for product photography. Its portable and folding design allows for easy setup and storage, making it ideal for various shooting needs. The integrated LED lighting system ensures bright and even illumination, minimizing shadows and enhancing image quality. Please read this manual carefully before use to ensure proper setup and operation.
2. Package Contents
Verify that all the following components are included in your package:
- 1 x Main Studio Box (80x80x80cm)
- 1 x Black Backdrop
- 1 x White Backdrop
- 1 x Orange Backdrop
- 2 x LED Light Boards (78 PCS LEDs each)
- 1 x Soft Cloth Diffuser
- 1 x US Plug Power Supply (AC 100-250V input, DC 18V 1.5A output)
- 1 x Package Bag
- 8 x Three-way Connectors
- 12 x Support Bars

Image: All components included in the PULUZ 80cm Portable Folding Photo Studio package, including the studio box, backdrops, LED light boards, power supply, and frame parts.
3. Specifications
| Material | Nylon Cloth (Studio Box), Silver (Reflective Interior) |
| LED Quantity | 2 * 78 PCS (Total 156 LEDs) |
| Lumen | 8500LM |
| Color Temperature | 5500K |
| Power Supply Input | AC 100-250V |
| Power Supply Output | DC 18V 1.5A |
| Power | 80W (40W * 2) |
| Unfolded Size | 80 x 80 x 80 cm / 31.5 x 31.5 x 31.5 inches |
| Weight | 6.2 kg / 13.67 lb |
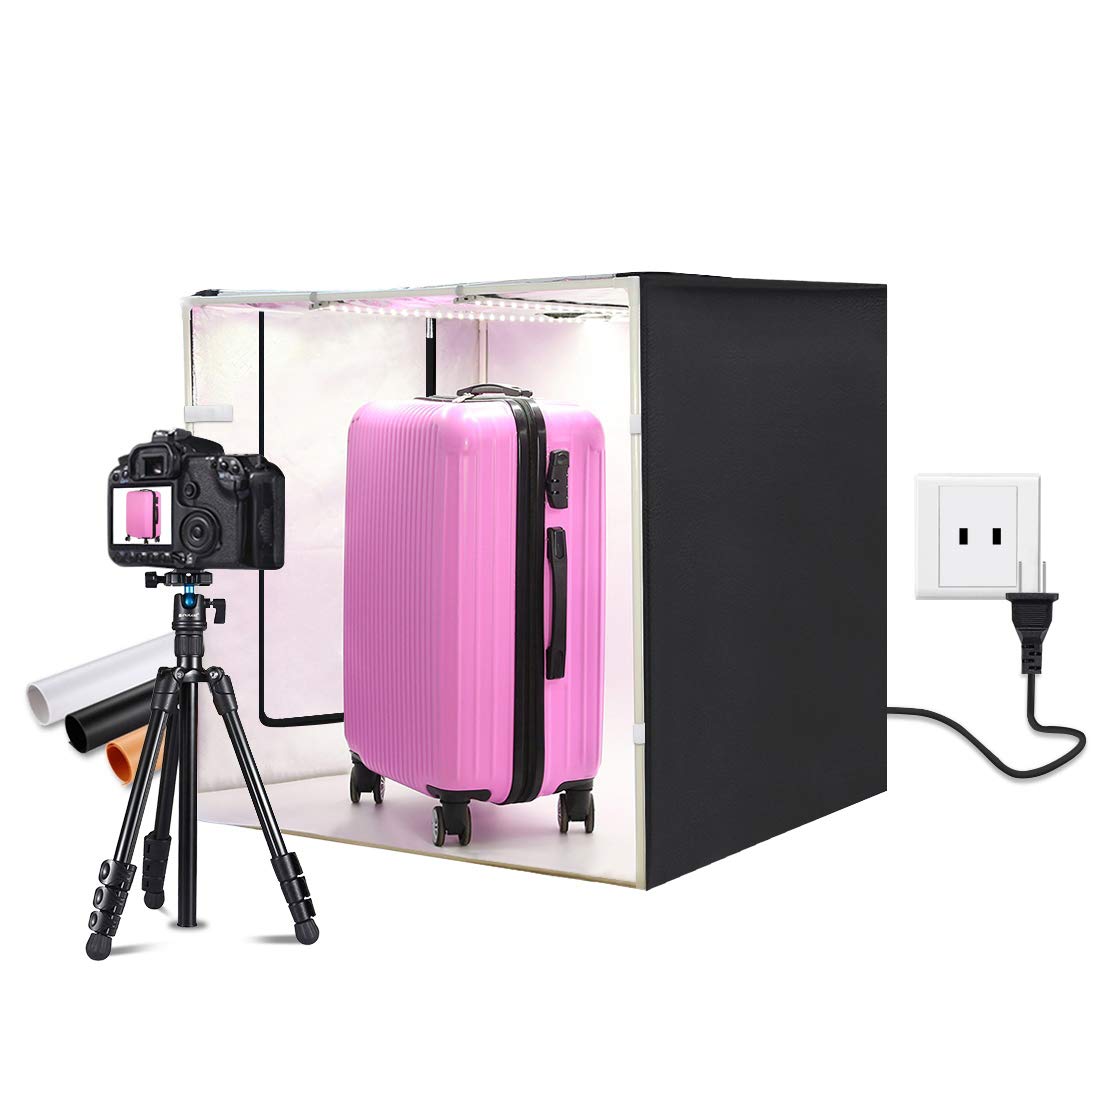
Image: Diagram illustrating the 80cm x 80cm x 80cm dimensions of the unfolded PULUZ photo studio.
4. Setup Instructions
Follow these steps to assemble your PULUZ 80cm Portable Folding Photo Studio:
- Unpack Components: Carefully remove all items from the package bag and verify against the 'Package Contents' list.
- Assemble the Frame: Connect the 12 support bars using the 8 three-way connectors to form a cubic frame. Ensure all connections are secure.
- Attach the Studio Box: Unfold the main studio box (nylon cloth). Drape it over the assembled frame, ensuring the reflective interior faces inwards. Secure the studio box to the frame, typically using integrated fasteners or Velcro.
- Install LED Light Boards: Position the two LED light boards at the top interior of the studio box. They usually attach via Velcro strips or clips. Ensure they are evenly spaced for optimal lighting.
- Connect Power: Plug the power supply into a suitable AC outlet. Connect the output cable from the power supply to the input port on the LED light boards.
- Insert Backdrop: Choose one of the three backdrops (black, white, or orange) and secure it inside the studio box. The backdrops typically attach to the top rear of the studio and drape down to the front.
- Add Soft Cloth Diffuser: If desired, attach the soft cloth diffuser below the LED lights to further soften the light and reduce harsh reflections.

Image: An assembled PULUZ photo studio, highlighting features such as the top shooting hole, left shooting window, brand logo, stone pattern reflective material, and the three-color backdrops.
5. Operating Instructions
Once assembled, your photo studio is ready for use. Follow these guidelines for optimal results:
5.1 Powering On and Adjusting Brightness
- Ensure the power supply is securely connected.
- Turn on the studio lights using the power control unit.
- Rotate the knob on the power control unit to adjust the brightness of the LED lights according to your shooting requirements.
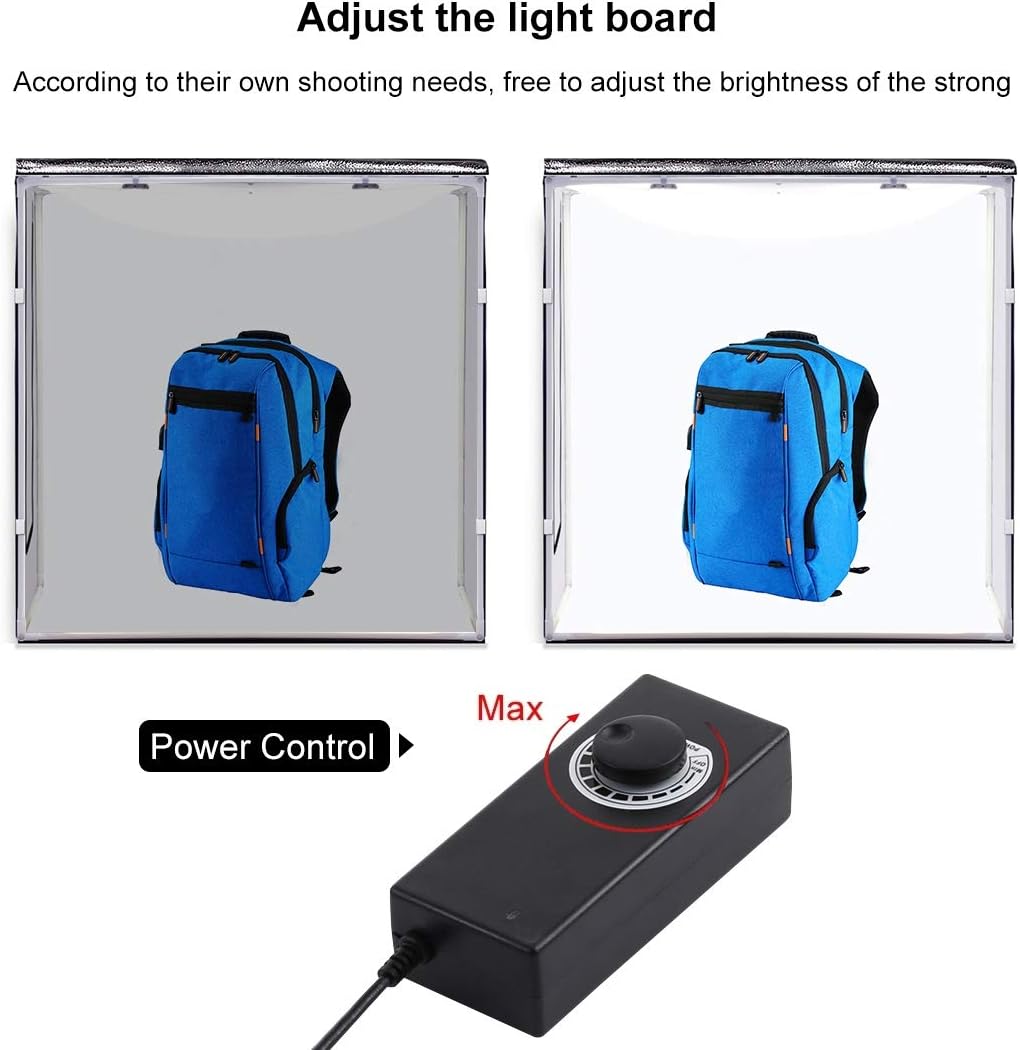
Image: The power control unit with a rotary knob, used to adjust the brightness of the LED lights inside the photo studio from minimum to maximum intensity.
5.2 Choosing Backdrops
- Select the appropriate backdrop (black, white, or orange) based on the product you are photographing and the desired contrast or mood.
- The white backdrop is ideal for clean, high-key product shots, while black provides dramatic, low-key effects. Orange can add a warm tone.
5.3 Shooting Angles
The studio offers multiple shooting options:
- Front Opening: Use the large front opening for standard eye-level shots.
- Top Hole: Utilize the special top hole for 90-degree vertical shots, ideal for capturing products from above.
- Side Window: The left shooting window allows for alternative side angles.
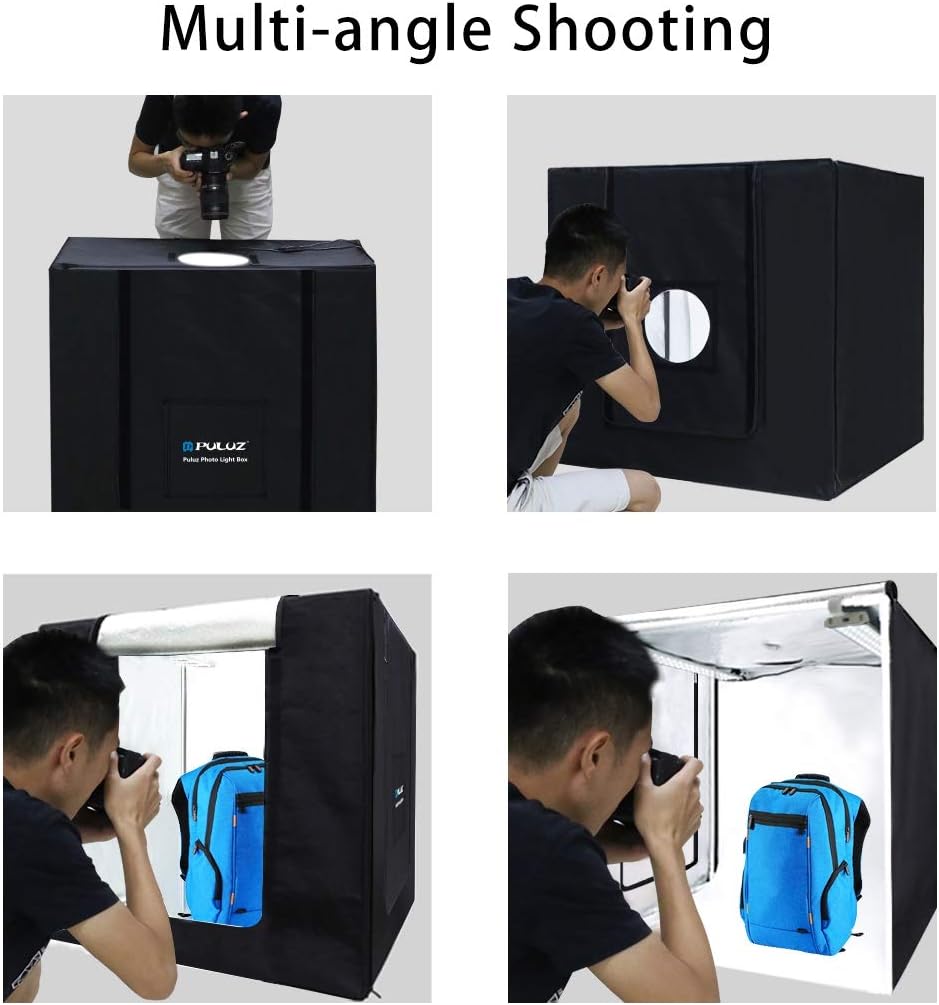
Image: Four panels demonstrating various shooting angles with the PULUZ photo studio, including top-down, front, and side views, showcasing its versatility.
5.4 Optimizing Lighting
- The 5500K color temperature LEDs provide natural daylight-balanced light.
- The silver reflective interior helps distribute light evenly and minimize shadows.
- For softer light and reduced glare on reflective surfaces, use the included soft cloth diffuser.

Image: A detailed view of the LED light board, emphasizing its high brightness and energy efficiency, along with close-ups showing high color rendering index LEDs and low heat emission.
5.5 Mobile Phone Shooting
The studio is suitable for both professional cameras and mobile phone photography. The flicker-free lighting ensures clear images when shooting with smartphones.

Image: A hand holding a mobile phone, demonstrating how to capture clear, flicker-free product photos inside the PULUZ photo studio.
6. Maintenance
Proper care and maintenance will extend the life of your photo studio:
- Cleaning: Use a soft, dry cloth to wipe down the exterior and interior surfaces of the studio box. For stubborn marks, a slightly damp cloth with mild soap can be used, followed by drying. Avoid abrasive cleaners.
- LED Lights: Keep the LED light boards free from dust. Do not use liquid cleaners directly on the LEDs.
- Backdrops: The backdrops can be gently wiped clean. If creased, they can be carefully ironed on a low setting or steamed.
- Storage: When not in use, disassemble the studio and store all components in the provided package bag. Store in a cool, dry place away from direct sunlight and extreme temperatures.

Image: The black carrying bag for the PULUZ Photo Light Box, designed for convenient storage and transport of the disassembled studio.
7. Troubleshooting
If you encounter any issues, refer to the following common problems and solutions:
- Lights Not Turning On:
- Check if the power supply is securely plugged into both the wall outlet and the LED light boards.
- Ensure the power control unit is turned on and the brightness knob is not set to minimum.
- Verify that the wall outlet is functional by plugging in another device.
- Uneven Lighting or Harsh Shadows:
- Ensure both LED light boards are properly installed and functioning.
- Use the included soft cloth diffuser to soften the light.
- Adjust the position of your product within the studio.
- Studio Box Not Standing Firmly:
- Check all support bar and three-way connector connections to ensure they are fully inserted and secure.
- Ensure the studio box fabric is correctly aligned and taut over the frame.
8. Warranty and Support
PULUZ is committed to providing high-quality products. We offer a 12-month warranty against manufacturing defects for this product from the date of purchase.
This warranty covers defects in materials and workmanship under normal use. It does not cover damage caused by misuse, accidents, unauthorized modifications, or improper maintenance.
For warranty claims, technical support, or any questions regarding your PULUZ 80cm Portable Folding Photo Studio, please contact your retailer or visit the official PULUZ website for customer service information. Please have your purchase receipt and product model information ready when contacting support.


