
1. Product Overview
The Tangkula TV Stand is a versatile farmhouse-style entertainment center designed to accommodate televisions up to 55 inches. It features a spacious tabletop, four open storage shelves, and integrated cable holes for organized media management. The stand is constructed with a reinforced X-shaped metal frame and heavy-duty metal legs for stability and durability.
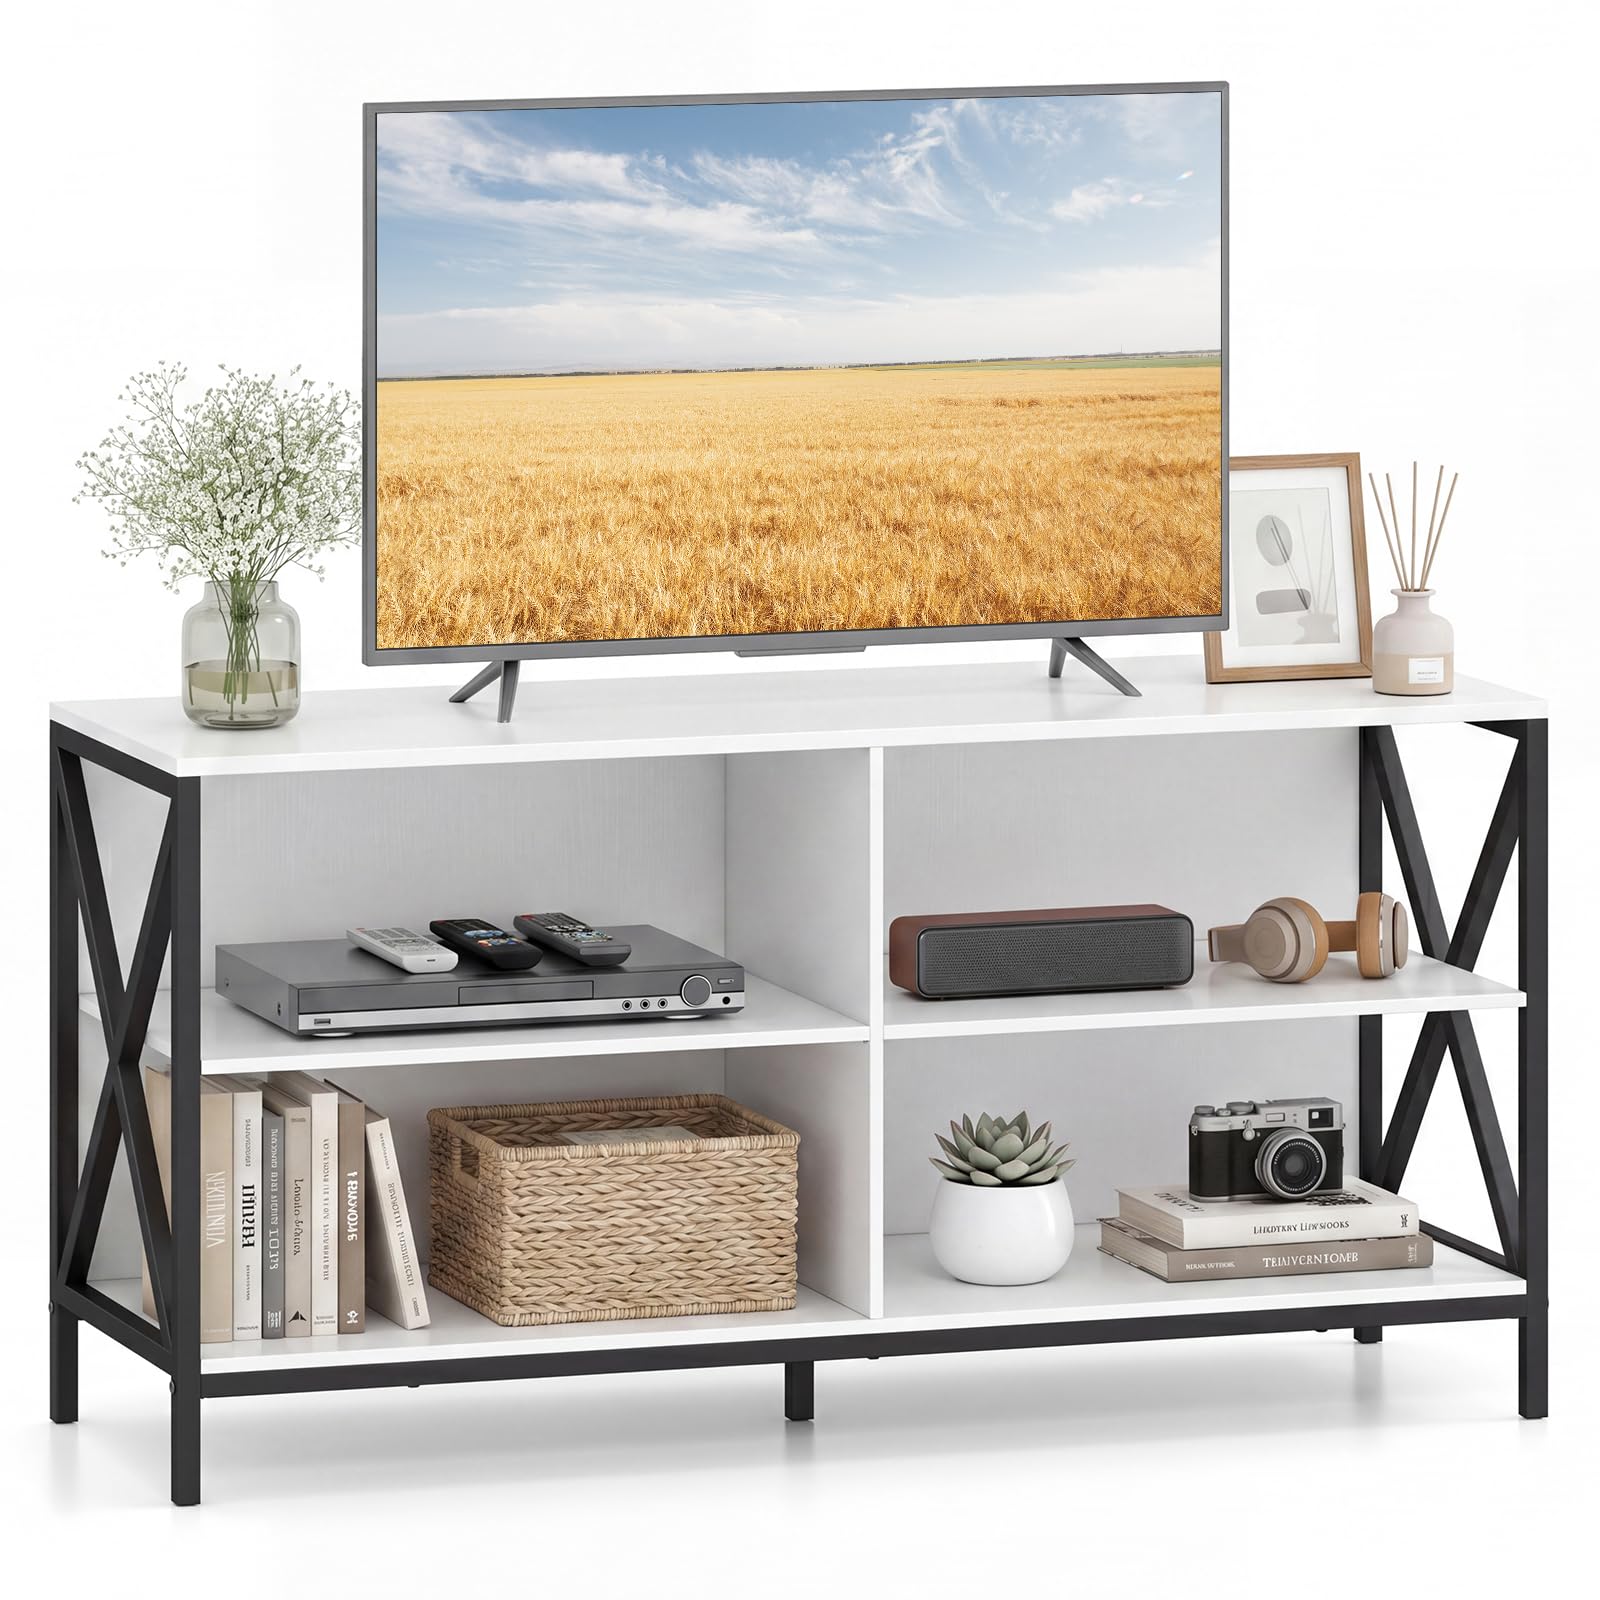
Image 1.1: Fully assembled Tangkula TV Stand, showcasing its design and storage capabilities.
Key Features:
- TV Compatibility: Designed for TVs up to 55 inches, providing a stable and spacious surface.
- Ample Storage: Four open shelves offer convenient storage for media devices, books, and decorative items.
- Sturdy Construction: Features a reinforced X-shaped metal frame and five heavy-duty metal legs for enhanced stability.
- Cable Management: Built-in cable holes help organize and conceal wires for a tidy appearance.
- Safety Features: Includes anti-toppling kits to secure the stand to the wall, preventing accidental tipping.
- Versatile Design: Can be used as a TV stand or a general storage cabinet in various rooms.
2. Safety Information
Please read and understand all safety instructions before assembly and use. Failure to follow these instructions may result in injury or damage to the product.
- Always secure the TV stand to the wall using the provided anti-toppling kits. This is crucial to prevent tipping, especially in households with children or pets.
- Do not place a television or other heavy objects on the stand until it is fully and correctly assembled.
- Ensure the stand is placed on a flat, level, and stable surface.
- Do not exceed the maximum weight capacities for the tabletop and shelves.
- Keep small parts and packaging materials away from children during assembly.
- Regularly check all connections and fasteners to ensure they remain tight.

Image 2.1: Illustration of the anti-toppling kit installation for enhanced safety.
3. Package Contents
Before beginning assembly, verify that all components listed below are present and undamaged. If any parts are missing or damaged, please contact customer support.
Included Components:
- 1 x TV Stand (all necessary panels and frame components)
- 1 x Hardware Pack (screws, dowels, cam locks, anti-toppling kits, etc.)
- 1 x Instruction Manual (this document)
4. Specifications
| Feature | Detail |
|---|---|
| Model Number | tv stand-65745-HW |
| Color | White |
| Overall Dimensions (L x W x H) | 47 x 16 x 23.5 inches |
| Material | Engineered Wood, Metal |
| Item Weight | 51.5 pounds |
| TV Size Compatibility | Up to 55 inches |
| Top Weight Capacity | 110 lbs |
| Each Shelf Weight Capacity | 22 lbs |
| Total Weight Capacity | 310 lbs |
| Style | Modern Farmhouse |
| Assembly Required | Yes |

Image 4.1: Detailed dimensions and total weight capacity of the TV stand.
5. Setup and Assembly Instructions
Assembly typically requires two adults. Please follow these steps carefully. A Phillips head screwdriver (not included) may be required.
- Unpack and Identify Parts: Carefully remove all components from the packaging. Lay them out on a clean, soft surface (e.g., carpet or blanket) to prevent scratches. Identify each part by comparing it to the parts list in your included instruction manual.
- Attach Cam Locks and Dowels: Insert wooden dowels and cam lock nuts into the pre-drilled holes on the main panels (top, bottom, and side panels) as indicated in your specific diagram. Ensure they are flush.
- Assemble Side Frames: Attach the X-shaped metal frames to the side panels using the provided screws. Ensure all connections are secure.
- Connect Base and Shelves: Attach the bottom panel to the assembled side frames. Then, insert the middle vertical support and horizontal shelves, securing them with cam lock screws. Turn the cam locks clockwise to tighten.
- Attach Top Panel: Carefully place the top panel onto the assembled structure, aligning the cam lock screws with the cam lock nuts. Tighten all cam locks.
- Install Metal Legs: Attach the five heavy-duty metal legs to the bottom of the TV stand using the provided hardware. Ensure the non-slip foot pads are correctly positioned.
- Install Anti-Toppling Kits: Following the instructions provided with the anti-toppling kits, securely attach them to the back of the TV stand and to a wall stud. This step is critical for safety.
- Final Check: Verify that all screws and fasteners are tight and that the stand is stable.

Image 5.1: Details of the sturdy construction elements, including the X-shaped frame and metal legs.
6. Operating Instructions
Once assembled and secured, your Tangkula TV Stand is ready for use.
- Placement: Position the TV stand in your desired location, ensuring it is on a stable, level surface and secured to the wall with the anti-toppling kits.
- TV Placement: Carefully place your television on the top surface. Ensure the TV's base is fully supported and does not overhang the edges.
- Organize Media: Utilize the four open shelves to store media players, gaming consoles, soundbars, books, or decorative items.
- Cable Management: Route power cords and signal cables through the built-in cable holes located on the back of the shelves. This helps keep wires tidy and prevents tangling.

Image 6.1: TV stand in use, demonstrating cable management holes and storage capacity.
7. Maintenance
Proper care will help maintain the appearance and longevity of your TV stand.
- Cleaning: Wipe the surfaces with a soft, damp cloth. Avoid using harsh chemicals, abrasive cleaners, or polishes that may damage the finish.
- Spills: Immediately wipe up any spills to prevent staining or damage to the engineered wood.
- Sunlight: Avoid prolonged exposure to direct sunlight, which can cause fading or discoloration.
- Heat: Do not place hot items directly on the surface. Use coasters or protective pads.
- Fasteners: Periodically check all screws and connections to ensure they remain tight. Re-tighten if necessary.
8. Troubleshooting
If you encounter any issues with your TV stand, refer to the following common solutions:
- Wobbling Stand: Ensure the stand is on a level surface. Check that all assembly screws and cam locks are fully tightened. Adjust the foot pads if applicable to compensate for uneven floors.
- Missing Parts: If you find any parts missing from the package, do not proceed with assembly. Contact Tangkula customer support immediately for assistance.
- Difficulty Assembling: Review the assembly instructions carefully. Ensure you are using the correct hardware for each step. Sometimes, parts may appear similar but have subtle differences. If issues persist, contact customer support.
- Damage During Shipping: If any components are damaged upon arrival, document the damage with photos and contact Tangkula customer support for replacement parts.
9. Warranty and Support
For warranty information or to obtain support for your Tangkula TV Stand, please refer to the purchase documentation or contact Tangkula directly through their official website or the retailer where the product was purchased.
Please have your model number (tv stand-65745-HW) and purchase date available when contacting support.