Introduction
This manual provides detailed instructions for the installation, operation, and maintenance of your Crunch Ground Pounder GP-2000.2 2-Channel Amplifier. Please read this manual thoroughly before attempting installation or operation to ensure proper use and to prevent damage to the unit or your vehicle's audio system. Keep this manual for future reference.
Safety Information
WARNING: This product contains chemicals known to the State of California to cause cancer and birth defects or other reproductive harm. For more information, visit www.P65Warnings.ca.gov.
- Always disconnect the vehicle's battery before installing or servicing any electrical components.
- Ensure all wiring is properly routed and secured to prevent damage from sharp edges or moving parts.
- Use appropriate gauge wiring for power and ground connections to prevent overheating and potential fire hazards.
- Do not mount the amplifier in locations exposed to direct sunlight, excessive heat, moisture, or dust.
- Consult a professional installer if you are unsure about any part of the installation process.
Package Contents
Verify that all items are present in the package:
- Crunch Ground Pounder GP-2000.2 Amplifier
- User Manual
Product Overview
The Crunch Ground Pounder GP-2000.2 is a 2-channel amplifier designed for car audio systems. It features a Class A/B topology for sound quality and robust protection circuitry.
Amplifier Dimensions
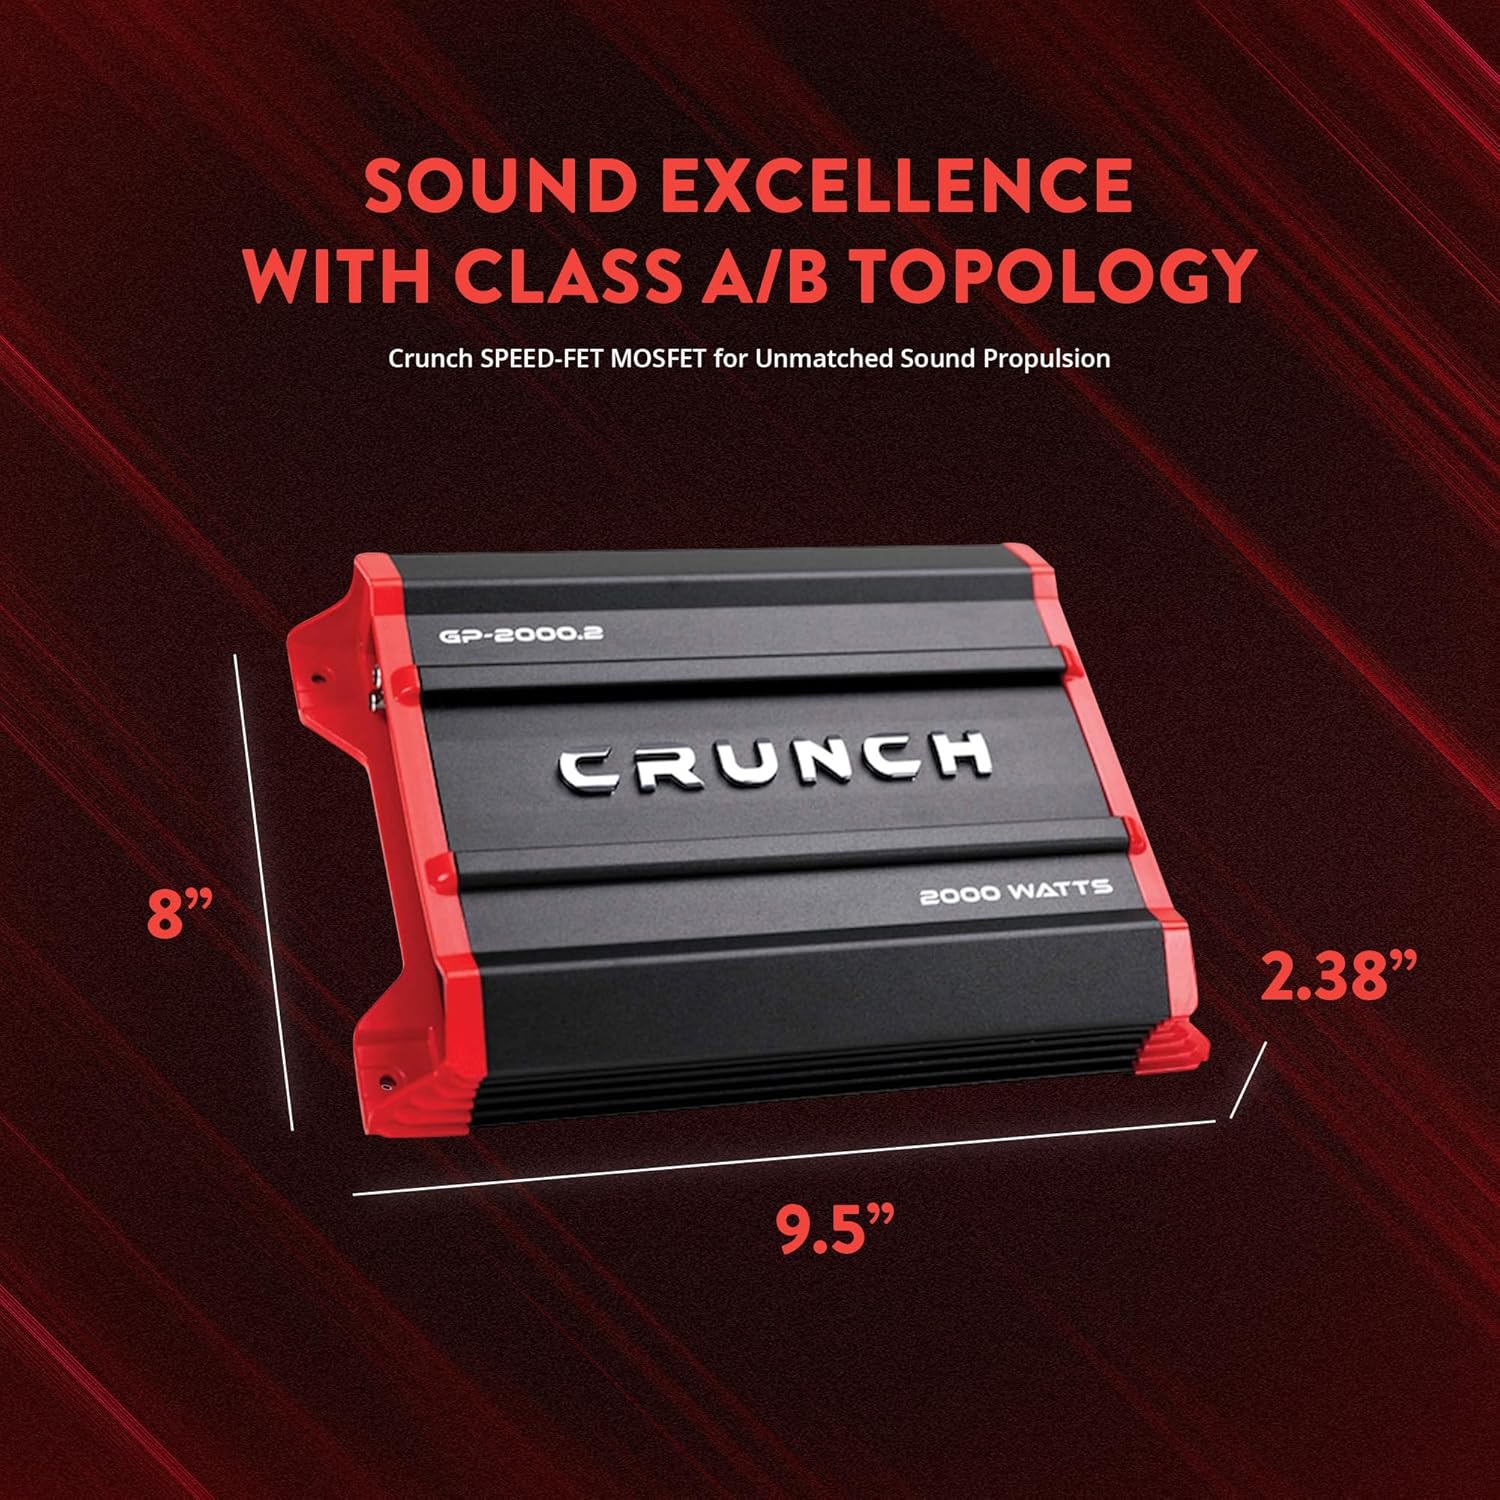
Image showing the Crunch GP-2000.2 amplifier with its physical dimensions labeled: 9.5 inches in length, 8 inches in width, and 2.28 inches in height.
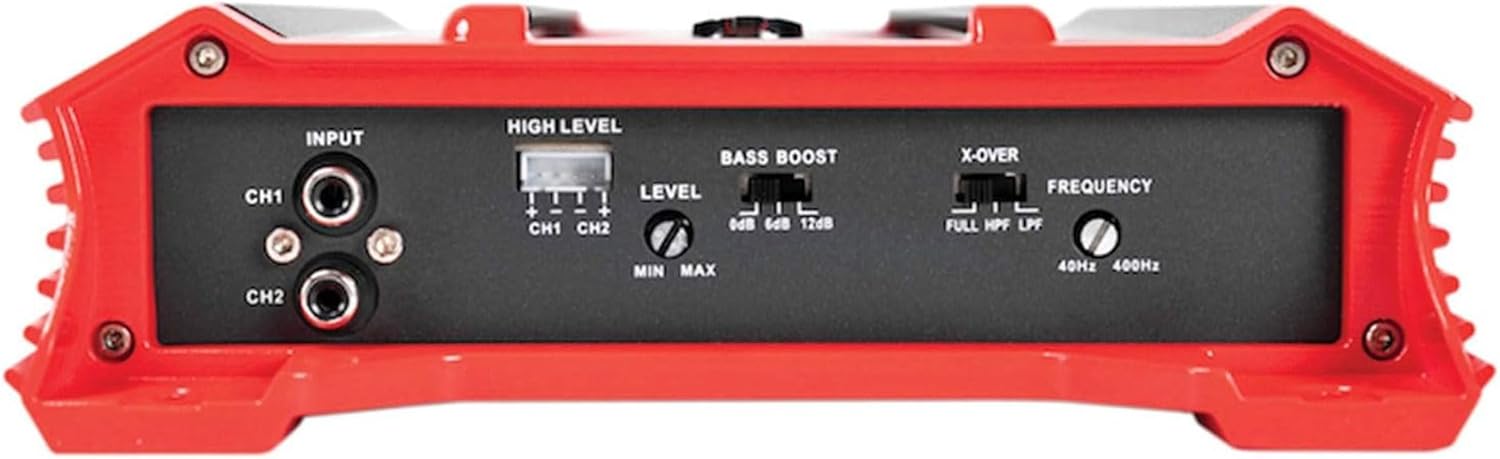
Control Panel Overview

This image displays the control panel of the GP-2000.2 amplifier, featuring RCA inputs for CH1 and CH2, a High Level input connector, Level adjustment knob (Min/Max), Bass Boost switch (0dB, 6dB, 12dB), and an X-OVER switch with Frequency knob (40Hz-400Hz) for Full, HPF, and LPF settings.
Power and Speaker Output Panel
This image shows the rear panel of the GP-2000.2 amplifier, detailing the power input terminals (GND, REM, +12V), a 30A fuse, PRT/PWR indicator lights, and speaker output terminals for CH1 and CH2, including bridged mono configuration.
Setup and Installation
Proper installation is crucial for optimal performance and safety. If you are not confident in your ability to install this amplifier, seek professional assistance.
Mounting Location
Choose a mounting location that is dry, well-ventilated, and protected from direct sunlight and excessive heat. Ensure there is sufficient space around the amplifier for proper cooling. Avoid mounting on carpeted surfaces that can impede airflow.

Example of the GP-2000.2 amplifier installed in a vehicle, demonstrating how it can be integrated into a car audio setup.
Wiring Connections
Follow these guidelines for wiring your amplifier:
- Power (BATT +12V): Connect directly to the positive terminal of the vehicle's battery using an appropriate gauge power cable. Install an in-line fuse holder within 18 inches of the battery.
- Ground (GND): Connect to a clean, unpainted metal surface of the vehicle chassis. Ensure a solid electrical connection.
- Remote (REM): Connect to the remote turn-on lead from your head unit. This wire turns the amplifier on and off with your car's audio system.
- RCA Inputs (INPUT CH1/CH2): Connect to the RCA outputs of your head unit or signal processor.
- High Level Input: If your head unit does not have RCA outputs, use the high-level input connector.
- Speaker Outputs (SPEAKER OUTPUT CH1/CH2): Connect your speakers to these terminals. Observe correct polarity (+ to + and - to -).
The amplifier supports stereo, bridged mono, or stereo/bridged mono configurations. Refer to the diagram below for a typical wiring setup.
Video demonstrating the Crunch GP-2000.2 amplifier, highlighting its features and potential installation scenarios. This video is provided by Spreetail, a seller of the product.
Operating Instructions
Initial Setup and Adjustments
- Level Control (Gain): Start with the Level control set to minimum. Gradually increase the volume on your head unit until distortion is heard, then reduce it slightly. Slowly increase the amplifier's Level control until the desired volume is achieved without distortion.
- Bass Boost: The Bass Boost switch offers 0dB, 6dB, and 12dB options. Use this to enhance low frequencies. Start with 0dB and adjust as needed. Excessive bass boost can cause distortion and speaker damage.
- Crossover (X-OVER):
- FULL: Full range audio output.
- HPF (High Pass Filter): Allows frequencies above the set frequency to pass through. Useful for full-range speakers to prevent low-frequency distortion.
- LPF (Low Pass Filter): Allows frequencies below the set frequency to pass through. Essential for subwoofers.
Maintenance
- Cleaning: Use a soft, dry cloth to clean the amplifier's exterior. Do not use harsh chemicals or abrasive cleaners.
- Fuse Replacement: If the amplifier does not power on, check the 30A fuse located on the power input panel. Replace with a fuse of the same type and rating only.
- Ventilation: Ensure the amplifier's cooling fins are free from obstructions to maintain proper heat dissipation.
Troubleshooting
| Problem | Possible Cause | Solution |
|---|---|---|
| No Power / No Sound |
|
|
| Distorted Sound |
|
|
| No Output from One Channel |
|
|
Specifications
| Feature | Detail |
|---|---|
| Model | GP-2000.2 |
| Brand | Crunch |
| Number of Channels | 2 |
| Output Power (2 Ohms) | 2 x 1,000 Watts |
| Output Power (4 Ohms) | 2 x 500 Watts |
| Output Power (Mono Bridged 4 Ohms) | 1 x 2,000 Watts |
| Crossover | Variable Electronic Crossover: 12 dB per octave (HPF/LPF/FULL) |
| Frequency Range | 40Hz - 400Hz (Crossover) |
| Bass Boost | 0dB, 6dB, 12dB |
| Dimensions (L x W x H) | 9.5 x 8 x 2.28 inches |
| Voltage | 9 Volts (Minimum Supply) |
| Material Type | Metal and Plastic |
| Manufacturer | Crunch |
| UPC | 806576231080 |
Warranty and Support
The Crunch Ground Pounder GP-2000.2 amplifier comes with a 1-year warranty from the date of purchase. This warranty covers defects in materials and workmanship under normal use. It does not cover damage caused by improper installation, accident, misuse, abuse, negligence, or unauthorized modification.
For warranty claims or technical support, please contact your authorized Crunch dealer or visit the official Crunch website for contact information. Please have your proof of purchase and product model number ready when seeking support.