1. Product Overview
Thank you for choosing the Lepro 10W LED Outdoor Floodlight. This manual provides essential information for the safe installation, operation, and maintenance of your new floodlight. Please read it thoroughly before use and retain it for future reference.
This product is a high-efficiency, IP65 waterproof LED floodlight designed for outdoor and indoor lighting applications such as gardens, yards, garages, and security lighting.
2. Safety Information
- Always disconnect power before installation or maintenance.
- Installation should be performed by a qualified electrician if you are unsure.
- Ensure the power supply voltage matches the product's requirements (220 Volts).
- Do not look directly into the LED light source when it is illuminated.
- Keep the product away from flammable materials.
- Do not modify the product in any way.
- Ensure all connections are secure and properly insulated to maintain IP65 rating.
3. Package Contents
The package typically includes:
- 2 x Lepro 10W LED Outdoor Floodlights
- Mounting hardware (screws, anchors)
- Instruction Manual
4. Product Features
- High Brightness: 10W LED chip provides 850 lumens of 5000K cool white light, equivalent to a 70W incandescent bulb.
- Durable Design: Constructed from die-cast aluminum and ultra-thin tempered glass, offering rust-proof and high-quality electrostatic adsorption surface treatment.
- Easy Installation: Features a bracket that can be easily mounted to ceilings, walls, or floors using two self-locking screws. Includes a 1-meter cable for connection.
- Efficient Heat Dissipation: Ultra-thin body design with an integrated heat sink ensures optimal thermal performance and extends product lifespan.
- IP65 Waterproof & Wide Application: Rated IP65 for protection against dust and water jets, suitable for various indoor and outdoor lighting projects including gardens, squares, billboards, factories, docks, stadiums, patios, warehouses, courtyards, garages, driveways, and entrances.
5. Specifications
| Specification | Value |
|---|---|
| Model Number | PR340010-DW-EU-2 |
| Power Consumption | 10 Watts |
| Luminous Flux | 850 Lumens |
| Color Temperature | 5000K (Cool White) |
| Voltage | 220 Volts AC |
| IP Rating | IP65 (Waterproof) |
| Material | Aluminum, Tempered Glass |
| Product Dimensions (L x W x H) | 9 x 2.4 x 7.8 cm |
| Weight | 200 Grams |
| Beam Angle | 110 degrees |
| Cable Length | 1 meter |
| Mounting Type | Wall-mounted, Ceiling-mounted, Ground-mounted |
For detailed energy efficiency information, please refer to the EPREL database:
6. Setup and Installation
Follow these steps for safe and proper installation:
- Prepare for Installation:
- Turn off the main power supply at the circuit breaker before starting any electrical work.
- Gather necessary tools: drill, screwdriver, wire strippers, electrical tape, and a pencil.
- Choose Mounting Location:
Select a suitable location on a wall, ceiling, or ground that provides the desired illumination area. The floodlight can be adjusted to direct light as needed.
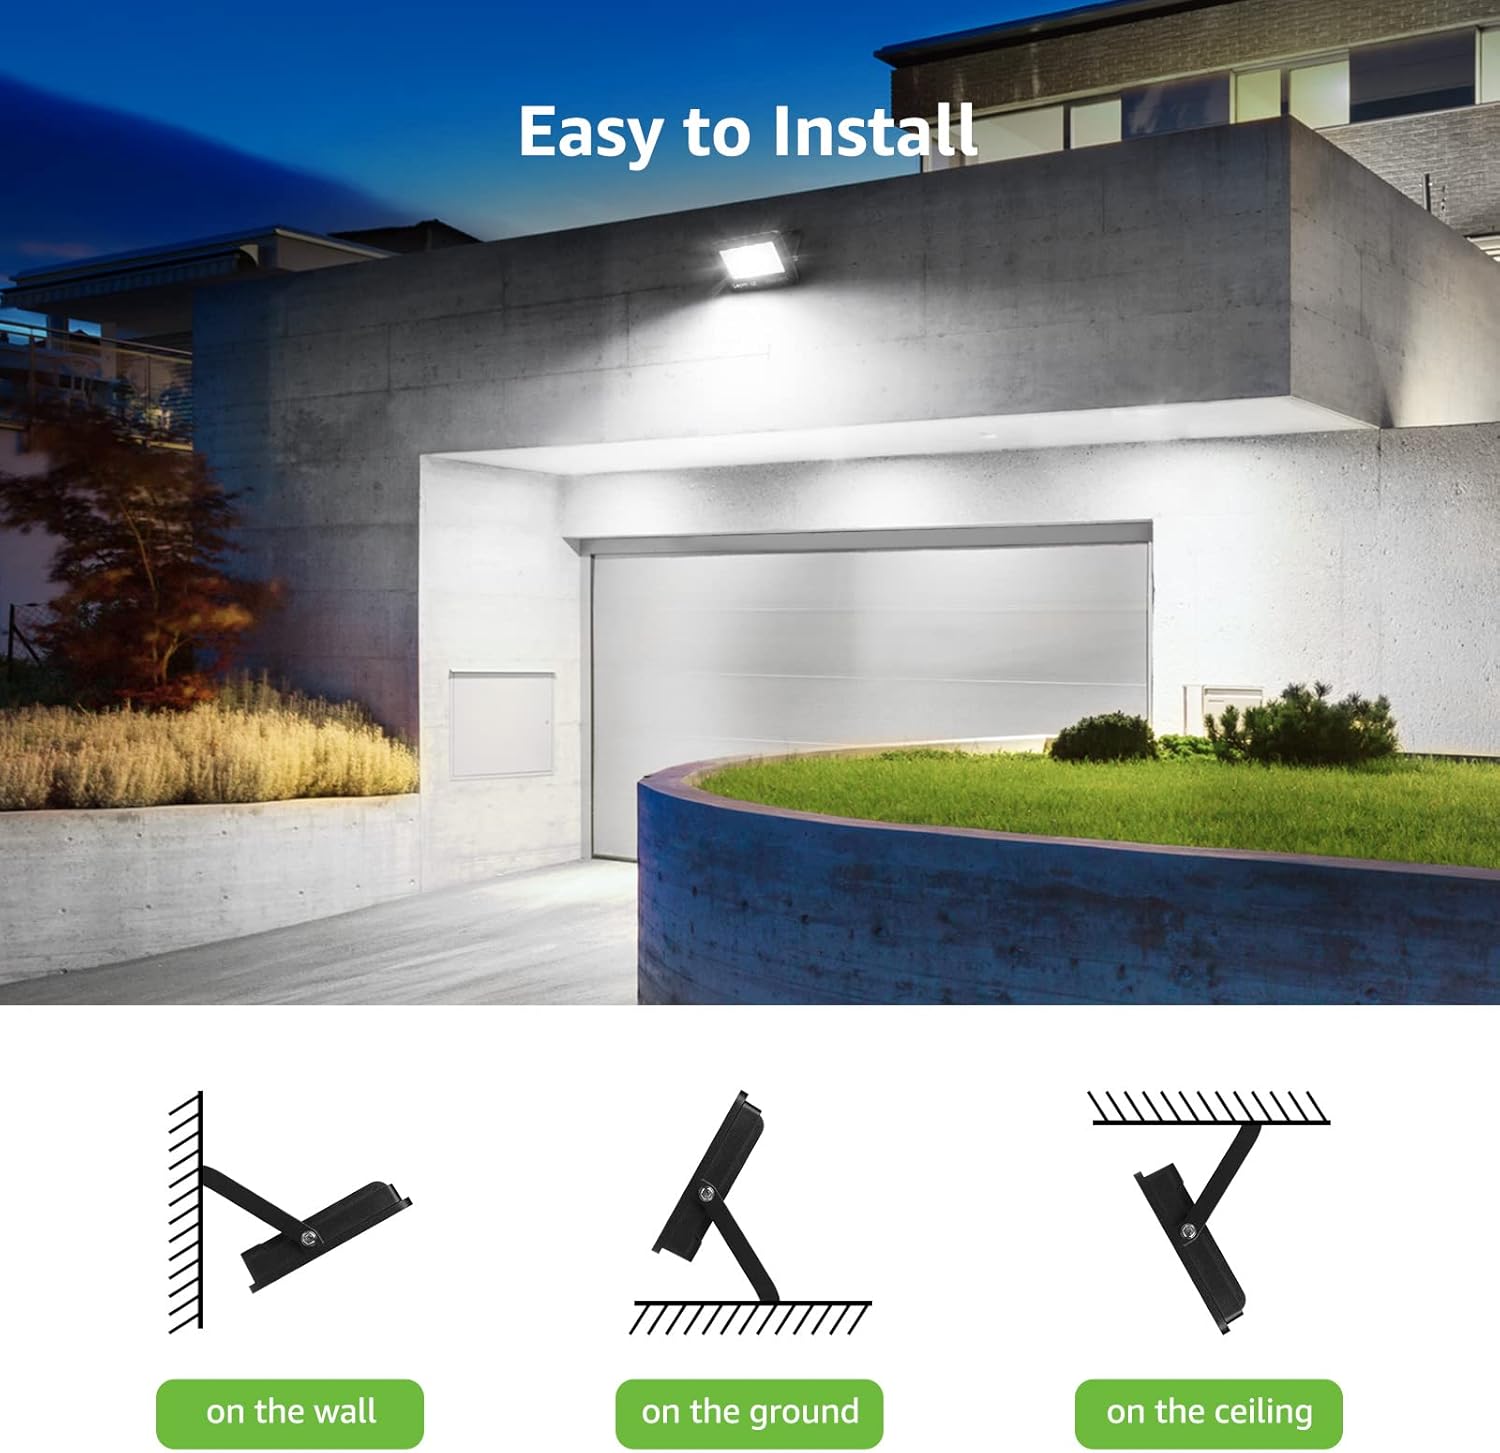
Image: Illustration of various mounting positions for the floodlight (wall, ground, ceiling).
- Mark and Drill Holes:
Use the floodlight's mounting bracket as a template to mark the drilling points on the chosen surface. Drill appropriate holes for the included mounting hardware.
- Secure the Bracket:
Attach the mounting bracket securely to the surface using the provided screws and anchors. Ensure it is firm and stable.
- Wiring Connection:
Connect the floodlight's cable to your main power supply. Observe the standard wiring color codes:
- Brown Wire: Live Wire
- Yellow & Green Wire: Ground Line
- Blue Wire: Neutral Wire

Image: Detailed view of the floodlight's heat sink and wiring color codes for electrical connection.
Ensure all connections are tight and insulated with appropriate waterproof connectors or electrical tape to maintain the IP65 rating, especially for outdoor installations.
- Attach the Floodlight:
Mount the floodlight unit onto the secured bracket using the self-locking screws. Adjust the angle of the floodlight to your desired position.
- Restore Power:
Once installation is complete and all connections are secure, restore power at the circuit breaker.

Image: The floodlight installed above a garage, demonstrating its wide beam angle and bright illumination.

Image: An outdoor floodlight illuminating a garden area from a height, showing its coverage.
7. Operating Instructions
The Lepro 10W LED Outdoor Floodlight operates by direct electrical connection. Once properly installed and connected to a power source, it can be controlled via a standard wall switch or an external timer/sensor system (not included).
- To Turn On: Activate the connected wall switch or power source.
- To Turn Off: Deactivate the connected wall switch or power source.
The floodlight provides instant full brightness upon activation.
8. Maintenance
Regular maintenance ensures optimal performance and longevity of your floodlight:
- Cleaning: Periodically clean the glass surface with a soft, damp cloth to remove dust and debris. Do not use abrasive cleaners or solvents. Ensure power is off before cleaning.
- Inspection: Regularly check the mounting bracket and wiring for any signs of damage, corrosion, or loose connections. Tighten screws if necessary.
- Environmental Durability: The IP65 rating ensures resistance to water and dust. The floodlight is designed to withstand various weather conditions, including heat and frost.

Image: Visual representation of the floodlight's IP65 waterproof, heat resistance, and frost resistance features.
9. Troubleshooting
If you encounter issues with your floodlight, refer to the following common problems and solutions:
| Problem | Possible Cause | Solution |
|---|---|---|
| Light does not turn on. | No power supply. Loose wiring connection. Faulty switch. | Check if the power is on at the circuit breaker. Verify all wiring connections are secure. Test the switch with another device or replace it. |
| Light flickers. | Unstable power supply. Loose connection. | Ensure stable power. Check for loose wiring and tighten connections. |
| Reduced brightness. | Dirty lens. Aging LED components. | Clean the glass surface of the floodlight. If the product is old, reduced brightness may indicate end of lifespan. |
If the problem persists after trying these solutions, please contact Lepro customer support.
10. Warranty and Support
Lepro products are designed for quality and durability. This product is covered by a standard return policy of 30 days from the date of purchase. For specific warranty terms and conditions, please refer to your purchase documentation or contact Lepro customer support.
For technical assistance, troubleshooting, or warranty claims, please visit the official Lepro website or contact their customer service department. You can often find support information on the product packaging or the retailer's website.
Online Resources: