1. Introduction
This manual provides comprehensive instructions for the safe and effective operation, maintenance, and troubleshooting of the BAOSHISHAN Digital Force Gauge 100N, Model WLS-ZMF100. This device is designed for precise measurement of tension and compression forces in various applications, including destructive tests. Please read this manual thoroughly before using the device to ensure proper functionality and to prevent damage or injury.
2. Safety Information
Observe the following safety precautions to ensure safe operation and to prevent damage to the device or injury to personnel:
- Do not exceed the maximum load capacity of 100N (10kg/22Lb/360Oz). Overloading can damage the sensor.
- Avoid dropping or subjecting the device to strong impacts.
- Do not attempt to disassemble or modify the device. Refer all servicing to qualified personnel.
- Keep the device away from water, excessive humidity, and extreme temperatures.
- Ensure proper attachment of test accessories to prevent them from detaching during measurement.
3. Package Contents
Verify that all items listed below are included in your package:
- 1 x Digital Force Gauge (WLS-ZMF100)
- 2 x 1.5V AAA Batteries
- 5 x Test Parts (various attachments)
- 1 x Extension Rod
- 1 x Trigger Pull Arm
- 4 x Screw M4*8
- 4 x Screw M4*10
- 2 x Nut M6
- 1 x Instruction Manual
- 1 x Calibration Certificate
- 1 x After-Sale Service Card
- 1 x Portable Storage Case

Image: Contents of the BAOSHISHAN Digital Force Gauge package, showing the gauge, test parts, batteries, manual, and storage case.
4. Product Overview
The BAOSHISHAN Digital Force Gauge is a compact and portable device designed for accurate force measurements. It features a backlit LCD display and intuitive button controls.
4.1 Device Components

Image: Front view of the Digital Force Gauge, highlighting the LCD screen and control buttons.
- LCD Display: Shows measurement values, units, battery status, and mode indicators.
- SET Button: Used for entering and confirming settings.
- POWER Button: Turns the device on/off.
- ZERO Button: Resets the current reading to zero.
- PEAK Button: Toggles between Real-time, PEAK, and First-PEAK modes.
- UNIT Button: Cycles through available measurement units (N, kg, Lb, Oz).
- Measurement Hook/Adapter Port: Located at the top, for attaching various test parts.
4.2 Display Elements

Image: Detailed view of the LCD display, showing battery indicator, mode indicators (P, T, MEM), unit indicators (K, N, kg, lb, Oz), and measurement value.
4.3 Test Parts and Accessories
The gauge comes with various test parts to accommodate different measurement scenarios.

Image: A selection of interchangeable test parts for the force gauge, designed for diverse applications.
5. Setup
5.1 Battery Installation
- Locate the battery compartment on the back of the device.
- Slide open the battery compartment cover.
- Insert two (2) AAA batteries, ensuring correct polarity (+/-).
- Close the battery compartment cover securely.

Image: Rear view of the force gauge with the battery cover removed, showing the two AAA batteries inside.
5.2 Attaching Test Parts
Select the appropriate test part for your application and screw it firmly into the measurement port at the top of the gauge.
6. Operating Instructions
6.1 Power On/Off
- To power on, press the POWER button.
- To power off, press and hold the POWER button for approximately 3 seconds.
6.2 Unit Conversion
The device supports four units: Newtons (N), kilograms (kg), pounds (Lb), and ounces (Oz).
- With the device powered on, press the UNIT button.
- Each press will cycle through the available units on the display.
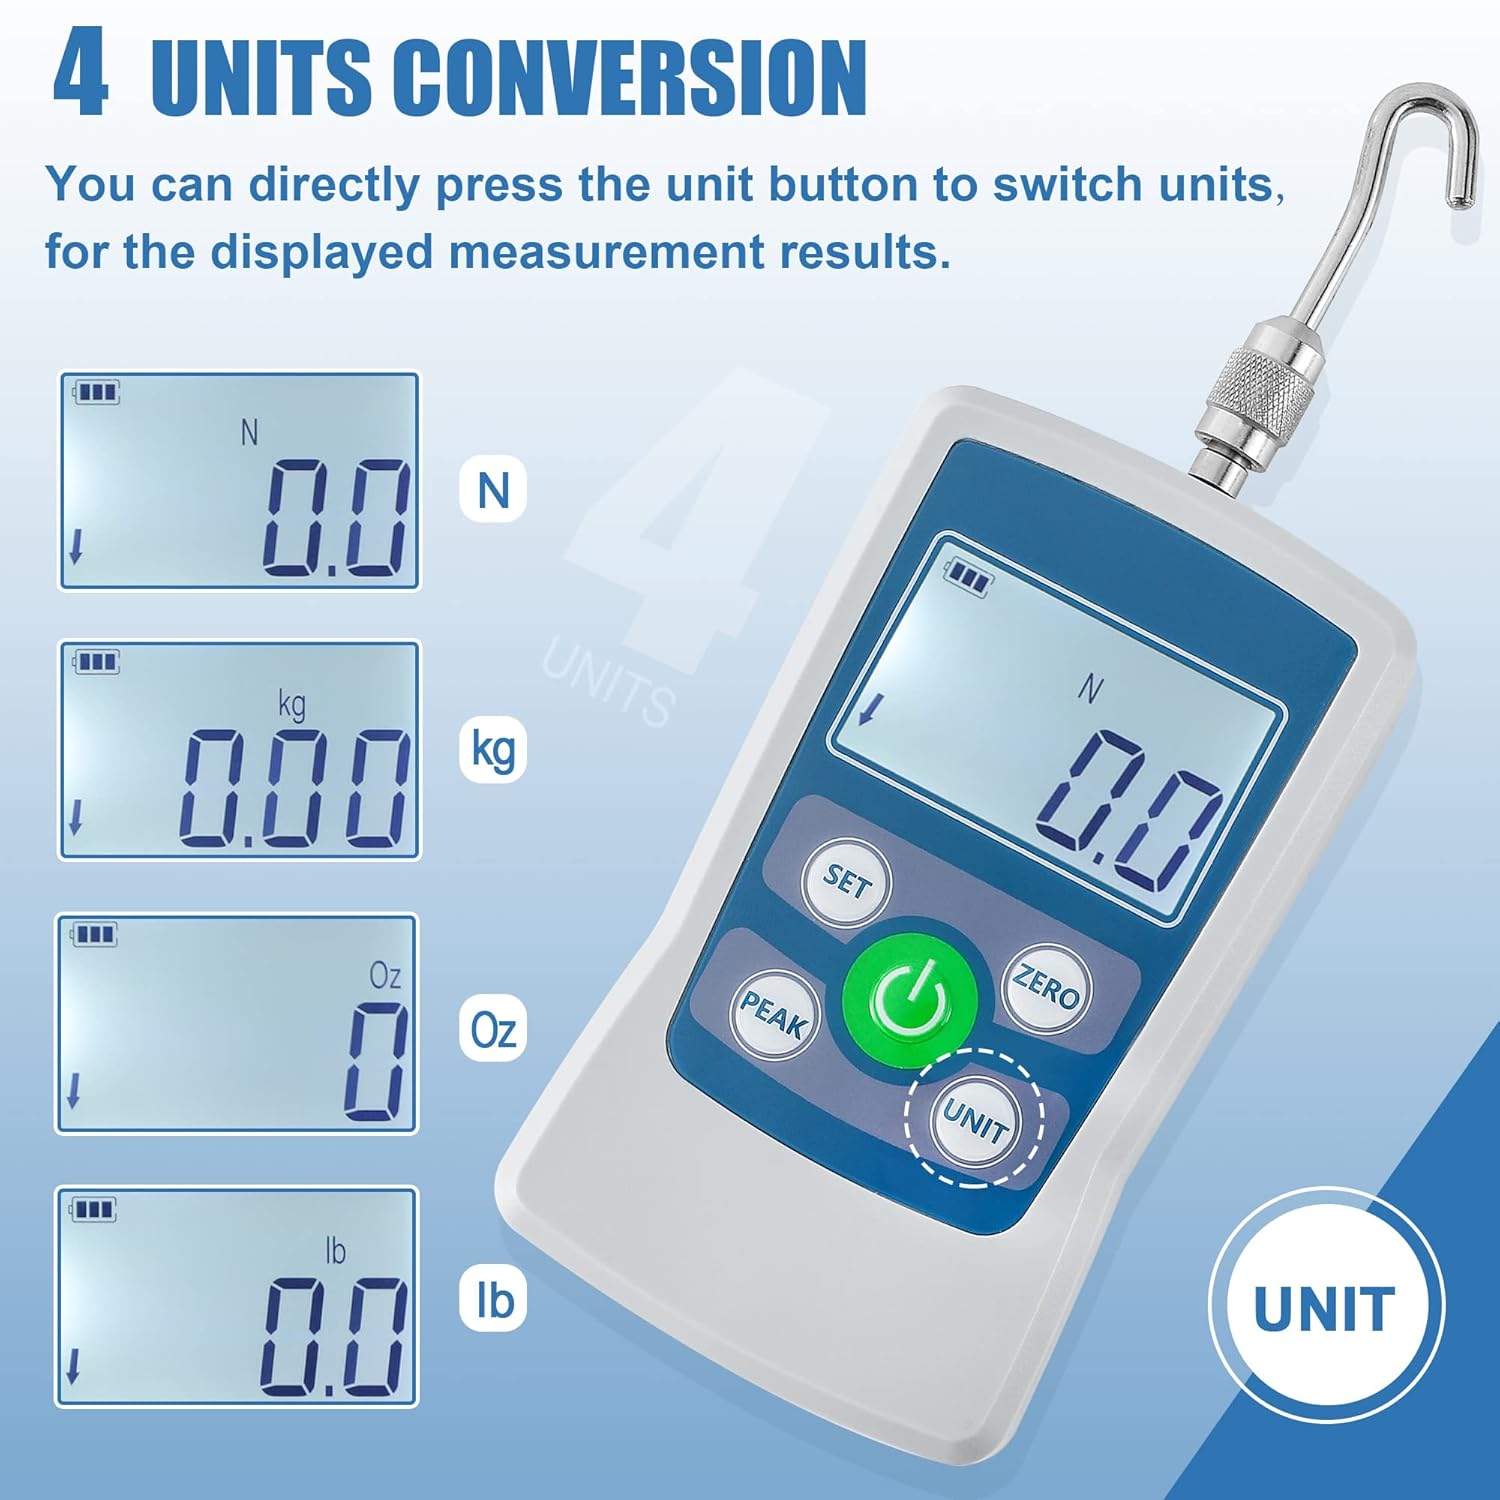
Image: The force gauge display cycling through Newtons (N), kilograms (kg), ounces (Oz), and pounds (Lb).
6.3 Measurement Modes
The gauge offers three measurement modes: Real-time, PEAK, and First-PEAK.
- Press the PEAK button to cycle through the modes.
- Real-time Mode: Displays the current force being applied.
- PEAK Mode: Holds and displays the maximum force applied during a measurement cycle.
- First-PEAK Mode: Captures and displays the first peak force detected, useful for initial break-away force measurements.
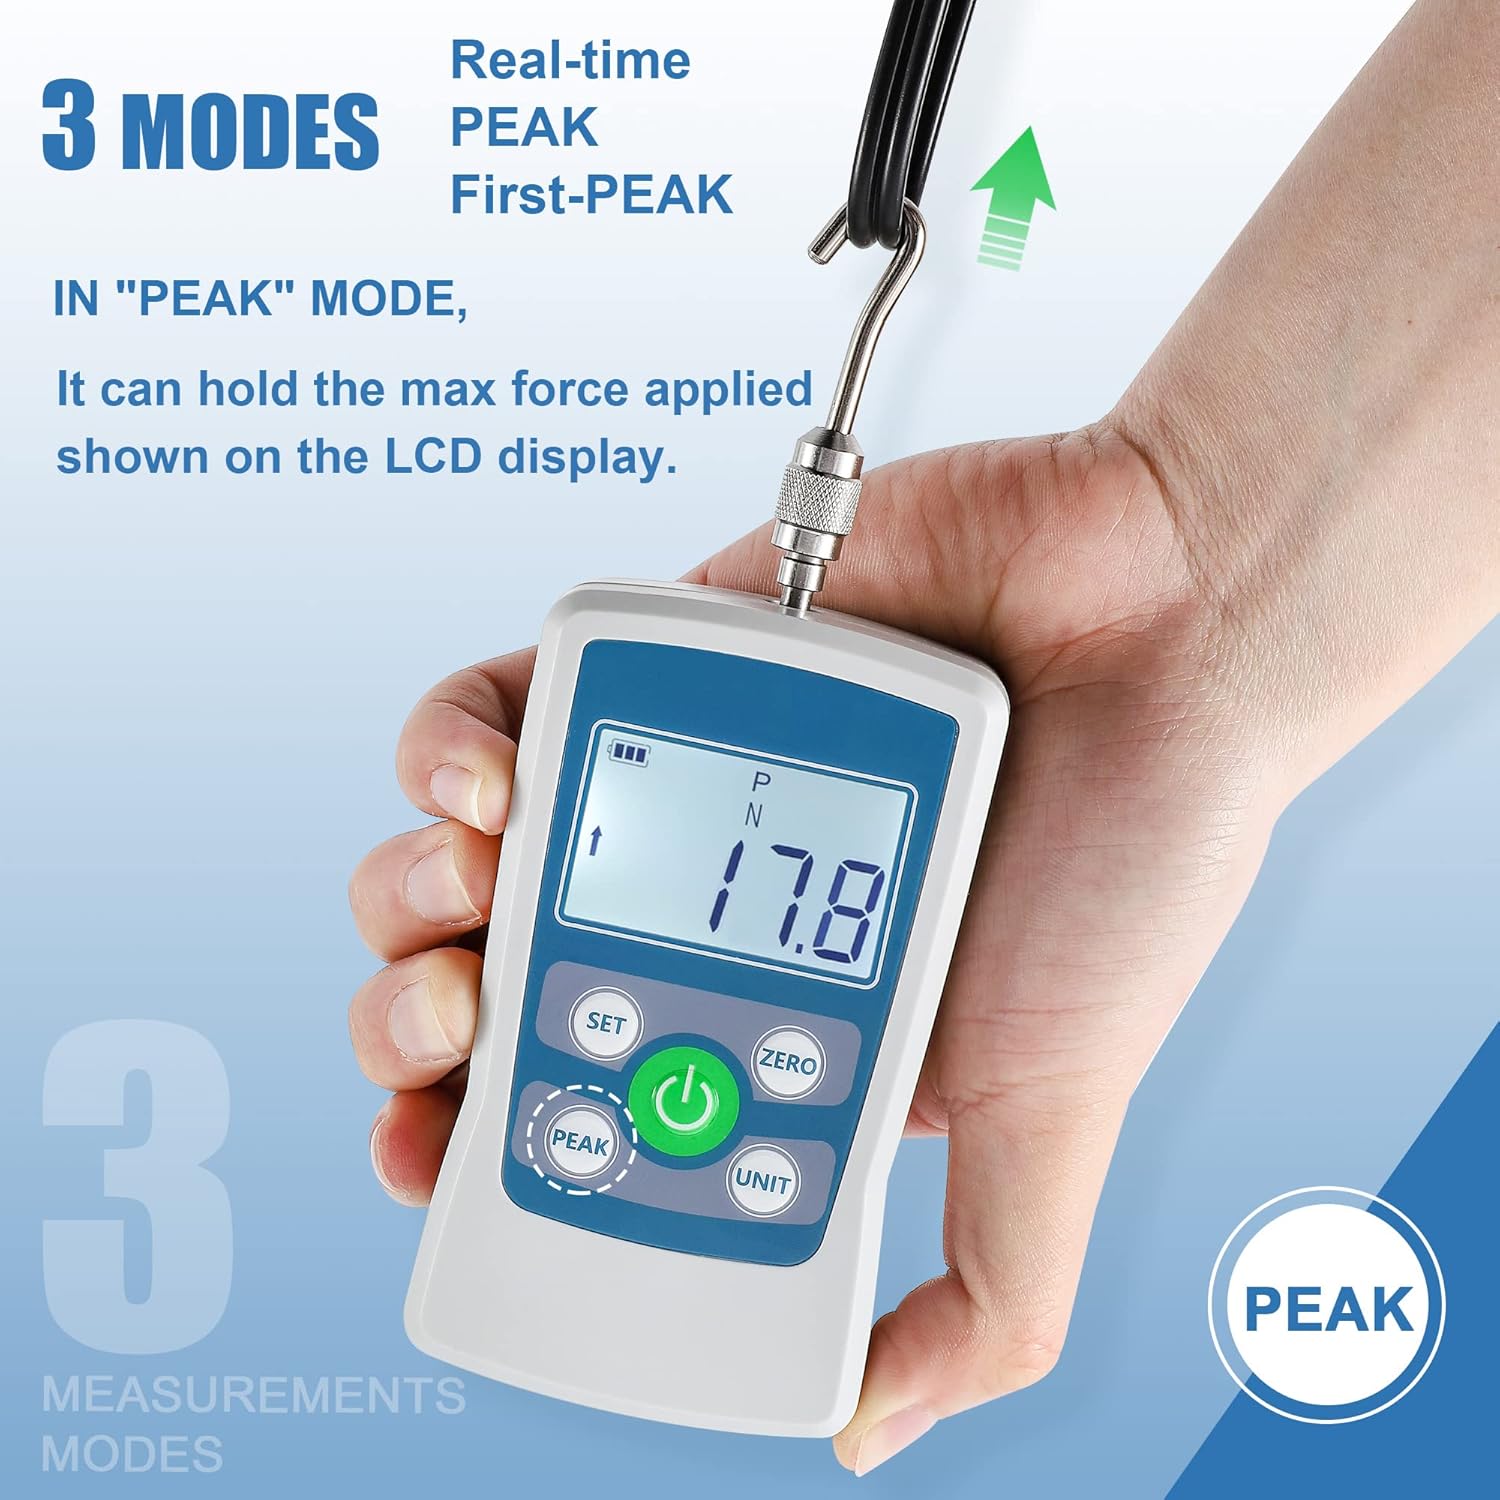
Image: The force gauge displaying a peak measurement in PEAK mode.
6.4 Zeroing the Gauge
To ensure accurate measurements, zero the gauge before each test or when the display shows a non-zero reading without any load.
- Ensure no load is applied to the gauge.
- Press the ZERO button. The display should show "0.0".
6.5 Limit Alarm Setting
You can set upper and lower force limits. If the measured force exceeds these limits, an audible alarm will sound.
- Press the SET button to enter the settings menu.
- Navigate to the limit setting option (refer to the on-screen prompts or full manual for specific navigation).
- Adjust the upper and lower limit values using the appropriate buttons.
- Confirm the settings by pressing SET again.
6.6 Minimum Force Shielding
This function allows the gauge to ignore and not display data below 0.5% of the full scale, preventing minor fluctuations from being shown. This function is enabled by default.
- To disable or re-enable this function, access the settings menu via the SET button and locate the 'Minimum Force Shielding' option.
6.7 Auto Shutdown
The device can be configured to automatically power off after a period of inactivity to conserve battery life. The default auto-off time is 10 minutes, adjustable from 0 to 15 minutes.
- To adjust the auto shutdown time, enter the settings menu using the SET button.
- Set the desired inactivity duration. Setting it to 0 minutes disables auto shutdown.
6.8 Performing a Push/Pull Test
- Attach the appropriate test part to the gauge.
- Power on the gauge and select the desired measurement unit and mode (Real-time, PEAK, or First-PEAK).
- Zero the gauge by pressing the ZERO button.
- Apply force to the object being tested, ensuring the force is applied axially to the gauge's sensor.
- Read the measurement on the LCD display. If in PEAK mode, the maximum value will be held.
- Release the force and record the reading if necessary.

Image: Demonstrations of the force gauge performing both push and pull tests.

Image: The force gauge being used with a trigger pull arm for precise measurement.
7. Maintenance
7.1 Cleaning
- Wipe the device with a soft, dry cloth.
- Do not use abrasive cleaners or solvents.
7.2 Storage
- Store the device in its portable storage case when not in use to protect it from dust and physical damage.
- Remove batteries if the device will not be used for an extended period to prevent leakage.
- Store in a cool, dry place away from direct sunlight.
8. Troubleshooting
| Problem | Possible Cause | Solution |
|---|---|---|
| Device does not power on. | Dead or incorrectly installed batteries. | Replace batteries with new AAA batteries, ensuring correct polarity. |
| Inaccurate readings. | Gauge not zeroed; Overload; Damaged sensor. | Press the ZERO button before measurement. Do not exceed max load. If problem persists, contact support. |
| Display shows "OL" or similar error. | Overload condition. | Remove load immediately. Do not exceed the maximum capacity. |
| No alarm sound when limits are exceeded. | Alarm function disabled or volume too low. | Check limit alarm settings in the menu and ensure the buzzer is enabled. |
9. Specifications
| Parameter | Value |
|---|---|
| Max. Load Value | 100N / 10kg / 22Lb / 360Oz |
| Load Value (Resolution) | 0.1N / 0.01kg / 0.01Lb / 1Oz |
| Accuracy | ±1% |
| Power Source | 2 x AAA batteries (included) |
| Product Dimensions (L x W x H) | 12.4 x 6 x 2.2 cm |
| Item Weight | 0.4 kg (400 g) |
| Auto Power-Off Time | Adjustable 0-15 minutes (Default: 10 minutes) |
| Material | Acrylonitrile Butadiene Styrene (ABS) |
| Model Number | WLS-ZMF100 |

Image: Dimensional drawing of the force gauge, indicating key measurements.
10. Warranty and Support
The BAOSHISHAN Digital Force Gauge 100N (Model WLS-ZMF100) comes with a 1-year warranty from the date of purchase. This warranty covers manufacturing defects and malfunctions under normal use.
For technical support, warranty claims, or service inquiries, please refer to the After-Sale Service Card included in your package or contact BAOSHISHAN customer service through their official channels.